Pages

Showing posts with label Stitched Rectangle Dies. Show all posts

Thursday, 2 May 2024

JAI 700: Just Add Shimmer Or Shine

 Hi!


Wow! Can you believe that Just Add Ink is celebrating its 700th challenge! How exciting! Fittingly, Rochelle has challenged us to add Shimmer or Shine to our cards. What fun!


I sent a day thinking about what stamps I had to fit this challenge, and finally settled on this awesome stamp from Ink Road Stamps, Expecto Stampo Vol 2.

scissorspapercard, Just Add Ink, Ink Road Stamps Expecto Stampo Vol 2

I started by using my Stamparatus to stamp the image onto Whisper White card using Memento ink. Luckily that I did use the Stamparatus, as I needed to ink the stamp a few times to get a solid impression. I hadn't yet used the stamp, and I mustn't have cleaned it properly first. I then masked it off and inked around it using blending brushes and Daffodil Delight, Blueberry Bushel and Night Of Navy Inks. I left a little white halo around the lantern.

scissorspapercard, Just Add Ink, Ink Road Stamps Expecto Stampo Vol 2

I cropped the panel with a Stitched rectangles die and then spritzed it with an Isocol and Champagne Shimmer Paint mix. You can see a few flecks of the shimmer in the photo, but IRL it's so much more! The mask was removed and the lamp was coloured with a metallic gold pen. The flame was coloured with a dark Daffodil Delight Blend, and the banner was coloured with my Pool Party Blends.

So there you have my shining lantern on a shimmery card! What will you make for the challenge? Will you shimmer, shine, or both? We'd love to see! Pop on over to the Just Add Ink blog, where you'll see what the Design team have made for the challenge. You'll also find our Linky to add your card to.

Bye for now,

Tina

Thursday, 26 October 2023

JAI 676: Just Add Inspiration

Hi! 


This week at Just Add Ink, we have a somewhat Halloween-themed Inspiration Challenge for you.


Or maybe you don't do Halloween, and you use other elements of the photo on your card. The colours and textures are great inspirations, too.


I did a little of both - Halloween for my main panel, and the gorgeous black & white plaid from the retired Pattern Party DSP in the background.


The main panel is a free colouring sheet from Kate Hadfield. I simply printed it to the size that I wanted, and coloured it with my Stampin' Blends.

The sentiments I've used are from a retired Stampin' Up! set, called Mr Funny Bones. A great set for Halloween!

We'd love for you to play along, even if you don't do Halloween. There's a lot more to take from the photo! You can see what the rest of the Design Team have used for Inspiration over on the Just Add Ink blog. You'll also find the linky so that you can add your card to our challenge.

Bye for now,

Tina

Sunday, 14 May 2023

CTC 419: Love

 Hi!


Welcome to the new CASEing The Catty Sunday Challenge Blog Hop. It's a great way to end the week! 


This week we are asking you to CASE a love project. You can choose anything from the catalogue that makes you think of love.


I chose this Oceanfront card from page 85, with the obvious 'love you' sentiment. The watercolour scene really appealed to me, and it's been a while since I've inked up my Oceanfront stamp set, so that was as good a reason as any to choose this card to CASE.

scissorspapercard, CASEing The Catty, Stampin' Up!, Oceanfront, Easter Bunny, Stylish Shapes Dies

The catalogue samples used Blending Brushes to ink the stamps, with the watercolour paper wet to give the softer look. I chose to use the baby wipe technique instead. I applied some Blackberry Bliss and Calypso Coral ink to the baby wipe, and then used it like an inkpad to ink up my sky stamp. The rest of the scene (apart from the plants) were just stamped as usual onto the wet watercolour paper.

scissorspapercard, CASEing The Catty, Stampin' Up!, Oceanfront, Easter Bunny, Stylish Shapes Dies

Once the panel was dry, the plants were stamped over the top and the card was assembled and decorated.

scissorspapercard, CASEing The Catty, Stampin' Up!, Oceanfront, Easter Bunny, Stylish Shapes Dies

I recreated the scene on the inside, without the wet watercolour paper. The sentiments that I used on my card are from the Easter Bunny stamp set. They are sort of vague enough to be suitable for several different occasions.

We'd love for you to play along with us this week. All you need to do is make a suitable card, take a photo and upload it to our Facebook group. I can't wait to see which card you choose to CASE.


Before you go, please keep hopping your way around all of the Crew blogs. There's lots more 'love' inspiration to be seen, starting with Julia Quinn with a super sweet card.

Bye for now,

Tina

Sunday, 7 May 2023

CTC 418: CASE The Annual Catalogue

Hi!


Thanks for joining me for the new CASEing The Catty Sunday Challenge Blog Hop. Has it been cold where you live? We have certainly had a little taste of what winter has in store here in Adelaide! The upside? It's perfect crafting weather 😁


We have a new Annual Catalogue, so naturally we are asking you to CASE from it! You can choose whichever project you'd like to CASE. If you've been following me for a while, you'd know that I like to flip through the catalogue, starting at the back page. I got to page 159 before I found this awesome card.


I really loved the simplicity of the layout, that it uses one of my must-have suites, and the cool flames at the back of the shuttle. I don't own this bundle (yet), but the flames did make me think of my Legendary Ride bundle. Perfect!

scissorspapercard, CASEing The Catty, Stampin' Up!, Legendary Ride Bundle, Rays Of Light

I started by creating my background. I stamped Rays Of Light onto Lost Lagoon cardstock using the matching ink. I am so loving that its back in the line-up. I cropped it with a Stitched Rectangle Die, but it wasn't quite as big as I'd like, so I added another layer of cardstock underneath.

scissorspapercard, CASEing The Catty, Stampin' Up!, Legendary Ride Bundle, Rays Of Light

My motorbike was created using Basic Black, Smokey Slate, Real Red and Silver Foil cardstocks, with a bit of Pumpkin Pie on the flame. I used Adhesive Sheets behind all of the small pieces (there are lots of them!), as it makes assembling the bike so much easier.

scissorspapercard, CASEing The Catty, Stampin' Up!, Legendary Ride Bundle, Rays Of Light

I stamped the large motorbike image on the inside. I think I'm going to have a lot of fun with this bundle!

To join in with our challenge, all you need to do is join our Facebook Group and add a photo of your project to the group. You don't need a blog or a fancy camera, we want to make it easy to play along.


Before you go, please continue your way around our Blog Hop. The next stop is my lovely friend, Judy May. I can't wait to see what she's made!


Bye for now,

Tina

Wednesday, 12 April 2023

Colour Creations: Soft Sea Foam

 Hi!


Did you miss me? I missed the Colour Creations blog hop! I had COVID, which made me miss the last two hops. The ole mojo went a bit AWOL, but hopefully I've been able to coax it back. 


I love this soft, feminine colour combo from Brian King. Soft Sea Foam is our feature colour this week, and I think it works beautifully with the two purples - Fresh Freesia and Blackberry Bliss.

scissorspapercard, Colour Creations, Stampin' Up!, Simply Fabulous, Stitched Rectangle Dies

I was so sad to see one of my favourite stamp sets on the retiring list - Simply Fabulous. I use it so much! I decided to pull it out and use it for my card this week.

scissorspapercard, Colour Creations, Stampin' Up!, Simply Fabulous, Stitched Rectangle Dies

I used my Stamparatus (another retiring item!) to stamp the sentiment, and luckily that I did, as it did not stamp cleanly the first time.

scissorspapercard, Colour Creations, Stampin' Up!, Simply Fabulous, Stitched Rectangle Dies

I stamped the same flowers on the inside of my card, as a nice finishing touch.

Thanks for joining me this week, but please do continue your way around our Soft Sea Foam blog hop. The next stop is my lovely friend, Cathy Proctor.

Cathy is also our wonderful host, so if you find any problems with broken links, just jump on over to her blog, where you'll find a list of all of tonight's participants to help get you back on track.

Bye for now,

Tina

Sunday, 19 February 2023

CTC 407: SAB Catalogue

 Hi!


Welcome to the CASEing The Catty Sunday Challenge Blog Hop. Isn't it a great way to finish off the weekend?


This week we are back to CASEing from the Sale-A-Bration Catalogue. There's only a couple of weeks left to get your freebies from the catalogue, so don't delay!


My eye was caught by this card on page 9 of the catalogue (ignore the graphic that says page 8!), I liked the fussy cut flowers over the rainy DSP and the black twine bow. I once again decided to use Favoured Flowers DSP on my card, and adjusted my design accordingly.

scissorspapercard, CASEing The Catty, Stampin' Up!, Favoured Flowers, Simply Fabulous, Sale-A-Bration

The grouping of flowers that I fussy cut seemed to be upside down when I had them at the bottom of the panel, so I flipped the panel to put them at the top. Much better!

scissorspapercard, CASEing The Catty, Stampin' Up!, Favoured Flowers, Simply Fabulous, Sale-A-Bration

I really love the geometric designs on the flip side of the floral papers. This layout is a great way to feature them - either as a subtle background, or a bolder edge around a panel.

scissorspapercard, CASEing The Catty, Stampin' Up!, Favoured Flowers, Simply Fabulous, Sale-A-Bration

Some scrap DSP and another fussy cut cluster of flowers finished off the inside. Once again, the flowers looked better at the top. I like to shake things up every now and then!

We'd love for you to play along with us this week, by CASEing a project from the Sale-A-Bration Catalogue. Just add a photo to our Facebook group and you're done!


Next up on our hop tonight is my lovely friend, Judy May, with what I'm sure will be a gorgeous card. You won't want to miss it!


Bye for now,

Tina

Wednesday, 15 February 2023

Colour Creations: Poppy Parade

 Hi!


Thanks for joining me for the new Colour Creations Blog Hop. This week we are looking at Poppy Parade, one of my favourite reds.


I liked this nautical colour combo from Brian King, and as I had just received the new On The Ocean bundle, I was all set!

scissorspapercard, Colour Creations, Stampin' Up!, On The Ocean Bundle

I have coveted this bundle ever since I saw it in the catalogue - it reminds me of one of my all time favourite childhood movies, The Goonies. For this card though, I decided to go a little more generic pirate. I started by stamping some of the waves on the bottom of the Pool Party Stitched Rectangle. I fussy cut along the line, and then stamped more waves on the bottom of the main piece. The cropped piece was then layered over the rest of the rectangle, popped up on Dimensionals. The pirate ship was tucked in between the layers, so that there are waves both in front and behind the ship.

scissorspapercard, Colour Creations, Stampin' Up!, On The Ocean Bundle

To bring more Poppy Parade into the card (as the feature colour!!), I cropped the skull and crossbones for the sails of the ship. I'm contemplating adding a flag to the top of the ship with a stamped skull and crossbones, too.

scissorspapercard, Colour Creations, Stampin' Up!, On The Ocean Bundle

A little more stamping on the inside finished off the card. I can see myself having a lot of fun with this bundle!

My lovely friend, Andrea Sergeant, is the next stop on our Blog Hop tonight. Please jump on over to her blog, where I'm sure there's something magnificent to be seen!

As always, the wonderful Cathy Proctor keeps us all organised. She has a list of all of tonight's participants on her blog, so if you come across a broken link, just jump on over to her blog to get back on track.

Bye for now,

Tina

Thursday, 9 February 2023

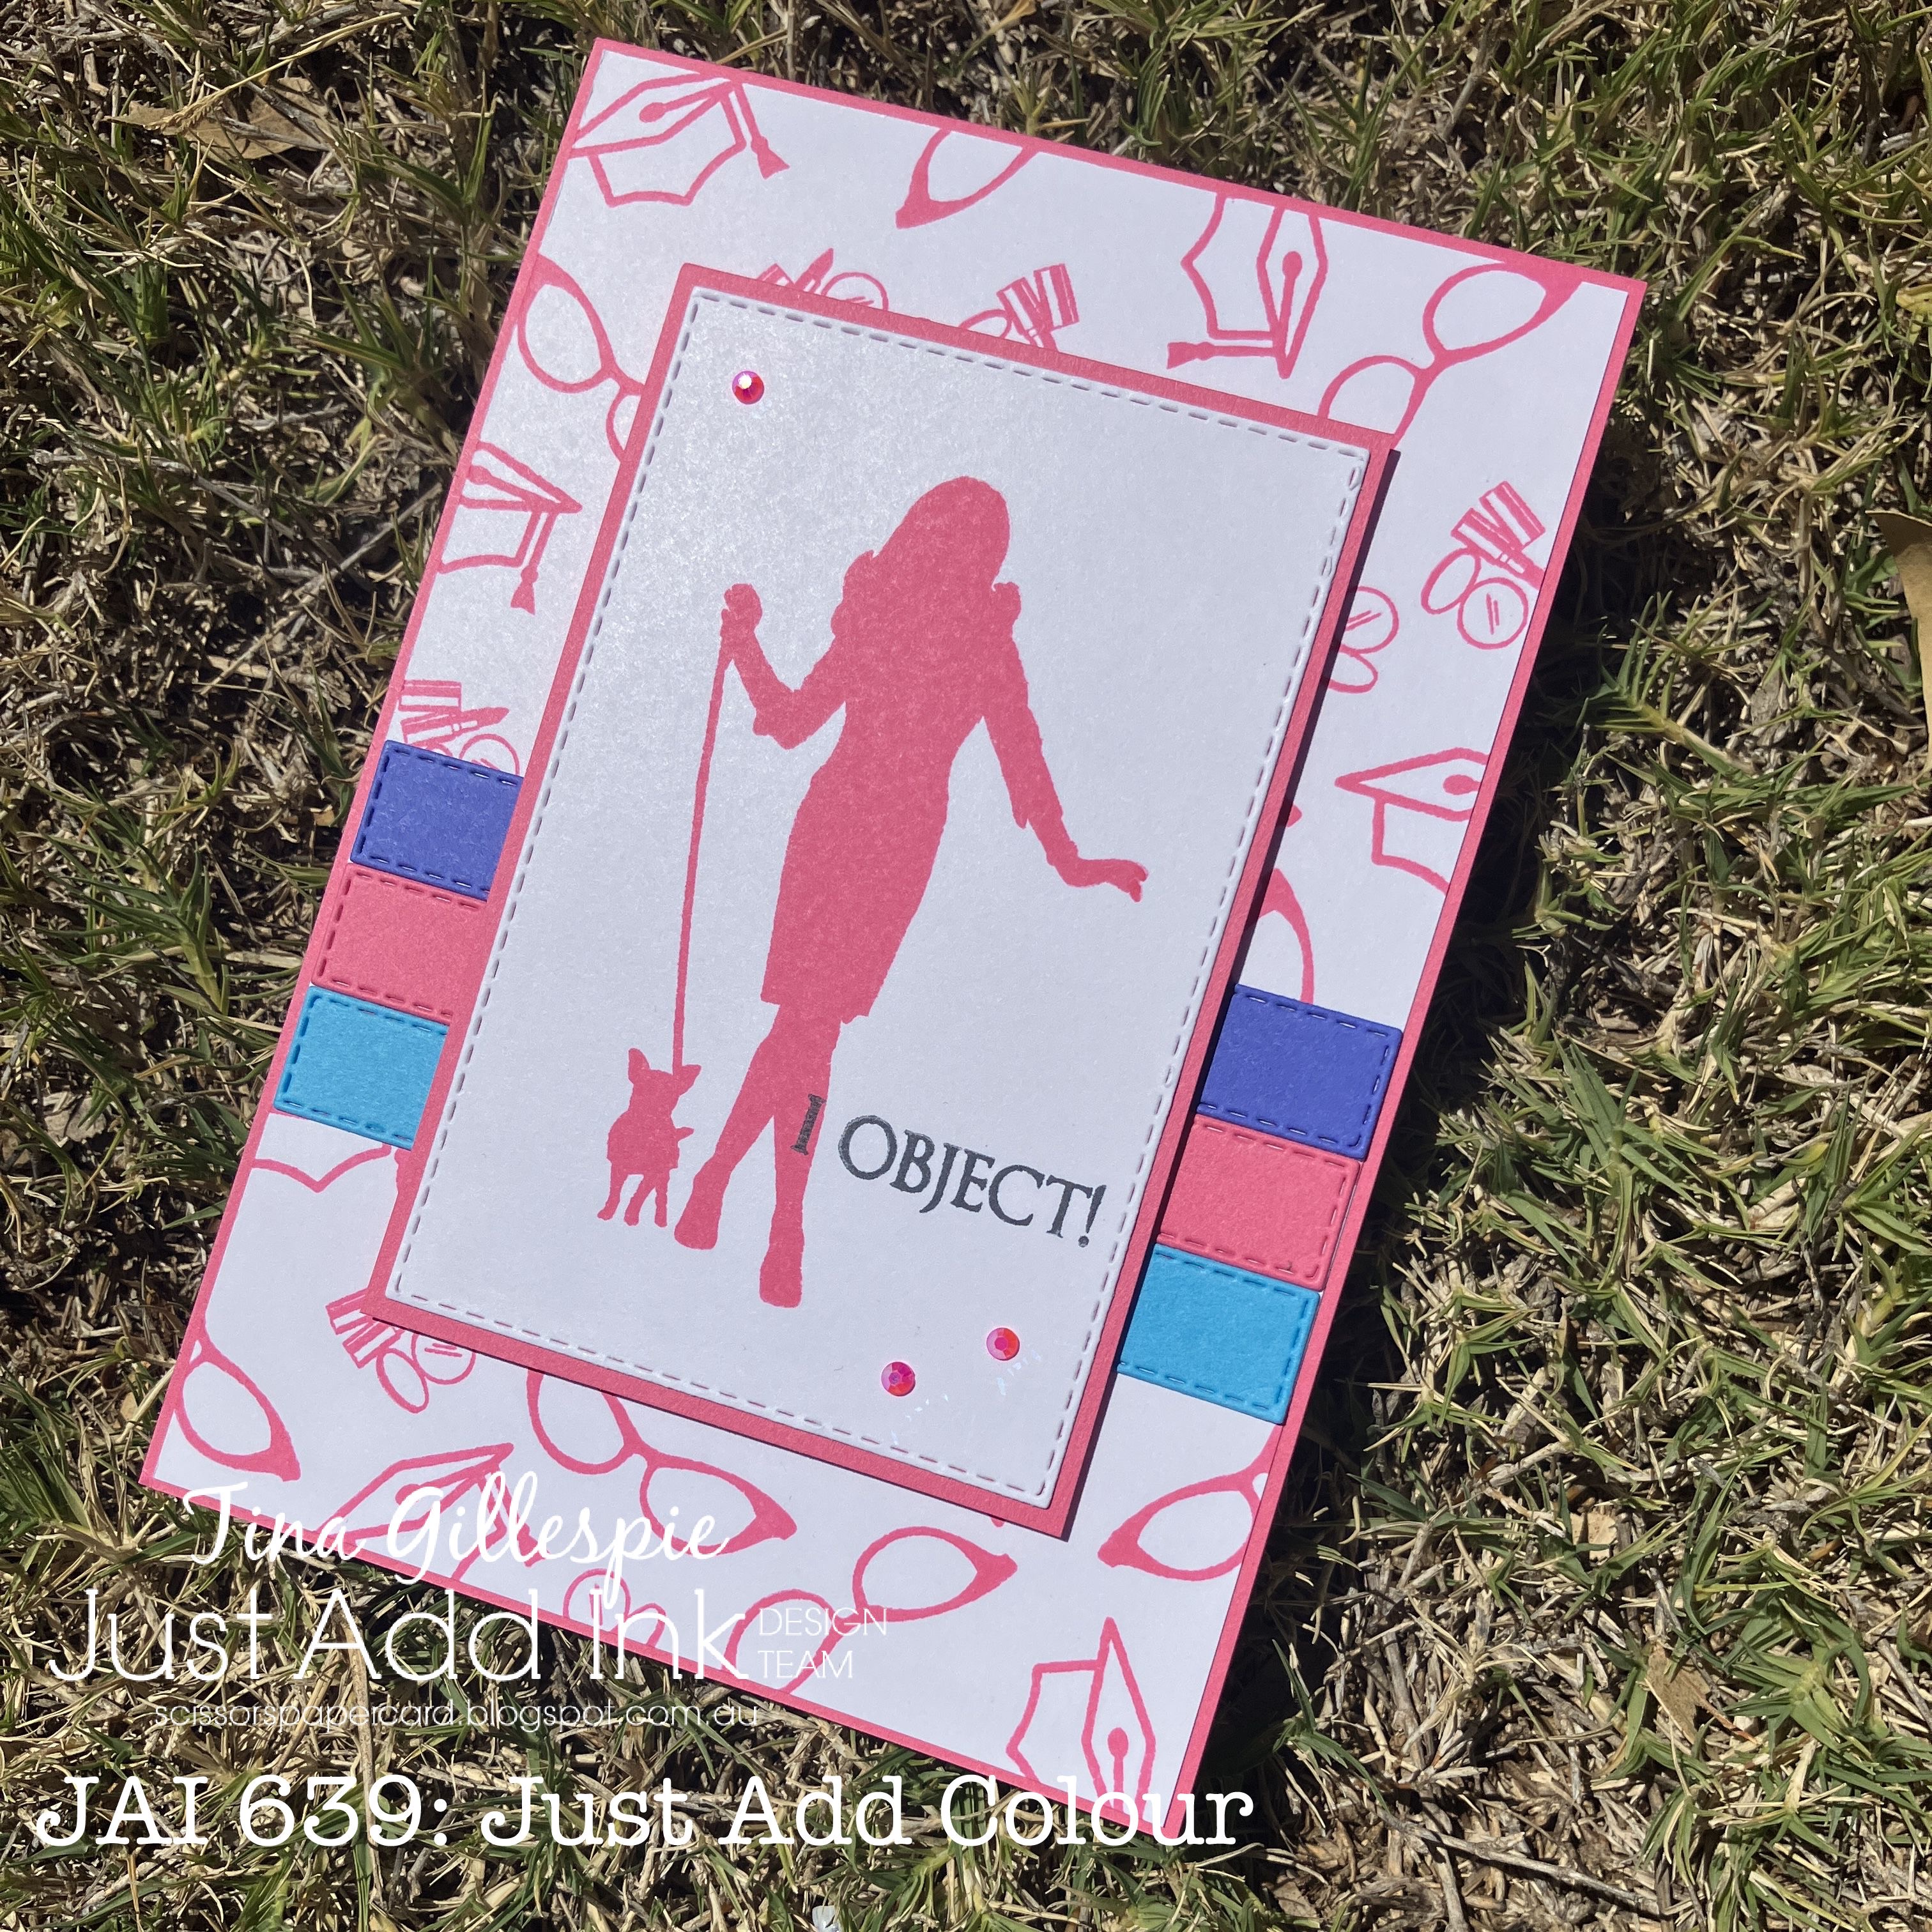
JAI 639: Just Add Colour

 Hi!


Welcome back to my blog for the new Just Add Ink challenge. This week we have a colour challenge for you, suggested to us by Jan.


Wow, it certainly is a bold and bright combo! I decided to make one of the colours the feature, and as I thought about which stamps I had in my collection, I knew I had the perfect stamp set.

scissorspapercard, Just Add Ink, Ink Road Stamps, I Object, Stampin' Up!, Stitched Rectangles Dies

It's an Ink Road Stamps set, called I Object. Polished Pink was the perfect choice for this stamp set, don't you think? I put three of the image stamps on the one block, and then used them to stamp my background. The stripes were cut using the smallest Stitched Rectangles Die. I just snipped them in half to stretch them over the card front.

scissorspapercard, Just Add Ink, Ink Road Stamps, I Object, Stampin' Up!, Stitched Rectangles Dies

I used my Stamparatus to stamp the main image, just so that if I didn't get a good imprint, I could easily stamp again. Thankfully, the first go was a good one!

scissorspapercard, Just Add Ink, Ink Road Stamps, I Object, Stampin' Up!, Stitched Rectangles Dies

My apologies to the other two colours, but the inside is pink all the way!

We'd love to see what you make with these colours. Will you go bold, or a little more subtle? You can see what the rest of the Design Team have made over on the Just Add Ink blog. You can also link up your card for the challenge over there. I can't wait to see what you create!

Bye for now,

Tina