Hi!
Hello and welcome to the new week's challenge at Just Add Ink! This week Rochelle has challenged us to Just Add Babies to our cards. Sadly, my baby days are long gone, but I do enjoy making a sweet baby card every now and then.
I actually made this card a couple of months ago for a card class, but as we get the JAI schedule several months ahead, I was able to save it to use for this week. As my friend Rachel says - work smarter, not harder!
I didn't usually buy the baby DSP in the catalogue, but I'm a bit of a sucker for stars, and this paper has the cutest star papers. I love this soft pastel version, perfect for a baby card.
I've had the elephant punch since it was released, but hadn't used it yet. This challenge was the perfect time to add a cute elephant to my card. I've used Night Of Navy and Soft Sea Foam, as they coordinate with the colours in the Twinkle Twinkle DSp. I thought the green made it a neutral card, but my class ladies thought it was more a boy card. What do you think?
I used the smaller elephant on the front, so the large elephant was left for the inside. The eyes were drawn on with a Night Of Navy marker. I think the punch comes with a circle section for the eyes, but I find it easier to draw them on than fiddle with something so tiny!
How will you add Babies to your card? I can't wait to see! You can link your card over at the Just Add Ink, where you'll also find the rest of the Design Team cards.
Bye for now,
Tina
Showing posts with label Twinkle Twinkle DSP. Show all posts
Thursday, 28 March 2019
Sunday, 25 November 2018
CASEing The Catty #205
Hi!
EDIT: Oh, wow, I was a winner at CASEing The Catty with this card!
It's been a long while since I've managed to play along with the CASEing The Catty challenge, but after a busy weekend with Rob and the kids, I decided I'd make sure I made the time to give the challenge a go. For challenge #205, the CTC have asked us to choose a birthday card from the catalogue and give it a Christmas twist. What fun! I made a cuppa and settled in with my Annual Catalogue and eventually decided I'd CASE the Mint Macaron/Gorgeous Grape card at the top right of page 136.
I kept the layout pretty much the same, and I also used Swirly Frames on my focal panel, but to give it the Christmas twist, I went with the Hometown Greetings Edgelits.
I started by stamping and cutting two of the large Swirly Frames circles in Night Of Navy and using my Layering Circles dies. I then took my Aquapainter and Night of Navy and Gorgeous Grape ink to create the evening sky on one of the circles. I was so thrilled with how that turned out! I also flicked over some Frost White Shimmer Paint to represent the stars. I cut the second circle with the edgelit, trimming off the second house as it didn't look quite right to me. I then used Dimensionals to pop it up on top of the first circle.
The inside was kept fairly simple so that I'll have plenty of room to write a Christmas message when I send the card. Thanks to the CTC team for a fun challenge!
Bye for now,
Tina
EDIT: Oh, wow, I was a winner at CASEing The Catty with this card!
It's been a long while since I've managed to play along with the CASEing The Catty challenge, but after a busy weekend with Rob and the kids, I decided I'd make sure I made the time to give the challenge a go. For challenge #205, the CTC have asked us to choose a birthday card from the catalogue and give it a Christmas twist. What fun! I made a cuppa and settled in with my Annual Catalogue and eventually decided I'd CASE the Mint Macaron/Gorgeous Grape card at the top right of page 136.
I kept the layout pretty much the same, and I also used Swirly Frames on my focal panel, but to give it the Christmas twist, I went with the Hometown Greetings Edgelits.
I started by stamping and cutting two of the large Swirly Frames circles in Night Of Navy and using my Layering Circles dies. I then took my Aquapainter and Night of Navy and Gorgeous Grape ink to create the evening sky on one of the circles. I was so thrilled with how that turned out! I also flicked over some Frost White Shimmer Paint to represent the stars. I cut the second circle with the edgelit, trimming off the second house as it didn't look quite right to me. I then used Dimensionals to pop it up on top of the first circle.
The inside was kept fairly simple so that I'll have plenty of room to write a Christmas message when I send the card. Thanks to the CTC team for a fun challenge!
Bye for now,
Tina
Thursday, 22 November 2018
AWH November Blog Hop: Sketch This
Hi!
Tonight the Art With Heart team are sharing creative projects featuring a card sketch. We hope you like how we have each put our own spin on the sketch and that it inspires you to get creative and make some fabulous cards. If you are inspired by the sketch, please share with us!
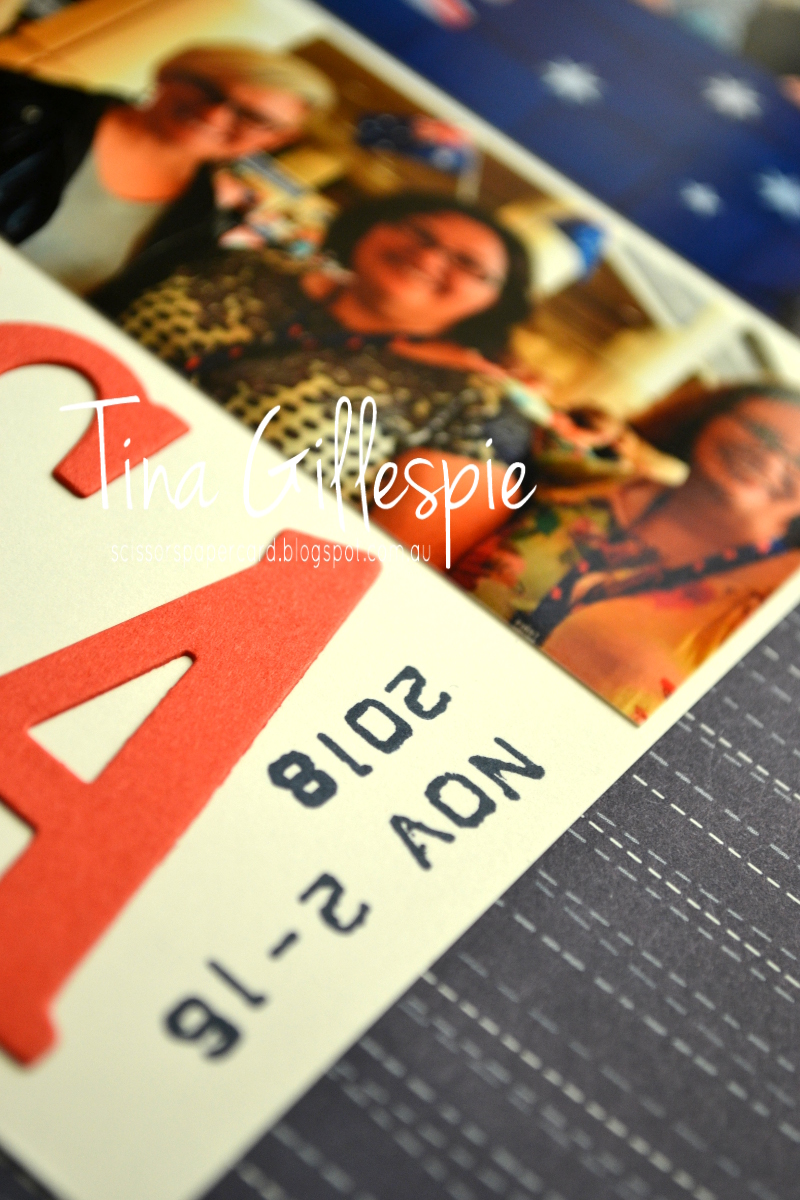
Can you see how I used the photos and postcard to replicate the main part of the sketch? I pretty much ignored the rest of the sketch as it didn't work with my page, but the most important part is included. I purchased the post card on my trip. I often do, as they photos are usually better than any I can hope to take! In this case though, the rustic flag appealed. Can you see that it's the flag painted onto some boards?
I then picked two photos that were the highlights from the two main parts of my trip. I had such a wonderful time travelling with Judy May, Kathryn Mangelsdorf and Rachel Palmieri, so I wanted to include them in this layout. The photo with the Aussie flag is from our visit to Stampin' Up!'s Home Office in Riverton, Utah, and the bottom photo is on the registration day of OnStage in Orlando, Florida, where we met Sara Douglass, the CEO of SU. You can see that I've cropped the photos to fit the sketch. How fabulous that the two photos I wanted to use worked perfectly!
I üst had to include a kangaroo to go with the American feel of the page. The kangaroo featured heavily in my swaps and gifts, so it will also feature heavily in this album. I coloured is with my watercolour pencils and blended with my Wink Of Stella pen. I tossed up between my Blends and pencils, but in the end went with the pencils as I felt it worked better with the rustic look of the flag postcard.
I love the Labeler Alphabet set! It's fabulous and versatile and will also feature heavily in the album, as it did on my swaps and gifts. And, yes, I did wear that flag headband for most of OnStage! It was a great way for people to find me, so I only took it off during the sessions so that I didn't annoy people sitting behind me.
Thats it for me for this month. You're now off to see what treasures Rachel Woollard has for you!
If you get lost along the way, here's the list of blogs participating in today's hop:
Rebecca Jacovou
Caroline Manwaring
Sharon Davern
Monika O’Neill
Sue Madex
Ros Davidson
Kate Morgan
Andrea Roberts
Tina Gillespie
Rachel Woollard
Bye for now,
Tina
Tonight the Art With Heart team are sharing creative projects featuring a card sketch. We hope you like how we have each put our own spin on the sketch and that it inspires you to get creative and make some fabulous cards. If you are inspired by the sketch, please share with us!
Just like last month, I decided to scrap a layout rather than make a card. I'm keen to get stuck into scrapping my USA trip, so this was just the starting point I needed. This page will be the opening page to my album.
Can you see how I used the photos and postcard to replicate the main part of the sketch? I pretty much ignored the rest of the sketch as it didn't work with my page, but the most important part is included. I purchased the post card on my trip. I often do, as they photos are usually better than any I can hope to take! In this case though, the rustic flag appealed. Can you see that it's the flag painted onto some boards?
I then picked two photos that were the highlights from the two main parts of my trip. I had such a wonderful time travelling with Judy May, Kathryn Mangelsdorf and Rachel Palmieri, so I wanted to include them in this layout. The photo with the Aussie flag is from our visit to Stampin' Up!'s Home Office in Riverton, Utah, and the bottom photo is on the registration day of OnStage in Orlando, Florida, where we met Sara Douglass, the CEO of SU. You can see that I've cropped the photos to fit the sketch. How fabulous that the two photos I wanted to use worked perfectly!
I üst had to include a kangaroo to go with the American feel of the page. The kangaroo featured heavily in my swaps and gifts, so it will also feature heavily in this album. I coloured is with my watercolour pencils and blended with my Wink Of Stella pen. I tossed up between my Blends and pencils, but in the end went with the pencils as I felt it worked better with the rustic look of the flag postcard.
I love the Labeler Alphabet set! It's fabulous and versatile and will also feature heavily in the album, as it did on my swaps and gifts. And, yes, I did wear that flag headband for most of OnStage! It was a great way for people to find me, so I only took it off during the sessions so that I didn't annoy people sitting behind me.
Thats it for me for this month. You're now off to see what treasures Rachel Woollard has for you!
If you get lost along the way, here's the list of blogs participating in today's hop:
Rebecca Jacovou
Caroline Manwaring
Sharon Davern
Monika O’Neill
Sue Madex
Ros Davidson
Kate Morgan
Andrea Roberts
Tina Gillespie
Rachel Woollard
Bye for now,
Tina
Monday, 19 November 2018
Orlando Roomie Gifts
Hi!
I'm back now from Orlando, and I had a wonderful time!
Today I have for you the gifts I made and had made for the ladies I shared a house with in Orlando. While on the hunt for Australian flag pencils for my swaps, I found these pens. Perfect!
I started with the same backing paper as I used for the pencils, but the only pieces I had left went sideways, not longways. I couldn't do a bag topper as I did for the pencils, so I went with a belly band instead.
I only had 6 to make, so I decided to stamp the kangaroos and colour them with my Blends. It was an extra special touch for some special people. I layered the kangaroos over a pair of Pool Party circles. I love the starry paper from the Twinkle Twinkle DSP pack, a bit of a nod to the American flag.
I wanted to make the gift extra special, and a little more personal, so I had some tote bags made up by Vistaprint to commemorate the trip.
Here's the tote. It's the perfect size for 12x12 papers, so I can see myself using it a lot - yes, I did have one made for me too. Hopefully the others find it just as useful!
Bye for now,
Tina
I'm back now from Orlando, and I had a wonderful time!
Today I have for you the gifts I made and had made for the ladies I shared a house with in Orlando. While on the hunt for Australian flag pencils for my swaps, I found these pens. Perfect!
I started with the same backing paper as I used for the pencils, but the only pieces I had left went sideways, not longways. I couldn't do a bag topper as I did for the pencils, so I went with a belly band instead.
I only had 6 to make, so I decided to stamp the kangaroos and colour them with my Blends. It was an extra special touch for some special people. I layered the kangaroos over a pair of Pool Party circles. I love the starry paper from the Twinkle Twinkle DSP pack, a bit of a nod to the American flag.
I wanted to make the gift extra special, and a little more personal, so I had some tote bags made up by Vistaprint to commemorate the trip.
Here's the tote. It's the perfect size for 12x12 papers, so I can see myself using it a lot - yes, I did have one made for me too. Hopefully the others find it just as useful!
Bye for now,
Tina
Tuesday, 6 November 2018
Na Na Na Na Na Na Na Na Bat Punch!
Hi!
LOL, I couldn't resist that blog post title, and you'll see why in a second!
It's the new Colour Creations Blog Share, and this week we are looking at a new neutral, Grey Granite. As greys go, it's an ok grey. I thought it was a bit hard to get excited about grey, until I had the idea for this card.
Its classic Batman! I went with the colours in the original TV Batman to create this fun kid's birthday card. It may in fact also be the colours from the original comic, but I dare not ask my husband or I might still be getting the answer half an hour later. He likes the opportunity to show off his super hero knowledge!
I was inspired by Batman's cape and utility belt on the front of the card. The Blueberry Bushel DSP is from the Best Route DSP - just a scrap I had left over from another project. The Grey Granite piece is from the Twinkle Twinkle DSP pack. I thought it was a bit more interesting than just a plain Grey Granite background. The Pineapple Punch ribbon was a great substitute for Batman's utility belt.
The Spooky Bats punch is a part of the Halloween range in the current Holiday Catalogue. I'm not big into Halloween, but I just had to have this punch to make Batman cards. I made the rookie mistake of asking Rob about the shape of the bat however, and yes, I did get a very extended answer!
That's it for me, as usual the rest of this week's cards are over at Catherine's blog.
Bye for now,
Tina
LOL, I couldn't resist that blog post title, and you'll see why in a second!
It's the new Colour Creations Blog Share, and this week we are looking at a new neutral, Grey Granite. As greys go, it's an ok grey. I thought it was a bit hard to get excited about grey, until I had the idea for this card.
Its classic Batman! I went with the colours in the original TV Batman to create this fun kid's birthday card. It may in fact also be the colours from the original comic, but I dare not ask my husband or I might still be getting the answer half an hour later. He likes the opportunity to show off his super hero knowledge!
I was inspired by Batman's cape and utility belt on the front of the card. The Blueberry Bushel DSP is from the Best Route DSP - just a scrap I had left over from another project. The Grey Granite piece is from the Twinkle Twinkle DSP pack. I thought it was a bit more interesting than just a plain Grey Granite background. The Pineapple Punch ribbon was a great substitute for Batman's utility belt.
The Spooky Bats punch is a part of the Halloween range in the current Holiday Catalogue. I'm not big into Halloween, but I just had to have this punch to make Batman cards. I made the rookie mistake of asking Rob about the shape of the bat however, and yes, I did get a very extended answer!
That's it for me, as usual the rest of this week's cards are over at Catherine's blog.
Bye for now,
Tina
Monday, 8 October 2018
Broadway Bound CASE
Hi!
Today I have a card for you that I CASEd from another SU Demonstrator. I love how demos from all around the world share their work so that we can all be inspired!
The demo I CASEd from is Kristi Grey, and you can see her original card here. I didn't really change a lot, I just made it a little more 'class friendly' as I made it as a sample for a card class I ran.
How fabulous is the Broadway Bound SDSP? The Gold Foil accents through the paper are gorgeous. I especially love the confetti paper.
Kristi didn't show the inside of her card, so I just did what I liked there. It's a little tricky stamping on the Gold Foil paper as it's a glossy surface, so we used Stazon ink. The effort is worth it though - who doesn't like a bit of glam on a card?
Bye for now,
Tina
Today I have a card for you that I CASEd from another SU Demonstrator. I love how demos from all around the world share their work so that we can all be inspired!
The demo I CASEd from is Kristi Grey, and you can see her original card here. I didn't really change a lot, I just made it a little more 'class friendly' as I made it as a sample for a card class I ran.
How fabulous is the Broadway Bound SDSP? The Gold Foil accents through the paper are gorgeous. I especially love the confetti paper.
Kristi didn't show the inside of her card, so I just did what I liked there. It's a little tricky stamping on the Gold Foil paper as it's a glossy surface, so we used Stazon ink. The effort is worth it though - who doesn't like a bit of glam on a card?
Bye for now,
Tina
Wednesday, 29 August 2018
A Twinkly Christmas
Hi!
Here we are again with a new week of Heart Of Christmas. This is the third week of our Christmas themed Blog Share.
A month or so ago I CASEd a card from the Annual Catalogue. You can see it here. For this week's Heart Of Christmas I decided to remake the card, but as a much faster and easier version.
I decided to use plain Whisper White for the rows of houses instead of the Silver Foil on the original card. It's a great substitute, and helps to keep costs down if you are mass producing cards like this.
Instead of water colouring and heat embossing the night sky I decided to use some paper from the Twinkle Twinkle DSP pack. Isn't it perfect for this card? Just another way to keep the costs a little lower.
I used an offcut of the DSP to finish the inside. I had originally planned to have the houses along the bottom, but it looked a little strange with the abrupt edge of the DSP along the top. Shifting the houses to the top solved this problem nicely!
Here are my two cards side by side so that you can see the differences.
Why not pop on over to Claire's blog to see the rest of the cards in the Heart Of Christmas Blog Share this week? They are always fantastic!
Bye for now,
Tina
Here we are again with a new week of Heart Of Christmas. This is the third week of our Christmas themed Blog Share.
A month or so ago I CASEd a card from the Annual Catalogue. You can see it here. For this week's Heart Of Christmas I decided to remake the card, but as a much faster and easier version.
I decided to use plain Whisper White for the rows of houses instead of the Silver Foil on the original card. It's a great substitute, and helps to keep costs down if you are mass producing cards like this.
Instead of water colouring and heat embossing the night sky I decided to use some paper from the Twinkle Twinkle DSP pack. Isn't it perfect for this card? Just another way to keep the costs a little lower.
I used an offcut of the DSP to finish the inside. I had originally planned to have the houses along the bottom, but it looked a little strange with the abrupt edge of the DSP along the top. Shifting the houses to the top solved this problem nicely!
Here are my two cards side by side so that you can see the differences.
Why not pop on over to Claire's blog to see the rest of the cards in the Heart Of Christmas Blog Share this week? They are always fantastic!
Bye for now,
Tina
Subscribe to:
Posts (Atom)