Pages

Showing posts with label Ornate Frames Dies. Show all posts

Sunday, 13 June 2021

CTC 322: Birthdays Section

 Hi!


It's time once again for the new CASEing The Catty Sunday Challenge Blog Hop. Usually I say that it's a nice way to end the weekend, but that's not the case this weekend. It's a long weekend, so we still have one more day to enjoy. Yay!


This week we are asking you to CASE the Birthday section of the Annual Catalogue, from pages 60 to 67. There's plenty to grab your attention there, but I couldn't go past this card.


I liked that the front was copped to allow the inside of the card to be seen from the front. I also liked the gradient of colour on the main panel on the front. While I was pondering on how to incorporate these two features into a new card, I also spotted the Butterfly Brilliance card on page 158. Bingo!

scissorspapercard, Stampin' Up!, CASEing The Catty, Brilliant Wings Dies, Ornate Frames Dies, Sweet As A Peach, Colour Families DSP

Instead of stamping with the key colours, I used DSP and the Brilliant Wings Dies. The DSP colours are Daffodil Delight, Polished Pink and Pool Party, with a card base of Just Jade.

scissorspapercard, Stampin' Up!, CASEing The Catty, Brilliant Wings Dies, Ornate Frames Dies, Sweet As A Peach, Colour Families DSP

The Whisper White panel over the top was cropped using the open butterfly die, and then each individual butterfly was cropped from the piece that popped out. The detailed butterflies are slightly smaller than the open butterflies, so it isn't too difficult to do this. I then just adhered them back into the appropriate opening.

scissorspapercard, Stampin' Up!, CASEing The Catty, Brilliant Wings Dies, Ornate Frames Dies, Sweet As A Peach, Colour Families DSP

The sentiments I used are from the Sweet As A Peach stamp set. I really love the fonts!

That's all from me for tonight, but your job is just starting! We'd love to see which card from the Birthday section you will choose to CASE. Make your card, snap a photo and upload it to our Facebook group before next Sunday evening. Easy!


Before you dash off, please do continue on with our Blog Hop. Next up is the lovely Julia, who has turned a funny card into a sweet tag. You won't want to miss it!

Bye for now,

Tina

Sunday, 14 June 2020

CTC #272: CASE The Flowers Of The Annual Catalogue

Hi!


Gee, these Sunday evenings seem to roll around very quickly! Maybe it's just because it's nearly the end of the weekend that they seem to sneak up on us? Regardless, it's time for the new CASEing The Catty Sunday Challenge Blog Hop.


This week we are reverting back to one week long challenges, and the challenge this week is to CASE any project involving flowers from the Annual Catalogue. As ever, I started at the back of the catalogue, and got as far as page 132 before I found a card that I wanted to CASE.


I really liked the multicolour die cut, which in the sample was created by cropping some cardstock with the flower die and then using one of the new Water Brushes to apply the colour to the die cut. It allows you to target each area and colour accordingly. I was short on time this week, and not having the time to colour and wait for it to dry, I opted to use DSP to get a similar affect.

scissorspapercard, Stampin' Up!, CASEing The Catty, Many Layered Blooms Dies, Lily Impressions DSP, Itty Bitty Birthday, Ornate Frames Dies

I had to use the retired Lily Impressions DSP, as none of the new DSP packs that I own had enough of the colour variation I required to achieve the look.  I selected a paper that had quite a lot of colour and used the bottom layer of the Many Layered Blossoms Dies to crop it. I then cropped the top layer using plain Whisper White card, and adhered it over the top. The Adhesive Sheets made this very easy, and way less messy than liquid glue!

scissorspapercard, Stampin' Up!, CASEing The Catty, Many Layered Blooms Dies, Lily Impressions DSP, Itty Bitty Birthday, Ornate Frames Dies

The blooms were popped up over a Blackberry Bliss card base using Black Dimenisonals. The Ornate Frames Die label was a bit of a nod to the original card - it had a strip of contrasting colour down each side of the card.

scissorspapercard, Stampin' Up!, CASEing The Catty, Many Layered Blooms Dies, Lily Impressions DSP, Itty Bitty Birthday, Ornate Frames Dies

For the inside, I cropped a small section of the die with the same DSP, but then I used Blackberry Bliss for the top layer, as Whisper White would not have stood out enough on the WW writing panel. The stamped sentiment is from Itty Bitty Birthdays, as is the front sentiment.

You can join in our challenge each week by adding your card to the wall in our Facebook Group. All are welcome, no blog or fancy editing required! We'd love for more people to join in the fun - the more the merrier!


Before you go check it out, though, don't forget to finish the Hop! Next you're off to see what my good friend, Judy, has made. She's a fabulous gardener, so floral cards are right up her alley!


Bye for now,

Tina

Thursday, 7 May 2020

JAI #504: Just Add Colour

Hi!


Thanks for popping in for the new Just Add Ink challenge. This week it's a colour combo, set by me!


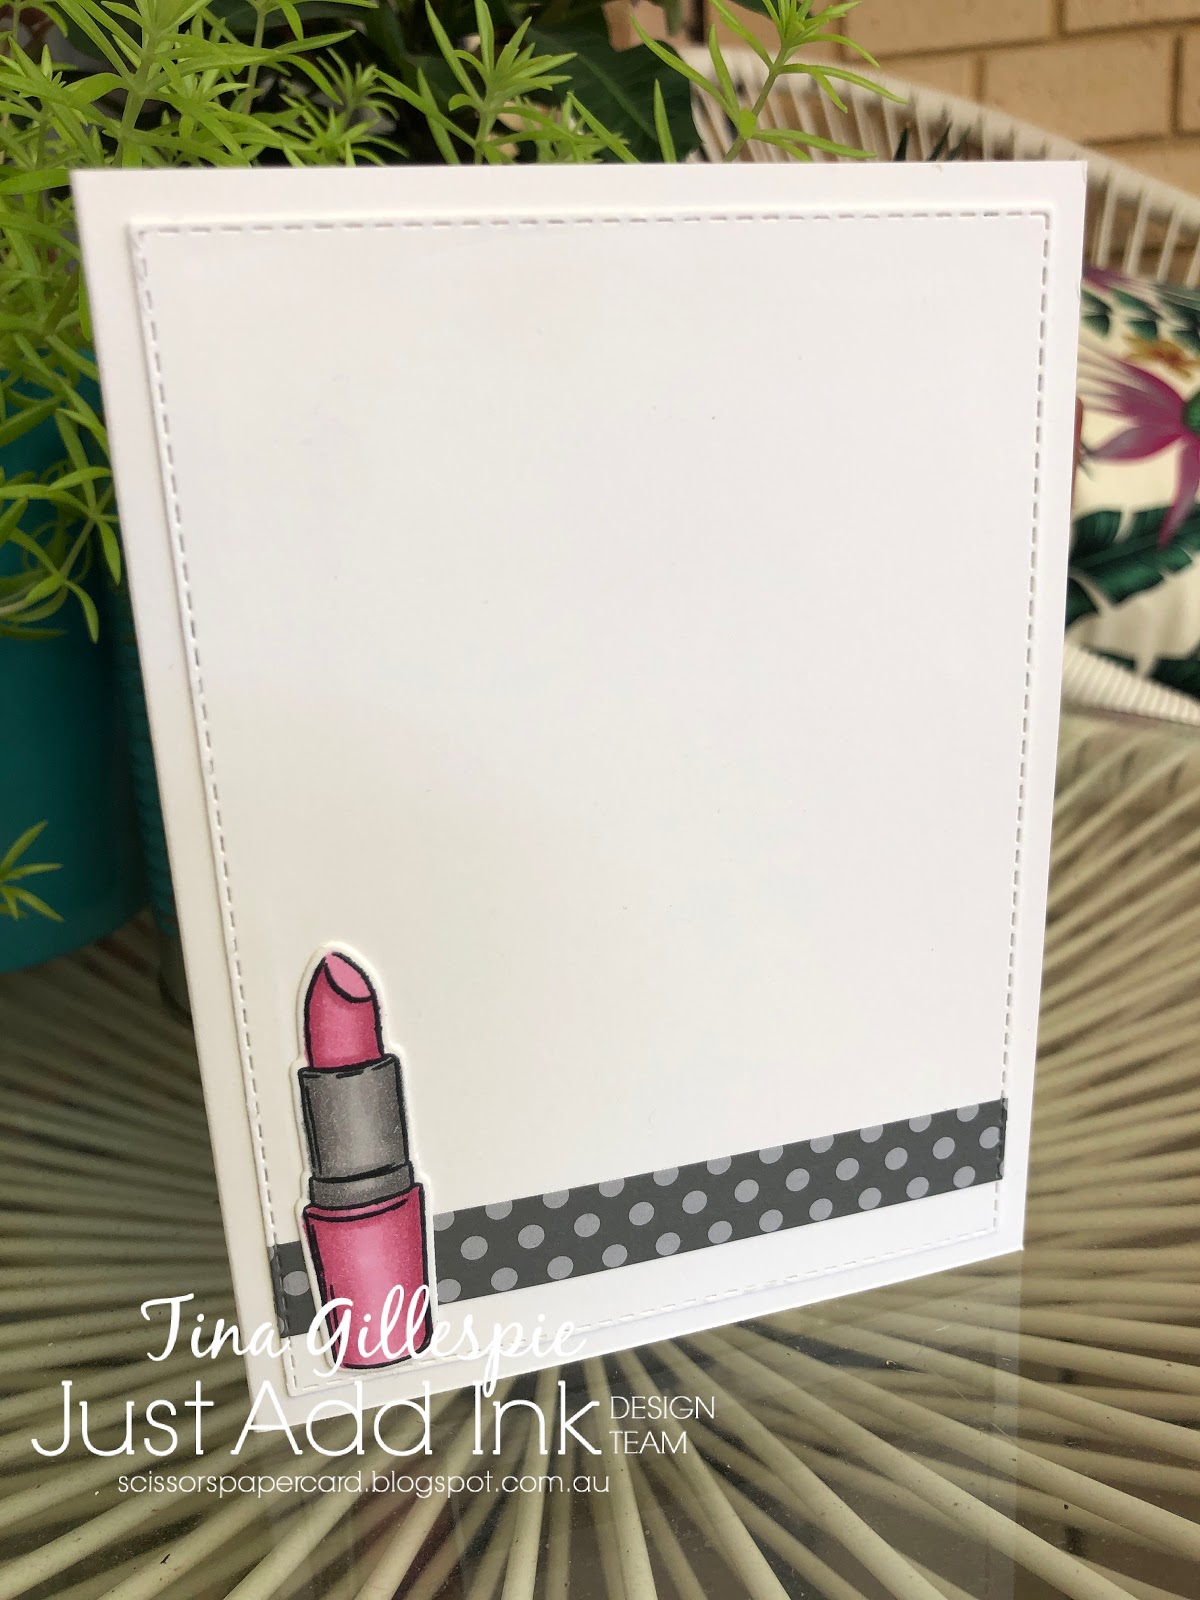
I really love the mix of greys with the dusky pink. I needed a Mother's Day card for my mum, and I thought this colour combo would work well for a feminine card, despite the greys.

scissorspapercard, Stampin' Up!, Just Add Ink, Dressed To Impress Bundle, Ornate Frames Dies, Stitched Rectangles Dies, Stampin' Blends, In Colour DSP

I only recently purchased the Dressed To Impress bundle, despite it being available since January. With the news that it was carrying over to the new Annual Catalogue, I decided to purchase while I could still get it at the discounted bundle price.

scissorspapercard, Stampin' Up!, Just Add Ink, Dressed To Impress Bundle, Ornate Frames Dies, Stitched Rectangles Dies, Stampin' Blends, In Colour DSP

I started by stamping the lipstick in Memento and then colouring with my Rococo Rose and Smokey Slate Blends. The sentiment comes from the stamp stamp set, and was cropped using a die from the bundle. The Glimmer label underneath was cut from the Ornate Frames Die. A strip of Basic Grey DSP and some Rose Metallic Thread, all layered over some sponged Rococo Rose ink, finished the front of the card.

scissorspapercard, Stampin' Up!, Just Add Ink, Dressed To Impress Bundle, Ornate Frames Dies, Stitched Rectangles Dies, Stampin' Blends, In Colour DSP

I had stamped and coloured a second lipstick at the same the as the one on the front, knowing it would go to great use on the inside. I adhered the strip of DSP to the card before I cropped it with the largest Stitched Rectangle die. This added the stitching to the DSP without any extra effort on my behalf. I didn't stamp an inside message, as I chose to write a personal message to my mum instead.

Time now to pop on over to the Just Add Ink blog, where you can find the rest of this week's Design Team cards. When you've made your card using the challenge colours, you can link it up there as well!

Bye for now,

Tina

Tuesday, 10 March 2020

Sneak Peek...

Hi!

One of the perks of being a Stampin' Up! Demo is that we often get access to new products before anyone else. SU released a new suite of products early, they will be in the new Annual Catalogue, but demos can get them in March, and they will be available to customers in April. Happily, my preorder arrived on Saturday morning, so I was able to have a play over the long weekend.

scissorspapercard, Stampin' Up!, Born To Shine, Ornate Style, Ornate Layers Dies, Ornate Frames Dies, Stampin' Blends

Isn't this floral image stunning? It's such a sweet bunch of flowers. I have no idea what kind of flowers they are meant to be, other than maybe daisies at the top. I stamped it in Memento ink and coloured it with my Blends.

scissorspapercard, Stampin' Up!, Born To Shine, Ornate Style, Ornate Layers Dies, Ornate Frames Dies, Stampin' Blends

The colours I used were Old Olive, Rich Razzleberry, Purple Posy, Flirty Flamingo, Daffodil Delight, Bronze and Pool Party. How lovely is the die cut panel? It's from the dies that come in the bundle with the stamp set. I love that this one is a better size for Australian sized cards, as it's slightly longer than the largest Stitched Rectangle die.

scissorspapercard, Stampin' Up!, Born To Shine, Ornate Style, Ornate Layers Dies, Ornate Frames Dies, Stampin' Blends

This is another stamp from the set - a single daisy that I stamped twice. I left the inside sentiment free, so that the card is a little more multipurpose. The 'For You' on the front covers a wide range of occasions.

I also purchased the DSP from the suite, which is very retro and reminds me of sheet sets that my nana used to have. I can't wait to play more, skeet your eye out for more samples in the future!

Bye for now,

Tina

Thursday, 20 February 2020

JAI #493: Just Choose Two

Hi!


Welcome back to a new Just Add Ink challenge! This week Patrice has challenged us to Just Add Two to our creations. Which two? Any of these two:


Now, for some reason I became a little fixated on having felt on my card. I'm not quite sure why - maybe because, of the three, it's the one that I was least likely to have. Nothing like making it hard for myself! LOL! I was sure I had a felt Christmas ornament that SU retired a long time ago *somewhere* in my craft room. I never found it, but I did find some cheap sheets of felt in the kid's craft stash.

scissorspapercard, Stampin' Up!, Just Add Ink, Varied Vases, Daisy Lane, Poppy Moments Dies, Brick & Mortar EF, Layering Leaves EF, Daisy Punch

I trimmed some green felt and attached it to a piece of Shaded Spruce cardstock with TomBow glue. Before it dried, I ran it through my Big Shot with the Layered Leaves 3D Embossing Folder. I was quite impressed with how well it held the embossed design!

scissorspapercard, Stampin' Up!, Just Add Ink, Varied Vases, Daisy Lane, Poppy Moments Dies, Brick & Mortar EF, Layering Leaves EF, Daisy Punch

To finish the card, I layered a piece of vellum embossed with the Brick & Mortar 3D Embossing folder with some of the Poppy Moments leaves and a Large Daisy. The second of my Two items is a button, the centre of the daisy. I used a Medium Classy Designer Button, which retired a while ago, and coloured it with my dark Pineapple Punch Stampin' Blend to change the colour from vanilla to yellow.

scissorspapercard, Stampin' Up!, Just Add Ink, Varied Vases, Daisy Lane, Poppy Moments Dies, Brick & Mortar EF, Layering Leaves EF, Daisy Punch

The inside was finished off with a So Saffron daisy and a sentiment from Varied Vases.

So which two will you choose? You can check out what the Design Team chose over at the Just Add Ink blog, where you can also link up your Just Choose Two card.

Bye for now,

Tina

Sunday, 5 January 2020

CTC #260 Week 1: January July Mini Catalogue

Hi!


Welcome to the first CASEing the Catty Blog Hop for 2020! I can't believe we are writing 2020 already! The blog before mine is the fabulous Angela's, but we are all linked in a circle, so just keep going until you get back to where you started.


This week we are CASEing projects from the new January-June Mini Catalogue. This year we are trying something new - each challenge will run for two weeks, not one. We will still have a blog hop each week, so there will be double the inspiration for each challenge. Yay!


I liked the layout and die cut elements on this card from page 19. I chose to use the new Under My Umbrella stamp set though. It's a cute line art set, perfect for colouring.

scissorspapercard, Stampin' Up!, CASEing The Catty, Under My Umbrella, Peaceful Moments, In Colour DSP, Poppy Moments Dies, Painted Labels Dies, Ornate Frames Dies, Stampin' Blends

How sweet are the boots and umbrella? I coloured the images with my Stamping' Blends, in Seaside Spray, Rococo Rose, Purple Posy, Daffodil Delight, Crumb Cake and Call Me Clover. I had a lot of fun practicing to get a rounded look on the boots and umbrella. Do you think I succeeded?

scissorspapercard, Stampin' Up!, CASEing The Catty, Under My Umbrella, Peaceful Moments, In Colour DSP, Poppy Moments Dies, Painted Labels Dies, Ornate Frames Dies, Stampin' Blends

The background was created with a die from the Poppy Moments Dies. I like that it cuts windows in the shape of a bunch of poppies in the card. I backed it with some Seaside Spray DSP from the In Colour pack. The label and tag dies are from the Painted Labels and Ornate Frames Dies. A few sequins finished off the front.

scissorspapercard, Stampin' Up!, CASEing The Catty, Under My Umbrella, Peaceful Moments, In Colour DSP, Poppy Moments Dies, Painted Labels Dies, Ornate Frames Dies, Stampin' Blends

The inside sentiment is from the new Peaceful Moments stamp set, with another spray of flowers from Under My Umbrella. They are such cute flowers!

As I said earlier, you now have two weeks to enter our challenges. You do this by taking a photo of your completed card an uploading to our Facebook group, telling us which challenge you are entering.


That's all from me for now, next up is the lovely Judy.


Bye for now,

Tina

Wednesday, 27 November 2019

AWH HOC Week 15

Hi!


Hello, and welcome to the second last Heart Of Christmas Blog Share for 2019. I've really enjoyed doing these blog shares again, as it's a great way to increase my stash of Christmas cards. And I get lots of inspiration from my Art With Heart team members. Winning!

scissorspapercard, Stampin' Up!, Art With Heart, Heart Of Christmas, Greatest Part Of Christmas, Night Before Christmas DSP, Ornate Frames Dies

This week's card was an attempt to use more of my Christmas DSP before Christmas. I selected paper from the Night Before Christmas pack. I love the 6 inch packs, as you get a bigger variety of papers than the 12 inch packs, but you end up with a lot more smaller pieces. I made sure I used as much of the sheet as I could on this card, starting with a full card front sized piece of the baubles paper. I think this is one of my favourite patterns from the pack.

scissorspapercard, Stampin' Up!, Art With Heart, Heart Of Christmas, Greatest Part Of Christmas, Night Before Christmas DSP, Ornate Frames Dies

I chose Poppy Parade card to complement the DSP, and used my Ornate Frames dies to cut a frame for my sentiment, which is from the Hostess set, Greatest Part Of Christmas. I really love that font! And yay for the dies carrying over to the new Mini Catalogue!

scissorspapercard, Stampin' Up!, Art With Heart, Heart Of Christmas, Greatest Part Of Christmas, Night Before Christmas DSP, Ornate Frames Dies

The inside is where I used the rest of the sheet of DSP. I just cut it in half lengthways and adhered it to the base, before cutting a piece of Whisper White card to fit in between, overlapping slightly. And there's that cute font again! I quite like how this inside looks, so I think I'll be doing it again with my 6 inch papers.

The lovely Michelle is hosting the Heart Of Christmas tonight, so please pop on over to her blog to see the rest of this week's cards.

Bye for now,

Tina

Sunday, 29 September 2019

CTC #248: Annual Catalogue With A Twist

Hi!


Welcome to the new CASEing The Catty Sunday Challenge Blog Hop! Have you started here with me, or come from Shannon's blog? It really doesn't matter, but please do continue hopping until you get back to where you started.


This week we are choosing a card from the Annual Catalogue and CASEing it using our Holiday Catalogue supplies. That sounds easy, until you realise that there's over 200 pages of projects to choose from! I ended up starting at the back, and soon came across this cute little card on page 206.


I loved the subtle DSP behind the main panel, and the way the image overhangs the circle panel. Too cute!

I started with a 4 1/4" square Old Olive card base, which I covered with a piece of DSP from the Night Before Christmas pack.

scissorspapercard, Stampin' Up!, CASEing The Catty, # Elfie, Night Before Christmas DSP, Stampin' Blends, Ornate Frames Dies, Stitched Shapes Dies

The next layer was Whisper White cardstock, cropped to 3 1/2" square. I ran it though my Big Shot in my Subtle folder. I actually placed the cardstock in the folder on a diagonal, so that the pattern runs  diagonally. I wish the camera had picked it up! The Whisper White Stitched Shapes Circle was sponged with Night Of Navy ink, fading out at the bottom of the circle. I stamped a scattering of stars in Golden Glitz Delicata ink.

scissorspapercard, Stampin' Up!, CASEing The Catty, # Elfie, Night Before Christmas DSP, Stampin' Blends, Ornate Frames Dies, Stitched Shapes Dies

My cute little elf was stamped in Memento ink and colours with my Blends - Ivory, Old Olive, Cherry Cobbler, Soft Suede, Daffodil Delight and Crumb Cake. I then used my Shimmery Crystal Effects to coat the edge of his hat, collar, buttons and bottom of his jacket. An Old Olive linen twine bow and a few shapes from the Ornate Frames Dies finishes off the front of the card.

scissorspapercard, Stampin' Up!, CASEing The Catty, # Elfie, Night Before Christmas DSP, Stampin' Blends, Ornate Frames Dies, Stitched Shapes Dies

Being a smaller card, there wasn't really enough room to stamp the elf again, so I contented myself with stamping and colouring the present and then stamping the sentiment from Elfie.

Phew, that's it from me. Do you know we have a Facebook group for our challenges? You don't need a blog to enter, just snap a photo of your card and upload it to the group. Done!


Now you're off on the next stop of this Blog Hop, which is my lovely friend and SU travel buddy, Judy!


Bye for now,

Tina

Sunday, 18 August 2019

CTC 242: Woven Threads

Hi!


It's the end of the weekend, which is sad, but it also means it's time for the new CASEing The Catty Sunday Challenge Blog Hop. Whoot! I always enjoy doing these hops and seeing the wonderful talent in the Design team. This week the blog before mine is the lovely Rachel's Blog, wether you came from there or are staring here, just keep hopping around the complete circle of blogs.


This week we are CASEing the colours in the Woven Threads DSP, and being inspired by the projects on pages 12 to 14. The colours in the DSP are Pretty Peacock, Purple Posy, Rococo Rose, Sahara Sand, Seaside Spray, Terracotta Tile, Whisper White. Lots to choose from!


This monochromatic card at the bottom of page 12 caught my eye. Actually, it was the Woven Threads Trim that hooked me on this card. I haven't used my Trim yet, and I thought this was a good opportunity to do so. As often happens though, my card took a different turn!

scissorspapercard, Stampin' Up!, CASEing The Catty, Crafting Forever, Birds Of A Feather, Ornate Frames Dies, Subtle Embossing Folder

I don't have any of the Woven Threads DSP, so I had to make my own background for this card. I kept the monochromatic look by stamping the pends from Crafting Forever in Pretty Peacock ink on Seaside Spray cardstock. I just eyeballed the stamping of the pens, and I was very pleased (and surprised) at how straight I managed to stay!

scissorspapercard, Stampin' Up!, CASEing The Catty, Crafting Forever, Birds Of A Feather, Ornate Frames Dies, Subtle Embossing Folder

The sentiment labels are why I didn't use the Trim - I thought the two elements would compete too much. These labels are from a new set of Dies in the Holiday Catalogue, called Ornate Frames. You may miss them, because they are in the Halloween section of the catalogue, but they are worth hunting for! I used four of the 11 dies on this label alone.

scissorspapercard, Stampin' Up!, CASEing The Catty, Crafting Forever, Birds Of A Feather, Ornate Frames Dies, Subtle Embossing Folder

I stamped the pens again for the inside, but this time I kept them all lined up in one direction. The tiny scalloped border is from the Decorative Ribbon Border punch - did you notice it on the front of the card too? I don't often make get well cards, but this one is now on it's way to a friend having a rough time in hospital. I hope it cheers her up!

That's it for me this week. Don't forget to check out the CASEing The Catty Facebook Group, where you can join in the fun of the challenges each week. Just create a card using our guidelines, and upload it to the group before the deadline each week. Easy!


To finish the hop, you need to pop on over to Sandra's Blog, where you're bound to be inspired!


Bye for now,

Tina