Hi!
Welcome to the new CASEing The Catty Sunday Challenge Blog Hop! Have you started here with me, or come from Shannon's blog? It really doesn't matter, but please do continue hopping until you get back to where you started.
This week we are choosing a card from the Annual Catalogue and CASEing it using our Holiday Catalogue supplies. That sounds easy, until you realise that there's over 200 pages of projects to choose from! I ended up starting at the back, and soon came across this cute little card on page 206.
I loved the subtle DSP behind the main panel, and the way the image overhangs the circle panel. Too cute!
I started with a 4 1/4" square Old Olive card base, which I covered with a piece of DSP from the Night Before Christmas pack.
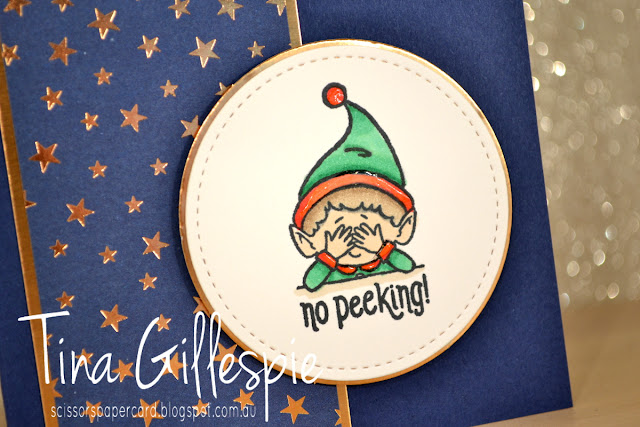
The next layer was Whisper White cardstock, cropped to 3 1/2" square. I ran it though my Big Shot in my Subtle folder. I actually placed the cardstock in the folder on a diagonal, so that the pattern runs diagonally. I wish the camera had picked it up! The Whisper White Stitched Shapes Circle was sponged with Night Of Navy ink, fading out at the bottom of the circle. I stamped a scattering of stars in Golden Glitz Delicata ink.
My cute little elf was stamped in Memento ink and colours with my Blends - Ivory, Old Olive, Cherry Cobbler, Soft Suede, Daffodil Delight and Crumb Cake. I then used my Shimmery Crystal Effects to coat the edge of his hat, collar, buttons and bottom of his jacket. An Old Olive linen twine bow and a few shapes from the Ornate Frames Dies finishes off the front of the card.
Being a smaller card, there wasn't really enough room to stamp the elf again, so I contented myself with stamping and colouring the present and then stamping the sentiment from Elfie.
Phew, that's it from me. Do you know we have a Facebook group for our challenges? You don't need a blog to enter, just snap a photo of your card and upload it to the group. Done!
Now you're off on the next stop of this Blog Hop, which is my lovely friend and SU travel buddy, Judy!
Bye for now,
Tina
Showing posts with label Blends. Show all posts
Showing posts with label Blends. Show all posts
Sunday, 29 September 2019
Wednesday, 18 September 2019
AWH HOC Week 5
Hi!
Wow, I can't believe it's Week 5 of the Heart Of Christmas Blog Shares already! My goodness, how the weeks are flying by!
As you can see, I have returned to Elfie - I can't resist the cute set for very long. I hadn't coloured the stocking image before this card, so it was well overdue! I select colours based on the Night Before Christmas DSP, which forms the background of my card.
Once again, I used the new Shimmery Crystal Effects to add some subtle dimension and shimmer to the card by applying a coat to the bands on both the hat and the stocking. It looks so much better in real life!
I used the same elf on the inside, coloured in exactly the same colours. I didn't use the Shimmery Crystal Effects, mostly because I was to impatient putting my card together and I couldn't wait for it to dry!
Now it's time to pop on over to Claire's blog, where you can find the rest of this week's Heart Of Christmas links.
Bye for now,
Tina
Sunday, 1 September 2019
CTC #244: Holiday Catalogue Cover
Hi!
Hello! It's time once again for the CASEing The Catty Sunday Challenge Blog Hop. You may have come from Monique's blog, or you may be starting here. Either way, just keep touring the blogs until you get back to where you started.
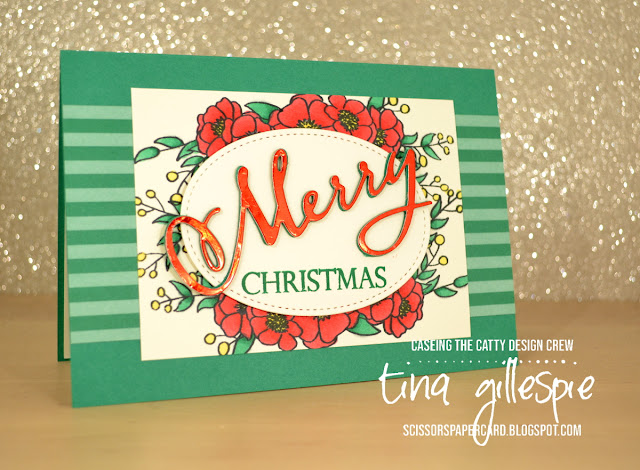
I don't actually have any of the products in that suite, so I had to search my stamp collection for something that would work in place of the wreath. Bloom and Grow fit the bill! I changed the circle to an oval to better suit the flowers, so I switched the orientation of the card too. The flowers were stamped and then I added a few extra of the smaller spray stamps at each end to fill the gaps. I coloured the little circle buds yellow to look a bit like wattle. I wanted to add a little Australian feel to the card.
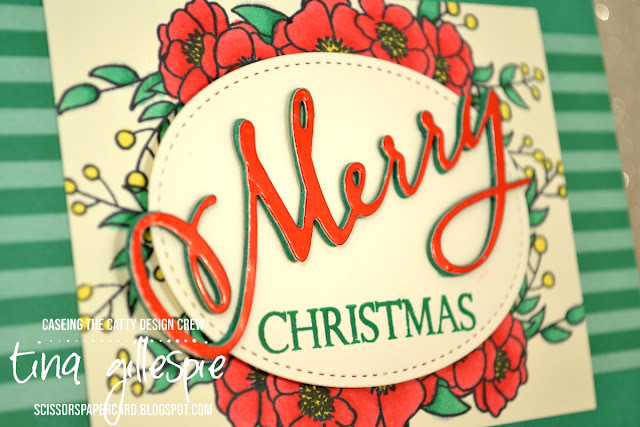
The Merry die cut was cut four times and stacked. The top is cut in Red Foil and the bottom three layers in Call Me Clover to match the card base. It's a cool effect that looks so much more effective in real life.
I stamped the flowers again on the inside. I'd curved the stamp a little for the front of the card to go around the oval, but I straightened it for the inside.
Don't forget to check out our Facebook group, where you can enter your card in this week's challenge. Which card catches your eye from the front cover?
Bye for now,
Tina
Hello! It's time once again for the CASEing The Catty Sunday Challenge Blog Hop. You may have come from Monique's blog, or you may be starting here. Either way, just keep touring the blogs until you get back to where you started.
This week we are CASEing projects from the front of the Holiday Catalogue. My eye was particularly taken by the wreath card in the Toile Tidings grouping of cards, so that's what I CASEd.
I don't actually have any of the products in that suite, so I had to search my stamp collection for something that would work in place of the wreath. Bloom and Grow fit the bill! I changed the circle to an oval to better suit the flowers, so I switched the orientation of the card too. The flowers were stamped and then I added a few extra of the smaller spray stamps at each end to fill the gaps. I coloured the little circle buds yellow to look a bit like wattle. I wanted to add a little Australian feel to the card.
The Merry die cut was cut four times and stacked. The top is cut in Red Foil and the bottom three layers in Call Me Clover to match the card base. It's a cool effect that looks so much more effective in real life.
I stamped the flowers again on the inside. I'd curved the stamp a little for the front of the card to go around the oval, but I straightened it for the inside.
Don't forget to check out our Facebook group, where you can enter your card in this week's challenge. Which card catches your eye from the front cover?
That's it for me, so now you're off to see what the lovely Peta has created. I wonder what hijinks Marvi has been up to this week?
Bye for now,
Tina
Wednesday, 28 August 2019
AWH HOC Week 2
Hi!
Welcome back to my blog for week 2 of the Heart Of Christmas Blog Share. Each week some of the Art With Heart team will be sharing their Christmas cards on a Wednesday evening. Last week I showed you this card, which featured the cute new stamp set, Elfie. This week I have a second card for you that uses all of the same elements, with just a couple of changes.
As you can see, I've just changed the position of the Brightly Gleaming SDSP starry panel and the elf circle, and also coloured the elf using more traditional Christmas Colours.
Once again I used the Shimmery Crystal Effects to add some shimmer to his hat, cuffs and collar.
I kept the inside exactly the same as the last card, except for the Christmas colours. The red ribbon has also had the Shimmery Crystal Effects applied.
Hmm, now the thinking cap has to go on for next week's card - I don't know that I could get away with another variation on this card LOL.
Now it's time to pop on over to Claire's blog, where you'll find the rest of the links for this week's Blog Share.
Bye for now,
Tina
Wednesday, 21 August 2019
AWH HOC Week 1
Hi!
Welcome to the first Heart Of Christmas Blog Share for 2019. This is the third year the Art With Heart team have been doing these blog shares, where every Wednesday evening in the lead up to December we will post Christmas cards for your inspiration. This is a great time of year to start, as the Holiday Catalogue is about to launch, and it's also a good idea to start your cards early!
My card uses three new Holiday Catalogue products. The stamp set is a cute new set, called # Elfie. It has a range of cute elves doing all sorts of Christmassy things - you will definitely be seeing a lot of their antics on my blog! The second is the stunning Brightly Gleaming SDSP. It's a Specialty paper, as it has gorgeous Copper highlights on half of the sheets in the pack. I wasn't really much of a copper fan until I saw this DSP!
I coloured this cheeky elf using my Blends in Night Of Navy, Crumb Cake and Ivory. The third new product, which is hard to see I the photo, is the new Shimmery Crystal Effects. It's a clear glue that has a shimmer, and that dries like a glaze. It's a lovely, subtle finishing touch.
The stamps on the inside are also from the Elfie set. It's always fabulous to have a set that combines images and sentiments for easy coordination! The gift was coloured using my Night Of Navy Blends, and then the ribbon got the Shimmery Crystal Effects treatment. It's quite quick drying - touch hard in less than 20 minutes on an area this small.
That's it from me, now it's time to head on over to Claire Daly's blog, where you'll find the rest of this week's cards. I can't wait to see what everyone's made!
Bye for now,
Tina
Sunday, 28 July 2019
CTC #239: CASE A Layout
Hi!
Welcome back to a new CASEing The Catty Sunday Challenge Blog Hop. It's been another busy week in my household, so I just squeaked into the end of the list for the blog hop, after Monique.
This week we are choosing a card from page 103 of the Annual Catalogue to CASE, but with an extra twist - we need to change the theme. So if the card you choose is a thank you card, you need to make anything but a thank you card. Easy!
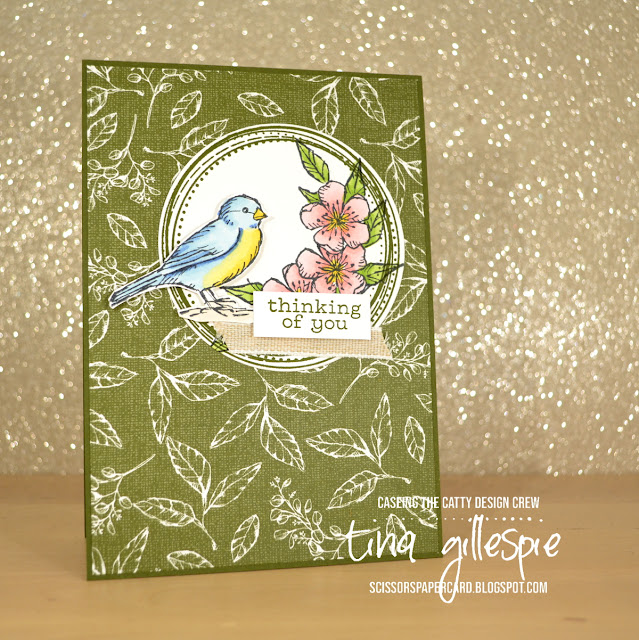
I was in a bit of a rush to get my card done, so I went for the Crumb Cake card at the top of this photo. In my rush I assumed it was a new baby card, as it's in the Kid's and Babies section. What's the opposite of a new baby card? A sympathy card. I always seem to need them for my stash.
It's funny how 'I need to get a card made in a hurry' morphed into 'I'll just do some colouring with my Blends', which I can never do in a hurry! I stamped the flower from Best Birds three times, masking each one as I went. Once all three were masked I stamped the leaves over the top. They were coloured with my Flirty Flamingo, Granny Apple Green and Daffodil Delight Blends.
The bird was then stamped and coloured using Daffodil Delight, Balmy Blue and Light Night Of Navy Blends, with Light Crumb Cake for the ground. The sentiment is from a Paper Pumpkin set I got while I was in the USA. I think it's Birds Of A Feather.
When I cut the card for the inside I was kidding myself that I'd only stamp one flower and leaf combo. As soon as I stamped the first flower I knew I had to do the whole trio - it wouldn't look right with just one. Sigh. Luckily I'm quicker at the photo editing and blog post writing than I am at making a quick card! LOL!
That's it for me for this week. Don't forget to join our Facebook group so that you can play along with our challenges each week.
In the meantime though, you're hopping off to see what Julia has made this week.
Bye for now,
Tina
Thursday, 4 July 2019
JAI #464: Just Add Colour
Hi!
It's that time of the week again - the new Just Add Ink challenge is live, and it's a fun colour challenge suggested by Jackie.
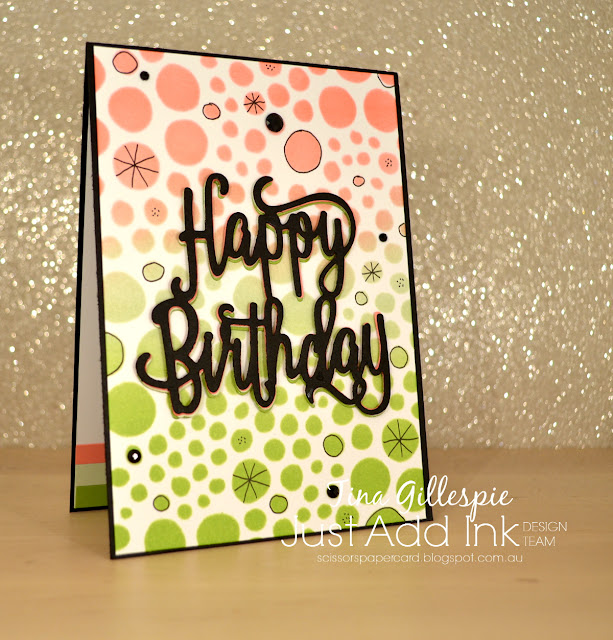
It took me a long time to think about what I cold do with these colours, and in the end I decided to use a new stencil that I purchased recently. It's called Holes Small and is by Ranger.
I lightly taped it down over a piece of Whisper White cardstock and then used my sponge brayer to add the ink. There's Granny Apple Green at the bottom, Soft Sea Foam in the middle and Flirty Flamingo on top.
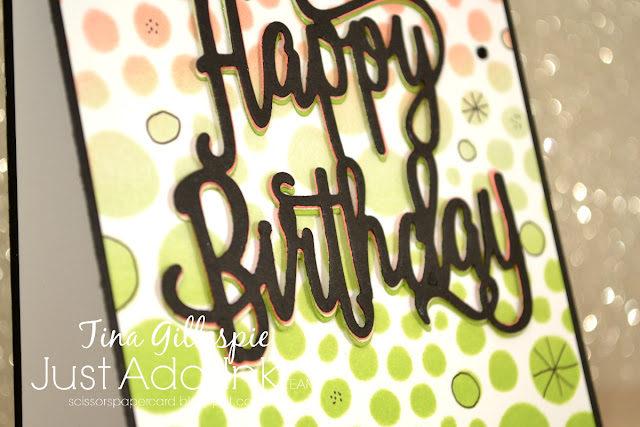
I die cut the now retired Happy Birthday die four times - once each in Granny Apple Green, Soft Sea Foam, Flirty Flamingo and Basic Black and then layered them up in that order. If you look carefully, you can see the different layers under the black. A subtle, but cool effect! I finished the card by doodling in some of the circles and adding some Black Faceted Dots.
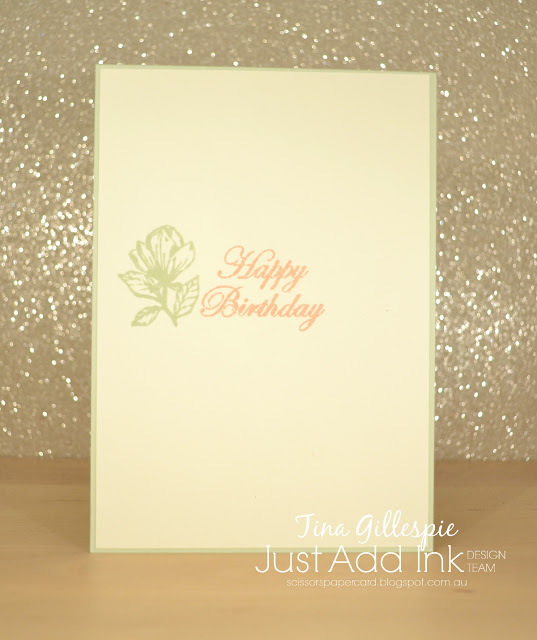
Instead of dots I got a bit lazy and went for stripes on the inside - just some offcuts of the cardstock to match the front colours. The stamp is from Genuine Gems, and I coloured it with my Granny Apple Green and Flirty Flamingo Stampin' Blends.
Time to pop on over to the Just Add Ink blog, where you can see the rest of this week's Design Team cards. You can also link up your card to enter the challenge. You'll have fun with these colours!
Bye for now,
Tina
Thursday, 27 June 2019
JAI #463: Just Choose Two
Hi!
This week at Just Add Ink, Jan has challenged us to choose two to add to our projects. Which two? Any two of:
That's right - foil, ribbon or sequins. Hmmm, which two will you choose? I sort of chose mine by accident, as I noticed that this card that I made for a class fit the bill for this weeks challenge! Lucky me!
You may look at my magnolias and think they don't look much like the magnolia set in the Annual Catalogue, and you'd be right! They are Stampin' Up! stamps, but you can find the set in a new, smaller brochure aimed at new stampers. Not that experienced stampers can't buy them though. I liked them as I found the other set too big. The set is called Magnolia Blooms, and it coordinates perfectly with the rest of the Magnolia Lane suite of products.
It's hard to see in the photo, but I embossed the background layer with the Subtle EF after stamping the smaller magnolia. This is the Faux Fabric look, and it certainly looks like fabric. A few green Iridescent sequins and a swish of Petal Pink ribbon and my card was done!
That's all from me - now it's time to pop on over to the Just Add Ink blog, where you can find the rest of this week's gorgeous Design team cards. You can also link up your card when you've decided if you'll add two of foil, ribbon or sequins!
Bye for now,
Tina
Tuesday, 25 June 2019
Beside The Seaside
Hi!
Here we are at the second last Colour Creations Blog Share - we've nearly run out of colours to feature! This week it's the new In Colour, Seaside Spray. It's a fabulous dusky light blue that I can see becoming a favourite of mine!
I've been on a bit of a sponge brayer kick again, so this week's card features the technique. It's totally different to the card I had in my head all week, but sometimes you've just got to go where the muse takes you!
I started with the sponge brayered panel and Seaside Spray ink. I brayered about 2/3 of the panel with Seaside Spray, tapering it off towards the top. I then flipped the panel and used So Saffron to brayer down from the top, blending with the Seaside Spray. I had intended to stop there, but the Saffron turned out darker than I expected. I balance out the panel, I brayered a little Night Of Navy at the bottom of the panel. I finished it off by flicking over a little water.
I stamped the main image onto some of the new watercolour paper using Stazon ink. The new paper is fabulous - so smooth and takes the water so well. Definitely worth a look if you enjoy watercoloring. The sentiment was stamped in Navy ink on Seaside cardstock and chopped up to add to the front.
I stamped the main image again on the inside in Seaside Spray ink, stamped off once. The image and sentiments are all from A Good Man, which is fast becoming my favourite set from the Annual Catalogue.
This card was actually a CASE of myself! I attended a stamping day hosted by Kathryn Mangelsdorf on the weekend, and I made a card with the group to demonstrate sponge brayering. Here's my slightly simpler card.
It's pretty much an identical card, just easier brayering and coloured with Blends rather than watercoloured.
Now it's time to hop on over to Catherine's blog, where you'll find the rest of this week's cards.
Bye for now,
Tina
Subscribe to:
Posts (Atom)


