Hi!
Welcome back to Week Two of the first CASEing The Catty Sunday Challenge for 2020! As I mentioned last week, we have switched to running each challenge over two weeks, with a new blog hop each Sunday as usual. That means you get twice the inspiration for each challenge! Speaking of inspiring, the blog before mine was the fabulous Rebecca's, and you can find the link to the next blog at the end of my post.
This week continues with CASEing any project from the January-June Mini Catalogue. There's so much to choose from! Last week I CASEd a card fairly closely, so this week I went looking for a technique to CASE. I didn't have to go far!
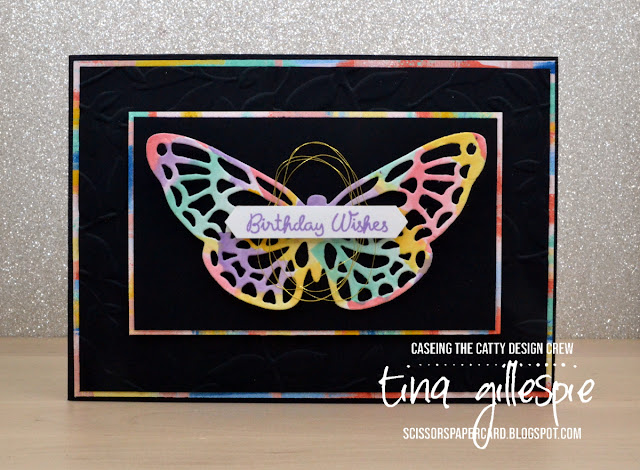
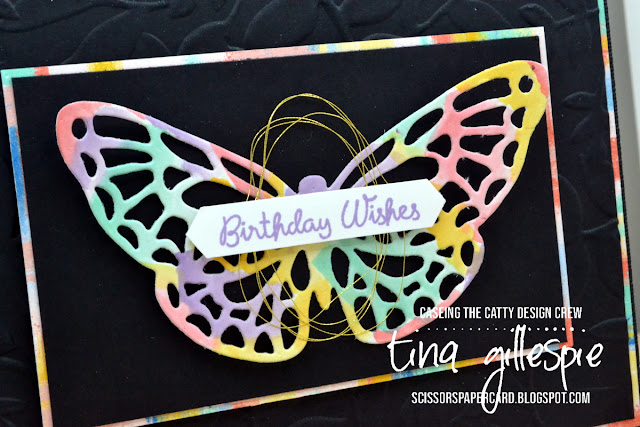
This beauty is on page 3, and uses a watercolour wash on the die cut background. It's such a fun technique, so I was very keen to give it a try!
I don't have the Heart To Heart bundle, so instead I used my Springtime Impressions Dies. I started by washing Highland Heather, Coastal Cabana, Mango Melody and Flirty Flamingo over a piece of Watercolour Paper. Once it dried, I cropped it using the butterfly die.
The rest of the card is just layers of Basic Black cardstock and Follow Your Art DSP. I love how the DSP mimics the look of the butterfly, without all the effort! You might also be able to see that I embossed the largest black layer with the Layered Leaves 3D Embossing Folder.
I used a couple of DSP offcuts to add to the side of the writing panel on the inside. Just a slither - any more takes away from the watercolour wash look from the butterfly.
Have you made your card and posted it to our Facebook group in the last week? If not, you still have another week - get to it! LOL!
For now though, it's time to hop on over to the wonderful Siobhan's blog. Give a little 'rawr!' as you go!
Bye for now,
Tina
Showing posts with label Follow Your Art DSP. Show all posts
Showing posts with label Follow Your Art DSP. Show all posts
Sunday, 12 January 2020
Tuesday, 3 December 2019
OnStage Sydney Beautiful Moments Presentation: Avid Samples
Hi!
Here's the third and final part of my OnStage Presentation sample posts. This time I have my Avid Crafter samples for the gorgeous Beautiful Moments stamp set. An Avid Crafter is one who stamps nearly every day and has to have it all! Sound familiar? I am definitely an Avid Crafter!! They definitely want more difficult projects and are willing to spend a lot of time (and money) on one card.
This card, using the Reflection Technique on my Stamparatus, was the card I demonstrated live on the day. It was a little nervewracking, but I did it! The hardest part is getting the water wash over the reflection part of the image to look right. I used Blueberry Bushell ink and an Aqua Painter. The rest of the image was coloured beforehand with my Aqua Painter and ink pads.
Once the Blueberry Bushell was was dry, I flicked my Chalk Marker over the top to give the look of light reflecting off ripples in the water.
I finished the inside with the image again in Crushed Curry Ink.
This image was originally a 'just trying things out' sample that turned out nicely enough to go on a card. I stamped the image on Shimmery White card using a no-line stamping technique and then coloured them with my Watercolour Pencils and an Aquapainter.
I layered two of the Stitched Labels to go behind the image panel.
The girls were stamped in Coastal Cabana to finish off the inside.
I used the Bridge Fold to create this card. All of the colouring was done on Watercolour Paper using my ink pads and Aqua Painter. I stamped using Stazon Ink.
I added a second row of flowers to the middle of the card, between the front layer and the back, to give the card more depth.
The back of the card uses Shimmery White card, as it copes well with watercolouring, but is smooth to write on.
This card is my absolute favourite of all the cards I made. It was the very first idea I had when I saw Jacque's stamp set - how well it would work with A Good Man. 'Perfectly' is the answer!
I used my Stamparatus and stocky notes to stamp and mask the images, starting with the dad/girl, then the mum/girl, and finally the island - which is actually an outline of Rangitoto Island, just off Auckland. A nice homage to Jacque's adopted hometown! I stamped on watercolour paper using Stazon ink and then coloured with my ink pads and Aqua Painter.
Once again, I used Shimmery White cardstock on the inside so that I could watercolcour.
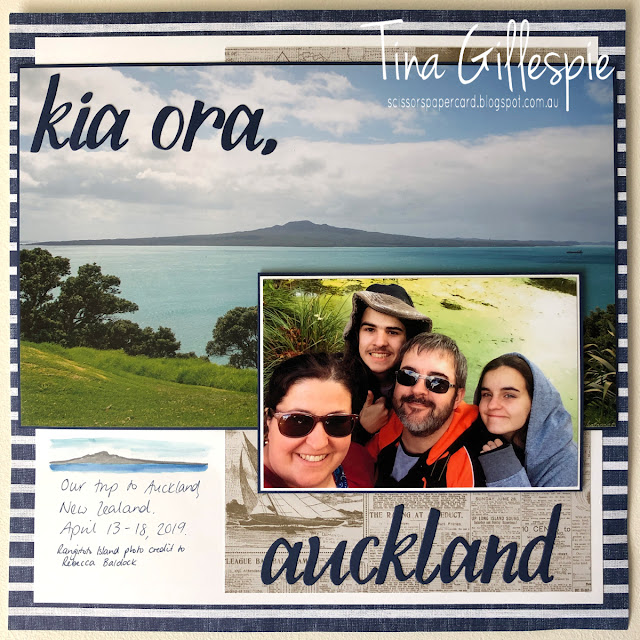
I also made a couple of scrapbook pages for the Presentation, to show how versatile the set is for all paper crafters. I'd recently been in Auckland for April's OnStage event, so I scrapped a photo of the family there, and another of Rangitoto Island. This will be the opening page of my album.
I also made a pocket page of my sisters and I when we were lots younger and entered a sandcastle building competition.
The two little girls on the beach were the perfect image for this page!
Thanks for checking out my samples. You can see my Beginner Samples here, and my Casual Samples here.
Bye for now,
Tina
Thursday, 7 November 2019
JAI #482: Just Add A Sketch
Hi!
Woo hoo, once again it's Friday and time for the new Just Add Ink challenge! This fortnight Jackie has designed a cute sketch for us to work with. Notice I said fortnight, and not week? Not a typo - this challenge will run for two weeks, as most of the Design Team will be off to attend Stampin' Up!'s OnStage event next weekend. I'll be heading off to Sydney, and I can't wait!
How fun is that sketch? I really love the little sentiment layers at the side of the tag. I felt like doing a spot of watercolouring, so I pulled out my Crafting Forever stamp set.
I stamped the pot of brushes onto some watercolour paper using Sahara Sand ink, which I stamped off first. I'm really getting into the no line watercolouring technique lately. It's kind of nice not to have the dark black Stazon outline sometimes.
I think my biggest problem is that I'm not patient enough to let each section dry fully. That, and the fact that I made this card at the last minute and had to rush - watercolouring is not something that you can rush! Still, I was mostly pleased with my efforts this time. It's hard to tell in the photograph, but I used my Silvery Shimmer Delicata ink to colour the metal parts of the brushes. It gives a really nice shimmer! I simply tapped the pad onto my Silicone Sheet, and then used my Aqua Painter to pick up the ink from there. Too easy!
LOL, as I said earlier, I was very short on time today, so the inside of my card just got one stamp. The 'For You' on the front makes this quite a generic card, so I can either leave it blank, or stamp an appropriate inside sentiment when I know what this card will be used for.
Thanks for stopping by. Now it's time to pop on over to the Just Add Ink blog to see the rest of this week's Design Team cards. Don't forget that you have two weeks in which to get your card into our challenge gallery for this sketch challenge.
Bye for now,
Tina
Thursday, 17 October 2019
JAI #479: Just Add Colour
Hi!
Hooray, it's Friday, so it's time for the newJust Add Ink challenge. This week Jackie has given us an unusual colour combination to work with.
I say unusual, because I wouldn't usually pair those shades of blue and green. I'm happy to say though, that they work together nicely!
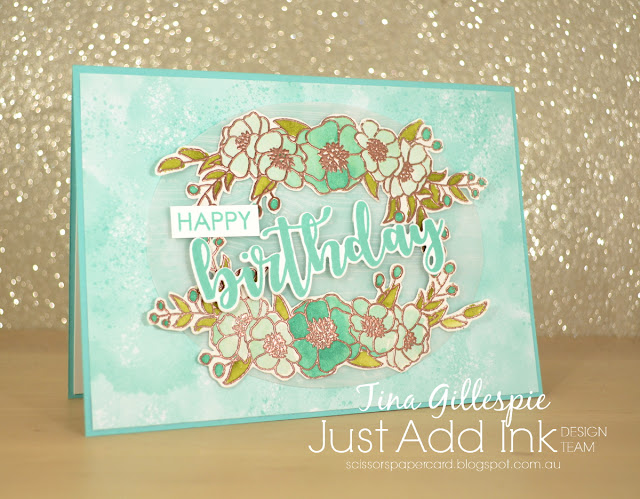
I decided to focus mostly on Coastal Cabana, with just a few Pear Pizzazz and Whisper White highlights. I started by heat embossing the sprays from Bloom and Grow using Copper Embossing Powder. I bent the stamp a little before I stamped so that it would fit around the oval better. It's very hard to see, but there is a vellum oval, dry embossed with the Pinewood Planks folder under the flowers and sentiment! The flowers were then watercoloured. I started with the middle flower, and worked my way out, diluting the ink more for each flower.
The sentiment is from Uniquely Creative, and it's called Sweet Sentiments Builder. I love that some of the words in the set have matching dies - it makes my life a little easier! I layered everything onto a base of Coastal Cabana DSP from the Follow Your Art pack. I wanted something with a bit of variation in the colour, not just a flat piece of blue.
The inside was stamped and coloured the same way as the front. I often use Shimmery White cardstock when I am watercolouring, as it's more cost effective than watercolour paper and it handles the water very well.
That's it for me - why not pop on over to the Just Add Ink blog, where you can see the rest of the Design Team cards and link up your own for the challenge. I think you'll like this colour combo!
Bye for now,
Tina
Thursday, 30 May 2019
JAI #459: Just Add Colour
Hi!
Here we are again with the new Just Add Ink challenge. This week Rochelle has put together this gorgeous colour combo.
I must admit, when I first saw it I wondered what Rochelle was thinking when she put pink and red together! I also struggle big time with 4 colour combos - I find it difficult to balance out the colours. I was pleasantly surprised with how well this one came together in the end - it's not such a tricky combo after all!
I've used a mix of old and new products on this card. The DSP is from a new suite called 'Follow Your Art', and is a great one for all the crafters out there - paper, paint and fabric. A lot of the DSP has bright, bold designs, but for this card I selected a piece that was softer Blushing Bride. I add some pop to the card I used Poppy Parade to add borders.
The Follow Your Art suite works really well with the existing Crafting Forever stamp set, which is carrying over to the new Annual Catalogue. The scissors are stamped from this set and coloured with my Blends. The bulldog clip is from the It Starts With Art stamp set and is also coloured with Blends. The retiring Fabulous Flamingo stamp set is the source of the sentiments. I wanted a thank you card for a friend who is helping me with a label for my first quilt, and I think this card will fit the bill perfectly!
The inside sentiment is from Crafting Forever, and goes so well with the scissor theme of the front of the card, don't you think?
Do you have an idea of how you can use this colour combo? You can pop on over to the Just Add Ink blog, where you can see the rest of this week's Design Team cards for more inspiration. Don't forget to come back and link up your card too!
Bye for now,
Tina
Subscribe to:
Posts (Atom)


