Hi!
Welcome to my first post of the night - there'll be another one a bit later! For now though, I am hopping with my demonstrator friend, Kelly Kent. It's her birthday (hip hip hooray!) and she's celebrating by doing a blog hop. what a fun way to celebrate! The blog before mine was Shannon's, but we are all linked in a circle, so start wherever and end where you start! Confused? LOL!
Tonight's cards are the first I made using the technique that's going totally viral, especially after all us demo's went to New Zealand and cleared them out of Press & Seal! Yes, it's the Floating Frames technique. I hope you're not too sick of it yet!
I made this card as a class sample and decided that it's far too hard for everyone to stamp, colour and cut a heap of flowers in a class, so we'd use punches with DSP instead. It really cuts down on the time involved but still makes a pretty awesome card! I used a sheet of 6x6 DSP from the Garden Impressions DSP pack combined with the Butterfly Duo punch for my card. One sheet of 6x6 gives plenty of butterflies for the front, with some left over to decorate the insides.
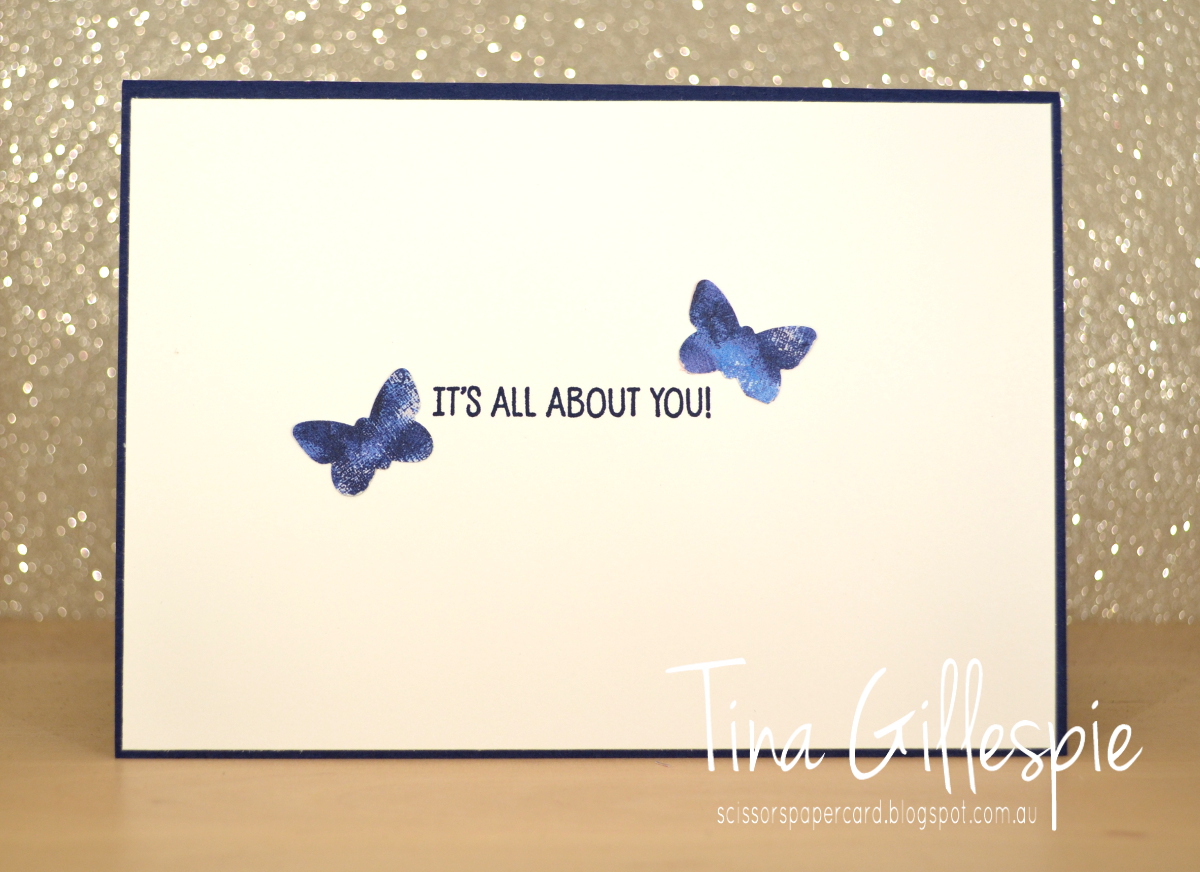
I'm not going to explain the technique, there are plenty of videos and tutorials out there. I will give you a few tips though. I didn't take a photo, but before I laid out my punched shapes on the copy paper, I traced the shape of the circle die onto the paper. This allowed me to see where I would cut and hopefully I could avoid teeny tiny pieces of butterfly to try to stick a dimensional to!
As it turned out, choosing a slightly mottled DSP worked well, as sometimes the Press & Seal sticks too well to the paper. If a little bit peels away, it's less obvious on a paper that already looks distressed!
Can you tell where the paper peeled away a little? Didn't think so! LOL
I kept the stamping simple by using the same sentiments on both cards, just switching the inside for outside to suit each one.
Slightly dodgy photo, but here's both cards together. I've made a few more Floating Frames cards since these, including a pair using the Balloon Duo punch. It's a bit addictive!
That's it for me, now you're hopping off to visit Monique's blog to see what gorgeous card she's made for Kelly's Birthday Hop.
Bye for now,
Tina
Showing posts with label Garden Impressions DSP. Show all posts
Tuesday, 14 May 2019
Tuesday, 19 March 2019
Powered Up Powder Pink
Hi!
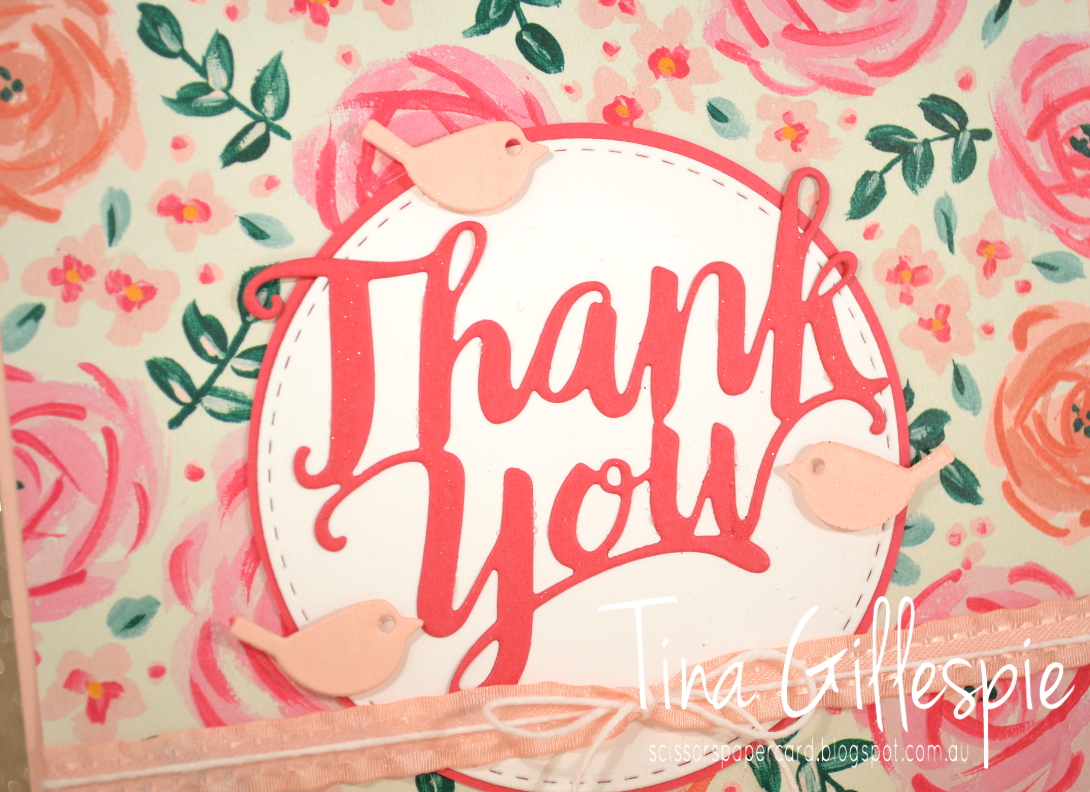
Gee whizz, another week has flown around again! Where are they going? This week for Colour Creations we are making cards using Powder Pink. I'm really not a pale pink fan, so I found this week's card a little difficult to start. I needed to make a second giant Thank You card (you can see the first one here), and so I pulled out my Garden Impressions DSP, which has a multitude of pinks.
The lady I am making this card for is quite girly, so I thought this paper would be perfect for her. She has been running our support group for families of special needs kids while our regular coordinator has been on leave. One term ended up being one year and one term! We will miss her when she goes.
How cute are these little birdies? They are from the Well Written Thinlits set, and the answer is 'super cute'! Once again, I ran my Wink Of Stella pen over the die cut Thank You and the birdies for a bit of extra bling.
As before, I added writing panels to both sides of the insides, as many people need to sign the card. It's a big one - nearly 6 inches square.
The Powder Pink ruffle ribbon adds that final, girly touch to the card, don't you think?
As always, Catherine's blog is where all the rest of the Colour Creations magic is happening this week. Why not pop on over?
Bye for now,
Tina
Gee whizz, another week has flown around again! Where are they going? This week for Colour Creations we are making cards using Powder Pink. I'm really not a pale pink fan, so I found this week's card a little difficult to start. I needed to make a second giant Thank You card (you can see the first one here), and so I pulled out my Garden Impressions DSP, which has a multitude of pinks.
The lady I am making this card for is quite girly, so I thought this paper would be perfect for her. She has been running our support group for families of special needs kids while our regular coordinator has been on leave. One term ended up being one year and one term! We will miss her when she goes.
How cute are these little birdies? They are from the Well Written Thinlits set, and the answer is 'super cute'! Once again, I ran my Wink Of Stella pen over the die cut Thank You and the birdies for a bit of extra bling.
As before, I added writing panels to both sides of the insides, as many people need to sign the card. It's a big one - nearly 6 inches square.
The Powder Pink ruffle ribbon adds that final, girly touch to the card, don't you think?
As always, Catherine's blog is where all the rest of the Colour Creations magic is happening this week. Why not pop on over?
Bye for now,
Tina
Thursday, 28 February 2019
JAI #446: Just Add Inspiration
Hi!
I lightly brayered over the panel I selected for my card with some Bermuda Bay ink to match the card base. It turned out quite patchy with some white areas showing though - exactly as I'd hoped! I then mounted it on a piece of Bermuda Bay Cardstock cut ever so slightly smaller than the panel, and popped the whole piece up on Dimensionals.
A few layered pieces on the front and I was done! I tore along the bottom edge of the Mango Melody cardstock for a different look, and then adhered it on top of a length of Melon Mambo cardstock. The DSP underneath is from the Garden Impressions DSP pack. I thought the colours and patterns worked well to represent the vases in the Inspiration photo.
I cropped the butterflies on the inside from another sheet of the DSP. I finally caved and purchased the Butterfly Duo punch after I'd fussy cut quite a lot of butterflies!
Is your mind turning over what you're going to do with the Inspiration photo? I hope so! It's a great picture, full of lots of elements to draw ideas from. I can't wait to see what you make! Don't forget to link it up over at the Just Add Ink blog.
Bye for now,
Tina
Time for the new Just Add Ink challenge! This week Rachael has found this absolutely gorgeous Inspiration photo to guide our crafting.
What a feast for the senses - can you imagine the texture and the scent to go with those glorious colours? So pretty! I went straight for the equally pretty Beautifully Detailed Laser-Cut Specialty Paper for my card.
I lightly brayered over the panel I selected for my card with some Bermuda Bay ink to match the card base. It turned out quite patchy with some white areas showing though - exactly as I'd hoped! I then mounted it on a piece of Bermuda Bay Cardstock cut ever so slightly smaller than the panel, and popped the whole piece up on Dimensionals.
A few layered pieces on the front and I was done! I tore along the bottom edge of the Mango Melody cardstock for a different look, and then adhered it on top of a length of Melon Mambo cardstock. The DSP underneath is from the Garden Impressions DSP pack. I thought the colours and patterns worked well to represent the vases in the Inspiration photo.
I cropped the butterflies on the inside from another sheet of the DSP. I finally caved and purchased the Butterfly Duo punch after I'd fussy cut quite a lot of butterflies!
Is your mind turning over what you're going to do with the Inspiration photo? I hope so! It's a great picture, full of lots of elements to draw ideas from. I can't wait to see what you make! Don't forget to link it up over at the Just Add Ink blog.
Bye for now,
Tina
Thursday, 15 November 2018
JAI #434: Just Add A Big Bold Sentiment
Hi!
Welcome to the new Just Add Ink challenge!
After a two week challenge last time, we are back to the usual one week timeframe with the new challenge. This week Nikki has challenged us to add a big, bold sentiment to our cards.
So, as you know, I've been in the USA for Stampin' Up!'s 30th Birthday Onstage celebration. My kids were pretty upset I was going without them, so I decided that I'd make them a card each that I'd post from the airport so that they'd get them in the mail. All kids love getting mail! Hopefully it will ease the sting of not getting to come too.
The stamp set is an old hostess set called Keep Calm. I love the different take on the classic English poster, and I thought it was perfect for these cards.
I used paper from the Garden Impressions DSP pack on each of the cards, choosing a different colour and design for each child. It's great that I was able to find two patterns more suited to boys in a very floral pack!
The card bases are the Silver Foil Edged Cards and Envelopes Pack. I've been using them quite a bit. Despite them being US sized, they are a great addition to our range, and an easy way to add a bit of pizzazz to a card. All I did was add the DSP and pop up the sentiment panel. Done!
My kids aren't really the kind to cry over me being away, in fact they'll probably have a fabulous time with Rob, as he tends to let them get away with more than I do!
All of the cards are the same on the inside too, just different colours and papers to match the front. I added a small strip of Silver Foil paper over the DSP just to help tie in with the front of the card. I really hope they love getting them I'm the mail!
You can see the rest of the Design Team's cards over at the Just Add Ink blog. Everyone had fun with this challenge, and I'm sure you will too.
Bye for now,
Tina
Welcome to the new Just Add Ink challenge!
After a two week challenge last time, we are back to the usual one week timeframe with the new challenge. This week Nikki has challenged us to add a big, bold sentiment to our cards.
So, as you know, I've been in the USA for Stampin' Up!'s 30th Birthday Onstage celebration. My kids were pretty upset I was going without them, so I decided that I'd make them a card each that I'd post from the airport so that they'd get them in the mail. All kids love getting mail! Hopefully it will ease the sting of not getting to come too.
The stamp set is an old hostess set called Keep Calm. I love the different take on the classic English poster, and I thought it was perfect for these cards.
I used paper from the Garden Impressions DSP pack on each of the cards, choosing a different colour and design for each child. It's great that I was able to find two patterns more suited to boys in a very floral pack!
The card bases are the Silver Foil Edged Cards and Envelopes Pack. I've been using them quite a bit. Despite them being US sized, they are a great addition to our range, and an easy way to add a bit of pizzazz to a card. All I did was add the DSP and pop up the sentiment panel. Done!
My kids aren't really the kind to cry over me being away, in fact they'll probably have a fabulous time with Rob, as he tends to let them get away with more than I do!
All of the cards are the same on the inside too, just different colours and papers to match the front. I added a small strip of Silver Foil paper over the DSP just to help tie in with the front of the card. I really hope they love getting them I'm the mail!
You can see the rest of the Design Team's cards over at the Just Add Ink blog. Everyone had fun with this challenge, and I'm sure you will too.
Bye for now,
Tina
Monday, 12 November 2018
Orlando Swaps Part Two
Hi!
Today's post actually has my second and third swap items. I hadn't intended to make a third, but somehow I found it on the go before I'd even finished swaps one and two! Oops!
Let's start with swap two, which was actually my first idea. I had decided early on that I wanted to do something around an Australian flag pencil. Do you think I could find an Australian flag pencil without paying ridiculous prices? In the end I found these Aboriginal Art designs, which I think worked much better with my colour scheme.
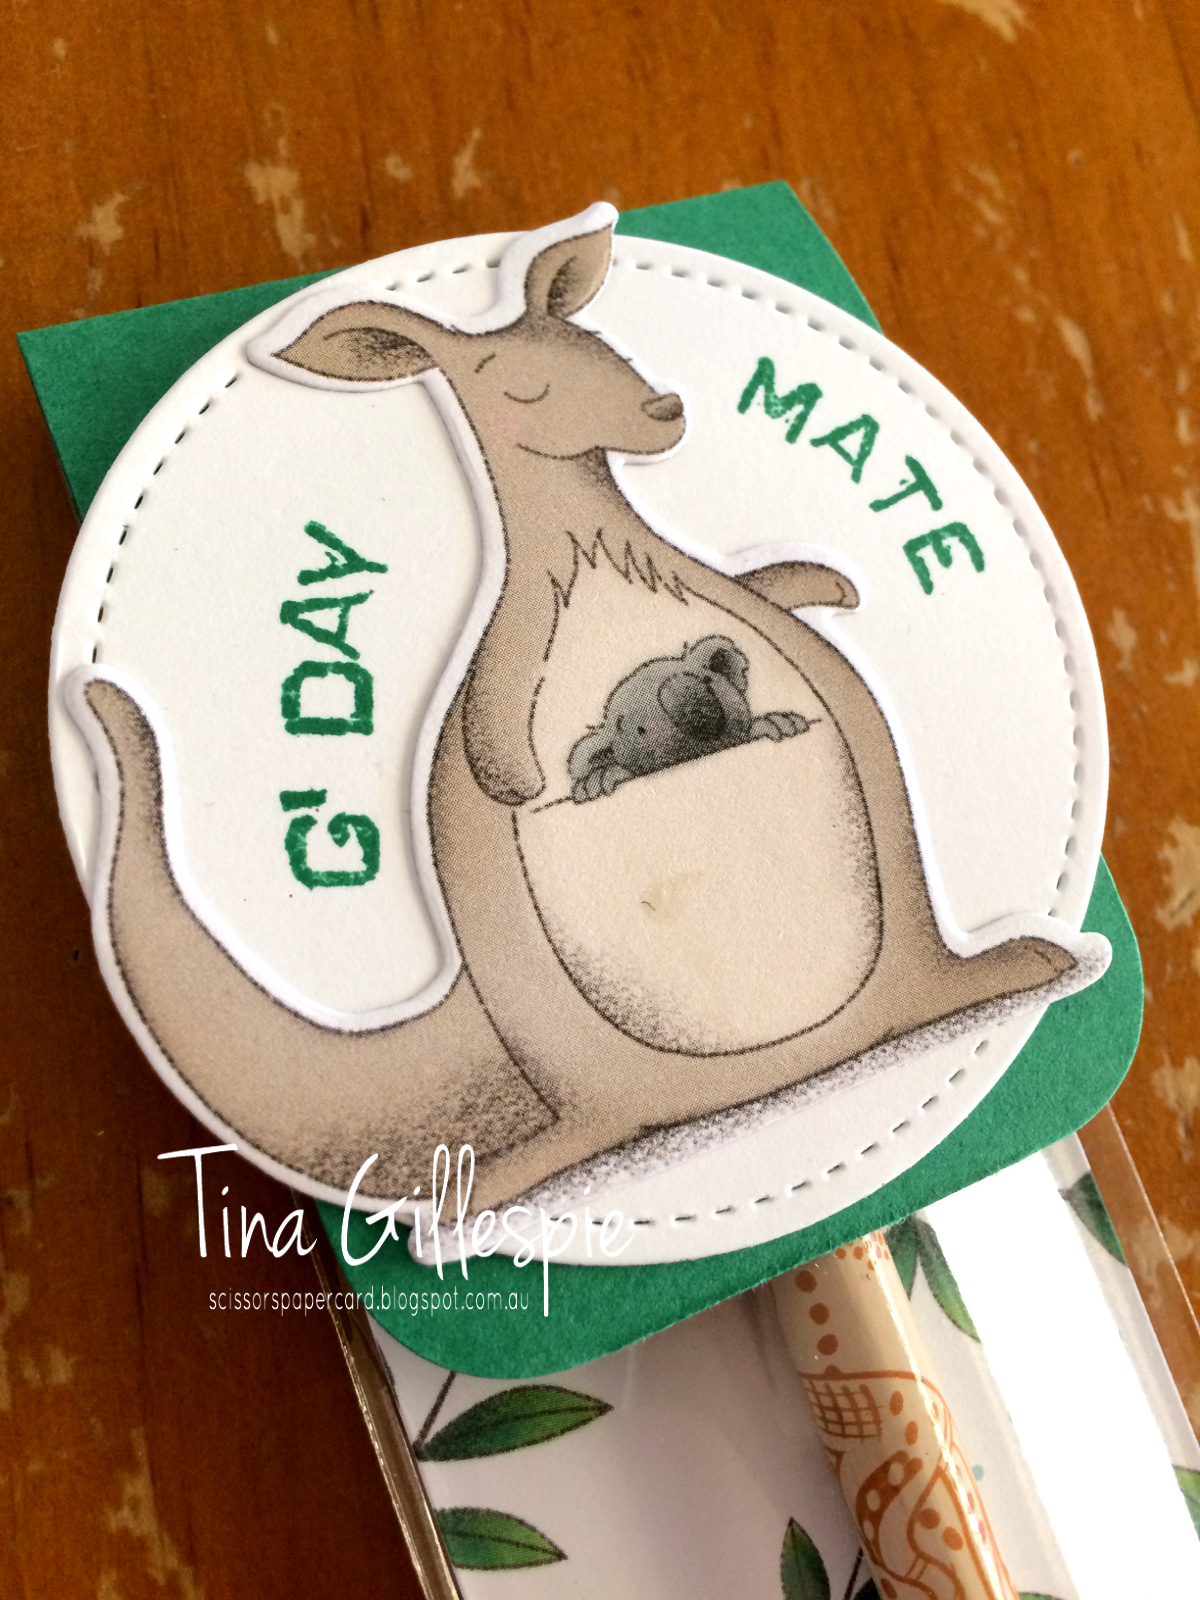
I've used the Animal Expedition DSP again, as I wanted to use the large kangaroos this time. There are two leafy designs - this one with the frogs, and another with little birdies. I used a mix of the two as my backing piece. The bags are in the Annual Catalogue.
I used my Stamparatus to stamp the 'g'day mate' sentiment on the Stitched Circle. It's very cliche Australian, but I'm hoping that the American demos will love it! I made 24 of these swaps.
Finally, I have my last minute swap. I happened to be in Coles when my favourite Twinings Tea, Australian Afternoon, was half price. It was the smaller packs with individually wrapped bags. I grabbed two to take to the US, but when I realised they fit with the Australian theme of my swaps I decided to add them to the mix.
I didn't have enough Animal Expedition DSP left to use, so I decided to use some of my Garden Impressions DSP. I used my Envelope Punch Board to create a little tea bagged size envelope, which I topped with a Stitched Labels Framelit. I stamped a pair of sentiments from Balloon Celebration and then used part of the big floral die from Springtime Impressions for the little cluster of flowers. A few rhinestones finished off the design.
I wonder which of my swaps will be the most popular - the Tim Tam Slam, Pencil or Tea? What do you think?
Bye for now,
Tina
Today's post actually has my second and third swap items. I hadn't intended to make a third, but somehow I found it on the go before I'd even finished swaps one and two! Oops!
Let's start with swap two, which was actually my first idea. I had decided early on that I wanted to do something around an Australian flag pencil. Do you think I could find an Australian flag pencil without paying ridiculous prices? In the end I found these Aboriginal Art designs, which I think worked much better with my colour scheme.
I've used the Animal Expedition DSP again, as I wanted to use the large kangaroos this time. There are two leafy designs - this one with the frogs, and another with little birdies. I used a mix of the two as my backing piece. The bags are in the Annual Catalogue.
I used my Stamparatus to stamp the 'g'day mate' sentiment on the Stitched Circle. It's very cliche Australian, but I'm hoping that the American demos will love it! I made 24 of these swaps.
Finally, I have my last minute swap. I happened to be in Coles when my favourite Twinings Tea, Australian Afternoon, was half price. It was the smaller packs with individually wrapped bags. I grabbed two to take to the US, but when I realised they fit with the Australian theme of my swaps I decided to add them to the mix.
I didn't have enough Animal Expedition DSP left to use, so I decided to use some of my Garden Impressions DSP. I used my Envelope Punch Board to create a little tea bagged size envelope, which I topped with a Stitched Labels Framelit. I stamped a pair of sentiments from Balloon Celebration and then used part of the big floral die from Springtime Impressions for the little cluster of flowers. A few rhinestones finished off the design.
I wonder which of my swaps will be the most popular - the Tim Tam Slam, Pencil or Tea? What do you think?
Bye for now,
Tina
Subscribe to:
Posts (Atom)