Pages

Showing posts with label Blog Share. Show all posts

Wednesday, 26 May 2021

Colour Creations: Soft Suede

 Hi!


Welcome back to the latest Colour Creations Creative Showcase. We are doing the last of the Core Colours this week - Soft Suede. Many years ago, Soft Suede was an In Colour, but after a brief retirement, it made it's way back as a member of the Neutrals Family. 

scissorspapercard, Stampin' Up!, Colour Creations, Biggest Wish, Forever Fern, Stitched Shapes Dies

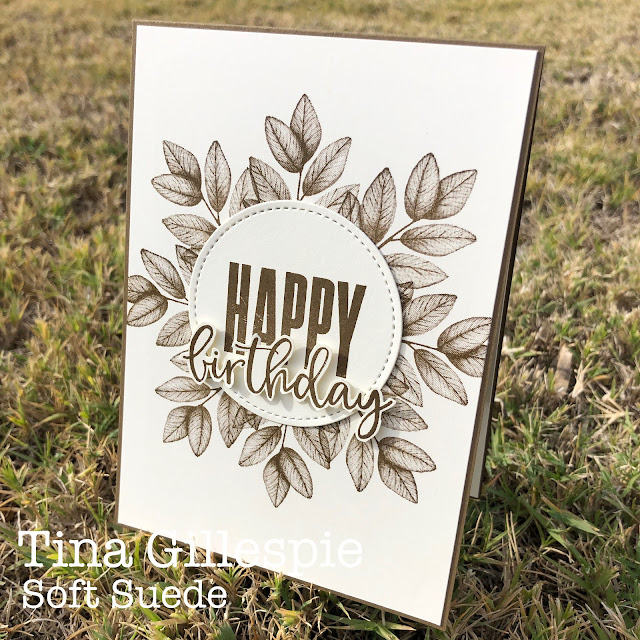
I started my card by using a pencil to trace around the inside of my circle die onto the Very Vanilla cardstock. This was to give me a guideline for stamping the leaves from Forever Fern. The pencil line can be erased, but it will end up under the circle, so it doesn't really matter.

scissorspapercard, Stampin' Up!, Colour Creations, Biggest Wish, Forever Fern, Stitched Shapes Dies

The sentiment is from a fabulous new stamp set, called Biggest Wish. It's a great mix of block and cursive words that can be mixed and matched to your heart's content. Definitely a keeper for me!

scissorspapercard, Stampin' Up!, Colour Creations, Biggest Wish, Forever Fern, Stitched Shapes Dies

I kept the inside very simple, just more leaves along the bottom. I tried to make it look like the top of the circle of leaves, like on the front, but I'm not sure that I was very successful! I still like it, though.

That's all from me tonight, but please do pop on over to Cathy's blog, where you will find the rest of this week's Soft Suede cards.

Bye for now,

Tina

Wednesday, 19 May 2021

Colour Creations: Soft Sea Foam

 Hi!


Welcome back for another week of the Colour Creations Creative Showcase. This week we are looking at Soft Sea Foam. As them name suggests, it's a very soft green from the Subtles colour family.

scissorspapercard, Stampin' Up!, Colour Creations, Sweet Strawberry Bundle, Basic Borders Dies

I kept my colour palette quite pale, with just Soft Sea Foam and Whisper White. I used the Sweet Strawberry bundle for the focal panel of my card, but just the flower and leaves image. I stamped them in SSF and then used my Blending Brush to add some ink over the top. I then coloured the leaves with my Dark SSF Blend. The flowers were stamped and punched separately on Whisper White. The centre is a retired Metallic sequin.

scissorspapercard, Stampin' Up!, Colour Creations, Sweet Strawberry Bundle, Basic Borders Dies

My card actually started with the zig zags! I cut a heap of edges using the Basic Borders Dies and then adhered the layers together to form the zig zags. Just a tip - make your pieces a little wider than you want your final piece to be. This gives you a little allowance to line up the zig zags precisely. Just trim the piece when you're finished.

scissorspapercard, Stampin' Up!, Colour Creations, Sweet Strawberry Bundle, Basic Borders Dies

Both themes were carried over to the inside of the card. You can't tell in the photo, but the flowers here have Wink Of Stella on their centres rather than the sequins. 

That's all from me for tonight, but please do head on over to Cathy's blog, where you'll find the rest of this week's Soft Sea Foam cards. We have one more week of our Core colours before we start on the new In Colours - that's going to be fun!

Bye for now,

Tina

Thursday, 13 May 2021

May Creative Showcase: New Annual Catalogue

 Hi!


Thanks for joining me for this month's Creative Showcase. Naturally, as the new Annual Catalogue began this month, we are focussing on products from that catalogue. I've been a bit slow off the mark with ordering from the catalogue, but I couldn't resist the gorgeous What A Year Memories & More card pack.

scissorspapercard, Stampin' Up!, Creative Showcase, What A Year Memories & More, Stitched So Sweetly, Brick & Mortar EF, Playful Alphabet Dies, Well Written Dies, Peaceful Moments

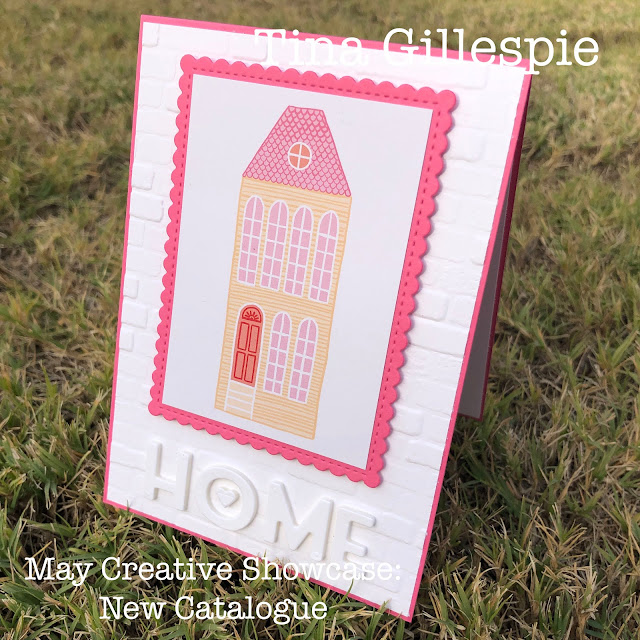
My sister recently purchased her first home, and so I thought that I would use one of the cards to make her a card of congratulations. This cute little card with the house was the perfect choice! The new Polished Pink cardstock was cropped using the largest Stitched So Sweetly die, and then I trimmed the card to fit inside the stitched line.

scissorspapercard, Stampin' Up!, Creative Showcase, What A Year Memories & More, Stitched So Sweetly, Brick & Mortar EF, Playful Alphabet Dies, Well Written Dies, Peaceful Moments

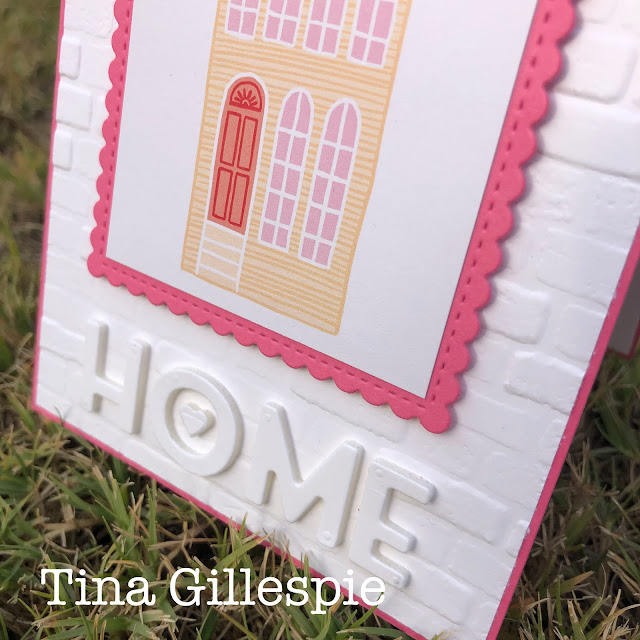
The only current embossing folder that I have is the Bricks & Mortar folder, which I thought was an apt choice for the background. The word home was cropped from Whisper White cardstock with some Foam Adhesive Sheet attached to the back using the Playful Alphabet Dies. I used the retired Well Written Dies for the cute little heart in the centre of the 'O'.

scissorspapercard, Stampin' Up!, Creative Showcase, What A Year Memories & More, Stitched So Sweetly, Brick & Mortar EF, Playful Alphabet Dies, Well Written Dies, Peaceful Moments

Nice and simple on the inside, with just the Congratulations sentiment from Peaceful Moments in Polished Pink ink. I didn't think we needed another bright pink in our range, but I am coming to like this pink!

You'll find the rest of the links for this month's Showcase over on Rachel's blog.

Bye for now,

Tina

Wednesday, 12 May 2021

Colour Creations: So Saffron

 Hi!


Thanks for coming back for this week's Colour Creations Creative Showcase. We are up to So Saffron this week, a lovely, soft yellow that I quite like. I was in the mood for butterflies this week, so my Brilliant Wings dies got a workout!

scissorspapercard, Stampin' Up!, Colour Creations, Brilliant Wings Dies, A Good Man

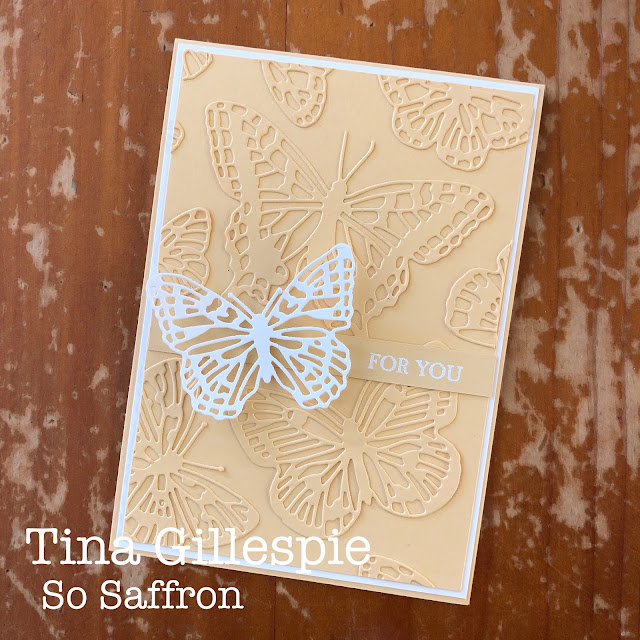
I started by covering the back of a quarter sheet of So Saffron in Adhesive sheet, and then run the piece through the Big Shot with as many of the detailed butterfly dies as I could fit on the sheet. I didn't worry if some were a bit cut off, as I knew that I would use them on the edge. The butterflies were then adhered to a second sheet of So Saffron card. I trimmed the edges, and then any useable pieces were added around the edges.

scissorspapercard, Stampin' Up!, Colour Creations, Brilliant Wings Dies, A Good Man

Another butterfly was cropped from Whisper White card and popped up over the heat-embossed sentiment strip. The sentiment is from A Good Man.

scissorspapercard, Stampin' Up!, Colour Creations, Brilliant Wings Dies, A Good Man

One final, partial, butterfly was used for the inside of the card, along with another sentiment from A Good Guy. I quite like this card, so I think I'm going to find it hard to give away! Maybe I will have to make it again in a different colour!

Please head on over to Cathy's blog, where the rest of this week's So Saffron cards are linked. It's sure to be a treat!

Bye for now,

Tina

Wednesday, 28 April 2021

Colour Creations: Shaded Spruce

 Hi!


Welcome back to a new Colour Creations Creative Showcase. This week we are highlighting Shaded Spruce. It took me a long time to warm up to this darker bright green, but now it's a colour I quite like.

scissorspapercard, Stampin' Up!, Colour Creations, Forever Gold Specialty Paper, A Good Man

I kept my card quite simple this week. I masked off the edges and used my Blending Brush with Shaded Spruce ink to create an ombre panel through the middle of the card. I love the larger head of the SU Blending Brushes for a task like this - the ink goes on so much quicker than with a smaller-headed brush.

scissorspapercard, Stampin' Up!, Colour Creations, Forever Gold Specialty Paper, A Good Man

The big fern leaf from the Forever Gold Laser Cut Paper was adhered over the top. This layout is a CASE of another card that I made last year for Christmas. It's such a cool way of showing off the gorgeous gold foil laser cut piece.

scissorspapercard, Stampin' Up!, Colour Creations, Forever Gold Specialty Paper, A Good Man

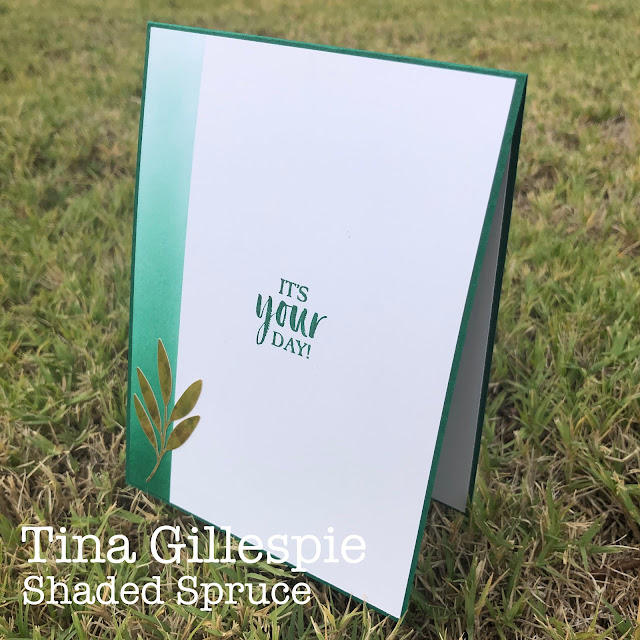
I repeated the ombre look on the inside, with another, smaller, piece of the laser cut paper over the top. The sentiments are from A Good Man.

That's all from me tonight, but please do head on over to Cathy's blog, where you'll find the rest of this week's Shaded Spruce cards for your viewing pleasure.

Bye for now,

Tina

Wednesday, 21 April 2021

Colour Creations: Seaside Spray

 Hi!


Phew, we are getting close to the end now! The Colour Creations Creative Showcase is up to Seaside Spray this week. I had to laugh a bit when I realised that I made my Seaside Spray card while watching Prince Philip's funeral - he was in the Navy, so it's kind of fitting. 

scissorspapercard, Stampin' Up!, Colour Creations, Pretty Perennials, Perennial Petals Dies, Dainty Diamonds 3DEF

I chose Basic Black as the main basis for my card, as I thought that the Seaside Spray flowers would really pop against it. I think that the extra Seaside Spray layer frames the card nicely, too. The flowers and leaves were cropped using the Perennial Petals dies.

scissorspapercard, Stampin' Up!, Colour Creations, Pretty Perennials, Perennial Petals Dies, Dainty Diamonds 3DEF

I embossed the topmost Basic Black layer with my soon-to-be-retired Dainty Diamonds embossing folder. I struggled for a long time over adding a sentiment - nothing I tried seemed to work. Finally, I just went small and simple and I think it works nicely. The sentiment is from the coordinating Pretty Perennials stamp set.

scissorspapercard, Stampin' Up!, Colour Creations, Pretty Perennials, Perennial Petals Dies, Dainty Diamonds 3DEF

I had one left over flower, so it was perfect for the inside. I also had a partial leaf die cut, so I put it to use with the flower. The white on white is not quite as impactful as white on black, but I like the look.

That's all from me, but please do pop on over to Cathy's blog, where you'll find the links for the rest of this week's Seaside Spray cards. I like this dusky blue, and will be a little sad when it retires.

Bye for now,

Tina

Wednesday, 14 April 2021

Colour Creations: Sahara Sand

 Hi!


Welcome back to the new Colour Creations Creative Showcase. This week was a challenge for me, as we tackled Sahara Sand. At the start of this Colour Creations series, I decided that I was only going to use the focal colour, plus Basics colours. It's really hard to make a Sahara Sand card with only Black, White or Vanilla to go with it!

scissorspapercard, Stampin' Up!, Colour Creations, A Good Man, Basic Borders Dies, Stitched Shapes Dies, Subtle 3DEF, Neutrals DSP

My idea started with a new set of dies that I received in my preorder this week - Basic Border Dies. It's a super versatile set of border dies with stitched features and a variety of shapes for adding borders to a piece of card or DSP. For my card, I chose a banner-like die, that cut the bottom edge of the Sahara Sand DSP.

scissorspapercard, Stampin' Up!, Colour Creations, A Good Man, Basic Borders Dies, Stitched Shapes Dies, Subtle 3DEF, Neutrals DSP

I layered the DSP over a piece of Subtle-embossed Whisper White card. The main image was stamped and sponged while the Stitched Shapes circle die was still in place. This leaves a nice, crisp white edge around the outside.

scissorspapercard, Stampin' Up!, Colour Creations, A Good Man, Basic Borders Dies, Stitched Shapes Dies, Subtle 3DEF, Neutrals DSP

I've left the inside sentiment free, as it means that it could be either a birthday card or a Father's Day card. I will stamp an appropriate sentiment when I use it. Can you see that I used the off-cut from the front at the bottom? The Basic Borders Dies give a stitched feature on both sides of the cut edge, so it was an easy task to add the off-cut to the inside.

It's time now to head on over to Cathy's blog, where you'll find the rest of this week's Sahara Sand links. I'm curious to see if anyone else had a hard time like me!

Bye for now,

Tina

Thursday, 8 April 2021

April Creative Showcase: Mother's Day

 Hi!


Thanks for stopping by for this month's Creative Showcase. This month we are making Mother's Day cards, getting in nice and early, ready for the big day next month. I was struggling a bit for ideas, until I was fluffing around at my craft desk and came across some images from Grace's Garden that I'd stamped ages ago, but done nothing with in the meantime. Straight away I pictured a scene in my head, and I'm pretty thrilled with how it translated to paper.

scissorspapercard, Stampin' Up!, Grace's Garden, My Meadow, Dressed To Impress, Stampin' Blends, Mother's Day Card

There are a lot of layers on this card! I started by using my Sponge Brayer and Blending Brush to apply some Balmy Blue and Pacific Point ink to the top part of the background layer. I wanted this layer to look like it had a dirt path that lead through a forest. I used stamps from My Meadow to achieve this look, and then finished the layer by applying some Granny Apple Green ink to the bottom of the card. Most of it is hidden by the next layer, but I like to be thorough!

scissorspapercard, Stampin' Up!, Grace's Garden, My Meadow, Dressed To Impress, Stampin' Blends, Mother's Day Card

The second layer is the tall flowers (no idea what type of flowers they are meant to be!) that sit behind the fence and gate. This layer also includes the part of the path that you can see in front of the gate, and the grass to either side. The third layer is the gate, fence and cat. I left the fence white, apart from some slight touches of grey, added with My Light Grey Granite Blend. I also fussy cut it out, including the tiny pieces in between the slats - I wanted to be able to see the path and flowers through the fence. The final layer is the cluster of flowers to the right of the gate.

scissorspapercard, Stampin' Up!, Grace's Garden, My Meadow, Dressed To Impress, Stampin' Blends, Mother's Day Card

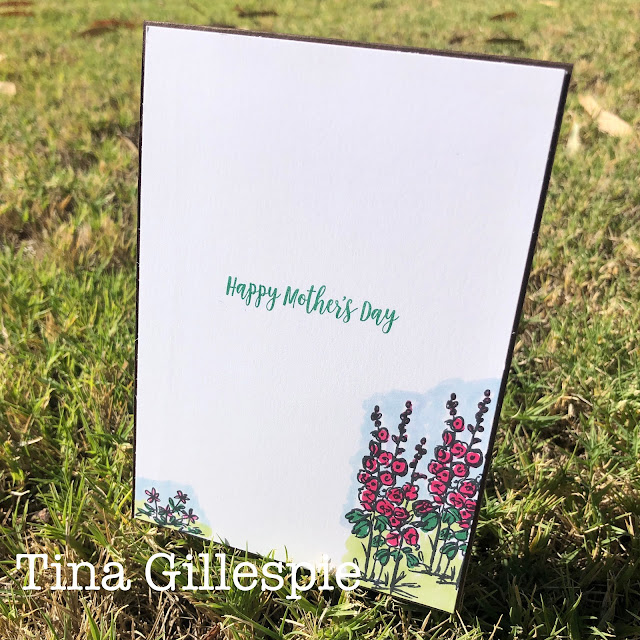
I couldn't find room for a sentiment on the front, so I had to put it on the inside! This one is from Dressed To Impress, and is flanked by some more flowers from Grace's Garden.

That's all from me for this month's Creative Showcase, but you can find the rest of the links for this month's blogs over on Rachel's blog. She does such a great job of keeping us all organised every month!

Bye for now,

Tina

Wednesday, 7 April 2021

Colour Creations: Terracotta Tile

 Hi!


Thanks for coming back for the new Colour Creations Creative Showcase. We are jumping out of order, just this once, as we had to fit Terracotta Tile into the series before it retires in around a month. As an In Colour, it is only in our range for two years before making way for a new set of In Colours. 

scissorspapercard, Stampin' Up!, Colour Creations, Forever Fern, Forever Flourishing Dies, Dainty Diamonds 3DEF

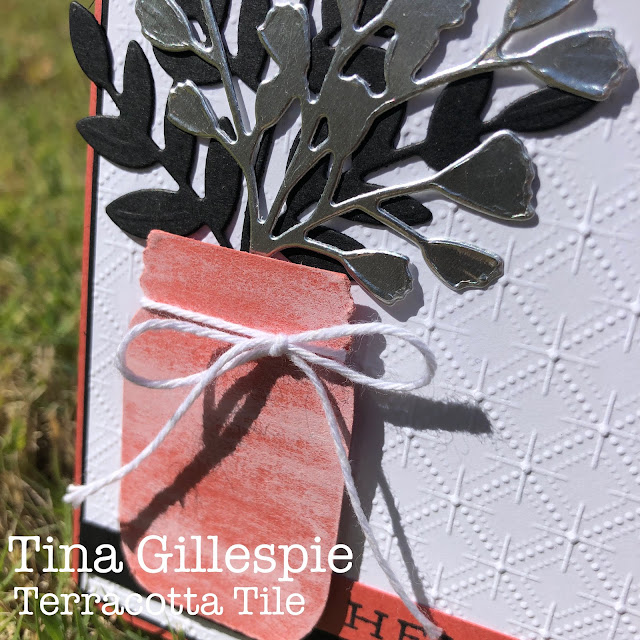
I recently repaired a broken Jar punch for a friend, and took the opportunity to punch a few shapes - I had to test that it was working, right? 😆 After punching the Jar from Terracotta Tile cardstock I used a small amount of White Craft ink and a dry water brush to apply the ink to the punched shape. I was deliberately going for a very streaky look, and I was please about how it turned out.

scissorspapercard, Stampin' Up!, Colour Creations, Forever Fern, Forever Flourishing Dies, Dainty Diamonds 3DEF

I then used my new Forever Flourishing Dies to crop some foliage to go into the vase. I used Basic Black card and Silver Foil. Neither shows up the embossing lines in the dies very well - I probably need to use a shim in my machine to get the full effect.

scissorspapercard, Stampin' Up!, Colour Creations, Forever Fern, Forever Flourishing Dies, Dainty Diamonds 3DEF

I repeated the scene on the inside, except that I cut down the black foliage a little so that it didn't take up too much space on the inside. I need room for writing a message! I also used some Terracotta Tile cardstock for the other foliage instead of foil.

Please pop on over to Cathy's blog for the rest of this week's Terracotta Tile cards. Next week we are back to our alphabetical order, featuring Sahara Sand.

Bye for now,

Tina

Wednesday, 31 March 2021

Colour Creations: Rococo Rose

 Hi!


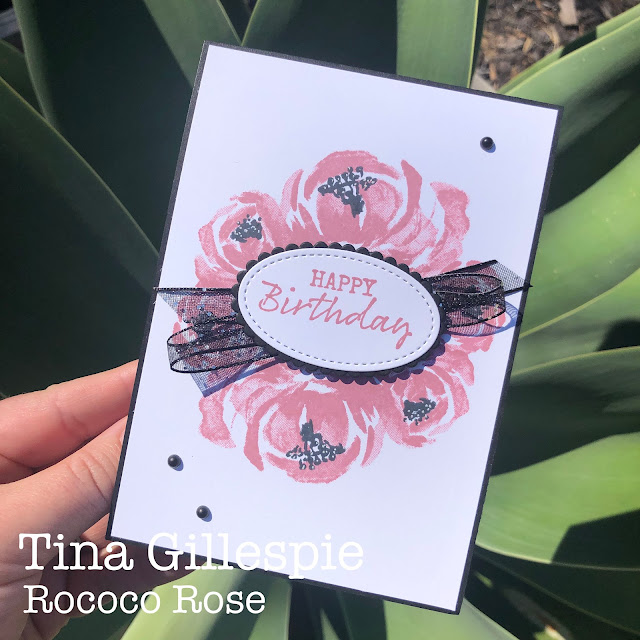
Welcome back to my blog for the new Colour Creations Creative Showcase. This week we are featuring one of the soon to be retired In Colours - Rococo Rose. At this start of this Showcase series, I would have described it as a dirty pink, but I have changed my ways and will now describe it as a dusky mid-pink. LOL! It's duskiness is what makes it a favourite pink that I will have a bit of trouble saying goodbye to.

scissorspapercard, Stampin' Up!, Colour Creations, Beautiful Friendship, Seaside Notions, Stitched Shapes Dies, Layering Ovals Dies

Another thing that I will have trouble farewelling is the gorgeous Beautiful Friendship stamp set. I'm not really big on floral stamp sets, but I loved how this one does all the hard work for you because the stamp itself is designed to leave different intensity of ink for different parts of the image.

scissorspapercard, Stampin' Up!, Colour Creations, Beautiful Friendship, Seaside Notions, Stitched Shapes Dies, Layering Ovals Dies

I also used another favourite, retiring, stamp set for the sentiments - Seaside Notions. It's been a go-to set this year, especially for the sentiments, as I love the mix of fonts and the size is usually perfect. Speaking of retiring, I have cropped the sentient with one of the dies in the Stitched Shapes set, which is also retiring. Sob! The Layering Oval underneath is also on the way out.

scissorspapercard, Stampin' Up!, Colour Creations, Beautiful Friendship, Seaside Notions, Stitched Shapes Dies, Layering Ovals Dies

I stamped the flower stamens in Memento ink, and then dotted over the top of them with a white gel pen. It helps to soften the starkness of the black ink.

That's all from me for tonight, but please do pop on over to Cathy's Blog, where you'll find the rest of this week's Rococo Rose cards. I can't wait to see what everyone has made!

Bye for now,

Tina
Wednesday, 17 March 2021

Colour Creations: Real Red

 Hi!


Thanks for joining me for Real Red week in the Colour Creations Creative Showcase series. Are you a red person? I love red, but I find it very hard to create with sometimes. I especially dislike stamping sentiments in red, and I only do it if there are no other possible choices. Maybe it goes back to my days as a High School teacher!

scissorspapercard, Stampin' Up!, Colour Creations, All Dressed Up Dies, Perennial Petals Dies, Gift Bag

My favourite accessory is my red handbag, and so I felt compelled to make a little handbag gift bag using my Real Red cardstock and All Dressed Up Dies. The dies make it so ease to create a stylish gift bag, complete with stitched details.

scissorspapercard, Stampin' Up!, Colour Creations, All Dressed Up Dies, Perennial Petals Dies, Gift Bag

Many handbags have a little dangly embellishment, so I felt the need to add one to my bag too. I used the dies from the perennial Petals set to create the flower. I cropped two flowers from Thick Whisper White and layered them back to back with Dimensionals. The Baker's Twice was looped around the handle of the bag and also around one of the Dimensionals so that it stayed in place.

scissorspapercard, Stampin' Up!, Colour Creations, All Dressed Up Dies, Perennial Petals Dies, Gift Bag

The pocket on the front is just glued around three edges so that I can pop a tiny message in it if I choose. I will decide when I know who is going to get a little gift from me 😊

Please pop on over to Cathy's Blog, where you'll find the rest of this week's Real Red cards - I'm sure you'll be in for a treat!

Bye for now,

Tina

Thursday, 11 March 2021

March Creative Showcase

 Hi!


Welcome to March's Creative Showcase. This time around, we are all basing our creations on a sketch designed by Rachel.


I quite like this sketch - how about you? I pulled out some Dandy Garden DSP to see how it would work with the layout. I think it works very well!

scissorspapercard, Stampin' Up!, Dandy Garden DSP, Sweet Ice Cream, Stitched Rectangles Dies, Ornate Layers Dies

I started by adhering two pieces of the DSP to a card front sized piece of Whisper White card. I then cropped it with the second largest Stitched Rectangles Die and layered it on another piece of Whisper White card.

scissorspapercard, Stampin' Up!, Dandy Garden DSP, Sweet Ice Cream, Stitched Rectangles Dies, Ornate Layers Dies

The dragonflies were punched from another sheet of the DSP, and popped up on Dimensionals. I stamped the sentiment in Misty Moonlight ink and cropped it with a die from Ornate Layers.

scissorspapercard, Stampin' Up!, Dandy Garden DSP, Sweet Ice Cream, Stitched Rectangles Dies, Ornate Layers Dies

I used the left over piece of DSP from the front of my card to frame the writing panel on the inside. Waste not, want not! One final dragonfly and I was done!

You can find the rest of the links for this month's Showcase over on Rachel's blog.

Bye for now,

Tina

Wednesday, 10 March 2021

Colour Creations: Purple Posy

 Hi!


Thanks for once again joining me for the Colour Creations Creative Showcase. This week we have one of my all-time least favourite colours, Purple Posy. To me, it's just not a very interesting colour. My apologies if you're a big fan!
scissorspapercard, Stampin' Up!, Colour Creations, Beautiful Moments, Stitched So Sweetly Dies, In Colour DSP

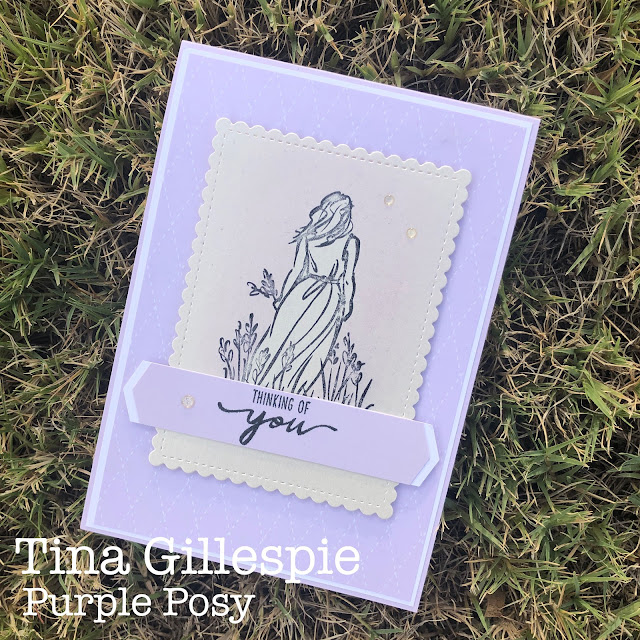
I had the idea with this card to sponge some Purple Posy ink around the woman to give a bit of a sunset/dusk like glow. I still have my Purple Posy ink pad , and while it's not a great ink to stamp with, it's OK with sponging. I stamped the image of the woman and then masked her off before using a Blending Brush to add the ink all around her. It's very subtle!

scissorspapercard, Stampin' Up!, Colour Creations, Beautiful Moments, Stitched So Sweetly Dies, In Colour DSP

You can sort of see the effect in the second photo. I used the new Pearlescent Paper as my base. I think that it doesn't 'take' ink as well as plain Whisper White, which is why it's quite pale.

scissorspapercard, Stampin' Up!, Colour Creations, Beautiful Moments, Stitched So Sweetly Dies, In Colour DSP

Just a bit of simple stamping on the inside, no sentiment. This makes the card a bit multi-purpose, as the front sentiment, "Thinking of You" is generic enough for be suitable for a few different situations.

As always, you can find the rest of this week's cards over on Cathy's blog

Bye for now,

Tina