Pages

Showing posts with label Brusho. Show all posts

Wednesday, 10 October 2018

Saved!

Hi!


Welcome to the new Heart Of Christmas Blog Share. I think we are up to about week 9 now, and so far I've managed to make a card each week. It's so nice to be well on my way to having my Christmas cards finished for 2018.

Today's card came about after a little experiment didn't go as well as I'd hoped.  I was wanting to see if I could used Isocol to activate Brushos powder over the top of an image stamped in Momento ink. Momento is designed to with with Blends, so water would have made the ink run. As it turns out, it does work, just differently than it would with water.


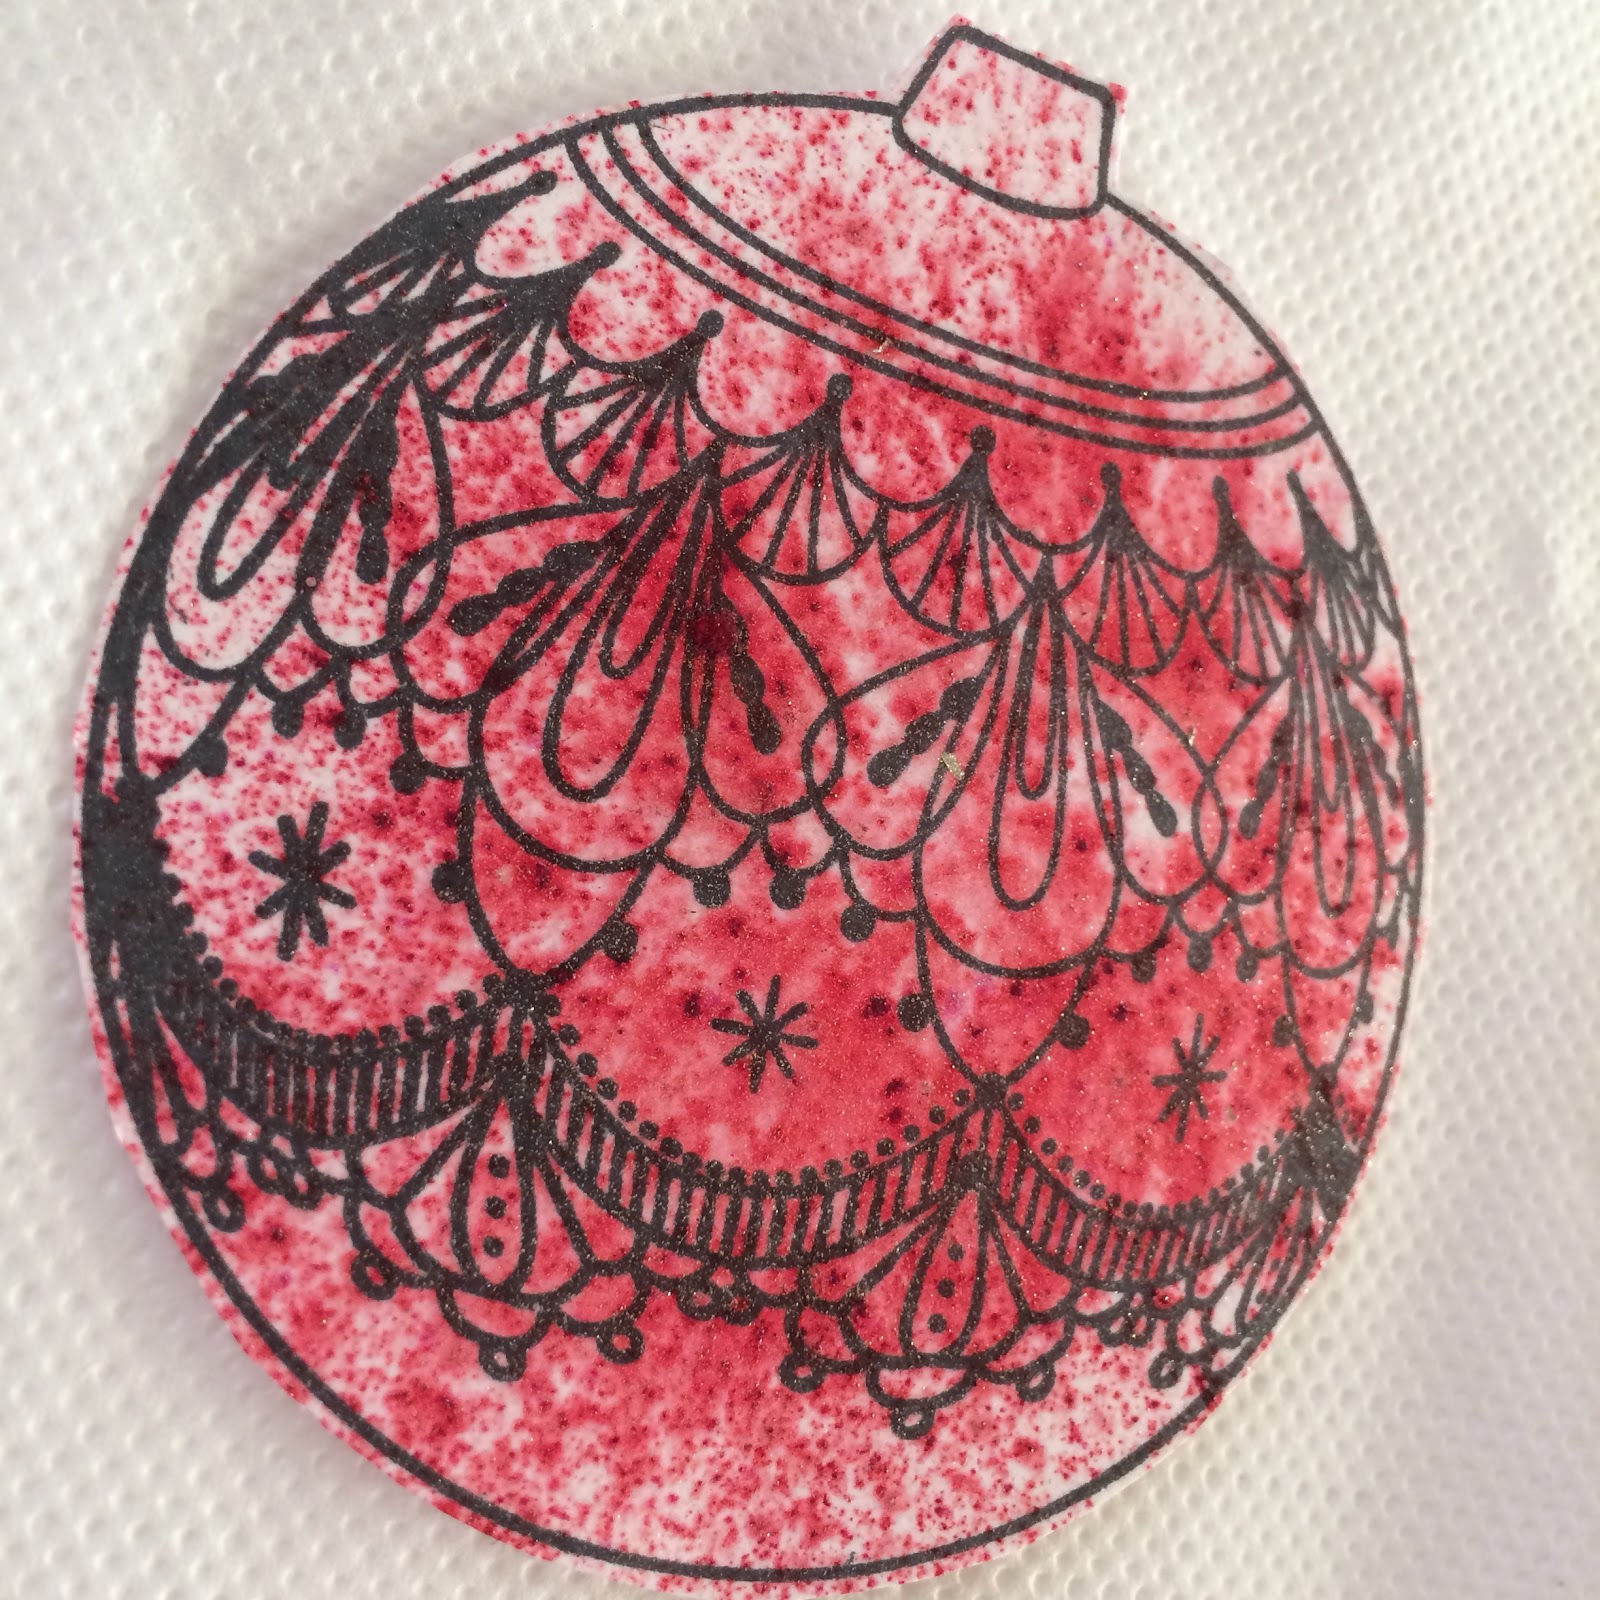
I chose the Brilliant Red Brushos because I was making a Christmas card, and red is Christmassy - right? Unfortunately, as one of my Facebook followers said, she was getting a serial killer vibe after I asked if it looked too much like blood splatter. LOL! Despite this, I was determined to make it work on a card, so after a bit of a think, this is what I made. The layout was a CASE of this card by my friend, Judy May.

scissorspapercard, Stampin' Up!, Art With Heart, Heart Of Christmas, Beautiful Baubles, Star Of Light, Merry Christmas To All, Broadway Bound SDSP, Brushos, Glitter Window

Red ornament, minus the serial killer blood splatters! Yay! I recently hosted an ATC swap with a Glitter Window technique theme, so it seemed a brilliant solution to my problem. Basically, you cut a hole in your card, run some clear packing tape across the back so that the sticky side is up, and then dump glitter over the top. Our Dazzling Diamonds is perfect for this, because you can still see through it. Finally, you adhere a stamped image behind the window so that you can see it through the window.

scissorspapercard, Stampin' Up!, Art With Heart, Heart Of Christmas, Beautiful Baubles, Star Of Light, Merry Christmas To All, Broadway Bound SDSP, Brushos, Glitter Window

A little bit of detail is lost when you do this technique, so to make the bauble look more like a bauble I took an old black marker (in case I ruined it) and coloured bits of the design to make them a lot bolder. I was pretty pleased with the overall effect. What do you think? Did I redeem the bauble?

scissorspapercard, Stampin' Up!, Art With Heart, Heart Of Christmas, Beautiful Baubles, Star Of Light, Merry Christmas To All, Broadway Bound SDSP, Brushos, Glitter Window

The bauble had done my head in by this point, so a super simple inside was definitely in order!

You can see the rest of this week's cards over at Claire's blog. I love seeing what everyone makes each week.

Bye for now,

Tina

Thursday, 20 September 2018

JAI #427: Just Add K

Hi!


Welcome to a new week's challenge at Just Add Ink. This week it's one of my alphabet challenges, this time using the letter K. It took a bit of thinking to work out what I was going to do. Ideas I came up with and discarded were a kaleidoscope card, a kite card and the kangaroo from Animal Outing. I just wasn't happy with any of them - but there's a list of ideas for you!


In the end I used a stamp set from Kindred Stamps for my K element. Kindred does some fantastic pop culture sets. This card was made a few weeks ago for my kids to give to my hubby for Father's Day. It snuck up on me this year - I thought it was a week later than it actually was. Oops! Luckily for my pop culture loving hubby, I had just the right stamps.

scissorspapercard, Stampin' Up!, Kindred Stamps, Neat & Tangled, Just Add Ink, Galactic Adventures: The Sequel, Time Warp, Labeler Alphabet, Brushos

There's a little bit of a not-so-secret K on this card, and if you're scratching your head at the sentiment, then you probably wouldn't get the K reference either. The character this stamp set is based on is from a very famous movie franchise, and he, very shockingly, kills his father. Don't worry if you didn't get it, my hubby and kids did, so that's what really matters I guess!

scissorspapercard, Stampin' Up!, Kindred Stamps, Neat & Tangled, Just Add Ink, Galactic Adventures: The Sequel, Time Warp, Labeler Alphabet, Brushos

The background was done with Brushos on some retired Naturals Ivory cardstock. It handles the water very well without warping too much. I used some of the blue and yellow powders. Once is dried I heat embossed a Neat & Tangled stamp called Time Warp over the top using Silver Embossing powder. It's such a cool, spacey looking background, don't you think?

scissorspapercard, Stampin' Up!, Kindred Stamps, Neat & Tangled, Just Add Ink, Galactic Adventures: The Sequel, Time Warp, Labeler Alphabet, Brushos

Maybe the image on the inside will help you to work out which movie franchise the character is from? How awesome is the Labeler Alphabet stamp set for creating custom sentiments? It's a bit of extra work, but the results are worth it.

What K ideas do you have for this week's challenge? You can see what the rest of the team did this week over at the Just Add Ink blog. Don't forget to link up your card when you're done!

Bye for now,

Tina

Monday, 16 April 2018

Playing With Brushos

Hi!

Have you had a chance to play with the new Brushos powders yet? They are a lot of fun!

scissorspapercard, Stampin' Up!, Brushos, Beautiful Bouquet, Daisy Delight, Coffee Break DSP

I was playing around with the Gamboge and Yellow powders to create this panel. I sprinkled the powders on Watercolour Paper, using mostly Yellow. A few spritzes of water and it's done! I didn't use too much water, as I wanted a speckled look.

scissorspapercard, Stampin' Up!, Brushos, Beautiful Bouquet, Daisy Delight, Coffee Break DSP

The rest of the card was built around the Brusho panel. I quite like pairing orange with brown, so I chose Tangerine Tango and Early Espresso. Did you know that Tangerine Tango is one of our retiring colours? I think it's a colour I will miss! The woodgrain paper is from the Coffee Break DSP pack.

scissorspapercard, Stampin' Up!, Brushos, Beautiful Bouquet, Daisy Delight, Coffee Break DSP

I love this sentiment! It's fabulous for so many occasions. It's from the Beautiful Bouquet stamp set, which is carrying over to the new Annual Catalogue. Yay!

Bye for now,

Tina

Thursday, 15 March 2018

JAI #400: Just Add Inspiration

Hi!


Yay! Time for a new Just Add Ink challenge! This week Kim has found this gorgeous inspiration photo to be a springboard for our creativity.


Hmm, this one stumped me for a while, as I don't usually make or send Easter cards. In the end I decided to go with the colours and the speckles and see where I ended up.


I kind of stretched the 'speckles' element by using my Blue Brushos powder with a minimal amount of water on a sheet of Glossy White cardstock. Using very little water limits how much colour is released by the powder. I also deliberately spritzed at a sharp angle to the cardstock so that the force of the water pushed some of the powder across the card. I was so pleased with how it turned out! To add to the speckles, I scooped a small amount of my Silver Embossing paste onto my Silicone Mat, added a little bit of water to make it a little runnier, and then flicked it over the page.


The mermaid, seaweed and shells were fussy cut from the Myths and Magic SDSP, and layered over a die cut from the Swirly Scribbles Thilits. I used my Labeler Alphabet stamps to create the sentiment. I deliberately haven't added a number after the 'look who's turning', as I don't know who will get this card yet. Given that all the little people in my family are currently boys, I might not use it for a long time! I finished the front of the card by adding some of the Clear Epoxy dots.


I had a second mermaid and shell already fussy cut, so it was quick and easy to pop them into the inside of the card.

So, what are you going to do with the Inspiration photo this week? Pop on over to the Just Add Ink blog to see what the rest of the Design team have done, and to link your card when you've made it. See you there!

Bye for now,

Tina

Tuesday, 30 January 2018

CTC #163: Sale-A-Bration

Hi!

I finally had the chance to play with the new Brusho Crystal Colour powders. They are a heap of fun - but messy! I started off slow with them to get a feel for them, and then ended up turning the panel I made into a card for the current CASEing The Catty Challenge. I love that my card ended up quite bold with the darker colours, as compared to the original card, which is much softer. You can find it on page 17 of the Sale-A-Bration catalogue.

scissorspapercard, Stampin' Up!, CASEing The Catty, Brusho, Picture Perfect Birthday, Daisy Delight, Celebrate You Thinlits

I took Whisper White cardstock and brushed over the top half with an Aquapainter. I then sprinkled some Yellow Brusho over the top and spread the colour with the Aquapainter. I then repeated the process on the bottom half with the Prussian Blue Brusho. You can see a little touch of green under the banner where the two colours met.

scissorspapercard, Stampin' Up!, CASEing The Catty, Brusho, Picture Perfect Birthday, Daisy Delight, Celebrate You Thinlits

I then die cut the word 'celebrate' into the panel, and turned it onto a shaker card using Silver and Black sequins. The balloons are punched from Silver Foil paper and Black Glimmer paper, which now that I think about it, may be retired. Oops! I then tied Black and Silver Metallic Thread around the balloons and left the ends messy.

scissorspapercard, Stampin' Up!, CASEing The Catty, Brusho, Picture Perfect Birthday, Daisy Delight, Celebrate You Thinlits

I added another balloon to the inside to tie it all together. I was really thrilled with how well the Brusho colour turned out - I'll certainly be playing with it again!

Bye for now,

Tina