Pages

Showing posts with label Sassy Salutations. Show all posts

Friday, 27 May 2016

JAI #313: Just Add A B

Hi!


Oh boy, am I glad it's Friday! I've had another week with a sick child - this time my 13 year old. He had Monday and Tuesday off school, but luckily he's pretty self sufficient and he's getting to old to want his mum fussing over him.


So, onwards to the real reason you're visiting my blog - the card making! This week at Just Add Ink it's my turn to set the challenge, and I'm challenging you to Just Add B. As usual with our Alphabet challenges, it can be anything to do with B. A stamp set, a colour, a theme, just let your imagination run wild.


I've had this image half coloured on my desk for a little while. Before you ask, no, it's not a Stampin' Up! stamp, and yes, I do feel a little bit naughty using something that's not ours. However, every person in our house is completely mad on Harry Potter, so it's one that just had to find it's way into my stash! I coloured the image with my Copic markers. I'm very new with colouring with Copics, so I'm on a big learning curve.


Everything else on my card is SU. I used the about to retire Squares Collection Framelits to cut the frame for the front of my card. You can see that I popped it up to give the image a bit more depth. If I'd been a bit cleverer (is that a word?) I would have turned the card into a shaker card by adding some Window Sheet and some of the new Foam Adhesive Strips. Oh well, maybe next time!


Because I'm just a tad stingy thrifty, I used the left over square from the front of the card to matt my inside sentiment. I quite like the red border!


So there you have it - a brown-haired boy in a blue bed reading books. Lots of B's for this week's challenge. You can see plenty of other B themed cards over at Just Add Ink. What B will you use?


Bye for now,


Tina

Monday, 23 May 2016

An English Garden in Honey

Hi!


Today I have another card that was made as a class sample. The main colours used are the retiring Hello Honey, which I paired with Delightful Dijon for a tonal effect on the flowers and the cute little bee.


I tried to replicate the layered flowers in the English Garden DSP in the main stamped panel using the combination of Delightful Dijon and Hello Honey. The leaves were all Old Olive, with the filling image stamped off once first.


You can also see I used a piece of the Delightful Dijon Dotted Lace Trim along the bottom of the main panel. I placed a stripe of adhesive along the back of the panel and then ruffled the ribbon along the adhesive. There's not a lot of gather, but I don't think it needed a lot.


The little honey bees are so cute! I think I've used them every time I've used the Garden In Bloom stamp set - I just can't resist them!


Bye for now,


Tina

Wednesday, 18 May 2016

Going Places With Lost Lagoon

Hi!


I think that today's card is one of my favourite cards that I have even made. I know - it's a big call! There's just some thing about it that really appeals to me.


I started by stamping some Gorgeous Grunge splatters in the opposite corners on the base card, and then built up the layers from there.


I used the retiring Amazing Birthday stamp for the sentiment. You can see that I used my 1 3/4" Circle Punch to crop the image. I wanted the wider border around it so that I could pierce some holes to add a decorative touch. I also pierced the Lost Lagoon circle.


I really, really love the splatter stamp for adding a little something to the inside of a card also. So glad it's not retiring!


Bye for now,


Tina

Friday, 1 April 2016

JAI #305: Just Add A Sketch

Hi!


How are you on this lovely Friday? Hopefully you haven't been taken for an April fool! There's no fooling around at Just Add Ink this week - it's a sketch challenge and it's one of my designs.


What do you think? The Design Team have done a great job with the sketch this week.  Here's my take on it.


I thought that the tall panels were perfectly suited for the tall flowers in the Flowering Fields stamp set. I stamped them in Black Stazon and then coloured them using my Stampin' Write Markers.


I used this card as a class sample. Some of my ladies also coloured the background DSP, which is the coordinating Wildflower Fields. I took a photo, I just need to get it off my phone!


Why don't you pop on over to the Just Add Ink blog to see the other fabulous cards that the Design Team have made?

Bye for now,

Tina


Wednesday, 2 March 2016

A Pretty Birthday Bouquet

Hi!

One of me favourite DSPs in the Occasions Catalogue is the very pretty Birthday Bouquet DSP. Today's card features on of the gorgeous floral designs.


I also used some of the new Blushing Bride Glimmer Paper to cut the butterfly. It's such a pretty, dusky pink and looks great in Glimmer Paper.


I think I stamped my sentiment a little high on this card. I may go back and add something underneath it so it doesn't look so high. Maybe some sequins - what do you think?


I love finding a little scrap of DSP to use on my inside. I often end up with these in my DSP, so it's great to find a use for them rather than waste the pieces.

Bye for now,

Tina

Monday, 18 January 2016

A Nice Cuppa

Hi!

I was able to get a bit of unexpected crafting time in yesterday while hubby made dinner, and today's card is the result.  I wanted to have a play with the new Have a Cuppa suite of products.  I'm a big tea drinker, so this suite really appealed to me.


I don't make a lot of single layer cards - probably because they nearly always seem unfinished to me. I do like this card though. It took a lot of playing around to get it to look right, but I'm fairly satisfied with the final product. The colours (Melon Mambo, Wisteria Wonder and Bermuda Bay) were taken from the coordinating Have A Cuppa DSP. You can see a bit of it peeking out from under the teapot.


The teapot was originally just the pot and lid, but it looked a little plain.  I die cut some scallop trim and adhered it to the pot using my Fine-Tip Glue Pen.  It still wasn't quite enough, so I grabbed my Clear Wink Of Stella Glitter Brush and added highlights to the scallops and lid.  Much better!


Isn't that curl of steam so cute? Love it!

Bye for now,

Tina

Friday, 13 November 2015

JAI #288: Just Add A Sketch

Hi!

Here we are at the end of the working week, time for some "it's nearly the weekend" fun!This week at Just Add Ink Narelle has designed a fabulous sketch for us.

Isn't it great?  I needed to make a card for a wedding I was attending, so I decided to switch the stars for hearts.


The wedding stationery was black with hints of white and silver, so I went with that colour scheme for my card.  I'd been playing with glitter and Heat and Stick powder for my classes, so I kept it out to use with my Dotty Angles stamp.


Doesn't it give a fabulous shimmer?


They are a little difficult to see, but I also used a few small hearts on the inside to tie in with the front of the card.

What will you do with this sketch? Why don't you pop on over to the Just Add Ink blog and see what the rest of the Design Team have done with the sketch?

Bye for now,

Tina

Monday, 26 October 2015

Easy Watercolouring With Blended Bloom

Hi!

Have you ever wanted to give watercolouring a go but have been put off by how difficult it seems?  It's really not that difficult, but this technique makes it super easy to do!


Isn't the flower gorgeous? I darkened the Watermelon Wonder a little using Photoshop so that you could see the variation in colour in the flower.


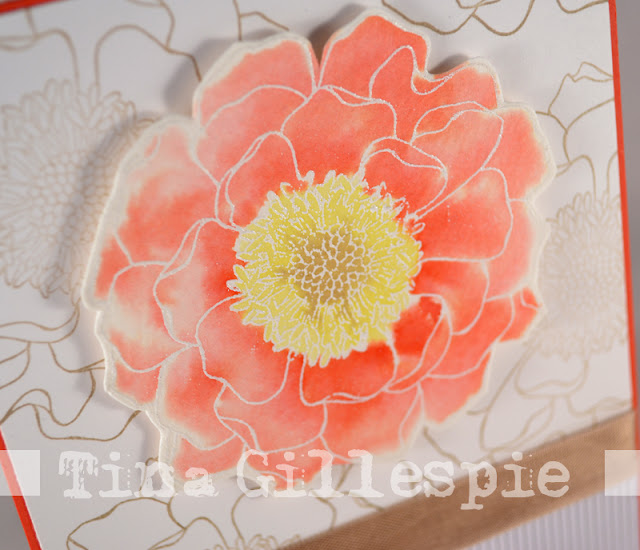
I think the technique is called Watercolour Splash.  To get the look you simply heat emboss your image using White Embossing powder onto Watercolour Paper. Then you take your Aqua Painter and brush a fair bit of water over the areas you want to colour (no ink used yet!). Then you use the Aqua Painter to pick up some ink from the lid of your inkpad and simply dip the tip of the brush into the water you brushed over the image. It's like magic watching the ink spread through the water! If you want parts of the image to be darker just add a little more ink. I did the petals in Watermelon Wonder first and then waited for it to dry before doing the centre of the flower in Daffodil Delight and Crumb Cake.


So there you have it - watercolouring is really not that hard. Why don't you give it a go?

Bye for now,

Tina

Monday, 17 August 2015

Bokeh Technique

Hi!

Have you become a member of the Bokeh fan club yet? I'd seen lots and lots of cards on the web using the technique but I'd been too scared to give it a go - it looked so hard!  Then my stamping ladies asked to try the technique so I gulped and said 'sure'. I was so wrong about it being hard! It's a great technique, a little time consuming, but certainly not difficult at all.


We used Washi Tape to secure the cardstock to the work surface.  As well as giving you stability while you work, it adds a lovely white border to the piece.  We sponged Wisteria Wonder, Daffodil Delight and Blushing Bride (I think!) ink over the cardstock and then, using various sized circle templates, sponged White Craft Ink over the top.


It's such a pretty effect!  We found that we needed to sponge the White Craft Ink on much thicker than we expected to get the effect we needed. The Congratulations was actually stamped over the top, it just looks like it was stamped underneath the White Craft Ink.


I used the dotty stamp from Dotty Angles in the same colour inks as on the front.  It's not really bokeh, but I hope you can see where I was going with it.

Bye for now,

Tina

Friday, 22 May 2015

JAI #263: Just Add Weddings!

Hi!

I'm back with my first Just Add Ink challenge in 8 weeks - I really missed doing the challenges, so I'm glad to be back.


This week Jan has challenged us to create with weddings in mind.  It can be anything to do with a wedding - think shower teas, invitations, congrats, anniversaries.... anything!


It may be a little predictable, but I went with the Something Borrowed suite of products from the Occasions Catalogue.  Can you believe that this is the first time I've cracked open that roll of gorgeous Sahara Sand Lace Trim? Neither can I!


I went with Blackberry Bliss as my accent colour.  I wanted the drama of a dark colour but I wasn't in the mood for using black or navy.  I was thrilled to see that the Crazy About You stamps and Hello You thinlits were carrying over to the new catalogue as I've had a lot of fun playing with them.


Now, the worst thing about Blackberry Bliss is that you have to be ULTRA careful not to get it anywhere it shouldn't be. In this case I noticed a small smudge of it at the top right of my inside.  I had intended to make a more elaborate inside using one of the Something Borrowed Embellishments.  I still will, but I ran out of time so this inside will do for now.

Are you inspired to play along at Just Add Ink this week?  I hope so!

Bye for now,

Tina

Thursday, 21 May 2015

AWH Blog Hop: Farewelling My Favourites

Hi!


Today I bring you another AWHT blog hop with some of the awesome ladies in the Art With Heart Stampin’ Up! Team. Today our focus is on our Favourite Retiring Product!


For my projects I decided to focus on the Flashback DSP.  It's a fabulous paper pack to use for slightly grungy male cards, as many of the pages have a distressed look.


I mostly like to keep male cards bold but clean and simple.  In this case I use the retiring What's Up punch to bracket the sentiment.  To do this I slid the DSP into the punch far enough to punch only the fatter arrow shape, and then repeated for the other side.


The sentiment is from another retiring stamp set/framelits combo: Just Sayin' and the Word Bubbles framelits.  I'm really going to miss the word bubbles - they are a lot of fun to use on cards!


To finish off the card I used the punched out pieces from the front and an old favourite (thankfully not retiring) Sassy Salutations.


On this card I have also used the Flashback DSP.  I wanted to make another male card, but a little more stepped up than the first card.  I decided to use the retiring Triangle punch to create a subtle feature that would help ground the sentiment panel. The geometric look of the triangles is fab on a male card.


The stamp set I used is from the Hip Hip Hooray Card Kit, which is retiring. I used my Real Red and Pool Party Stampin' Write markers to colour the image before I stamped it.


The inside was finished off with some more DSP and Triangles.  I also used another stamp from the Hip Hip Hooray set.

Let’s keep this blog hop hopping. Next up we have the amazing Genna Gifford.

http://thestampersmess.com/2015/05/farewell-to-my-favourite-blog-hop/

Sorry, Blogger isn't playing nicely and allowing me to add the link to Genna's blog on the image.  Just click here instead.

If you find a broken link or have come to this blog hop from a different entry point, you can view the participants below:

1. Judy May
2. Tina Gillespie
3. Genna Gifford
4. Ros Davidson
5. Claire Daly
6. Nikki Sadler
7. Kathryn Mangelsdorf
8. Kayleen McLean
9. Kathryn Ruddick
10. Jenny Van Dijk
11. Kate Morgan
12. Rachel Woollard
13. Barbara Lindsey

Friday, 20 February 2015

JAI #251: Just Add Thanks

Hi!

I'm sure everyone has someone in their life that they are thankful for - I know that I have lots of people!  This week at Just Add Ink we are challenging you to Just Add Thanks - make a Thank You card and hopefully send it to someone deserving.


I love this sentiment from Kinda Eclectic and it's perfect for Thank You cards. Would you believe that the DSP on this card started life as a 4 inch square sample? It's from the Something Borrowed DSP pack in the Occasions Catalogue.  I simply cut an inch off the bottom to split the paper.  The sentiment conveniently covers the gap.


I'm really loving the new Butterflies Thinlits, also from the Occasions Catalogue.  I think they look a little naked without something on the body section.  I love the Jumbo Rhinestone, however they are retired so I'm going to have to start thinking of something else to put there as I think I only have 2 more left in my stash!


So, who are you thankful for? I can't wait to see your card over at Just Add Ink.

Bye for now,

Tina

Wednesday, 18 February 2015

MDS Meets Blendabilities

Hi!

Today I have a hybrid card for you.  Hybrid simply means that part of the card was created digitally and printed, and the rest of the card was made using 'traditional' card making methods.


In this case the digital element is the hexagon background.  It's one that I have in my My Digital Studio library of downloads.  It's part of the Lemonade Stand download.  I simply created a 6x4 inch canvas in MDS, selected, positioned and resized the image and then printed it.  I then coloured random hexagons with my Blendability markers.  Easy!


The hard part was actually finishing the card!  I didn't want to cover too much of the background I'd spent so much time working on.  I ended up using the 'yay' diecut from the Circle Flip Card Thinlits and then a retired stamp to finish the sentiment.


I finished off the inside with the cake stamp from the Big Day Sale-A-Bration stamp set.  It's such a great set for making Birthday cards!

Bye for now,

Tina

Friday, 13 February 2015

JAI #250: Just Add Inspiration

Hi!

This week at Just Add Ink Trish has given us some gorgeous images to inspire our creativity.  As it's Valentine's Day tomorrow, it's the perfect opportunity to make a card using her picture board for inspiration.


How adorable are those biscuits and the teacup?  Rob and I don't really 'do' Valentines, so I decided to stick with the love theme, but to make a congratulations card that would be suitable for either a wedding or engagement.


I used some of the Strawberry Slush DSP from the Confetti Celebration DSP pack and the Sweetheart Punch to create the main panel on my card.


Each heart was popped up on Dimensionals and then the whole panel was popped up too.  It's a really lovely pink, even though the photos aren't showing it!


The card is a longer, thinner one than the usual card size to accommodate the size of the hearts.  It's nice to play around with card sizes sometime though!

I hope you can play along with us at Just Add Ink this week.  It's meant to be stinking hot this weekend in Adelaide, so I'm planning to hibernate in my craft space!

Bye for now,

Tina