Pages

Showing posts with label Peace & Joy. Show all posts

Thursday, 9 December 2021

JAI 584: Just Add A Christmas Gift Tag

 Hi!


Thanks for again joining me for the new Just Add Ink challenge. As we inch ever closer to Christmas, we have decided to challenge you to make a Christmas gift card holder or tag - we all need plenty of those right now!


Every year I like to send a huge box of chocolates to my youngest son's school as a thanks for all their hard work. It's a very small special school, so they certainly work very hard with the kids all year. I decided to make an extra-large tag to attach to the chocolates.

scissorspapercard, Stampin' Up!, Uniquely Creative, Just Add Ink, Peace & Joy Bundle, Star Wreath Die, In Good Taste DSP, Be Dazzling SP, Christmas Tag

I started with a piece of In Good Taste DSP, which I cropped to 2 1/2 by 6 inches. I then used snips to shape the top and bottom edges into a more tag-like shape. Some Glittered Organdy ribbon was stapled to the top.

scissorspapercard, Stampin' Up!, Uniquely Creative, Just Add Ink, Peace & Joy Bundle, Star Wreath Die, In Good Taste DSP, Be Dazzling SP, Christmas Tag

The Star Wreath Die is from Uniquely Creative, and was used to cut some Green Foil. I layered it under some of the Be Dazzling SAB paper and the retired Joy Dies and Red Foil to finish it off. It's very sparkly!!

Please jump on over to the Just Add Ink blog, where you'll find the rest of this week's Design Team gift tags and gift card holders. You can also link up your project in our challenge.

Bye for now,

Tina

Wednesday, 9 December 2020

Colour Creations: Misty Moonlight

 Hi!


Welcome back for the second last Colour Creations Creative Showcase for 2020. We will be back in 2021 with the remaining colours, but we are taking a well deserved break for Christmas/New Year after we do Mossy Meadow next week. For this week, we are all making cards using Misty Moonlight. It's a gorgeous dirty blue, a bit like denim.

scissorspapercard, Stampin' Up!, Colour Creations, Waterfront, Peace & Joy, Joy To The World Paper Pumpkin, Home Together Dies, Shimmer Paint

I started my card by cutting a Thick Whisper White card base and then two smaller pieces for the front. The curves were cut using the curved die from the Home Together Dies. I laid them over the top of the card and then used a pencil to draw along the top edges to give myself a guide for stamping the trees. The tree stamp is from Waterfront, and was stamped in Memento ink.

scissorspapercard, Stampin' Up!, Colour Creations, Waterfront, Peace & Joy, Joy To The World Paper Pumpkin, Home Together Dies, Shimmer Paint

I then used a sticky note and a 1 3/4" circle punch to mask off the moon. My blending brush was used to apply Misty Moonlight ink to the top half of the card, making sure I kept the colour very light around the moon and darker further out. I then splattered some Frost White Shimmer Paint over the inked area. The hill pieces were glued flat to the card front, after I'd stamped the top one with the sentiments from Peace & Joy.

scissorspapercard, Stampin' Up!, Colour Creations, Waterfront, Peace & Joy, Joy To The World Paper Pumpkin, Home Together Dies, Shimmer Paint

The offcuts from the hills on the front were used on the inside - I rarely waste anything! I related the same process as for the front, I just didn't do a moon. I was thrilled with how the card turned out, and I found it quite easy. The hardest part was waiting for the Shimmer Paint to dry!

That's all from me for tonight, but please do head on over to Catherine's Blog, where you'll find the rest of the links for this week's Misty Moonlight cards.

Bye for now,

Tina

Sunday, 8 November 2020

CTC #293: CASE A Card From Page 36

 Hi!


I'm back with you this week for the new CASEing The Catty Sunday Challenge Blog Hop. I had to miss last week, as my littlest boy had a few medical challenges. He's all good now though.


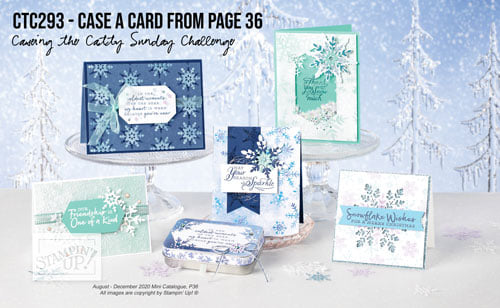
This week we are asking you to CASE a card from page 36 of the August - December Mini Catalogue. It features the Snowflake Splendor Suite of products. As pretty as they are, I don't have any of this suite, so I had to think a little bit out of the box.


I ended up choosing this card from the bottom left of the page to CASE, simply because of the ink blending. I do love an ombre background!

scissorspapercard, Stampin' Up!, CASEing The Catty, Peace & Joy, Joy To The World, Joy Dies, Winter Snow EF, Paper Pumpkin, Christmas

I had a piece of Whisper White card in my stash that had been embossed with the Winter Snow Embossing Folder when I had a stamping day with a friend recently. I used a blending brush to apply some Flirty Flamingo ink so that it was darker at the bottom and faded to white at the top. The original card has the fade going sideways, but I much prefer this way!

scissorspapercard, Stampin' Up!, CASEing The Catty, Peace & Joy, Joy To The World, Joy Dies, Winter Snow EF, Paper Pumpkin, Christmas

The 'joy' stamp and die is from the Peace & Joy bundle, but the wreath underneath is from the New Paper Pumpkin kit, Joy To The World. They work so perfectly together! I layered it over a piece of Silver Foil and Coastal Cabana cardstock, both cut into banners using my Banners Pick A Punch.

scissorspapercard, Stampin' Up!, CASEing The Catty, Peace & Joy, Joy To The World, Joy Dies, Winter Snow EF, Paper Pumpkin, Christmas

The inside sentiment is also from the Joy To The World kit. I really love the neat, handwritten style font. And it works perfectly side by side with Peace & Joy - you will be seeing a lot more of it on my blog!

There are five different cards and a cute little tin that you can choose from to CASE. Which one catches your eye? You can participate in our challenge by posting a photo of your project to our Facebook group.


In the meantime though, please do continue with the Blog Hop. Technically, I'm the last stop, but if you started in the middle you can hop on through to Monique's blog. Her card is so cute, you won't want to miss it!

Bye for now,

Tina

Wednesday, 28 October 2020

Colour Creations: Just Jade

 Hi!


Welcome back to this week's Colour Creations Showcase. This week we are highlighting one of the newest In Colours - Just Jade. It's what I'd call a dusky green, and is a shade that I really like. Despite that, I haven't used it much, yet. After this week's showcase, I may find myself reaching for it a little more!

scissorspapercard, Stampin' Up!, Colour Creations, Stitched Triangles Dies, Peace & Joy Bundle, Stitched Stars Dies, Subtle 3DEF, Dainty Diamonds 3DEF, Itty Bitty Christmas

I started by using my Stitched Triangles dies to cut a heap of isosceles triangles from Just Jade cardstock. I then threw them into my Subtle 3DEF and ran it though my Big Shot. I didn't want the embossing to go in the same direction on each triangle, although it seems that in trying to be random, two have ended up the same! Oh well.

scissorspapercard, Stampin' Up!, Colour Creations, Stitched Triangles Dies, Peace & Joy Bundle, Stitched Stars Dies, Subtle 3DEF, Dainty Diamonds 3DEF, Itty Bitty Christmas

I cut some tree trunks from Brushed Metallic foil, and also the word 'peace' from my Joy Dies. The stars are from the swirly die in the Stitched Stars set. All this was layered over the top of a Whisper White layer, embossed with the Dainty Diamonds 3DEF. I like how the pattern could be stars twinkling in the background.

scissorspapercard, Stampin' Up!, Colour Creations, Stitched Triangles Dies, Peace & Joy Bundle, Stitched Stars Dies, Subtle 3DEF, Dainty Diamonds 3DEF, Itty Bitty Christmas

I repeated the trees on the inside, just on a much smaller scale, and the finished off with a sentiment from Itty Bitty Christmas.

As is usual for our Colour Creations Showcase, the list of all participants is over on the lovely Catherine's blog. Please do pop on over to see what everyone has made.

Bye for now,

Tina

Sunday, 25 October 2020

CTC #291: CASE A Mini Catalogue Bundle Card

 Hi!


Thank you for joining me for the new CASEing The Catty Sunday Challenge Blog Hop. This week we are asking you to CASE a project from pages 71-75 of the August-December Mini Catalogue, which just happen to be the pages that show all of the available bundles in the catalogue.


That gives you a whopping 30 different projects to choose from! I was a bit tempted to go back and have another go at the Have A Hoot card, which I CASEd a couple of weeks ago. In the end, I opted to try something new, and chose the Snowflake Wishes card on page 73.


I don't have this bundle (which I think is even better for imaginative CASEing!), but I loved the way that the front of the card was split, with the banner dividing the two sections. The designer also used Gold Foil on the card.

scissorspapercard, Stampin' Up!, CASEing The Catty, Peace & Joy, Itty Bitty Christmas, Joy Dies, Heartwarming Hugs DSP, Red Foil

My Heartwarming Hugs DSP has been feeing a little unloved lately, so I pulled it out and selected two of the more subtle patterns. The Real Red went at the bottom, as it was the heavier of the two patterns. I added a thin strip of Red Foil to separate the two DSPs.

scissorspapercard, Stampin' Up!, CASEing The Catty, Peace & Joy, Itty Bitty Christmas, Joy Dies, Heartwarming Hugs DSP, Red Foil

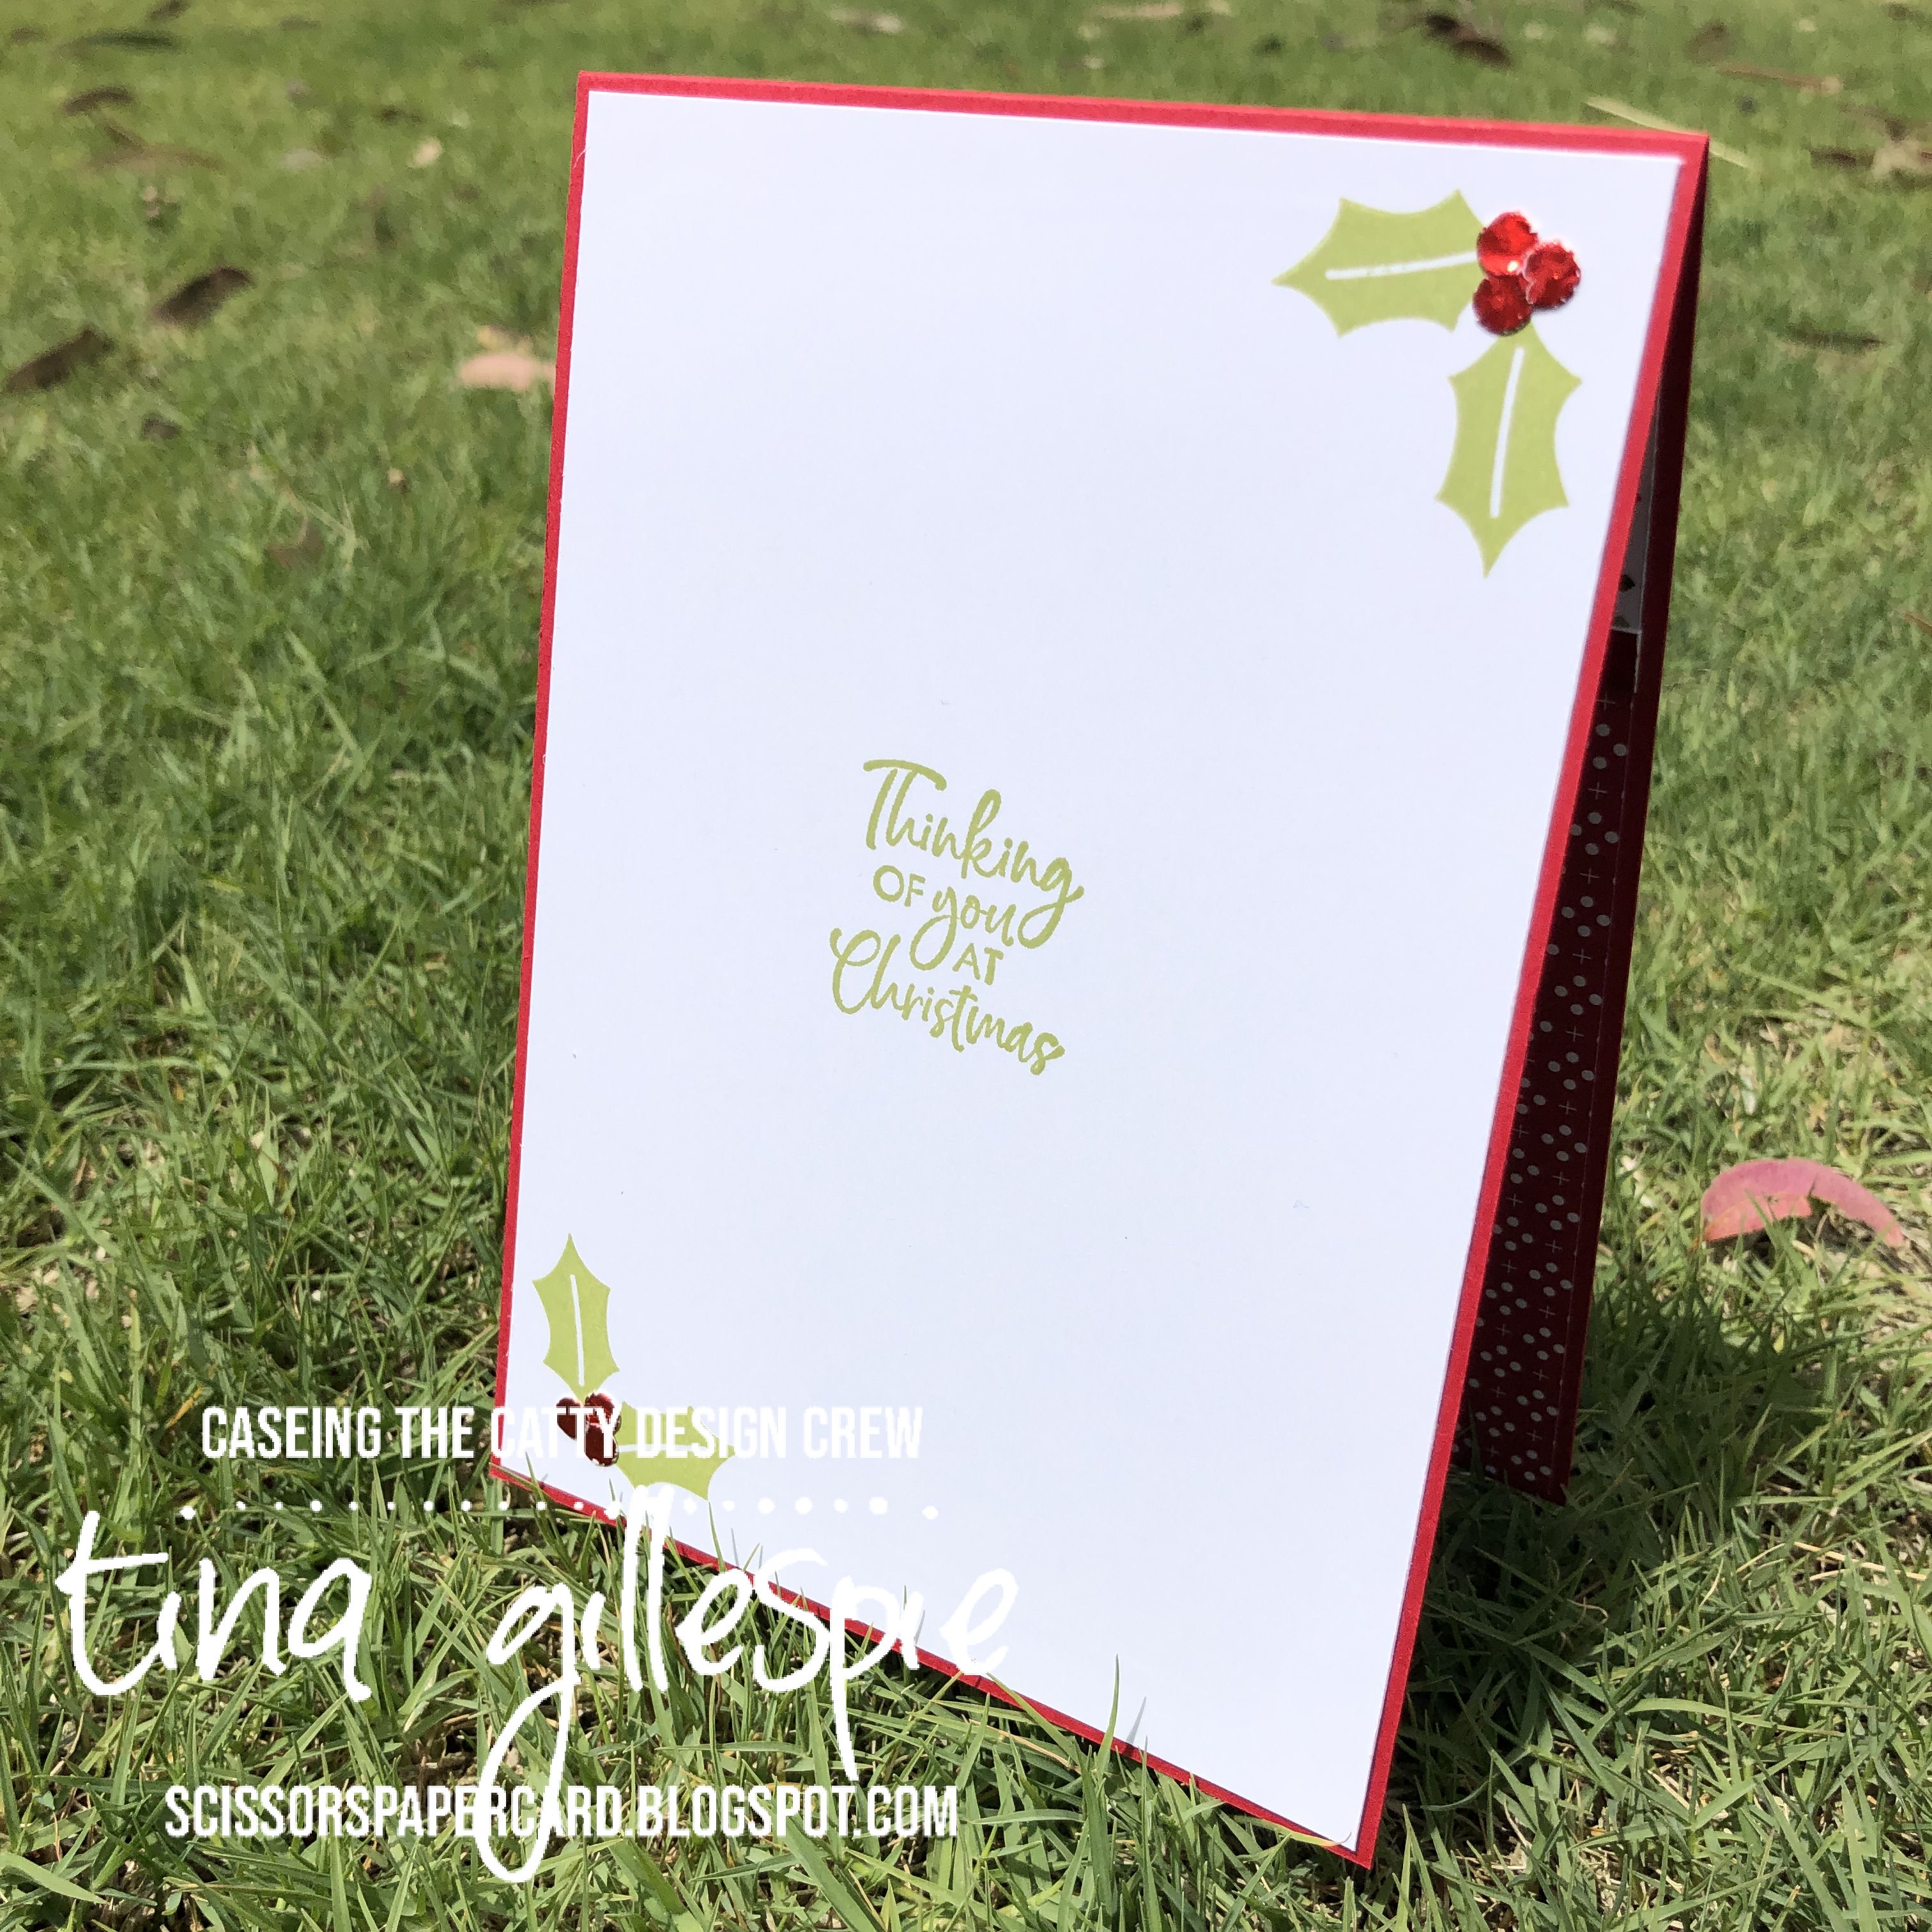
Instead of a banner for my sentiment, I opted to use all three layers of the 'bright' Joy Dies. I started with Pear Pizzazz, then Whisper White, and finally some more Red Foil (yay for adhesive sheets!). They were popped up over the join in the DSPs, and then some holly leaves from Peace & Joy were arranged around them. I had some left over foil with adhesive on the back, so I punched some small circles from the foil and used them for the holly berries.

scissorspapercard, Stampin' Up!, CASEing The Catty, Peace & Joy, Itty Bitty Christmas, Joy Dies, Heartwarming Hugs DSP, Red Foil

I like the look of the holly, so I repeated it on the inside, to accompany the sentiment from Itty Bitty Christmas. I quite like this card, I may have to try it with some other DSP packs. I think it would look great with the Brightly Gleaming DSP, too.

To enter our challenge - and we'd really love to see what you make - just join our Facebook group and add your picture to the group. You don't need a blog or any fancy camera or software, just snap a photos with your phone and post it in the group. 


Before you dash off to get creating, please do finish the Blog Hop. Next up is the lovely Peta, and her wondercat, Marvi. We all love seeing his adventures each week!

Bye for now,

Tina

Thursday, 15 October 2020

JAI #527: Just Add A Sketch

 Hi!


Woo Hoo for Friday and the newJust Add Ink challenge! This week Kim has drawn up a fun sketch for us to follow.


That little flourish at the top has so many possibilities!

scissorspapercard, Stampin' Up!, Just Add Ink, Peace & Joy, Joy Dies, World Map Dies, Tim Holtz Mini Globe Die, Glimmer Paper, Smooshing

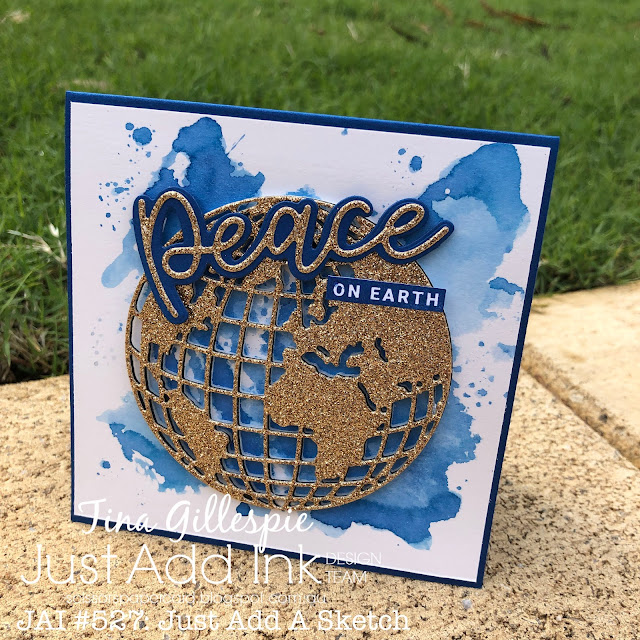
I've CASEd myself a little bit for this card. I made a similar card in Granny Apple Green last week, and after I did I thought that it would also look great in blue. This sketch gave me the opportunity to try it!. The background is Blueberry Bushel ink smooshed onto Shimmery White cardstock. I kept hold of my Blueberry ink when it retired earlier this year, as it's a wonderful blue that stays blue when you add water. A lot of other blues go grey or purple.

scissorspapercard, Stampin' Up!, Just Add Ink, Peace & Joy, Joy Dies, World Map Dies, Tim Holtz Mini Globe Die, Glimmer Paper, Smooshing

The globe die is a Tim Holtz Sizzix die, called Mini Globe. I cut it twice - once in Basic Black with a layer of Foam Adhesive Sheet, and a second time in Gold Glimmer Paper. I just glued the Gold on top of the black once I'd popped out all the pieces - there were a lot to pop out!

scissorspapercard, Stampin' Up!, Just Add Ink, Peace & Joy, Joy Dies, World Map Dies, Tim Holtz Mini Globe Die, Glimmer Paper, Smooshing

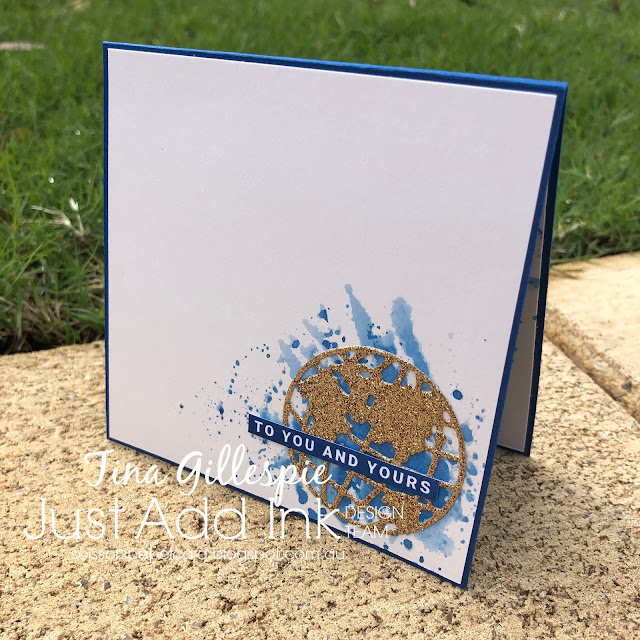
I completed this inside just like my Granny Apple Card - why mess with a good thing? The smaller globe is from the World Map Dies.

You can find the rest of this week's Design team cards over on the Just Add Ink blog, where you can also link up your card once you've made it. Can't wait to see what you do with the sketch.

Bye for now,

Tina

Wednesday, 7 October 2020

Colour Creations: Granny Apple Green

 Hi!


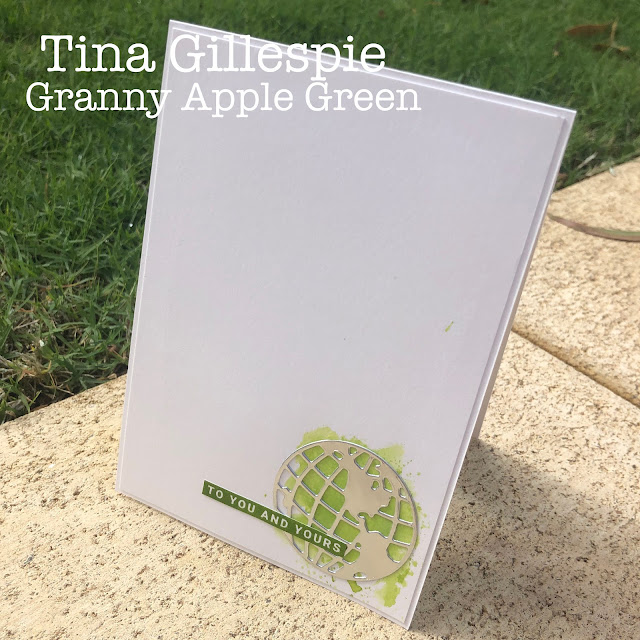
Thanks for joining me for the new Colour Creations Creative Showcase. We are looking at Granny Apple Green this week. I really like this bright, cheerful green.

scissorspapercard, Stampin' Up!, Colour Creations, Peace & Joy Bundle, World Map Dies, Silver Foil, Smooshing Technique

I started off with some Shimmery White cardstock, and then I smooshed it with some Granny Apple Green Ink. To do this, I used my Aqua Painter to add some water my largest clear block. I then used the Aqua Painter to add some GAG ink and then smooshed the cardstock over the ink. I let it dry a little and then repeated until I was happy with the look. Letting it dry between smooshes gives you a few 'tide lines' instead of one great big blob of ink.

scissorspapercard, Stampin' Up!, Colour Creations, Peace & Joy Bundle, World Map Dies, Silver Foil, Smooshing Technique

A Silver Foil globe from the World Map dies - showing Australia, of course - was the perfect compliment to the sentiments I used on the front of the card. I backed my foil with an Adhesive sheet before die cutting, which makes adhering so much easier. I cropped a few stars from the left over foil to go on the front.

scissorspapercard, Stampin' Up!, Colour Creations, Peace & Joy Bundle, World Map Dies, Silver Foil, Smooshing Technique

I couldn't do only half of the world, so the other globe went on the inside. I'd smooshed this piece of card when I did the front so that I only have one lot of mess to clean up. I hate when I don't remember to do the inside until after I've cleaned up!

As always, please pop on over to Catherine's blog, where you'll find the rest of the links to this week's Granny Apple Green cards.

Bye for now,

Tina

Sunday, 27 September 2020

CTC #286: CASE A Leaf Or Tree Project

 Hi!


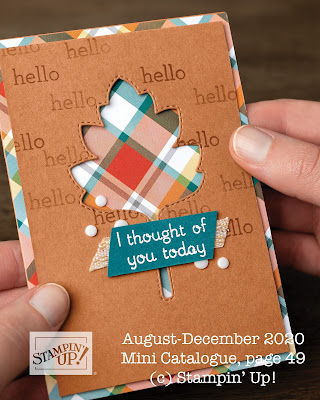
Thanks for joining me once again for the new CASEing The Catty Sunday Challenge Blog Hop. This week we are challenging you to find a Leaf Or Tree Project from the August-December Mini Catalogue and CASE it.


For these kinds of challenges, I always start at the back of the catalogue and flick forwards. I kinda assume that most people start at the front, and I don't want the back of the catalogue to feel unloved! I got to page 49 before I found a suitable candidate for CASEing.


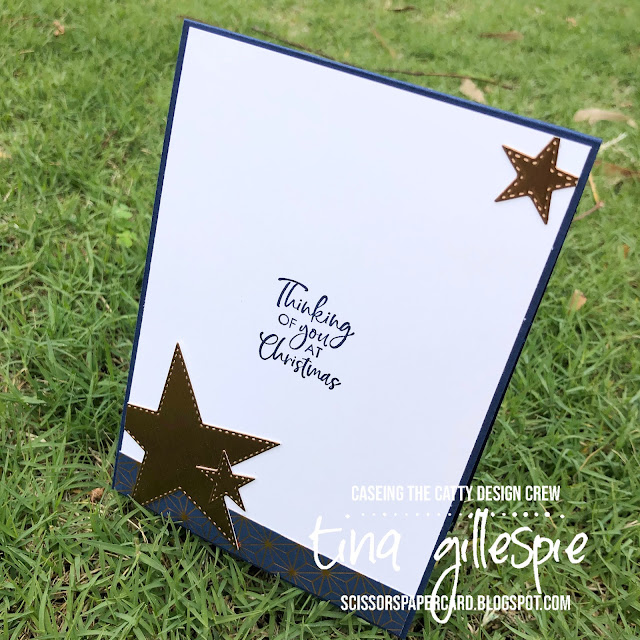
Part of the reason that it took quite a few pages was that I don't really have a lot of leaf or tree stamps or dies, so I had to find something that would translate to the products I do have. In this instance I liked the DSP that both framed the main panel and peeked through the leaf opening. I also liked the stitched detail around the leaf, so when it came time to reach for my supplies, I pulled out my Stitched Stars Dies.

scissorspapercard, Stampin' Up!, CASEing The Catty, Brightly Gleaming SDSP, Peace & Joy Bundle, Stitched Stars Dies, Stitched Rectangles Dies, Itty Bitty Christmas, Brushed Foil, Christmas Card

I die cut three star windows, because that suited my layout better. The Brushed Copper Foil, layered over some Night Of Navy and Copper DSP from the Brightly Gleaming SDSP pack, is so lush for a Christmas card.

scissorspapercard, Stampin' Up!, CASEing The Catty, Brightly Gleaming SDSP, Peace & Joy Bundle, Stitched Stars Dies, Stitched Rectangles Dies, Itty Bitty Christmas, Brushed Foil, Christmas Card

The hardest part of this card was getting the 'on Earth' part of the sentiment. I didn't want to add another colour to the mix as it would have been really glaring. Embossing with Copper powder on Night Of Navy cardstock was a fizzer, as was the retired Delicata inks. I ended up using Bright Copper Shimmer Paint. The paint pooled into the letters, which I was trying not to do, but in the end I actually preferred how it looked. Gotta love those happy accidents!

scissorspapercard, Stampin' Up!, CASEing The Catty, Brightly Gleaming SDSP, Peace & Joy Bundle, Stitched Stars Dies, Stitched Rectangles Dies, Itty Bitty Christmas, Brushed Foil, Christmas Card

I had a tiny strip of DSP left from the front, and the three stars cut from the main panel. I may as well use them on the inside, alongside a sentiment from Itty Bitty Christmas.

Our challenge is hosted in our Facebook group. It's super easy to participate - just join the group and post your photo. Easy!


Next up on our Blog Hop is the lovely Julia, who has made a stunning Christmas card for the challenge.


Bye for now,

Tina

Sunday, 20 September 2020

CTC #286: AC Project With A MC Twist

 Hi!


Wow, I hope that wherever you are you've had the glorious weather that Adelaide had today! We had a lovely, sunny 24ºC -perfect weather for my youngest to turn 13.

This week the CASEing The Catty Sunday Challenge is a mash up - we want you to CASE a project from the Annual Catalogue, but give it a Mini Catalogue twist. It sounds trickier than it really is - just pick a card and make it using stuff, or ideas, from the Mini Catalogue.


I was inspired by some of the team last week, who CASEd this card from the Annual Catalogue. The letter board is such a fun idea for a card, and I liked the idea of giving it a Chrismtassy twist.

scissorspapercard, Stampin' Up!, CASEing The Catty, Playful Alphabet Dies, Peace & Joy, Heartwarming Hugs DSP, In Good Taste DSP, Itty Bitty Christmas

It took me a little while to think of a Christmas message to go on the letter board. I can't stand 'X-mas', so that was a no-go. Peace & Joy fit perfectly! I cropped the letters with some Adhesive Foam Sheet on the back so that they had dimension. To add to the Christmas feel I stamped some holly and berries from the Peace & Joy stamp set and fussy cut them to go on the frame. A piece of retired Basic Black twine turns it into a hanging frame, with some more holly holding it up.

scissorspapercard, Stampin' Up!, CASEing The Catty, Playful Alphabet Dies, Peace & Joy, Heartwarming Hugs DSP, In Good Taste DSP, Itty Bitty Christmas

I scored the Basic Black cardstock that was the base of the frame to add to the letter board look. The wooden frame was made with some DSP from the In Good Taste DSP pack. The red DSP is from the Heartwarming Hugs DSP.

scissorspapercard, Stampin' Up!, CASEing The Catty, Playful Alphabet Dies, Peace & Joy, Heartwarming Hugs DSP, In Good Taste DSP, Itty Bitty Christmas

I finished off the inside with a sentiment from Itty Bitty Christmas and a bit more holly.

That's all from me tonight! As always, you can enter this week's challenge via our Facebook group. Just make your card, photograph it and post the photo in the group. Easy!


Before you go, please do finish the Blog Hop. Next up is my fellow South Australian, Michelle. She's CASEd a very fun card!

Bye for now,

Tina