Pages

Showing posts with label Labeler Alphabet. Show all posts

Thursday, 25 February 2021

JAI #543: Just Add A Sketch

 Hi!


Thanks for joining me for the new Just Add Ink Challenge. This week Kelly has designed a really fun sketch for us to use.


What do you think of when you see the sketch? I am quite a logical person, and I like the orderliness of the grid. It made me think of a die that I'd purchased recently, but had yet to use. It's the Circle Coverplate Die, from Uniquely Creative.

scissorspapercard, Stampin' Up!, Just Add Ink, Uniquely Creative, Circle Coverplate Die, Stitched Stars Dies, Labeler Alphabet

You didn't think I'd cut all those circles individually, do you? LOL! The die cuts them all at once, and the stitched border too. The stars were cut individually though, using the Stitched Stars Dies. I used Magenta Madness, Basic Black and Silver Foil. 

scissorspapercard, Stampin' Up!, Just Add Ink, Uniquely Creative, Circle Coverplate Die, Stitched Stars Dies, Labeler Alphabet

When I was finished adding all the stars, I realised that there wasn't really a good place for a sentiment. I tried a few different things, but nothing that I was happy with. In the end, I just left it blank. The repeated stars and the bold magenta make enough of a statement, that I think a sentiment isn't really necessary.

scissorspapercard, Stampin' Up!, Just Add Ink, Uniquely Creative, Circle Coverplate Die, Stitched Stars Dies, Labeler Alphabet

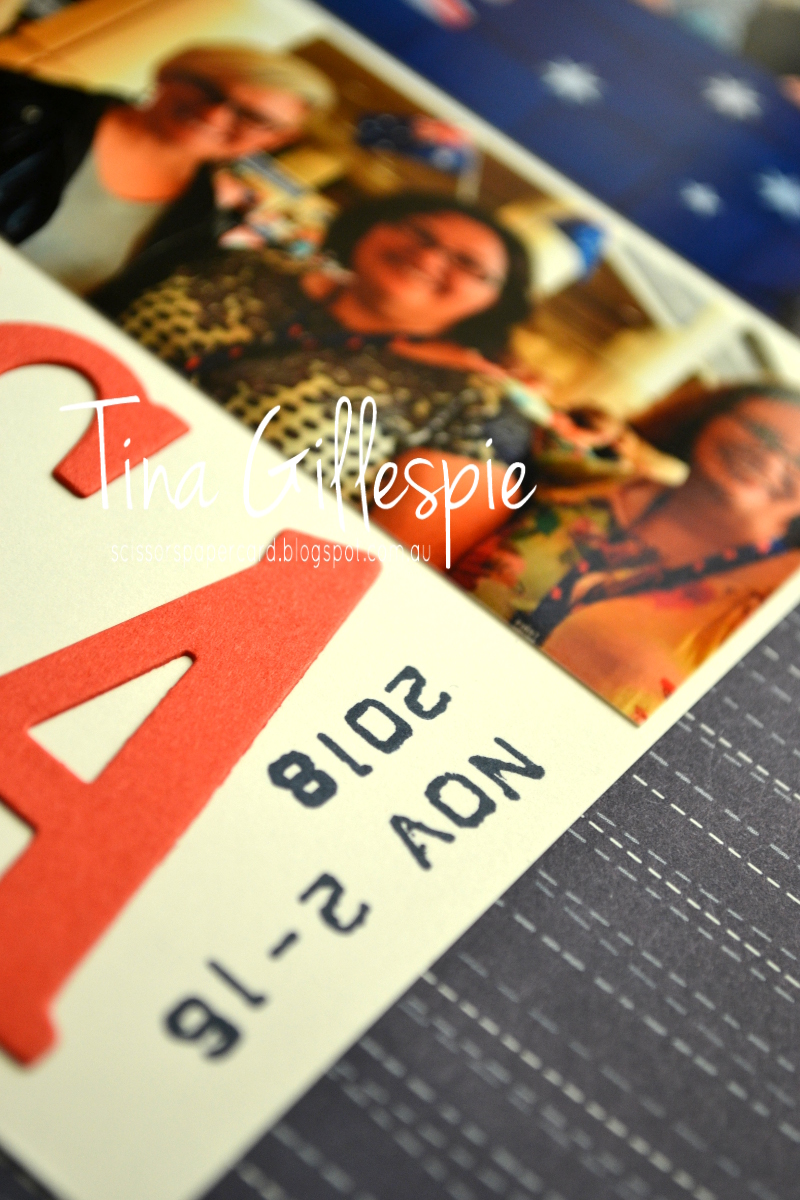
I didn't have a suitable sentiment for the inside, so I used my retired Labeller Alphabet stamps to create my own. The star die was used to create the opening to allow the magenta to peek through. I'm not sure what I'll use this card for, but like for my daughter next time she dances in a performance. The colours fit her dance studio colours perfectly!

Please head on over to the Just Add Ink blog, where you'll find the rest of this week's Design Team cards. You can also enter your card in our challenge - what do you see in the sketch?

Bye for now,

Tina

Sunday, 24 November 2019

CTC #256: Annual Catalogue With A Holiday Twist

Hi!


Welcome to this week's CASEing The Catty Sunday Challenge Blog Hop. They are such a nice way to end the weekend, don't you think? The blog before mine was the lovely Shannon's - are you coming from there or starting here? Either way, just keep going until you get back to where you started.


This week our challenge is to choose a card from the Annual Catalogue to CASE, but to give it a Holiday Catalogue Twist.  After opening the Annual Catalogue at a few random pages, I decided to stop on this card from page 158.


The banner, and the layers underneath, was what caught my eye. I think it's because it reminds me a little of some of the new stuff about to come out. However, the challenge is to use Holiday Catalogue products, so I pulled out my trusty So Many Stars bundle.

scissorspapercard, Stampin' Up!, CASEing The Catty, Labeler Alphabet, Greatest Part Of Christmas, Brightly Gleaming SDSP, Stitched Stars Dies, Christmas, Copper Foil

I started by creating the banner. It's just the retired Labeller Alphabet stamped and then cropped using the Classic Label punch. I then folded it over a length of Whisper White Baker's Twine, adhered the two sides with a glue dot, and snipped the back to match the front.

scissorspapercard, Stampin' Up!, CASEing The Catty, Labeler Alphabet, Greatest Part Of Christmas, Brightly Gleaming SDSP, Stitched Stars Dies, Christmas, Copper Foil

The large starry swirl piece was made slightly larger by snipping it in half under the Copper star and pushing the ends out. I like that you can see much more of it this way.

scissorspapercard, Stampin' Up!, CASEing The Catty, Labeler Alphabet, Greatest Part Of Christmas, Brightly Gleaming SDSP, Stitched Stars Dies, Christmas, Copper Foil

I had a few stars left from the swirly die cut on the front, so they were put to good use framing the sentiment from the Greatest Part Of Christmas stamp set. I love that font, as it nearly looks hand written.

Don't forget to add your card to our Facebook group once you have made it. You don't need a blog or fancy photography, so it's super easy to join in.


In the meantime though, please do continue the hop! Next up is Rebecca with a very peaceful card.


Bye for now,

Tina

Tuesday, 16 July 2019

Happy Birthday Ada!

Hi!

Last week my daughter had a birthday, turning 14. Ada's a mad Harry Potter fan, and so I usually make her a Harry Potter themed card. She's been talking lately about getting a Dark Mark tattoo when she's old enough (gulp!), so I decided to go with that theme for her card. For those not in the know, the Dark Mark is a magical tattoo on the 'baddies' (Death Eater's) arm that they use to summon each other.

scissorspapercard, Stampin' Up!, The Ink Road, Expecto Stampo, Labeler Alphabet, Incredible Like You, Scan And Cut

The Dark Mark is a skull with a snake coming out of the mouth. I certainly don't have any stamps for that! In the end I purchased a cut file from an Etsy store and cut it from some Shaded Spruce cardstock.  The Basic Black cardstock was a little to stark, so after I adhered the Dark Mark I misted it with some old Smooch shimmer mist that I found on my desk.

scissorspapercard, Stampin' Up!, The Ink Road, Expecto Stampo, Labeler Alphabet, Incredible Like You, Scan And Cut

I can't take credit for the sentiment on the card. -I googled 'Death Eater Birthday Cards' and found one that I liked. Avada Kedavdra is an Unforgivable Curse that kills the person it's aimed at, hence the second part of the sentiment!

scissorspapercard, Stampin' Up!, The Ink Road, Expecto Stampo, Labeler Alphabet, Incredible Like You, Scan And Cut

The inside sentiment is from an Ink Road Stamp set called Expecto Stampo. Incendio is another spell to light a fire, so it's perfect for the birthday candles. These were just stamped using the retired Incredible Like You stamp set. Did you notice I stamped 14 candles?

In case you were wondering, Ada loved the card!

Bye for now,

Tina

Thursday, 28 March 2019

AWH BLog Hop: Easter

Hi!

Tonight the Art With Heart team are sharing creative projects with an Easter theme. Do you make Easter cards or gifts? I usually don't, but I decided to join in the Blog Hop anyway!


Don’t forget, Sale-A-Bration ends on March 31st! There is still time to earn free product with purchase or even join our Stampin’ Up! team. Ask any of the girls on the hop for more details.

I was a bit short for time this week, so I turned to a kit for inspiration. The Incredible Like You kit turned out to be fabulous for this hop. I chose the wreath card, but ended up chopping it up and making two cards. So much for time poor!

scissorspapercard, Stampin' Up!, Art With Heart, Incredible Like You Kit, Painted Seasons Bundle, Brushwork Alphabet, Rectangle Stitched Framelits, Easter

This card uses the front of the kit card with the Granny Apple Green Glimmer paper peeking out from behind the wreath laser cut piece. Under that is part of the kit card base, cropped with the largest Rectangle Stitched Die. I originally cropped the front of the card, not realising that the back go the card was also printed. The front has a subtle wash effect and I didn't want to cover it with the wreath, so I ended up cropping the back and using it instead.

scissorspapercard, Stampin' Up!, Art With Heart, Incredible Like You Kit, Painted Seasons Bundle, Brushwork Alphabet, Rectangle Stitched Framelits, Easter

The word Easter was stamped using the Brushwork Alphabet stamp set, as I don't have any current stamp sets with an easter sentiment. I layered the Story Label Punch over a flower and foliage from the Painted Seasons Stamp set. You may notice there are two flowers, but I said 'a flower'. That's because I snipped one in half, as I'd already cleaned and put away the stamp before I realised I wanted a second flower for the front. A quick snip and it was problem solved!

scissorspapercard, Stampin' Up!, Art With Heart, Incredible Like You Kit, Painted Seasons Bundle, Brushwork Alphabet, Rectangle Stitched Framelits, Easter

I don't have Easter suitable inside sentiments, so I left the inside of this card blank, apart from some more Painted Seasons leaves and a flower.

So now I had one finished card and a cropped Rectangle Stitched panel, so I decided t make a second Easter card, using the other pieces of the kit card that I didn't use on the first card.


scissorspapercard, Stampin' Up!, Art With Heart, Incredible Like You Kit, Labeler Alphabet, Rectangle Stitched Framelits, Butterfly Elements, Easter

I wanted to keep the front of this card a bit more simple so that you can see the wash effect on the Granny Apple Green piece. It's subtle, but very nice! This time I used my Labeler Alphabet stamp set to make the front sentiment. The label, Twine and Grapefruit Grove striped circle were all parts from the kit, I just added a few Wooden Elements Butterflies.

scissorspapercard, Stampin' Up!, Art With Heart, Incredible Like You Kit, Labeler Alphabet, Rectangle Stitched Framelits, Butterfly Elements, Easter

The label has a silver border, so I decided to make the butterflies silver too. I simply took a silver Sharpie and coloured the wood. Done! It's a matte silver, but it looks really nice in real life.

scissorspapercard, Stampin' Up!, Art With Heart, Incredible Like You Kit, Labeler Alphabet, Rectangle Stitched Framelits, Butterfly Elements, Easter

I'll probably send this card to my mum, so I added the 'with love' to the inside. Now I just have to remember to send it!

Well, that's it from me, now it’s time to hop on over to our next participant, the very talented, Vicki Boucher.


If you find a broken link or have come to this blog hop from a different entry point, you can view the participants below:

Catherine Proctor 

Caroline Manwaring 
Sue Madex
Kate Morgan
Ros Davidson
Kathryn Mangelsdorf
Rachel Palmieri
Rebecca Jacovou
Judy May
Rachel Woollard 
Christina Barnes
Tina Gillespie 
Vicki Boucher 

Bye for now,

Tina

Thursday, 22 November 2018

AWH November Blog Hop: Sketch This

Hi!


Tonight the Art With Heart team are sharing creative projects featuring a card sketch. We hope you like how we have each put our own spin on the sketch and that it inspires you to get creative and make some fabulous cards. If you are inspired by the sketch, please share with us!


Just like last month, I decided to scrap a layout rather than make a card. I'm keen to get stuck into scrapping my USA trip, so this was just the starting point I needed. This page will be the opening page to my album.

scissorspapercard, Stampin' Up!, Art With Heart, Animal Outing, Labeler Alphabet, Twinkle Twinkle DSP, Large Letters Framelits, Watercolour Pencils, Scrapbooking

Can you see how I used the photos and postcard to replicate the main part of the sketch? I pretty much ignored the rest of the sketch as it didn't work with my page, but the most important part is included. I purchased the post card on my trip. I often do, as they photos are usually better than any I can hope to take! In this case though, the rustic flag appealed. Can you see that it's the flag painted onto some boards?

I then picked two photos that were the highlights from the two main parts of my trip. I had such a wonderful time travelling with Judy May, Kathryn Mangelsdorf and Rachel Palmieri, so I wanted to include them in this layout. The photo with the Aussie flag is from our visit to Stampin' Up!'s Home Office in Riverton, Utah, and the bottom photo is on the registration day of OnStage in Orlando, Florida, where we met Sara Douglass, the CEO of SU. You can see that I've cropped the photos to fit the sketch. How fabulous that the two photos I wanted to use worked perfectly!

scissorspapercard, Stampin' Up!, Art With Heart, Animal Outing, Labeler Alphabet, Twinkle Twinkle DSP, Large Letters Framelits, Watercolour Pencils, Scrapbooking

I üst had to include a kangaroo to go with the American feel of the page. The kangaroo featured heavily in my swaps and gifts, so it will also feature heavily in this album. I coloured is with my watercolour pencils and blended with my Wink Of Stella pen. I tossed up between my Blends and pencils, but in the end went with the pencils as I felt it worked better with the rustic look of the flag postcard.

scissorspapercard, Stampin' Up!, Art With Heart, Animal Outing, Labeler Alphabet, Twinkle Twinkle DSP, Large Letters Framelits, Watercolour Pencils, Scrapbooking

I love the Labeler Alphabet set! It's fabulous and versatile and will also feature heavily in the album, as it did on my swaps and gifts. And, yes, I did wear that flag headband for most of OnStage! It was a great way for people to find me, so I only took it off during the sessions so that I didn't annoy people sitting behind me.

Thats it for me for this month. You're now off to see what treasures Rachel Woollard has for you!

If you get lost along the way, here's the list of blogs participating in today's hop:

Rebecca Jacovou
Caroline Manwaring
Sharon Davern
Monika O’Neill
Sue Madex
Ros Davidson
Kate Morgan
Andrea Roberts
Tina Gillespie
Rachel Woollard 


Bye for now,

Tina

Monday, 12 November 2018

Orlando Swaps Part Two

Hi!

Today's post actually has my second and third swap items. I hadn't intended to make a third, but somehow I found it on the go before I'd even finished swaps one and two! Oops!

Let's start with swap two, which was actually my first idea. I had decided early on that I wanted to do something around an Australian flag pencil. Do you think I could find an Australian flag pencil without paying ridiculous prices? In the end I found these Aboriginal Art designs, which I think worked much better with my colour scheme.

scissorspapercard, Stampin' Up!, Animal Expedition DSP, Animal Friends Thinlits, Stitched Shapes Thinlits, Labeler Alphabet

I've used the Animal Expedition DSP again, as I wanted to use the large kangaroos this time. There are two leafy designs - this one with the frogs, and another with little birdies. I used a mix of the two as my backing piece. The bags are in the Annual Catalogue.

scissorspapercard, Stampin' Up!, Animal Expedition DSP, Animal Friends Thinlits, Stitched Shapes Thinlits, Labeler Alphabet

I used my Stamparatus to stamp the 'g'day mate' sentiment on the Stitched Circle. It's very cliche Australian, but I'm hoping that the American demos will love it! I made 24 of these swaps.

Finally, I have my last minute swap. I happened to be in Coles when my favourite Twinings Tea, Australian Afternoon, was half price. It was the smaller packs with individually wrapped bags. I grabbed two to take to the US, but when I realised they fit with the Australian theme of my swaps I decided to add them to the mix.

scissorspapercard, Stampin' Up!, Garden Impressions DSP, Springtime Impressions Thinlits, Stitched Labels Thinlits, Balloon Celebrations

I didn't have enough Animal Expedition DSP left to use, so I decided to use some of my Garden Impressions DSP. I used my Envelope Punch Board to create a little tea bagged size envelope, which I topped with a Stitched Labels Framelit. I stamped a pair of sentiments from Balloon Celebration and then used part of the big floral die from Springtime Impressions for the little cluster of flowers. A few rhinestones finished off the design.

I wonder which of my swaps will be the most popular - the Tim Tam Slam, Pencil or Tea? What do you think?

Bye for now,

Tina

Friday, 9 November 2018

Orlando Swaps Part One

Hi!

How exciting - today is the first day of OnStage in Orlando. I wrote this post a couple of weeks ago, but still, I bet I'm going to be excited on the day!

Normally on a Friday I'd have the latest Just Add Ink post for you, but to cater for OnStage, last week's challenge actually runs for two weeks. Click on the link to check out the challenge details.

Instead I have for you one of the swaps I made to take to Orlando. Did you know that most Americans have never heard of the chocolatey goodness that is a Tim Tam? Did you also know that you can buy a box of 150 individually wrapped Tim Tams at Officeworks? What a perfect opportunity to educate some people on the delights of Tim Tams!


I started by working out how I was going to package the Tim Tam. I ended up deciding to use my Envelope Punch Board and the Crafty Owl's Box Buster to create a little box. This is the shape I ended up with, after starting with a 5 1/8" square piece of DSP.

scissorspapercard, Stampin' Up!, OnStage Swaps, Animal Expedition DSP, Labeler Alphabet, Envelope Punch Board, Stamparatus

I had to do some additional trimming on the bottom left and top right corners, as they wouldn't fold nicely into the box if I didn't. Once I'd folded along the score lines and snipped to create flaps, I turned the piece over and used my SNAIL to adhere some instructions to the inside of the box. Yep, I'm going to educate my fellow on how to do the Tim Tam Slam!

scissorspapercard, Stampin' Up!, OnStage Swaps, Animal Expedition DSP, Labeler Alphabet, Envelope Punch Board, Stamparatus

I then popped a Tim Tam into the box and folded the instructions over the top. I then started folding the box. I worked out that if I folded the larger long edge, followed buy the two short edges and finally the shorter long edge, I could get away with using one of my demo labels to hold the box closed.

scissorspapercard, Stampin' Up!, OnStage Swaps, Animal Expedition DSP, Labeler Alphabet, Envelope Punch Board, Stamparatus

If I tried folding in the short edges first there wouldn't be enough of the flaps exposed to stick to the label.

scissorspapercard, Stampin' Up!, OnStage Swaps, Animal Expedition DSP, Labeler Alphabet, Envelope Punch Board, Stamparatus

Here's the bottom of the box with my label attached. Now - how to decorate the top?

scissorspapercard, Stampin' Up!, OnStage Swaps, Animal Expedition DSP, Labeler Alphabet, Envelope Punch Board, Stamparatus

Aww, how cute! I made 40 of these swaps, as that's how many little kangaroos there are in two packs of the Animal Expedition DSP. I had very sore hands after hand cutting all 40 kangaroos and 80 branches! Thankfully, for the stamping I was able to use my Stamparatus for super quick production line stamping.

I'll be back on Monday with my other swap.

Bye for now,

Tina

Thursday, 20 September 2018

JAI #427: Just Add K

Hi!


Welcome to a new week's challenge at Just Add Ink. This week it's one of my alphabet challenges, this time using the letter K. It took a bit of thinking to work out what I was going to do. Ideas I came up with and discarded were a kaleidoscope card, a kite card and the kangaroo from Animal Outing. I just wasn't happy with any of them - but there's a list of ideas for you!


In the end I used a stamp set from Kindred Stamps for my K element. Kindred does some fantastic pop culture sets. This card was made a few weeks ago for my kids to give to my hubby for Father's Day. It snuck up on me this year - I thought it was a week later than it actually was. Oops! Luckily for my pop culture loving hubby, I had just the right stamps.

scissorspapercard, Stampin' Up!, Kindred Stamps, Neat & Tangled, Just Add Ink, Galactic Adventures: The Sequel, Time Warp, Labeler Alphabet, Brushos

There's a little bit of a not-so-secret K on this card, and if you're scratching your head at the sentiment, then you probably wouldn't get the K reference either. The character this stamp set is based on is from a very famous movie franchise, and he, very shockingly, kills his father. Don't worry if you didn't get it, my hubby and kids did, so that's what really matters I guess!

scissorspapercard, Stampin' Up!, Kindred Stamps, Neat & Tangled, Just Add Ink, Galactic Adventures: The Sequel, Time Warp, Labeler Alphabet, Brushos

The background was done with Brushos on some retired Naturals Ivory cardstock. It handles the water very well without warping too much. I used some of the blue and yellow powders. Once is dried I heat embossed a Neat & Tangled stamp called Time Warp over the top using Silver Embossing powder. It's such a cool, spacey looking background, don't you think?

scissorspapercard, Stampin' Up!, Kindred Stamps, Neat & Tangled, Just Add Ink, Galactic Adventures: The Sequel, Time Warp, Labeler Alphabet, Brushos

Maybe the image on the inside will help you to work out which movie franchise the character is from? How awesome is the Labeler Alphabet stamp set for creating custom sentiments? It's a bit of extra work, but the results are worth it.

What K ideas do you have for this week's challenge? You can see what the rest of the team did this week over at the Just Add Ink blog. Don't forget to link up your card when you're done!

Bye for now,

Tina

Thursday, 15 March 2018

JAI #400: Just Add Inspiration

Hi!


Yay! Time for a new Just Add Ink challenge! This week Kim has found this gorgeous inspiration photo to be a springboard for our creativity.


Hmm, this one stumped me for a while, as I don't usually make or send Easter cards. In the end I decided to go with the colours and the speckles and see where I ended up.


I kind of stretched the 'speckles' element by using my Blue Brushos powder with a minimal amount of water on a sheet of Glossy White cardstock. Using very little water limits how much colour is released by the powder. I also deliberately spritzed at a sharp angle to the cardstock so that the force of the water pushed some of the powder across the card. I was so pleased with how it turned out! To add to the speckles, I scooped a small amount of my Silver Embossing paste onto my Silicone Mat, added a little bit of water to make it a little runnier, and then flicked it over the page.


The mermaid, seaweed and shells were fussy cut from the Myths and Magic SDSP, and layered over a die cut from the Swirly Scribbles Thilits. I used my Labeler Alphabet stamps to create the sentiment. I deliberately haven't added a number after the 'look who's turning', as I don't know who will get this card yet. Given that all the little people in my family are currently boys, I might not use it for a long time! I finished the front of the card by adding some of the Clear Epoxy dots.


I had a second mermaid and shell already fussy cut, so it was quick and easy to pop them into the inside of the card.

So, what are you going to do with the Inspiration photo this week? Pop on over to the Just Add Ink blog to see what the rest of the Design team have done, and to link your card when you've made it. See you there!

Bye for now,

Tina

Wednesday, 31 May 2017

Kelly's Happy Blog Hop

Hi!

Wow, two posts in one day! Both are very special though. This evening's post is a fun Blog Hop that I am participating in that celebrated the 5 year Stampiversary of my friend and JAI team member, Kelly Kent. If you've ever met Kelly, you'd know that shy and quiet aren't words to describe her, so it comes as no surprise that she's celebrating with a big bang!


The theme of today's Blog Hop is simply, happy. You have probably come from Jacqui's blog, where you're bound to have seen something amazing. If you're starting here at my blog, that's entirely fine. Just keep on hopping until you get back to where you started!

I decided to make a layout for the blog hop. It's been a little while since I've scrapped, so I was feeling a little rusty, but it was very enjoyable to spend a few hours on this page.


I've used the new In Colour Tranquil Tide as the base of my layout. Unfortunately I haven't been able to photograph it well, as it is actually a lot more similar in colour to the T2 Melbourne Breakfast label I have used on my page. Speaking of which, do you ever use 'found' objects like this on your layouts? I sometimes do, but never with precious photos, as I can never be sure that they are photo safe.


I journaled directly onto my layout using a PL marker, as I didn't want another big block of white on the page. I used the thicker, 0.5, marker so that the writing was a bit easier to read against the dark background


I love this title! A quick Google search for 'tea quotes' gave me these words. There are heaps of tea related quotes out there, but not many that also include the word happy. Luckily, this one was perfect for me!
 
I hope you've enjoyed my 'happy' page, as I had a lot of fun making it. And before you ask, yes, I was sipping tea from my cup as I scrapped the photo. As a matter of fact, I'm sipping from it now, as I type this post. No doubt I'll also be sipping tea from it as I do the Blog Hop when it goes live!
 
It's now time for you to hop along to the next blog, which just happens to be my friend, Kathryn. Before you go, I'd love for you to leave a comment and let me know what you thought about my layout. I'd love to know!
 
http://www.katlodesigns.com/stamping_with_kathryn_low/2017/05/kellys-friends.html
 
If there's a broken link, just head back to Kelly's blog. She will have a list of the blogs, so you can find where you were up to and keep going - it will definitely be worth it!
 
Bye for now,
 
Tina