Pages

Showing posts with label Punch Art. Show all posts

Sunday, 8 March 2020

CTC #264 Week 2: A Masculine Twist

Hi!


Hello, and welcome back to the new CASEing The Catty Sunday Challenge Blog Hop. We are half way through this fortnight's challenge of taking a card from the current Mini Catalogue and giving it a masculine twist. Did you arrive here after seeing the tree-mendous card on Julia's blog? Or are you starting here? Either way, just keep on hopping until you get back to your starting point.


I didn't have to go far into the catalogue before I found the card I wanted to CASE - in fact, it is on the front cover!! I really liked the repeated circles in the background of the card.


I started thinking about which shapes I had that could make this card masculine. I toyed with using the golfing paper, but in my house the male members are gamers, so my thoughts naturally went more that way.

scissorspapercard, Stampin' Up!, CASEing The Catty, Label Me Bold, Itty Bitty Birthdays, Tulip Builder Punch, Punch Art

I recalled seeing the new Tulip Builder punch being used to create the ghosts from Pacman, so that's what I decided to do! Rob helped me choose the colours of the ghosts - we went with Real Red for Blinky, Blushing Bride for Pinky, Balmy Blue for Inky and Pumpkin Pie for Clyde. I learned a lot about Pacman while making this card!!!

scissorspapercard, Stampin' Up!, CASEing The Catty, Label Me Bold, Itty Bitty Birthdays, Tulip Builder Punch, Punch Art

I went with a Pacific Point border around my main panel, as it was the closest I had to the electric blue that defines the maze in the game. Rob knew straight away why I'd picked it, so I guess I chose correctly! Pacman was simply a 1 3/4" circle with a wedge cut out and popped up with black dimensionals, and the sentiment is from Label Me Bold.

scissorspapercard, Stampin' Up!, CASEing The Catty, Label Me Bold, Itty Bitty Birthdays, Tulip Builder Punch, Punch Art

On the inside we have Blinky chasing Pacman. Quite by coincidence, Blinky is the leader of the Ghosts - I just picked red as I thought it would be the one to stand out most against the white background!

That's all for me this week! It's the final week to get your entries in for our challenge. Just add your photo to the wall in our Facebook group - it really is that easy!


In the meantime, though, please do continue on with our Blog Hop! Next up is the lovely Angela's blog - she's been busy this week and has lots to show you!


Bye for now,

Tina

Thursday, 11 April 2019

JAI #452: Just Add A Sketch

Hi!


Welcome to the new Just Add Ink challenge. This week it's a sketch challenged designed by me! This was a fun sketch to design, and I think it can be interpreted so many ways - don't just stick to circles, any shape is fine!


I think I designed this before Christmas and I had snowflakes in my head instead of circles. In the end, I used a mix of Pokeballs and stars.

scissorspapercard, Stampin' Up!, Just Add Ink, Amazing Life Bundle, Picture Perfect Birthday, Large Numbers, Classic Garage DSP, Punch Art, Pokemon

I made this card for my oldest child, Alex, who is turning 16 (gulp!) in a few days. He's mad on Pokemon Go, and the Pokeballs are a big part of the game. The Crushed Curry DSP is from the Classic Garage DSP Pack, I loved the subtle grungy pattern in it.

scissorspapercard, Stampin' Up!, Just Add Ink, Amazing Life Bundle, Picture Perfect Birthday, Large Numbers, Classic Garage DSP, Punch Art, Pokemon

To make the Pokeballs I punched 1 1/4 inch circles in Whisper White and Real Red, then snipped the red ones in half. I added a thin strip of Basic Black to the back of the red and then adhered the whole lot to the white. To get the little circles, I used a 1/4 inch circle punch and then punched a 1/2 inch circle over the opening to create a black 'donut'. I then adhered it over the top of a 1/2 inch white circle and then glued that to the larger circle. Done!

The numbers 16 were done in a similar way to the larger part of the Pokeball. The hardest part was lining up the black strip!

scissorspapercard, Stampin' Up!, Just Add Ink, Amazing Life Bundle, Picture Perfect Birthday, Large Numbers, Classic Garage DSP, Punch Art, Pokemon

I made a fourth Pokeball for the inside of the card too - why not when I'm already making three? LOL. I hope Alex loves his card, I know I had fun making it.

Time to head on over to the Just Add Ink blog, where you can find the rest of the Design Team's cards  and add your own to the challenge.

Bye for now,

Tina

Tuesday, 26 March 2019

A Roaring Good Time With Pumpkin Pie

Hi!


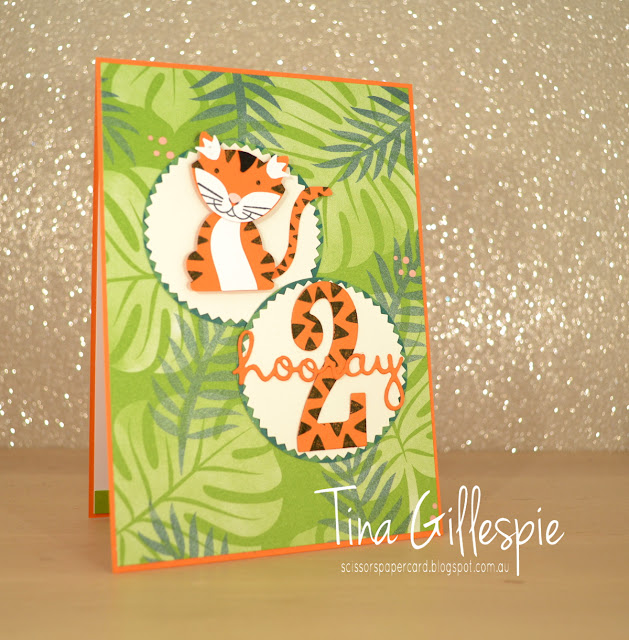
Wowee, the Art With Heart team are ripping though the colours in the Stampin' Up! range. We are up to Pumpkin Pie this week. When deciding what to make I reached for my Brights cardstock tub, but I didn't find Pumpkin Pie. Oops! I forgot that in the last Colour Refresh, Pumpkin Pie was moved to the Regals.

scissorspapercard, Stampin' Up!, Art With Heart, Colour Creations, Foxy Friends Bundle, Birthday Cheer, Tropical Escape DSP, Well Written Framelits, Large Numbers Framelits, Punch Art

I have a great nephew turning two in a couple of weeks, and so this was a great opportunity to make a fun card for him. I was originally thinking a lion, but they are yellow, not orange! Tiger it was, then! I did a google search for tigers made using the fox builder punch and found a few. The one I followed was just marked as 'Alana'. How cute is he?

scissorspapercard, Stampin' Up!, Art With Heart, Colour Creations, Foxy Friends Bundle, Birthday Cheer, Tropical Escape DSP, Well Written Framelits, Large Numbers Framelits, Punch Art

He was a little fiddly to make, but soooo worth the effort. I made his stripes by stamping just the ear part of one of the heads in the Foxy Friends stamp set. I repeated this for the 2, which I think looks super cute!

scissorspapercard, Stampin' Up!, Art With Heart, Colour Creations, Foxy Friends Bundle, Birthday Cheer, Tropical Escape DSP, Well Written Framelits, Large Numbers Framelits, Punch Art

I had the foresight to make a second tiger at the same time as the first. Usually I only make one and then wish for a second one for the inside but can't be bothered as they are so fiddly. I got smart this time! You may notice that his tail is on the other side - that was a bit of an oops moment that worked out nicely.

Why not pop on over to Catherine's blog, where you can find the links for the rest of this week's Pumpkin Pie cards? They're gonna be great!

Bye for now,

Tina

Monday, 19 June 2017

A Daisy Windmill

Hi!

After I returned from On Stage in Perth, I was showing my class ladies some photos I'd taken of the Inspiration Boards. They saw a card made by Kelly Kent to showcase the Daisy Punch, and straight away asked if they could make it in class.


I was keen to do it, especially as we'd been doing a bit of work with the Sponge Brayers, and this was a good way to show them how to do a panel with three colours. We used Daffodil Delight, Peekaboo Peach and Watermelon Wonder to create the stunning background.


I pre-cut all of the pieces for the windmill, so that everyone just had to glue down the bits. The windmill blades where made by punching the daisy twice and then trimming with two different circle framelits to crop them to the correct size. Kelly is so clever to think of this!


We finished the inside by carrying over the silhouette look. I was really struggling with what to do, when Rob suggested I do a fence. I wasn't sure what to use to get the look, but after a quick flick through the catalogue I decided the stamp from Timeless Textures would be fabulous for the wire fence. I think I should have flattened the ends of the Classic Label punch, as it looks a little to picket fence rather than farm fence. Next time!

You can see Kelly's card at the end of this post. There are heaps of gorgeous cards using the Daisy bundle in her post, so it's well worth a look.

Bye for now,

Tina

Friday, 25 September 2015

JAI #281: Just Add Colour

Hi!

This week at Just Add Ink we have a colour challenge with a difference: YOU get to choose the colours you use! The very tricky Di came up with this challenge, and gave us a limit: you can only use THREE colours. Which three will you choose?


I decided to go with one of my favourite colours, which is blue. This card is Hudson's 8th Birthday card.  We gave him a water play table and a few little rubber duckies to go in it, so I ran with that for his card.


You can see that my two other colours are yellow (Daffodil Delight) and orange (Tangelo Twist).  The blues I used are Marina Mist and Soft Sky.  There's a bit of Basic Black and Whisper White in the card, but technically they aren't colours, so I think I'm ok!


To make the duckie I just googled 'duck punch art Stampin' Up!', clicked on Images and just went from there.  He's a bit of a cutie!  I made the water by just punching along the edge of the cardstock with my smallest circle punch.


Which three colours will you choose for your card? Pop on over to the Just Add Ink blog to see the gorgeous combos the other girls have selected.

Bye for now,

Tina

Monday, 5 January 2015

Creeper Card

Hi!

Do you have young children? If so, you're bound to know what Minecraft is.  My children play it lots.  Over the Summer holidays they have played it lots and lots. They talk to me about it lots too.  How about your children?  Anyway... Alex was invited to a mate's birthday party so I took the opportunity to make a punch art Creeper Card.


It's really easy to make, you just need a heap of different shades of green cardstock punched into 1 inch squares. I arranged them randomly to create the background.  I made this card ages ago, but I think I used Garden Green, Wild Wasabi, Old Olive and Pistachio Pudding.


I then used the 1 inch punch to create the face from Basic Black cardstock.  It took a bit of trial and error to get what I guess is the mouth bit right, but I did eventually.


Kids are a bit obsessed with their age, so I thought that this stamp was perfect for the inside!

Bye for now,

Tina

Monday, 28 July 2014

Punch Art Penguin

Hi!

Today I have a card for you that I used as a sample for a card class.  I had been asked to make a card that used the Owl Builder Punch in a different way to the usual owl.  I've seen a few cute penguin Christmas cards that are made using the Owl Builder Punch, so I decided to go with that.


How cute is that little fella! We created the snow he's playing in by tearing some Whisper White cardstock in half, sponging the edges and layering the pieces on the front of the card.  Then our little penguin was popped up on top and the whole thing was sprayed with a shimmer mist.


Quite a few of my ladies decided to give the little bloke a playmate or two.  I guess he does look a little lonely all by himself on the front of the card.


So, there's my first Christmas card done for the year.  Only 99 or so more to go!

Bye for now,

Tina

Wednesday, 16 April 2014

Happy Birthday Alex!

Hi!

On Sunday my eldest child, Alex, turned 11.  Can't believe my first baby is that old!   He's madly into Lego, especially The Lego Movie Lego.  I just had to make him a Lego card to celebrate his 11th Birthday.


I don't know why the card looks a bit wonky in the photo - it isn't in real life!  I love how easy it is to create the look of Lego with a square and a few circle punchies. Oh, and some sponging and Dimensionals too!


I used Real Red, Daffodil Delight, Gumball Green and Pacific Point as the colours of my blocks.


I used the stamp from my Hip Hip Hooray Kit on the inside of the card, along with some more punch art Lego.  I'm pleased to say that Alex loved the card.

Bye for now,

Tina

Monday, 17 March 2014

Superman Punch Art

Hi!

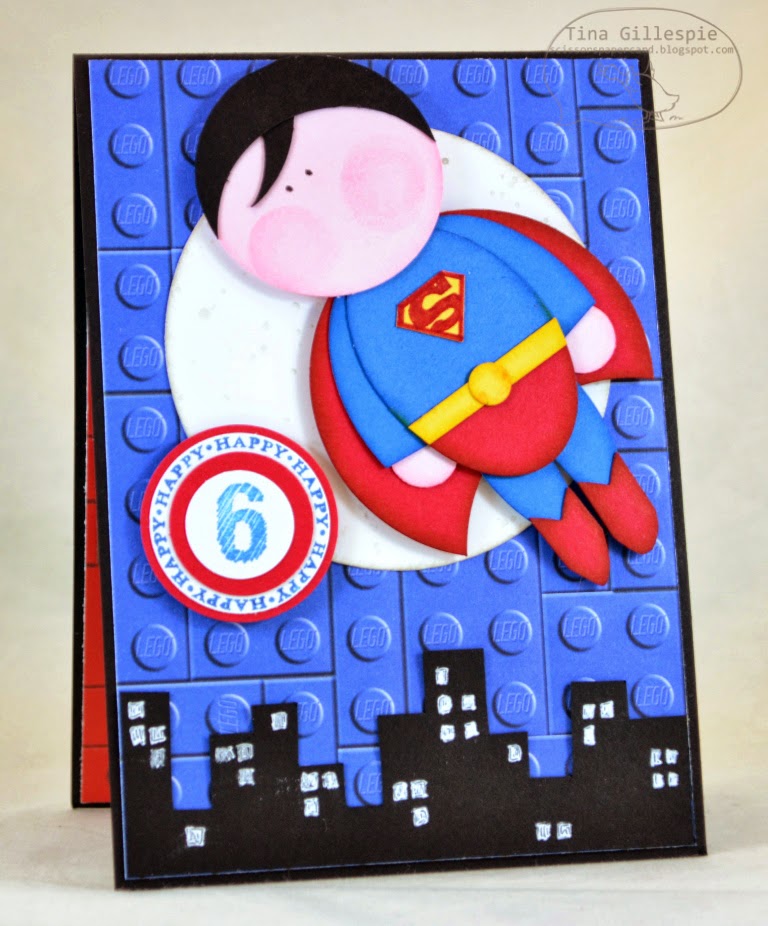
A couple of weeks ago we were invited to a very special little boy's 6th Birthday party.  He's right into superheroes (aren't most 6 year old boys?) and so the party had a superhero theme.  Of course I had to make a card to suit the theme.  After scouring the 'net for ideas I found this card by Caroline Bennie with the most perfectly cute Superman.


The Lego paper was from my stash, and I'd stuck it down before I realised that a blue Superman on a blue background was probably not going to work too well.  My solution was to make the moon for Superman to fly past.


I used a Circles Collection Framelit to cut the circle and then stamped it lightly with the small splatter stamp from Gorgeous Grunge.  I was trying give the effect of the craters on the moon.  I then created a cityscape by cutting the Basic Black cardstock to replicate buildings and using my white gel pen to add in some lights in windows.


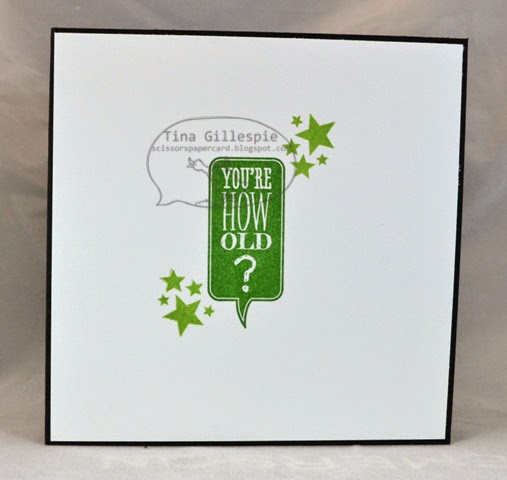
I finished off the inside with a couple more scraps of Lego paper.  The birthday boy loved his card I'm pleased to report. Oh, and thanks to my hubby Rob for creating the logo for the front of Superman's costume.  He's a bit of a superhero nerd so I think he was the best person for the job.

Bye for now,

Tina

Friday, 6 December 2013

JAI #194: Just Add Santa

Hi!

How many days until the man in the red suit visits good children?  I don't think I really want to know at this point in time! So let's think about something else instead, like the latest Just Add Ink challenge.

http://just-add-ink.blogspot.com.au/

This week we are challenging you to Just Add Santa to your papercrafting projects.


I've made a few of the shirt front cards lately, so I decided to make a Santa version.


It was a pretty easy card to make, and I love how cute it looks!


I made the silver buckle from the Glimmer Paper.


I made this card with a few of my regular stamping groups, and it was quite a popular card.  A lot of the ladies added a few black buttons down the front of the shirt using a small circle punch to create the buttons.  Two of my ladies went a step (or more!) further and made these cards.


I loved how they turned my Santa Claus idea into Mrs Claus!  Fabulous idea!

I hope you can find some inspiration amongst the Design Team cards and also some time to play along with us at Just Add Ink this week.

Bye for now,

Tina
Wednesday, 6 November 2013

Some More Onesie Cards

Hi!

Did you see the baby boy onesie card I posted on Monday?  Today I'm back with some more.


These cards were made as samples for a card class.  We were trying the shaving foam technique.  You can find a tutorial here.  It's pretty easy really - definitely worth a try.


I made the bases Whisper White this time so that I didn't have to fiddle around to cut an insert for the middle of the card.  Easy!

Bye for now,

Tina

Monday, 4 November 2013

Baby Boy Onesie Card

Hi!

A couple of weeks ago I showed some baby boy cards that I'd made on commission. Today I have the final card that I made.


This was my first go at making a onesie card and I loved it!  They are so easy to make and look so fabulous.


I used my circle punches to cut the neck and leg holes, after trimming the card to the shape I needed.  I then added some crisp white accents to the arms, legs and neck.  The glimmer paper star is a cute little finishing touch.


The trickiest part of the whole card was cutting the insert for the inside!

Come back on Wednesday for some more Onesie cards.

Bye for now,

Tina

Monday, 21 October 2013

Baby Boy Cards

Hi!

One of Rob's cousins had a baby boy recently and so Rob's mum asked me to make a congrats card for each of the great grandparents, granddad and parents of the new bubba. My stamping ladies had asked to do a technique this month so I decided to combine the two and make some cards using cardstock coloured using the shaving foam technique.  It was so much fun!


I loved the swirly effect the shaving foam technique achieves.  It reminded me of water so I used it as a base for a rubber duckie to swim on.


I think duckie looks pretty happy swimming around on the 'water'.


When you do the shaving foam technique, you don't just colour one piece of cardstock, you keep on going until you have exhausted your foam.  The cardstock on the washing line card was the first one I tried and I didn't quite press it onto the foam enough, especially around the edges.  I ended up cutting it a bit smaller to hide this fact.


Aren't the onesies cute - made using the breast section of the owl punch, as well as the little heart.  The shoulder straps were made using a retired punch, but you could just as easily cut them by hand.


Can't waste any pieces - one of the better offcuts was used on the inside!

In case you are wondering I used Marina Mist and Soft Sky ink refills in the shaving foam and the cardstock I used on the cards was Marina Mist, Daffodil Delight and Whisper White.

Bye for now,

Tina