Pages

Showing posts with label Amazing Life. Show all posts

Tuesday, 23 April 2019

Spruced Up Flamingo

Hi!


Gosh, we are getting to the end of our Colour Creations Blog Shares now. I will miss them! Hmmm, I wonder if I can convince everyone to continue for a further 5 weeks with the new In Colours? Maybe!

Anyway, this week we are up to Shaded Spruce. It's a fabulous deep green, new to the range this year as a part of the Regals colour family.

scissorspapercard, Stampin' Up!, Art With Heart, Colour Creations, Tropical Chic Bundle, Fabulous Flamingo, Amazing Life, Tropical Escape DSP, Fancy Fold

I recently saw this card by my JAI friend Lou, and thought it was a simple, but very effective fancy fold. Before I explain, let me show you how it folds out. You can see that there's a round window in the front of the card. I used my Tropical Chic stamp set to create a little frame for the window. It's carrying over to the new Annual Catalogue - yay!

scissorspapercard, Stampin' Up!, Art With Heart, Colour Creations, Tropical Chic Bundle, Fabulous Flamingo, Amazing Life, Tropical Escape DSP, Fancy Fold

The first flap opens to show the image from Fabulous Flamingo. I used my Stamparatus to line up all of the layers, making it so much easier to stamp. Sadly, the flamingo is retiring at the end of May. I used a piece of Tropical Escape DSP to anchor the flamingo panel. I will miss that DSP! You can see another little strip of it down the left side of the card....

scissorspapercard, Stampin' Up!, Art With Heart, Colour Creations, Tropical Chic Bundle, Fabulous Flamingo, Amazing Life, Tropical Escape DSP, Fancy Fold

...which is actually on the inside of the card. I like how it adds interest to both the middle layer and the inside layer - much like the flamingo for the front and middle.

So how do you make this card? Just take a piece of A4 card and cut it in half longways. Score at 4 inches and 8 inches and you're done! Oh, cut your window in the first 4 inch section so that it becomes the front of the card. This way the shorter panel becomes the middle flap, showing that little strip of DSP from the inside. It also folds much more nicely this way.

Time to pop on over to Catherine's blog for the rest of this week's Shaded Spruce cards. Don't forget that if you right click on each link you can open the link in a new tab or window to avoid having to jump back and forwards from Catherine's blog.

Bye for now,

Tina

Thursday, 11 April 2019

JAI #452: Just Add A Sketch

Hi!


Welcome to the new Just Add Ink challenge. This week it's a sketch challenged designed by me! This was a fun sketch to design, and I think it can be interpreted so many ways - don't just stick to circles, any shape is fine!


I think I designed this before Christmas and I had snowflakes in my head instead of circles. In the end, I used a mix of Pokeballs and stars.

scissorspapercard, Stampin' Up!, Just Add Ink, Amazing Life Bundle, Picture Perfect Birthday, Large Numbers, Classic Garage DSP, Punch Art, Pokemon

I made this card for my oldest child, Alex, who is turning 16 (gulp!) in a few days. He's mad on Pokemon Go, and the Pokeballs are a big part of the game. The Crushed Curry DSP is from the Classic Garage DSP Pack, I loved the subtle grungy pattern in it.

scissorspapercard, Stampin' Up!, Just Add Ink, Amazing Life Bundle, Picture Perfect Birthday, Large Numbers, Classic Garage DSP, Punch Art, Pokemon

To make the Pokeballs I punched 1 1/4 inch circles in Whisper White and Real Red, then snipped the red ones in half. I added a thin strip of Basic Black to the back of the red and then adhered the whole lot to the white. To get the little circles, I used a 1/4 inch circle punch and then punched a 1/2 inch circle over the opening to create a black 'donut'. I then adhered it over the top of a 1/2 inch white circle and then glued that to the larger circle. Done!

The numbers 16 were done in a similar way to the larger part of the Pokeball. The hardest part was lining up the black strip!

scissorspapercard, Stampin' Up!, Just Add Ink, Amazing Life Bundle, Picture Perfect Birthday, Large Numbers, Classic Garage DSP, Punch Art, Pokemon

I made a fourth Pokeball for the inside of the card too - why not when I'm already making three? LOL. I hope Alex loves his card, I know I had fun making it.

Time to head on over to the Just Add Ink blog, where you can find the rest of the Design Team's cards  and add your own to the challenge.

Bye for now,

Tina

Tuesday, 9 April 2019

Beautifully Detailed Razzleberry Cake

Hi!


Hi and welcome to this week's Colour Creations Blog Share. As this goes live, I should be heading to bed as I have a very early start tomorrow on my NZ trip, but knowing me I will still be packing and trying to get all those last minute things done. Oh well, I can sleep on the plane!

This week we are creating with Rich Razzleberry. I can remember way back when it was a new In Colour that we got in Australia at the start of the process of bringing our market into line with the USA market. We also got Melon Mambo and Soft Suede at the same time. Ahh, the memories!

scissorspapercard, Stampin' Up!, Art With Heart, Colour Creations, Well Said, Amazing Life Bundle, Beautifully Detailed DSP, Subtle DTIEF, Stampin' Blends

I've paired the colour with the Beautifully Detailed Laser Cut Paper and the Rectangle Stitched Framelits. I stared by cutting the frame using the rectangle dies. I added adhesive around the back of the frame and then laid it over the sheet of laser cut paper, lining up the two edges. I then trimmed off the excess laser cut paper and adhered the whole piece to the Rich Razzleberry card base, which I had embossed with the Subtle DTIEF.

scissorspapercard, Stampin' Up!, Art With Heart, Colour Creations, Well Said, Amazing Life Bundle, Beautifully Detailed DSP, Subtle DTIEF, Stampin' Blends

I pulled out my Rich Razzleberry Blends to colour the cake from Amazing Life, which is in a bundle with the Stitched Rectangle Framelits. To get a rounded look on the cake layers I coloured about a third of the way in from each edge with the Light Blend. I then coloured about half of each of those thirds with the Dark Blend. I used the Light Blend to smooth the lines, but not to go over the middle section. Finally, I coloured over the middle section very lightly and quickly the the Light Blend, applying as little colour as possible to the cardstock. You could probably even use the Colour Lifter in this middle section to get a 'shine' line.

scissorspapercard, Stampin' Up!, Art With Heart, Colour Creations, Well Said, Amazing Life Bundle, Beautifully Detailed DSP, Subtle DTIEF, Stampin' Blends

I stamped the cake on the inside and coloured it the same way as the front. The candle is Light Bermuda Bay and the flame is Dark Daffodil Delight.

Time now to pop on over to Catherine's blog, where you can find the rest of this week's cards.

Bye for now,

Tina

Tuesday, 2 April 2019

Gettin' Real, Red.

Hi!


It's time for a new Colour Creations Blog Share. We are up to the R's this week - starting with Real Red. I'm a bit of a red fan, so I enjoyed pulling out some Real Red things and getting inky this week. Not that I don't enjoy getting inky anytime, it's just, as I'm sure you'll agree, some colours are way easier than others to get inspired by!

scissorspapercard, Stampin' Up!, Art With Heart, Colour Creations, Classic Garage DSP, Jar Of Love, Amazing Life, Colour Spritzer

My first stop is usually to check what DSP has the feature colour, and this week I chose the Classic Garage DSP. I don't have any of the other coordinating products, but it's easy enough to make a great card if you don't mind a bit of fussy cutting.

scissorspapercard, Stampin' Up!, Art With Heart, Colour Creations, Classic Garage DSP, Jar Of Love, Amazing Life, Colour Spritzer

I started by dusting off my long retired Stampin' Spritzer and using it to splatter some Basic Black ink over the Real Red DSP. I then layered some fussy cut cogs, dials and car over the top. I also added a strip of the road sign pattern as an anchor for all the other 'bits'. The 'For You' is from Jar Of Love on Very Vanilla cardstock, but it looked too clean compared to the rest, so it got the spritzer treatment too!

scissorspapercard, Stampin' Up!, Art With Heart, Colour Creations, Classic Garage DSP, Jar Of Love, Amazing Life, Colour Spritzer

While I had the spritzer out, I also added some splatters to the inside. Another strip of the Real Red DSP and I was nearly done. The car was fussy cut from the DSP, but I used a car that was along the edge of the paper. I didn't want the whole car, so why waste a whole one when I could use a partial car?

Why not pop on over to Catherine's blog, where you can find the links to the rest of this week's Colour Creations cards featuring Real Red?

Bye for now,

Tina

Tuesday, 20 November 2018

Lemon Lime, But No Twist

Hi!

Welcome to the new Colour Creations Blog Share for this week.


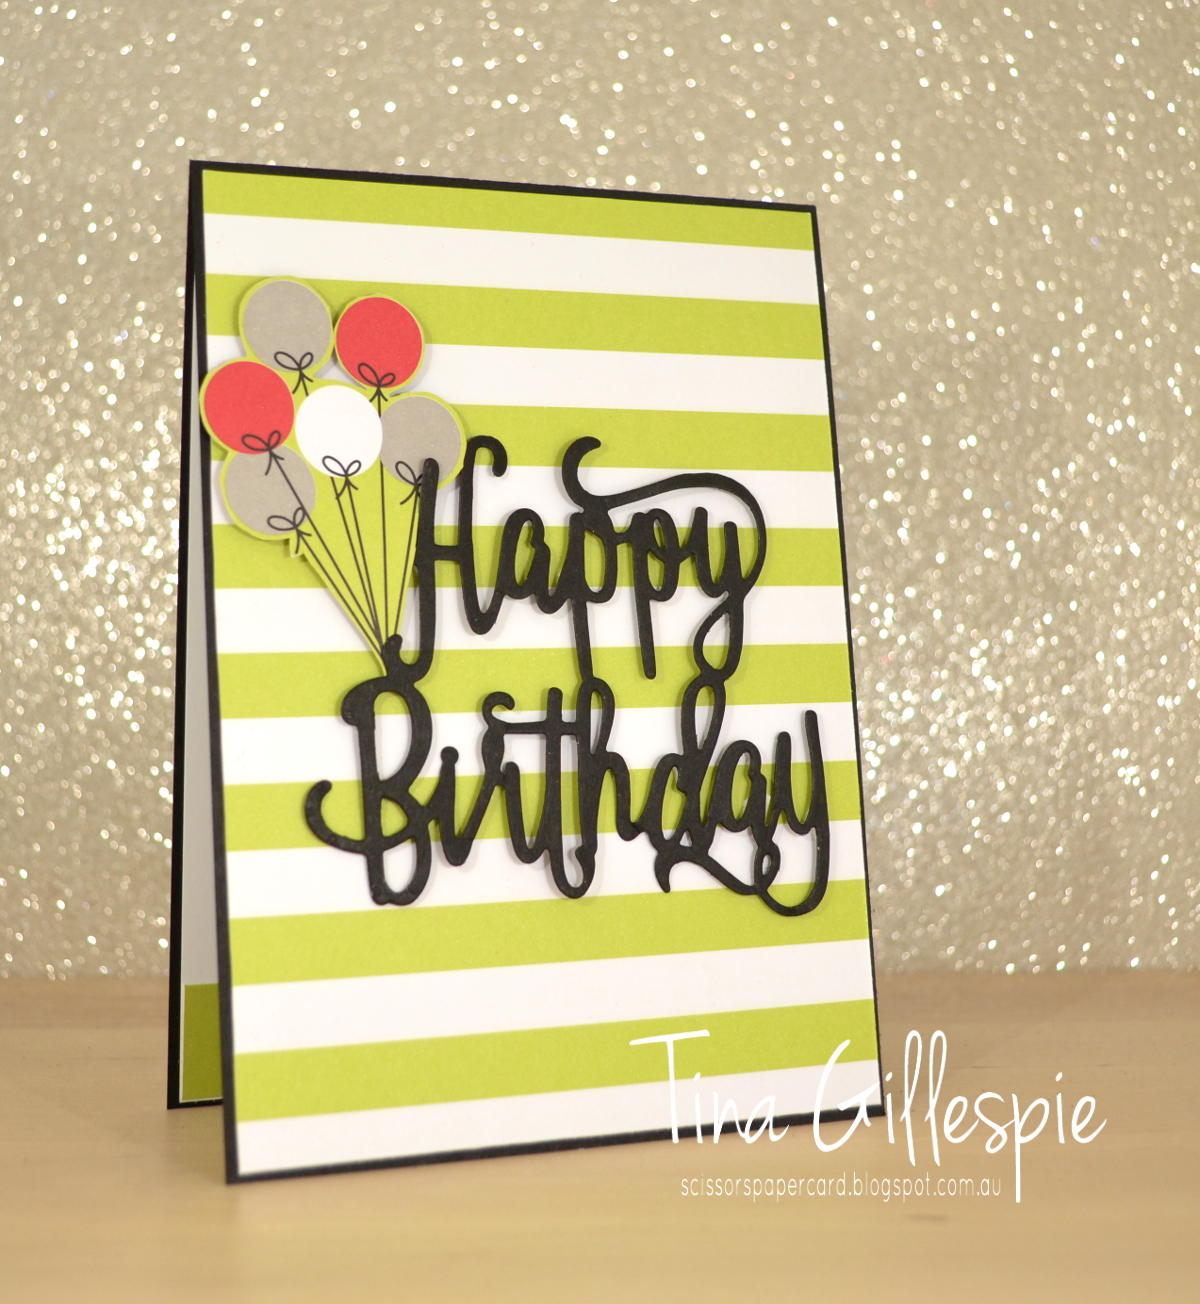
This week we are looking at Lemon Lime Twist - a colour that I originally thought 'OMG, what are they thinking???', but have since come to love! It's such a bright, fresh colour.

I've been pondering over this card for the past 2 weeks or so. It's my first 'post Orlando trip' card, but I've been thinking about it on and off while I was away. I knew I'd be jet lagged, so I wanted a simple card that wouldn't take too much brain power to put together, but still looked fabulous. Hence, the 'Lemon Lime, but no Twist' title of my post, LOL.

scissorspapercard, Stampin' Up!, Art With Heart, Colour Creations, Broadway Bound SDSP, Happy Birthday Thinlit, Amazing Life

The basic design was set pretty much from the start - the LLT stripes on a Basic Black card with the BB die cut. I liked the boldness of the colours and simplicity of the design.

scissorspapercard, Stampin' Up!, Art With Heart, Colour Creations, Broadway Bound SDSP, Happy Birthday Thinlit, Amazing Life

I worried that it was a little too simple though, so I added the fussy cut balloons from the Broadway Bound SDSP pack (which is also where the striped DSP came from). Overall, I was pleased!

scissorspapercard, Stampin' Up!, Art With Heart, Colour Creations, Broadway Bound SDSP, Happy Birthday Thinlit, Amazing Life

Oooh, did you notice that the inside contains a little sneak peek? The cupcake was also fussy cut from the Broadway Bound SDSP, but the sentiment is from a stamp set from the upcoming Occasions Catalogue called Amazing Life. It's a really fun birthday set.

As always, you can find the rest of this week's cards over at Catherine's blog. I can't wait to see what everyone has made!

Bye for now,

Tina