Pages

Showing posts with label Blendabilities. Show all posts

Friday, 3 June 2016

JAI #314: Just Add Inspiration

Hi!


As always, Friday at Just Add Ink is new challenge time!


This week Di has picked a gorgeous citrus image for our inspiration. The colours in the pic are fabulous, so that's where I decided to go with my card.


This little cutie has been sitting on my desk for a week or so, waiting for the right card. I think she's a LaLa Land stamp, and I coloured her with a mix of Copics and Blendabilities.


Her dress is a bit more vibrant than it appears in this photo - I just couldn't get Photoshop to get the colour accurate without distorting the other colours.


You can see that I used the retired Have A Cuppa DSP on my background as a nod to the citrus in the photo. Don't you just love it when you have the perfect piece of DSP in your stash?


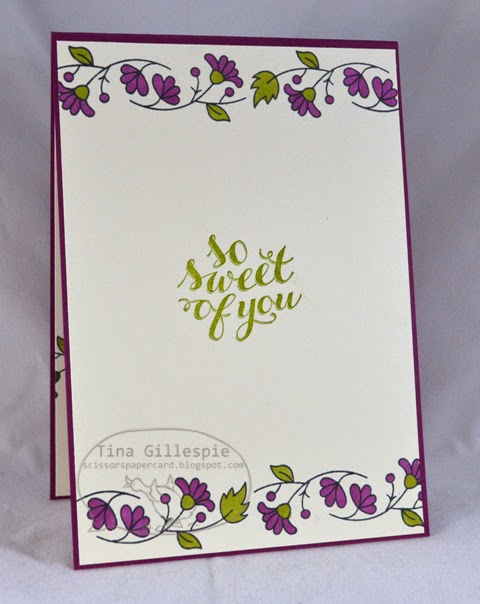
LOL, I'm not sure why I put a balloon on the inside, as there aren't any balloons on the front. It just seemed appropriate for a birthday card!


What inspiration do you take from the photo? Why don't you pop on over to see what the rest of the Just Add Ink Design Team have made?


Bye for now,


Tina

Friday, 13 May 2016

JAI #311: Just Add Masking

Hi!


We are back with another week of challenges at Just Add Ink. This week Nikki has challenged us to Just Add Masking to our projects. I needed to make a Mother's Day card for my Mother-in-Law, so I decided to make a floral card for her.


I have been a bit obsessed with colouring lately, especially with using my retired Blendabilities markers. I decided to make the card with the large flower in Birthday Blossoms so that I had good sized flowers to colour.


I used my Rich Razzleberry Blendabilites to colour the flowers while I was watching TV. Silly me got distracted and opened one of my markers over my work, leaving a splatter on the cardstock. There was no way I was going to scrap my work, so I ended up opening and closing my marker over the card a few times so that I ended up with the splatters all over the front. A very happy accident, as I love the end result!


Even though this set is a birthday stamp set, I think it works really nicely as a Mother's Day card. The stamps I used aren't specific to a birthday - and honestly - Mother's Day should be a day about celebrating mothers.


The rest of the Design Team have done a fabulous job the masking challenge. You can see their gorgeous cards, and join in the challenge, over at the Just Add Ink blog.


Bye for now,


Tina

Friday, 18 March 2016

JAI #303: Just Add An E

Hi!


Yippee! It's Friday! What have you got planned for the weekend? I'm just a bit excited to be going to see Bryan Adams at A Day On The Green tomorrow night. He's a big favourite of mine and I've seen him in concert nearly every time he's been to Australia. Can't wait!

But in the meantime, it's time for a new Just Add Ink challenge. This week it's one of my letter challenges, and we've selected 'E' for you. To enter, you just need to make a project that is somehow themed using the letter E. It could be a colour, like Elegant Eggplant, or feature something like an envelope, or use a stamp set that starts with E, like Endless Birthday Wishes. Easy, right!


I decided to create a project that was Eastern in feel. I love the Bohemian DSP for these types of projects, especially when it's teamed with Perfect Peacock.


I coloured the peacock with my Blendabilites and then used Glue Dots to secure an Expressions Natural Element (more E's!!) over the top.

I hope you can find something E related to inspire you this week.  See you over at Just Add Ink!

Bye for now,

Tina

Friday, 22 January 2016

JAI #295: Just Add A Sketch

Hi!


Here we are at the Friday end of the week again, ready for the weekend and another Just Add Ink challenge. This week we have a sketch challenge for you, designed by ME!


Funnily enough, I struggled a little with this sketch! It looks so easy, doesn't it? The hard part is all that white space. In the end though, I was really happy with the card I created.


So soft and pretty, if I do say so myself! I stamped the image from You've Got This in Momento ink and coloured it with my (retired) Blendabilites, then cut it in quarters. I matted it with a very thin matt of Old Olive, just to help it pop from the background. I finally popped each square up using Dimensionals.


It's really difficult to see, but I also stamped the big background stamp from You've Got This in Pink Pirouette behind the squares. It helps to ground them a little, and because I stamped the sentiment over the image it helps link the sentiment to the flower.


OK, now it's really, really hard to see, but I also stamped the background stamp on the inside.  This time I stamped it off first so that it is very pale. I wanted the effect, but I didn't want to feel like I have to 'write around' the image, if you get what I mean.

I've had a sneak peek of the Design Team's cards this week, and they are all amazing!  I really love what they've done with this sketch, and I'm sure you'll do something fabulous with it too.  Why don't you pop on over to the Just Add Ink blog to take a look?

Bye for now,

Tina

Monday, 2 November 2015

Tap Tap Tap To Say Thanks

Hi!

I found this card in my 'To Blog' folder on my computer and realised I was yet to post it on my blog. I made it quite a while ago, so it was probably about time I shared it.


The typewriter was stamped in Momento and coloured with my Blendabilities. I also used my Silver Marker to colour some of the metal bits on the image. I deliberately used a quick, messy style of colouring, as I think it suits the image.


I love the 'tap tap tap' stamp for finishing off the inside of the card.


Bye for now,

Tina

Thursday, 30 July 2015

JAI #273: Just Add Colour

Hi!

It's Friday, so you know what that means - time for a new Just Add Ink challenge.  This week we have a gorgeous colour combination for you.  I fell in love with this combo instantly!


How fabulous is it?  The beautiful, rich jewel colours are balanced wonderfully by the neutrals.  I've been wanting to play with Hey Girl since I got it a month or so ago, and I had a niece turning 11, so it was perfect timing!


I got my Blendabilites out to colour this one. I know, they are discontinued, so it's a bit of a tease, but I thought they'd work really well with the image. I used my Blackberry Bliss Stampin' Write marker for the butterflies as there were no BB Blendies. To ground the images I used my Aqua Painter with some Crumb Cake ink.  It's difficult to tell, but I also used the Aqua Painter with some Soft Sky ink to do the sky.  The card just looked a bit funny stark white.


One of the things I love about this set is the cute little butterflies.  I especially love that you get two - one facing in each direction.

See you over at Just Add Ink!

Bye for now,

Tina

Friday, 27 March 2015

JAI #256: Just Add A Sketch

Hi!

This week at Just Add Ink it's a sketch challenge, designed by me for your inspiration.


It's a cute little sketch, if I do say so myself!  Here's what I did with it.


The most difficult part was choosing which tag punch to use!  To matt the tag I cut a strip of Rose Red cardstock that was 2 1/8 inches wide (the tags are 2 inches wide) and then punched it with the Ornate Tag Topped punch.  However, instead of sliding the cardstock along the channel into the punch I inserted it into the punch over the top of the channel before punching.


I love this sweet little baby stamp!  I framed the image with a couple of rows of paper piercing. It's a great, inexpensive way to add a feature to a card.


What are you going to do with the sketch?  The Design Team have had a fun time playing with it and have come up with a stunning bunch of cards.  You can see them over at Just Add Ink.

Bye for now,

Tina

Friday, 20 March 2015

JAI #255: Just Add Eggs or Ovals!

Hi!

This week at Just Add Ink we are challenging you to add Eggs or Ovals to your papercrafting.  While at this time of year it is a chance for you to show us your Easter crafting, it doesn't have to be Easter related - any eggs or ovals are fine, as long as they are a feature on your card.


I don't usually make Easter cards, so I don't have any Easter stamp sets.  It was an easy problem to solve though, I just browsed through my My Digital Studio downloads until I found something suitable.  This little cutie came from the Eggstra Spectacular Stamp Brush set.


I coloured the images with my Blendabilites.  I think the little sheep is so very super cute!


With a little bit of digital cropping and pasting I created the rows of Easter Eggs to liven up the inside of the card.

So what will you do with ovals or eggs? Pop on over to the Just Add Ink blog to see what the other Design Team members have created this week.

Bye for now,

Tina

Wednesday, 18 February 2015

MDS Meets Blendabilities

Hi!

Today I have a hybrid card for you.  Hybrid simply means that part of the card was created digitally and printed, and the rest of the card was made using 'traditional' card making methods.


In this case the digital element is the hexagon background.  It's one that I have in my My Digital Studio library of downloads.  It's part of the Lemonade Stand download.  I simply created a 6x4 inch canvas in MDS, selected, positioned and resized the image and then printed it.  I then coloured random hexagons with my Blendability markers.  Easy!


The hard part was actually finishing the card!  I didn't want to cover too much of the background I'd spent so much time working on.  I ended up using the 'yay' diecut from the Circle Flip Card Thinlits and then a retired stamp to finish the sentiment.


I finished off the inside with the cake stamp from the Big Day Sale-A-Bration stamp set.  It's such a great set for making Birthday cards!

Bye for now,

Tina

Thursday, 20 November 2014

JAI #241: Just Add A Sketch!

Hi!

Woo Hoo, it's Friday! Yes, it's been one of those weeks! Let me forget it all and jump into the new challenge at Just Add Ink.  This week we have a sketch for you.  It's one I designed for the challenge, and I hope it inspires you all.

 
I decided to stamp a whole panel of flowers, colour them with my Blendabilities and then chop it up to create the three vertical panels in the sketch.  I think chopping up the cardstock after colouring them was the hardest part of this card - it wasn't something I wanted to mess up after spending so long colouring!


It all turned out beautifully though! I used Wisteria Wonder, Old Olive and Daffodil Delight Blendabilities to colour the flowers and then coordinating ribbon and cardstock.


I couldn't get the horizontal panel working to my satisfaction as it was in the sketch, so I decided to abandon it and try something different.  The ribbon/die cut are a great substitute I think.


I really love these flowers from the I Like You Hostess stamp set - they are great for colouring!

I hope you can find time to play along with my sketch this week at Just Add Ink.  I'd love to see how you interpret it!

Bye for now,

Tina

Monday, 22 September 2014

Perfect Peacock In Blendabilities

Hi!

It's a bit of an upside down day for me today - Hudson is home sick and so my usual routine is out the window!  He's got a cold, so there's a bit of grumpiness and a very snotty nose.  Best not to share those germs!


I have wanted this stamp ever since I first saw it.  Shelli Gardiner demonstrated a few projects at Convention back in May that used this stamp and I think I, and around 700 other Demonstrators, fell in love with it on the spot!  It's such a beautiful stamp, and it was lots of fun to colour with my Blendabilities Markers.


I recently had a niece turn 21 and I thought that such a special occasion warranted an extra special card.  I stamped the sentiment on Vellum so that I didn't obscure the peacock too much.  I cut the 21 numbers using the number dies in the File Tabs Edgelits, and then finished off the card with some scattered Sequins.


The inside of the card looked much prettier in real life.  I had to play with the colours a bit so you could see the peacock I stamped on the inside, which makes the sentiment colour look hideous.  You'll have to trust me that it was very pretty!

Bye for now,

Tina

Monday, 1 September 2014

Curvy Bordering Blooms

Hi!

Have you noticed that Stampin' Up! have introduced Photopolymer stamps in the new Catalogues? They are a fabulous new stamping option.  You may have tried photopolymer stamps before and been unimpressed with the results, but you won't be unimpressed with our new range.  They have been specifically designed to work with our inks, so you can wave goodbye to splotchy, patchy stamped images. Yay!


Another great advantage of the photopolymer stamps is that they are flexible and can be bent into different shapes.  On this card I bent the floral border stamp into a curve to wrap around the Thanks sentiment.  I think it looks great, and was certainly a 'wow' amongst the ladies who made this card with me.


We stamped the image in Momento ink and coloured the image with Blendabilities.  One thing to be careful of when you bend the stamp is to make sure it doesn't buckle, as it means you will probably end up with ink on the buckle which will transfer to your cardstock.


On the inside I reverted the stamp back to it's original, straight form.  Which way do you like the stamp? Bent or straight?

Bye for now,

Tina

Friday, 22 August 2014

JAI #228: Just Add Colour

Hi!

It's time for another Just Add Ink Challenge!  This week Kim has put together a fabulous colour combination to inspire us.


It's such a pretty combination!  I decided to go with a floral card using the new hostess stamp set called I Like You.


I cheated a little with the colours as I wanted to use my Blendabilities to colour the images and they don't come in Blackberry Bliss or Mossy Meadow.  I switched them for Wisteria Wonder and Old Olive.


My card is actually an easel card. I wanted to make an extra special card for someone who was having a bit of a rough time and needed cheering up.


For a touch of luxury I used a row of Rhinestones to hold open the card in it's easel position.


Well, that's it for me for now!  I hope to see you over at Just Add Ink with these gorgeous colours.

Bye for now,

Tina

Wednesday, 20 August 2014

I Like You In Wisteria Wonder

Hi!

The hostess stamp set I Like You was made for the Blendabilities I think!  It's a fabulous set for colouring, especially when you are just starting out.  The smaller areas are a little easier to blend with great effect.


This card was made as a sample for a Blendabilities colouring class.  The simple white on white design of the card really lets the gorgeous flower take centre stage on the card.


You can see that I popped the smaller flower up to give a little more dimension.


This little flower on the inside is also popped up.  The main reason for this is that when you colour with Blendabilites the colour shows through on the back of the cardstock.  I didn't want the very back of my card to have colour on it, so this was a nice solution.

If you'd like to learn how to colour with Blendabilites please get in touch with me.  I can offer small group classes at a time that suits you.  It's lots of fun!

Bye for now,

Tina