Hi!
Time for a new Colour Creations Blog Share. This week it's Smokey Slate, which I surprisingly found to be a hard colour toward with! I asked Rob for inspiration and he straight away said to make a Game Of Thrones card. Umm, no! In the end, I decided to go with a classic pink and grey combo.
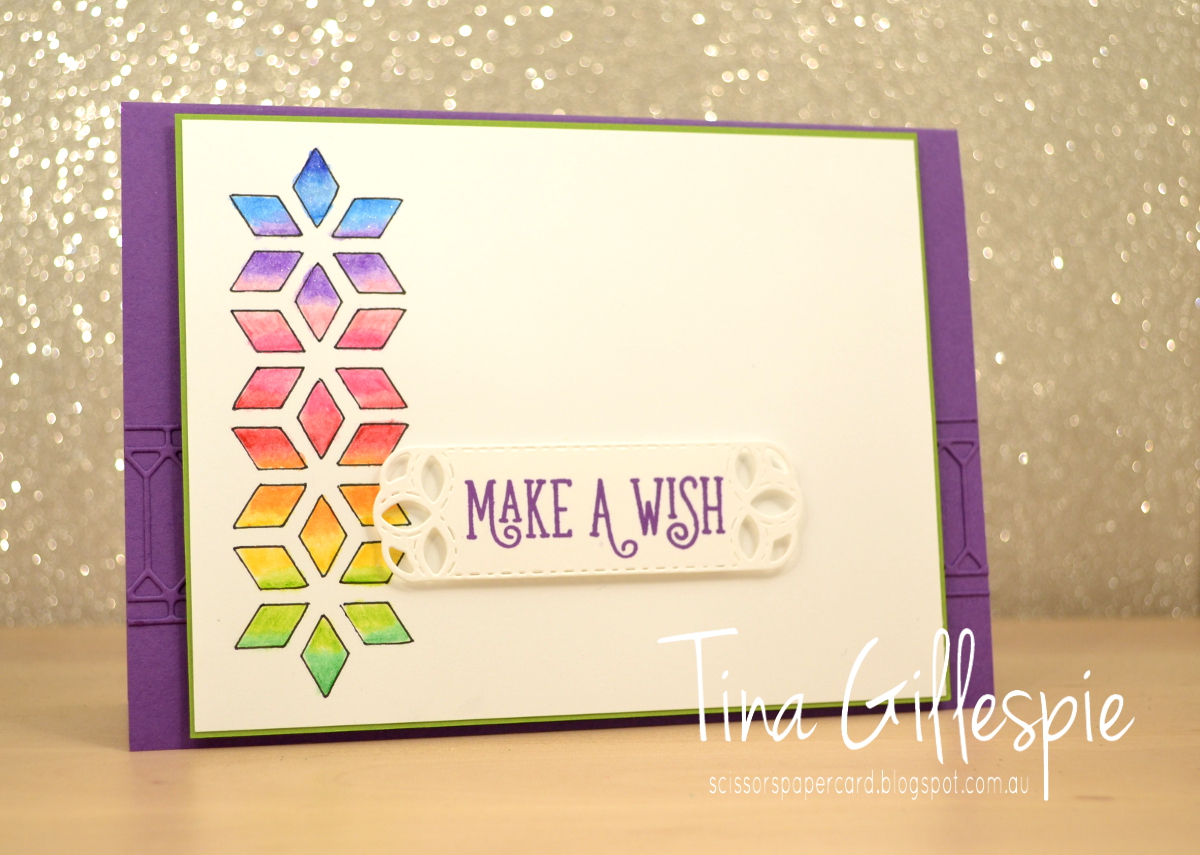
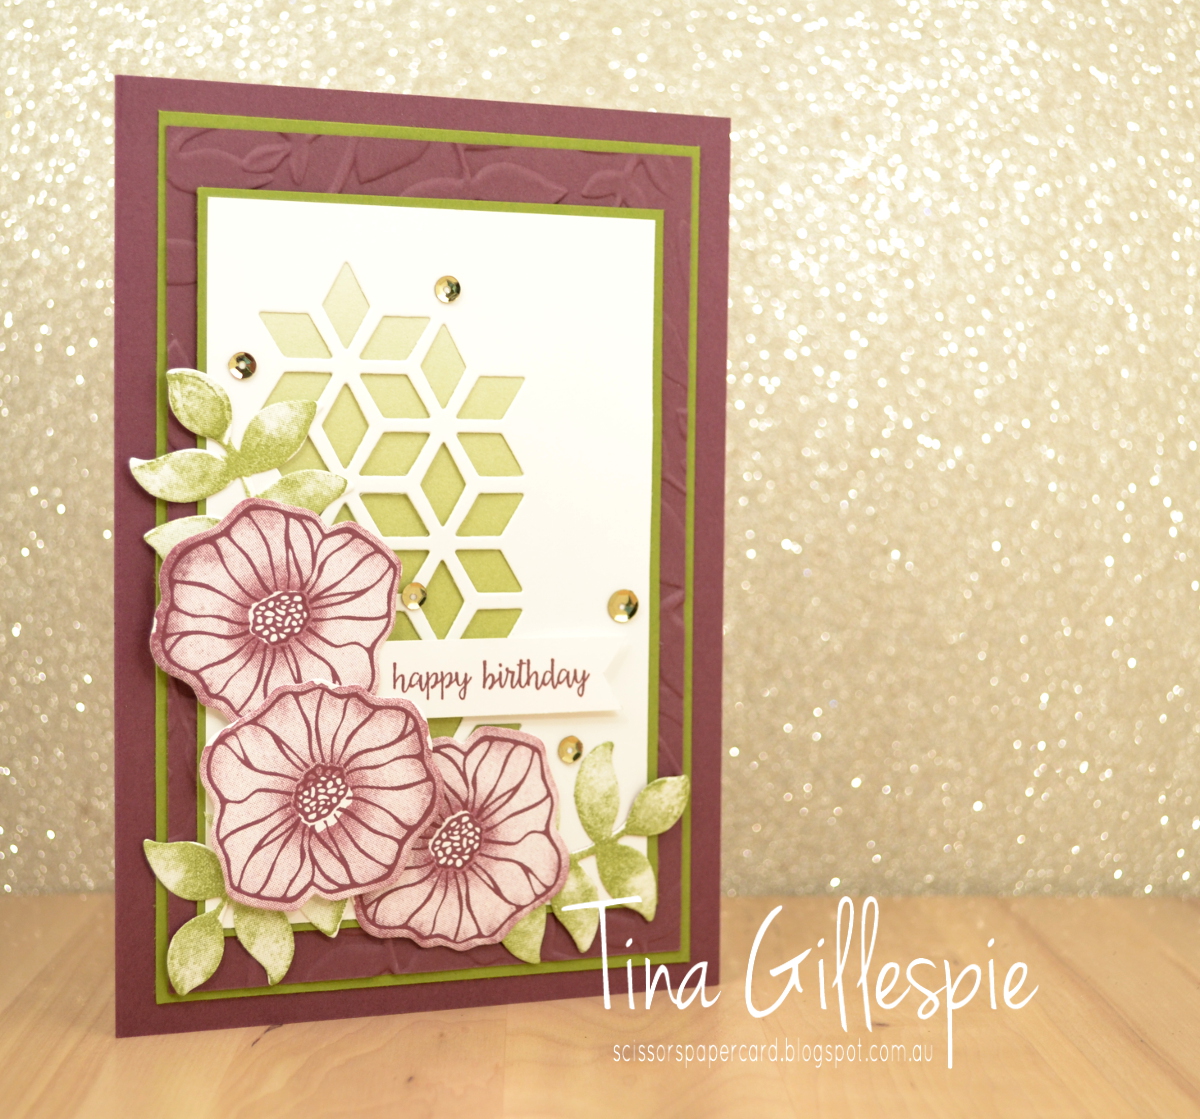
My new Rococo Rose ink pad was on my desk, so I did a bit of smooshing with it. I then added some Smokey Slate smooshing around the edges. Once it dried I used my retiring Eclectic Layers dies to cut a few diamonds into the cardstock.
The stamp set is a new one from the upcoming Annual Catalogue, called Genuine Gems. The pieces on my card are actually chopped from a larger sentiment that says 'I told the universe to send some awesome your way'. I half coloured the open letters and then matted them in halves on Smokey Slate and Rococo Rose cardstock. I was going for a card for an older teen girl, so I was trying a few funky things out.
I did a little more smooshing on the inside. It's hard to see, but there is some Smokey Slate in there amongst the Rococo Rose!
Tina to pop on over to Catherine's blog, where you can find the rest of this week's Smokey Slate cards.
Bye for now,
Tina
Showing posts with label Eclectic Layers Thinlits. Show all posts
Tuesday, 30 April 2019
Tuesday, 28 August 2018
A Crumb Cake CASE
Hi!
Here we are with another Colour Creations Blog Share. I've lost track of the week number, but I've managed to play along every week now - Im happy with that! This week we are focussed on one of my very favourite neutrals - Crumb Cake. Is it a colour that you use lots?
I can't remember why I was flicking through the catalogue, but a card on page 139 caught my eye. I'm sure you will work out which one when you have a look. I don't have the Eastern Beauty suite, so I decided to substitute with other stuff from my stash. I was a bit stumped on what to use for the window part until I came across the piece of Crumb Cake I used on my card. I'd cut it ages ago and not used it. Once I trimmed it for the front it was perfect!
I went for some lovely bright colours for the flower and leaves - Highland Heather, Gorgeous Grape and Crumb Cake for the flower and Lemon Line Twist with Granny Apple Green for the leaves. The epoxy dots I used on the front are retired, but you'll soon be able to purchase something similar from the Holiday Catalogue 😉
The flower on the inside was my first attempt. I used Early Espresso on the centre, but thought it turned out too dark. Instead of wasting the effort, I popped it on the inside!
Why not pop on over to Catherine's blog, where you can see the rest of this week's Crumb Cake cards? You can bet I will!
Bye for now,
Tina
Thursday, 23 August 2018
AWH August Blog Hop: Coloured Images
Hi!
For this month's Blog Hop I decided to stretch the rules a little. The theme is Coloured Images, but instead of stamping and colouring an image I created a mask which I used to draw my own image to colour.
Do you recognise it? It's a die from the Eclectic Layers Thinlits set. I cut it from scrap cardstock, trimmed it to the size I was after, used washi to adhere it to my cardstock and then traced through the design with a pen.
I then used my watercolour pencils to colour the rainbow of colours in the design. I use a Wink Of Stella pen to blend the colours together. LOL, I don't think I've ever used the pencils with my Aqua Painter! Each of the little sections was coloured with two colours, leaving a little white in the middle. The WOS pen is then used to smooth the colour and to pull it into the white section until the two colours blend nicely.
Just in case you were wondering, here's the colours I used. It was a mix of the old and new packs to get the perfect spectrum. The new collection of Watercolour Pencils are available this month, however Stampin' Up! have said that they may be in an upcoming catalogue.
I used some of the same colours to colour the butterfly on the inside.
Are you a colourer? What's your preferred medium? Are you keen on pencils, markers or Blends? I love all three!
That' sit for me, so now it’s time for you to hop on over to Ros Davidson's blog. She makes awesome cards, and she's also the one that organises us to do our hops. Thanks, Ros!
Here's a list of all of the hoppers tonight in case you come across a broken link:
Tonight the Art With Heart team are sharing creative projects featuring cards with images that you can colour in. We hope our Blog Hop inspires you to pick up some Stampin’ Write markers, Watercolour pencils, Stampin' Blends or another form of colouring medium and colour in with your stamps.
Don’t forget to contact any of the ladies on the blog hop to order any products, especially the limited edition Colour Your Season products.
For this month's Blog Hop I decided to stretch the rules a little. The theme is Coloured Images, but instead of stamping and colouring an image I created a mask which I used to draw my own image to colour.
Do you recognise it? It's a die from the Eclectic Layers Thinlits set. I cut it from scrap cardstock, trimmed it to the size I was after, used washi to adhere it to my cardstock and then traced through the design with a pen.
I then used my watercolour pencils to colour the rainbow of colours in the design. I use a Wink Of Stella pen to blend the colours together. LOL, I don't think I've ever used the pencils with my Aqua Painter! Each of the little sections was coloured with two colours, leaving a little white in the middle. The WOS pen is then used to smooth the colour and to pull it into the white section until the two colours blend nicely.
Just in case you were wondering, here's the colours I used. It was a mix of the old and new packs to get the perfect spectrum. The new collection of Watercolour Pencils are available this month, however Stampin' Up! have said that they may be in an upcoming catalogue.
I used some of the same colours to colour the butterfly on the inside.
Are you a colourer? What's your preferred medium? Are you keen on pencils, markers or Blends? I love all three!
That' sit for me, so now it’s time for you to hop on over to Ros Davidson's blog. She makes awesome cards, and she's also the one that organises us to do our hops. Thanks, Ros!
Here's a list of all of the hoppers tonight in case you come across a broken link:
Bye for now,
Tina
Thursday, 26 October 2017
JAI #383: Just Add Cake
Hi!
Welcome back to another challenge this week at Just Add Ink. This week Chloe has challenged us to Just Add Cake to our cards.
Pardon the pun, but I thought this would be a piece of cake! Then I had a look through my stash..... Nothing! No cake related stamps, dies or punches. What?!? Thankfully the ole thinking cap was working well this week, and I eventually came up with the brilliant idea (if I do say so myself!) of making a cake topper.
I wanted to go with something ultra feminine and girly, so I decided that I'd start with pink and go from there. The Gold Glimmer paper adds a touch of glam to the topper, don't you think?
I love the look of the layered ribbon streamers at the base of the topper. I just selected a few different trims that worked well together, cut them the same length and then stapled them to the bottom layer of the topper. Too easy!
The topper was adhered to a long bamboo skewer using a strong glue. A second Powder Pink scalloped circle was glued to the back to hide the skewer.
I chopped off around a third of the skewer so that the topper didn't sit too high off the cupcake. I really hate wasting anything, so I decided I'd make a mini topper to go with the main one. I already had a couple of stars cut from the Gold Glimmer paper, so it was easy enough to make. Then I thought that two cupcakes looked a little lonely, so I made three more mini toppers. Now it looks like a party of cupcakes! My 12yo daughter Ada gave her tick of approval, so I guess I hit the mark!
The rest of the Design Team have come up with some cracking great ideas this week. You can see their cards over at the Just Add Ink blog, where you can also link up your Just Add Cake creation. Can't wait to see what you do!
Bye for now,
Tina
Thursday, 19 October 2017
JAI #382: Just Add Colour
Hi!
I hope you've had a lovely week. We've had a few hot days here in Adelaide, and I've loved it! Bring on summer!
During the week, I also created a card for this week's Just Add Ink challenge. It's a colour combo this week, suggested by Patrice.
Isn't it lovely - the yummy neutrals with the pop of Fresh Fig.
There's lots of different bits and pieces on this card. Do you create like that, or do you stick to one stamp set? I do a bit of both. In this case I've stamped with the flourish from Timeless Textures, the flowers from Oh So Eclectic and the sentiment from Jar Of Love. Chuck in some vellum, Black Thread, silver sequins, some Pick A Pattern Washi tape and leaf dies from Eclectic Layers, and you have a card!
I coloured the flowers with my Fresh Fig ink pad and a Blender Pen. I wanted a heavy concentration of colour at the base of the flower, fading to a super pale shade near the tips of the petals.
I used a lot of the same elements on the inside, but I opted to leave out the black elements, as they dominated too much in the smaller space I was decorating.
This was such a fun colour combination. You can see what the rest of the team have created over at Just Add Ink. You can also link up your card there when you're ready.
Bye for now,
Tina
Monday, 9 October 2017
Eclectic Colour Theory
Hi!
One of the DSP pack that is included in this month's Buy 3 Get 1 Free sale is the Colour Theory DSP stack. It's a great little 6x6 inch stack, that has lovely graduated colour pages. You can see the Old Olive paper behind the diamond grid die cut section in this card.
I recently purchased the Oh So Eclectic bundle and this was the first card I made with it. Do you ever buy a stamp set, die set or bundle just for one item? Sigh.... I have! In this case, I purchased the bundle just for that diamond grid die. I have come to love the rest of the bundle though.
There's lots of layers on this card - 6, not counting the flowers and leaves on the top. The colour combo of Fresh Fig, Old Olive and Very Vanilla is one I hadn't tried before, but I'm really loving it. What do you think?
Bye for now,
Tina
Subscribe to:
Posts (Atom)