Pages

Thursday 28 September 2017

JAI #379: Just Add Inspiration

Hi!

I hope you're ready for Friday and the new challenge!


This week at Just Add Ink Kelly has provided a beautiful Inspiration Photo for the challenge. I love it, as it makes me think of summer. I am soooo over winter and ready for summer to roll around, so I was excited to create using this photo as my guide.


I decided that rather than my usual literal approach to Inspiration Photos, this time I was going to find inspiration in another way. After a bit of consideration, I decided to use the colours as the basis for my card.

scissorspapercard, Stampin' Up!, Just Add Ink, Foil Frenzy SDSP, Butterfly Framelits, Sunshine Sayings, No Bones About It, Butterfly Basics

I mostly went with the pink and the green from the photo, with touches of brown, black and white. The pitcher reminded me of a strawberry champagne cocktail I particularly enjoy over summer, so I decided to include some 'bubbles' in my card as an extra little tribute.

scissorspapercard, Stampin' Up!, Just Add Ink, Foil Frenzy SDSP, Butterfly Framelits, Sunshine Sayings, No Bones About It, Butterfly Basics

I used the Lemon Lime Twist Foil Frenzy SDSP to represent the bubbles. The foil finish adds a touch of glam to the card without being overwhelming. Sometimes a little bit of the Foil Frenzy SDSP goes a long way!

scissorspapercard, Stampin' Up!, Just Add Ink, Foil Frenzy SDSP, Butterfly Framelits, Sunshine Sayings, No Bones About It, Butterfly Basics

I used a spotty stamp from No Bones About It to carry the bubbly look through to the inside of the card. It seemed a bit funny to use a dinosaur stamp on a girly, butterfly card - but it works!

What do you see in the Inspiration Photo? You can link your card over at Just Add Ink, where you can also see the cards that the rest of the Design team have created. It's a fabulous lot, as usual!

Bye for now,

Tina

Wednesday 27 September 2017

AWH HOC Week 18

Hi!

My apologies for the silence on my blog lately. I've had a couple of minor, and thankfully fixable, health issues, and as well as sucking away my energy they seem to have sucked away my creativity. I'm on the mend again, just in time for this week's Heart Of Christmas blog share. I missed being able to play along last week, so I'm glad to be back in the swing of things this week.


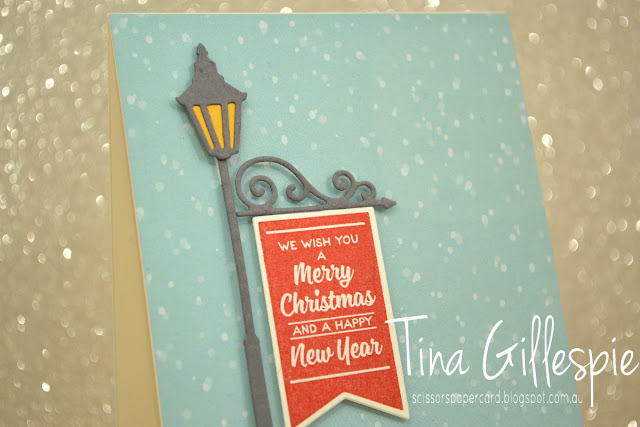
One of the first things I saw in the new Holiday Catalogue was the Brightly Lit bundle, which included the fabulous lamp post stamps and dies. I immediately thought of Narnia - we are all big fans in this house! The bundle, and Christmas Around The World DSP, found it's way to my house, but after that I was stumped. In the end I decided to make a simple Christmas card featuring the lamp post dies.

scissorspapercard, Stampin' Up!, Brightly Lit, Christmas Lamppost Thinlits, Christmas Around The World

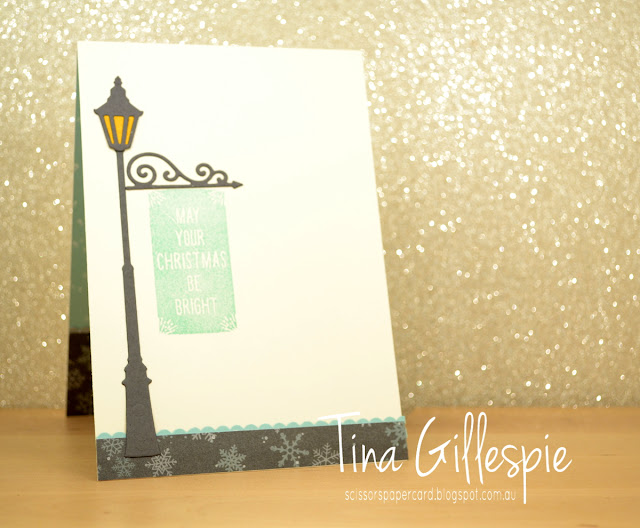
One of the things I decided to do on this card, was to have the DSP go edge to edge, rather than the card base forming a mat. When I do this, I always cut my card base to be 4" wide rather than 4 1/8", as it's more cost efficient to cut your DSP 4" rather than 4 1/8" to cover the whole front. Cutting it to 4" means you can get 6 fronts out of one sheet of DSP rather than 4.

scissorspapercard, Stampin' Up!, Brightly Lit, Christmas Lamppost Thinlits, Christmas Around The World

I popped up the main part of the lamp post BEFORE I realised how tiny I'd need to cut my Mini Dimensionals in order to pop up the lamp post arm (I wonder what the correct name is?). I think I cut each Mini Dimensional into 4 tiny strips to be able to fit under the dis cut and not be seen. I'm pretty impressed with that effort!

scissorspapercard, Stampin' Up!, Brightly Lit, Christmas Lamppost Thinlits, Christmas Around The World

Another lamp post and banner completes the inside. I'm really looking forward to having a bit more of a play with this set now that my mojo is slowly returning!

Why don't you pop on over to Claire's blog now? You can find links to the rest of the team there.

Bye for now,

Tina

Thursday 21 September 2017

AWH Blog Hop: Fancy Folds

Hi!


Welcome to another Art with Heart Team blog hop where we are focusing on fancy folds. You will find loads of creative inspiration tonight, showcasing different folding techniques and projects. Don't be afraid of trying some Fancy Fold cards; they may look intimidating, but in fact, they are not that difficult to create.


scissorspapercard, Stampin' Up!, Art With Heart, Wood Textures, Number Of Years, Milestone Moments, Tabs For Everything, Bunch Of Blossoms

I was recently asked to make a birthday card for a woman turning 50, but it had to be big enough for around 30 people to sign. My first thought was to make a super-sized card, but I thought about how annoying that would be to store, so I decided to make something that was the size of a regular card, and add some extra pages for the guests to write on.

scissorspapercard, Stampin' Up!, Art With Heart, Wood Textures, Number Of Years, Milestone Moments, Tabs For Everything, Bunch Of Blossoms

I'm not sure of the name of the fold, but you pretty much take a sheet of cardstock that is double the height of the finished card and 3-4 times the width. In this case I used a sheet of 12x12 cardstock in Elegant Eggplant. I should mention at this point that my brief included using purple and no flowers - the recipient is a really outdoorsy kind of person who enjoys camping, etc.

scissorspapercard, Stampin' Up!, Art With Heart, Wood Textures, Number Of Years, Milestone Moments, Tabs For Everything, Bunch Of Blossoms

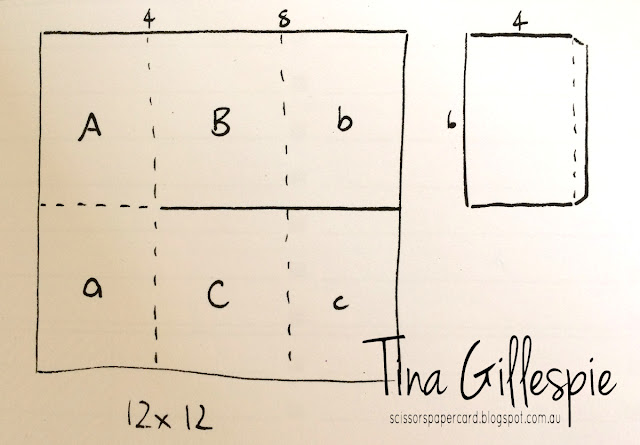
I scored the 12x12 at 4 and 8 inches, and then turned it 90 degrees and cut at 6 inches from the edge and stopping at the second score line from the edge. I also cut two extra pieces of cardstock that were 6x4, with an additional flap on one 6 inch side. Here's a diagram that shows what I did. Dashed lines are scored, solid are cutting lines, and all measurements are in inches.

scissorspapercard, Stampin' Up!, Art With Heart, Wood Textures, Number Of Years, Milestone Moments, Tabs For Everything, Bunch Of Blossoms

I adhered the to extra flaps to the edges of b and c. I then adhered A to a, B to b and C to c using Tear And Tape Adhesive. This creates a little book with 8 pages. You could leave the top of each page open, so that you could have extra tags in the pockets too.

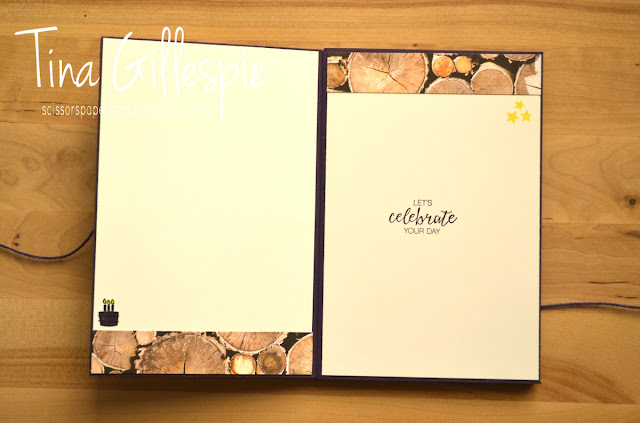
I decorated the front and back cover with Wood Textures DSP and used another piece of cardstock to act as a spine, hiding all of the folds. I added a length of twine to the cover before adding the spine, so that the card can be tied shut.

scissorspapercard, Stampin' Up!, Art With Heart, Wood Textures, Number Of Years, Milestone Moments, Tabs For Everything, Bunch Of Blossoms

Each of the pages was decorated with a little more of the DSP, and I also added a few stamps from the Tabs For Everything set to give it a bit more colour. I heard that the card was a hit, so I was very pleased!

Well, that's it for me, so now you're hopping off to visit Kate Morgan's blog. She always has something fabulous that is bound to inspire.
If you find a broken link or have come to this blog hop from a different entry point, you can view the participants below:


Bye for now,

Tina

Thursday 14 September 2017

JAI #377: Just Add Colour

Hi!

I'm a bit excited for this week's Just Add Ink challenge!


This week it's a colour combination, suggested by Rochelle, and I think it rocks! I love the mix of blues, and the addition of Lemon Lime Twist gives it a fresh lift. What do you think?


As I was very enthused about this combo, I decided to cut loose and have a lot of fun with it. You know that fun = mess, don't you? LOL

scissorspapercard, Stampin' Up!, Just Add Ink, Best Birds, Swirly Bird, Playful Backgrounds, Embossing Paste

Would you believe that there are three different stamp sets used on this card? I started with the swooshy stamp in Playful Backgrounds in Pool Party. I then stamped some splatters from Swirly Bird in Dapper Denim over the top. I then got out my Embossing Paste and added some Lemon Lime Twist, before applying it over the top of the stamping using the diamond mask from the Pattern Party Decorative Masks.

scissorspapercard, Stampin' Up!, Just Add Ink, Best Birds, Swirly Bird, Playful Backgrounds, Embossing Paste

While it dried, I stamped and watercoloured the images from Best Birds. I've had this bundle for a year and hardly used it - now that I've started playing with it, I'm not sure why I haven't done so before now. It's a great set!

scissorspapercard, Stampin' Up!, Just Add Ink, Best Birds, Swirly Bird, Playful Backgrounds, Embossing Paste

I sort of ran out of room for a sentiment on the front, so I had to put it in the inside. I really tried on the front, but there wasn't anywhere to put it that didn't look tacked on. Oh well, sometimes it's good to break the rules and not put one on at all.

You can see what the rest of the Design Team have created with this fun colour combo this week over at the Just Add Ink blog. We'd love to see what you do with it too.

Bye for now,

Tina

Wednesday 13 September 2017

AWH HOC Week 16

Hi!

Welcome back to week 16 of The Heart Of Christmas! I'm once again hosting this week's round, as Claire is with her family. I hope you're being inspired by our Christmas cards to get started on your own - slowly but surely Christmas is coming!


This week I have made a fairly simple card, using the new Merry Music SDSP. It's a fabulous pack that I have found my self reaching for over and over again.

scissorspapercard, Stampin' Up!, Carols Of Christmas, Merry Music SDSP, Star Of Light

How cool is this way to add colour to the DSP? The pack is entirely white and black, but there's nothing stopping you from adding some colour. In this case, I used my sponge brayer to roll on some Garden Green ink. I wanted the ombre look, so I rolled up from the bottom each time, allowing the colour to fade away the closer I got to the top of the card.

scissorspapercard, Stampin' Up!, Carols Of Christmas, Merry Music SDSP, Star Of Light

Aren't these large sentiments fabulous? I like that this one has a bit of a curve, so it's less obvious if your stamp it a little crooked!

scissorspapercard, Stampin' Up!, Carols Of Christmas, Merry Music SDSP, Star Of Light

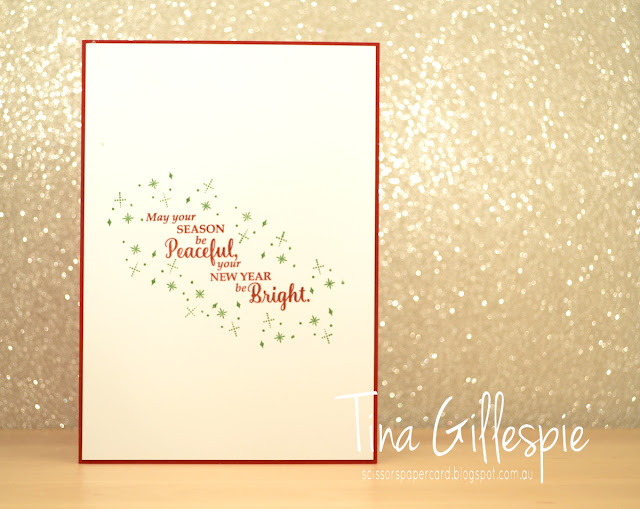
I originally only intended to stamp a few of the little twinkles around the inside sentiment, but once I got going, I couldn't stop!

Thanks for stopping by again. Here's the links to the rest of the team that are participating today. I'm sure they'd love it if you popped over to their blogs to look at their gorgeous cards and to give them a little comment love.

Kate Morgan

Ros Davidson

Caroline Manwaring

Rachel Woollard

Andrea Roberts

Monika O'Neil

Bye for now,

Tina


Monday 11 September 2017

Lift Me Up With Colour Theory

Hi!

Today's card is a quick and easy one that I made to show off the gorgeous ombre papers in the Colour Theory DSP Stack. I love the ombre look, and while it's not difficult to achieve the look yourself with some cardstock and a sponge brayer, there are times when it's easier to just grab for the DSP.

scissorspapercard, Stampin' Up!, Lift Me Up, Butterfly Basics, Colour Theory DSP

I was after a bit of a sunrise effect with the background, so I arranged my Crushed Curry DSP so that the darker section was at the top, rather than at the bottom like I usually do. I think I stamped my sentiment too close to the bottom, but that's because I completely forgot to stamp it until I'd adhered the Crushed Curry DSP to the base using Dimensionals. Those little suckers really grip! Rather than trying to remove the whole lot, I just removed the one under the sentiment and replaced it with a new one after I'd stamped.

scissorspapercard, Stampin' Up!, Lift Me Up, Butterfly Basics, Colour Theory DSP

I kept the rest of the card nice and simple - just the little scattering of balloons and clouds.

scissorspapercard, Stampin' Up!, Lift Me Up, Butterfly Basics, Colour Theory DSP

I think this would be a great card for those times where you need to whip up a card in a rush. What do you think?

Bye for now,

Tina
Thursday 7 September 2017

JAI #376: Just Add D

Hi!

And hello to you too, Friday! You are most welcome in this house this week! I'm certainly looking for ward to the weekend.


How about you? Will you create something for our new Just Add Ink challenge this weekend? I'd better tell you what it is then! It's one of my alphabet challenges, and we are challenging you to Just Add D to your card. You can choose anything D related - a stamp set, theme, embellishment, technique - as long as it starts with a D.


I decided to stamp a card that uses my favourite set for little boys - No Bones About It. Dinosaurs are always popular with little lads.

scissorspapercard, Stampin' Up!, Just Add Ink, No Bones About It

The dinosaurs were stamped using Pacific Point/Night Of Navy, and Pumpkin Pie/Cajun Craze. Wild Wasabi and Chocolate Chip were used for the leaves and footprints. I love the bright, fun colours - perfect for a young child.

scissorspapercard, Stampin' Up!, Just Add Ink, No Bones About It

I think I had most fun stamping the inside. I love the way that the triceratops is chasing the T-Rex. Probably not very factually accurate, but let's not let that get in the way of a fun card!

scissorspapercard, Stampin' Up!, Just Add Ink, No Bones About It

What 'D' element will you add to your card? Sometimes I compete with myself to get as many as I can on my card, but this time I only had the Dinosaurs. Just link your project up over at Just Add Ink to join in the fun.

Bye for now,

Tina

Wednesday 6 September 2017

AWH HOC Week 15

Hi!

Welcome to this week's Heart Of Christmas with the Art With Heart team.


This week I have the pleasure of hosting The Heart Of Christmas. Claire has some family commitments, and so I volunteered to be a temporary home for the Bog Share until she is able to resume.

scissorspapercard, Stampin' Up!, Santa's Sleigh Framelits, Hearts Come Home, Stitched Shapes Framelits, Embossing Paste, Christmas

This week's card came about as I had an extra sample Embossing Paste/Glitter panel left over from a card class last month. I didn't want to waste it, so I decided to make it up into a card that was different to the card the classes made. I'd stuffed up the panel a little by getting some paste where it wasn't wanted, so I had to trim it a little to hide my whoopsie.

scissorspapercard, Stampin' Up!, Santa's Sleigh Framelits, Hearts Come Home, Stitched Shapes Framelits, Embossing Paste, Christmas

The word 'Joy' comes from the new Hearts Come Home stamp set. The whole sentiment is actually Joy To The World, but I only wanted(/had room for) the word Joy.

scissorspapercard, Stampin' Up!, Santa's Sleigh Framelits, Hearts Come Home, Stitched Shapes Framelits, Embossing Paste, Christmas

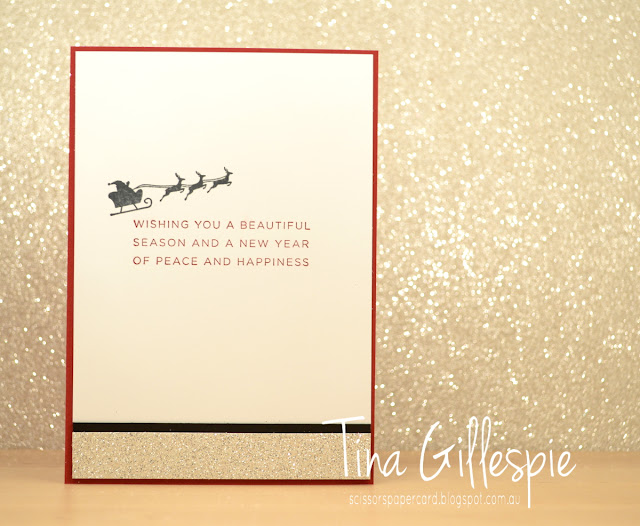
I do love a bit of glimmer on a Christmas card, so I added a strip to the inside to finish it off.

Here are the links to the rest of the Art With Heart ladies who are sharing their gorgeous Christmas projects this week:

Kate Morgan

Sharon Davern

Caroline Manwaring

Rachel Palmieri

Rachel Woollard

Ros Davidson

Claire Daly

Monika O'Neill

Catherine Proctor

I'm sure they'd love it if you left them a comment.

Bye for now,

Tina