Pages

Wednesday 31 March 2021

Colour Creations: Rococo Rose

 Hi!


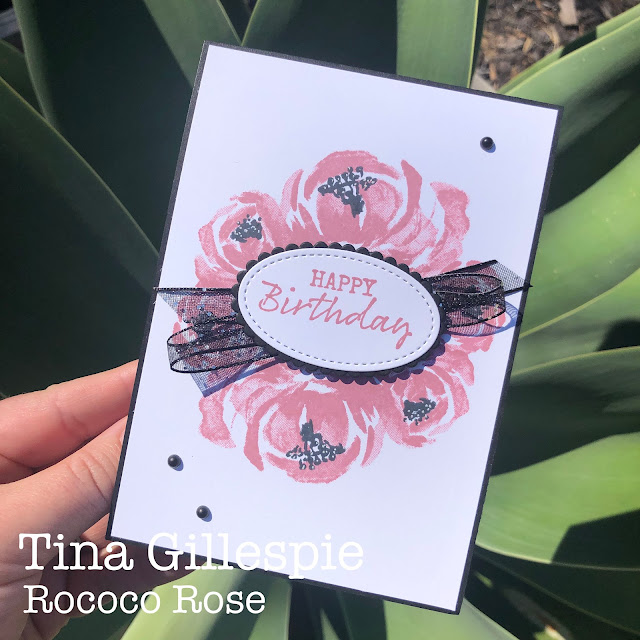
Welcome back to my blog for the new Colour Creations Creative Showcase. This week we are featuring one of the soon to be retired In Colours - Rococo Rose. At this start of this Showcase series, I would have described it as a dirty pink, but I have changed my ways and will now describe it as a dusky mid-pink. LOL! It's duskiness is what makes it a favourite pink that I will have a bit of trouble saying goodbye to.

scissorspapercard, Stampin' Up!, Colour Creations, Beautiful Friendship, Seaside Notions, Stitched Shapes Dies, Layering Ovals Dies

Another thing that I will have trouble farewelling is the gorgeous Beautiful Friendship stamp set. I'm not really big on floral stamp sets, but I loved how this one does all the hard work for you because the stamp itself is designed to leave different intensity of ink for different parts of the image.

scissorspapercard, Stampin' Up!, Colour Creations, Beautiful Friendship, Seaside Notions, Stitched Shapes Dies, Layering Ovals Dies

I also used another favourite, retiring, stamp set for the sentiments - Seaside Notions. It's been a go-to set this year, especially for the sentiments, as I love the mix of fonts and the size is usually perfect. Speaking of retiring, I have cropped the sentient with one of the dies in the Stitched Shapes set, which is also retiring. Sob! The Layering Oval underneath is also on the way out.

scissorspapercard, Stampin' Up!, Colour Creations, Beautiful Friendship, Seaside Notions, Stitched Shapes Dies, Layering Ovals Dies

I stamped the flower stamens in Memento ink, and then dotted over the top of them with a white gel pen. It helps to soften the starkness of the black ink.

That's all from me for tonight, but please do pop on over to Cathy's Blog, where you'll find the rest of this week's Rococo Rose cards. I can't wait to see what everyone has made!

Bye for now,

Tina

Wednesday 24 March 2021

Colour Creations: Rich Razzleberry

 Hi!


Thanks for once again joining me for the new Colour Creations Creative Showcase. This week it's Rich Razzleberry's turn. Razzleberry was one of a trio of In Colours (alongside Melon Mambo and Soft Suede) that was released mid way through a catalogue year, with the goal of bringing the South Pacific market into line with the North American market. I was thrilled when it later returned as a core colour, as it's a gorgeous, rich purple,

scissorspapercard, Stampin' Up!, Colour Creations, Creative Showcase, Under My Umbrella, Ornate Layers Dies, Subtle 3DEF, Watercolour Pencils

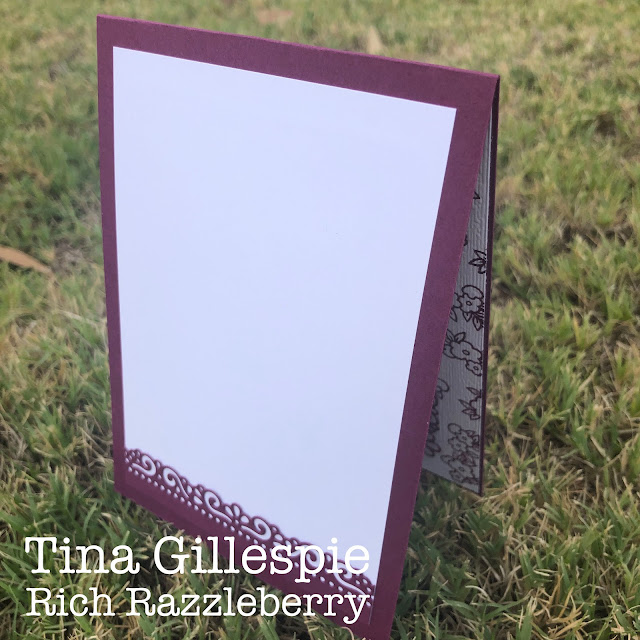
For this week's card I pulled out three products that I love, but haven't played with much lately - Under My Umbrella bundle, Ornate Layers Dies and my Watercolour Pencils. The focal images were stamped in Memento ink and then coloured with my Rich Razzleberry Watercolour pencil. I used my usual Wink Of Stella to blend the colour rather than water. I find I have much more control over the colour this way.

scissorspapercard, Stampin' Up!, Colour Creations, Creative Showcase, Under My Umbrella, Ornate Layers Dies, Subtle 3DEF, Watercolour Pencils

My background was stamped using the two smallest flower clusters. I popped both onto one block and away I went until the Whisper White cardstock was covered. I then embossed it with my Subtle 3DEF folder, to give the effect of fabric. I was hoping that this photo would capture the sparkly boots, etc, but it was a dull day here in Adelaide, with no sun to help show the shimmer. Oh well, you'll just have to imagine it!

scissorspapercard, Stampin' Up!, Colour Creations, Creative Showcase, Under My Umbrella, Ornate Layers Dies, Subtle 3DEF, Watercolour Pencils

I used an offcut of Rich Razzleberry card and the same Ornate Layers Die as on the front to crop a little feature piece for the bottom of the writing panel. I think that it looks quite pretty!

That's all from me for tonight, but please do pop on over to Cathy's blog, where you'll find the rest of this week's Rich Razzleberry cards. We are close to the end now, I think only about 9-10 weeks to go.

Bye for now,

Tina

Sunday 21 March 2021

CTC 310: CASE A Layout

 Hi!


Oh, goodness, this weekend has gone so quickly! Sunday evening really snuck up on me! I had a really lovely night last night at the Adelaide Fringe Festival with some school mums, which meant that today was a bit slower of a day. Luckily I already had my card made, I just needed to do the photography and blogging.


Anyway, on with the show! This week at CASEing The Catty we are challenging you to CASE the layout of the card with the three bow ties - isn't it a fun card? Here's a sketch to help you see the different elements.
I liked the three repeated elements, but I decided to go for blocks rather than shapes. I won a sample pack of the Fine Art Floral DSP a while back and hadn't used any yet, so this was a great opportunity to finally crack it open.

scissorspapercard, Stampin' Up!, CASEing The Catty, Fine Art Floral DSP, Pretty Perennials, Itty Bitty Birthdays, All Dressed Up Dies, Stitched Rectangles Dies, Subtle 3DEF

I used my Stitched Rectangles Dies to crop the DSP into three panels, and layered them on some Old Olive card. The three panels were then layered over a piece of Petal Pink card, which I'd embossed with the Subtle 3DEF.

scissorspapercard, Stampin' Up!, CASEing The Catty, Fine Art Floral DSP, Pretty Perennials, Itty Bitty Birthdays, All Dressed Up Dies, Stitched Rectangles Dies, Subtle 3DEF

The sentiments are from Pretty Perennials. The 'birthday' part is stamped on a strip that was cropped using one of the All Dressed Up Dies. It's meant to be the handbag strap, but I use it a lot for adding sentiments!

scissorspapercard, Stampin' Up!, CASEing The Catty, Fine Art Floral DSP, Pretty Perennials, Itty Bitty Birthdays, All Dressed Up Dies, Stitched Rectangles Dies, Subtle 3DEF

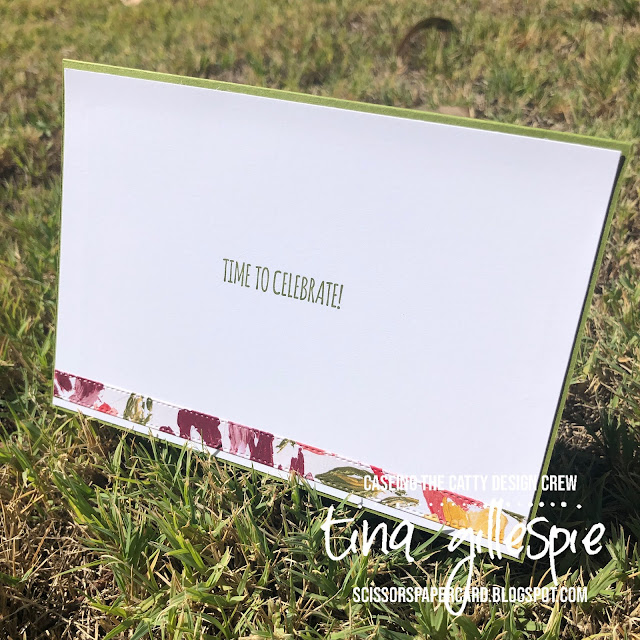
I used the same die to crop a long, thin strip of the DSP to decorate the inside of my card. It's a great way to give a scrap a pretty edge to jazz up the inside of your card.

That's all from me tonight, but this is where is just begins for you! We'd love to see what you do with this sketch, so please pop on over to our Facebook Group, where all you need to do it add a photo of your creation to enter our challenge. 


Before you go, please do finish our hop! Next up is the wonderful Julia - I adore her card, especially as it features my favourite colour!

Bye for now,

Tina

Thursday 18 March 2021

JAI 546: Just Add Steampunk

 Hi!


Thanks for joining me for the new Just Add Ink challenge. This week Chantelle is daring us to make a card or project in the Steampunk style. It had quite a lot of the Design Team wondering what is Steampunk?


To me Steampunk is the blend of mechanical/industrial and arty/fantasy elements. Sort of the Industrial Revolution meets Alice In Wonderland, I guess! Either way, it was out of my comfort zone but I was bound to have a bit of fun with it. 

scissorspapercard, Stampin' Up!, Just Add Ink, A Touch Of Ink, Mr Funny Bones, Sweet Ice Cream, World Of Good Suite, Tim Holtz Cogs Dies

Cogs are a bit of a no-brainer for Steampunk, so I added a good handful to my background. I layered them over and under some DSP and a Memories and More card from the World Of Good Suite. The words are also from a M&M card. Texture is often used in Steampunk cards, especially corrugated card, which I used to layer under my main sentiment.

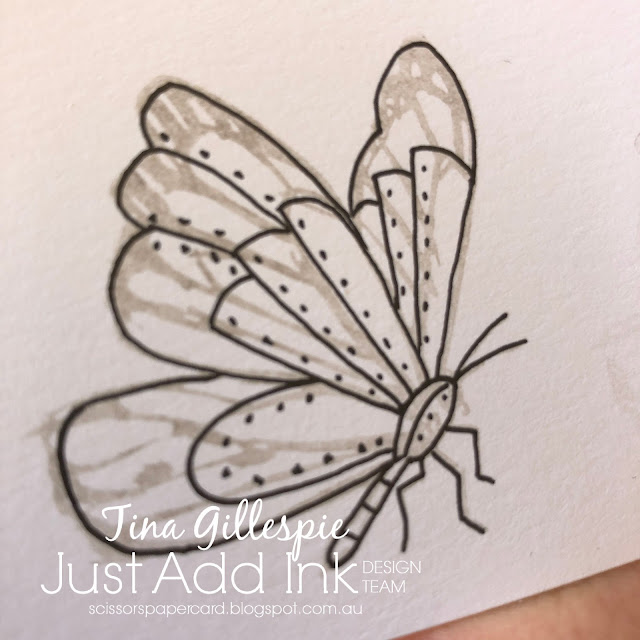
Let's talk about my butterfly. I googled some images/pages and found this one, which became the inspiration for my butterfly. I really love how the butterfly looks like it's made from metal plates, riveted together.

scissorspapercard, Stampin' Up!, Just Add Ink, A Touch Of Ink, Mr Funny Bones, Sweet Ice Cream, World Of Good Suite, Tim Holtz Cogs Dies

My only butterfly stamp was the one from A Touch Of Ink, so I stamped it in stamped-off Gray Granite ink. I then used my Copic Multiliner to draw in the plates and rivets, following the basic outlines from the stamp. Then I just coloured it with my Smokey Slate and Soft Suede Stampin' Blends.

scissorspapercard, Stampin' Up!, Just Add Ink, A Touch Of Ink, Mr Funny Bones, Sweet Ice Cream, World Of Good Suite, Tim Holtz Cogs Dies

I was very pleased with how it turned out! I reckon the seahorse from Seaside Notions would look pretty cool drawn and coloured like this, too.

scissorspapercard, Stampin' Up!, Just Add Ink, A Touch Of Ink, Mr Funny Bones, Sweet Ice Cream, World Of Good Suite, Tim Holtz Cogs Dies

I finished the card with some more cogs on the inside. You might be able to see the Wink Of Stella that I added to all the cogs on my card. I couldn't resist adding a top hat to the inside, either - it seems to be a common image used in Steampunk cards, although usually with the cool goggles over the top.

Overall, the Steampunk theme wasn't as scary as I though it would be. Have you ever tried it? Why not give it a go? You can link your card up over on the Just Add Ink blog, where you can also find the rest of this week's Design team cards.

Bye for now,

Tina

Wednesday 17 March 2021

Colour Creations: Real Red

 Hi!


Thanks for joining me for Real Red week in the Colour Creations Creative Showcase series. Are you a red person? I love red, but I find it very hard to create with sometimes. I especially dislike stamping sentiments in red, and I only do it if there are no other possible choices. Maybe it goes back to my days as a High School teacher!

scissorspapercard, Stampin' Up!, Colour Creations, All Dressed Up Dies, Perennial Petals Dies, Gift Bag

My favourite accessory is my red handbag, and so I felt compelled to make a little handbag gift bag using my Real Red cardstock and All Dressed Up Dies. The dies make it so ease to create a stylish gift bag, complete with stitched details.

scissorspapercard, Stampin' Up!, Colour Creations, All Dressed Up Dies, Perennial Petals Dies, Gift Bag

Many handbags have a little dangly embellishment, so I felt the need to add one to my bag too. I used the dies from the perennial Petals set to create the flower. I cropped two flowers from Thick Whisper White and layered them back to back with Dimensionals. The Baker's Twice was looped around the handle of the bag and also around one of the Dimensionals so that it stayed in place.

scissorspapercard, Stampin' Up!, Colour Creations, All Dressed Up Dies, Perennial Petals Dies, Gift Bag

The pocket on the front is just glued around three edges so that I can pop a tiny message in it if I choose. I will decide when I know who is going to get a little gift from me 😊

Please pop on over to Cathy's Blog, where you'll find the rest of this week's Real Red cards - I'm sure you'll be in for a treat!

Bye for now,

Tina

Sunday 14 March 2021

CTC 309: Mini Catalogue Bundles

Hi!


Thanks for joining me once again for the new CASEing The Catty Sunday Challenge Blog Hop. This week we are asking you to CASE a card from the Bundles Section of the Jan-June Mini Catalogue.


There were quite a few cards through the section that appealed to me, but as soon as I saw this card, I knew it was the one!


I loved the blended background with the silhouette-type images over the top. I was recently invited to a birthday party for a friend who, before COVID, travelled regularly to Bali. I thought that this was a great opportunity to make a Bali-ish card for her.

scissorspapercard, Stampin' Up!, CASEing The Catty, Friend Like You, Friendly Silhouettes Dies, Shimmer Paint

I wanted the look of a Bali sunset, so I started with some Whisper White card and used my Blending Brushes to apply ink to the card. From top to bottom I used Daffodil Delight, Purple Posy, Blueberry Bushel and Night Of Navy. I then used my Friendly Silhouette Dies to cut the palm trees and horizon line.

scissorspapercard, Stampin' Up!, CASEing The Catty, Friend Like You, Friendly Silhouettes Dies, Shimmer Paint

I used a dry Aqua Painter to flick some Frost White Shimmer paint over the top - hopefully it looks like stars just starting to appear in the night sky. Finally, I popped the whole piece up on a Basic Black card base.

scissorspapercard, Stampin' Up!, CASEing The Catty, Friend Like You, Friendly Silhouettes Dies, Shimmer Paint

I replicated the scene on the inside, except that I used stamped palm trees from Friend Like You. I also dotted the stars on with a white gel pen instead of the flicked paint.

So, what do you think? Bali at sunset? I hope so!

As always, you can join in with our challenge through our Facebook group. Just post a photo of your project in the group. It really is that easy!


Next up in this week's blog hop is the lovely Peta. Her card is stunning, and uses a die set that I am trying to resist buying. She's making it very difficult for me!

Bye for now,

Tina

Thursday 11 March 2021

JAI 545: Just Add Shades Of Green

 Hi!


Welcome back to the new Just Add Ink Challenge. This week Lou has suggested that we use shades of green on our cards.


This one was a little tricky for me at first, as green isn't a colour I gravitate to very much. Then I remembered my pop culture stamps and an idea was born!

scissorspapercard, Stampin' Up!, Kindred Stamps, Ink Road Stamps, Just Add Ink, You're Super, Justice Is Served, Full Circle Vol 3: Heroes, Stampin' Blends

Who else could I choose but this big guy? He's the perfect character for this week's card. He's from a retired Kindred Stamps set, called You're Super, and I coloured him with my Shaded Spruce, Highland Heather and Basic Black Stampin' Blends. The sentiment is from another retired Kindred Stamps set, called Justice Is Served.

scissorspapercard, Stampin' Up!, Kindred Stamps, Ink Road Stamps, Just Add Ink, You're Super, Justice Is Served, Full Circle Vol 3: Heroes, Stampin' Blends

The background of my card was made by smooshing my Shaded Spruce ink pad onto my largest clear block, spritzing it with water and then placing my cardstock on top. I lifted it a few times and repositioned it to cover the whole piece with ink. The blotchy effect is very cool, if I do say so myself!

scissorspapercard, Stampin' Up!, Kindred Stamps, Ink Road Stamps, Just Add Ink, You're Super, Justice Is Served, Full Circle Vol 3: Heroes, Stampin' Blends

I used the offcut from the front of the card to matt my writing panel on the inside of my card. The icon image os from an Ink Road Stamps set, called Full Circle Vol 3: Heroes. I love it when stamps from different companies work together perfectly! The sentiment is from You're Super.

That's all from me for tonight, but please do head on over to the Just Add Ink blog, where you'll find the rest of this week's Design team cards. I hope that you'll enter our challenge too - do you like green? Which shade (or shades) will you choose to use?

Bye for now,

Tina

March Creative Showcase

 Hi!


Welcome to March's Creative Showcase. This time around, we are all basing our creations on a sketch designed by Rachel.


I quite like this sketch - how about you? I pulled out some Dandy Garden DSP to see how it would work with the layout. I think it works very well!

scissorspapercard, Stampin' Up!, Dandy Garden DSP, Sweet Ice Cream, Stitched Rectangles Dies, Ornate Layers Dies

I started by adhering two pieces of the DSP to a card front sized piece of Whisper White card. I then cropped it with the second largest Stitched Rectangles Die and layered it on another piece of Whisper White card.

scissorspapercard, Stampin' Up!, Dandy Garden DSP, Sweet Ice Cream, Stitched Rectangles Dies, Ornate Layers Dies

The dragonflies were punched from another sheet of the DSP, and popped up on Dimensionals. I stamped the sentiment in Misty Moonlight ink and cropped it with a die from Ornate Layers.

scissorspapercard, Stampin' Up!, Dandy Garden DSP, Sweet Ice Cream, Stitched Rectangles Dies, Ornate Layers Dies

I used the left over piece of DSP from the front of my card to frame the writing panel on the inside. Waste not, want not! One final dragonfly and I was done!

You can find the rest of the links for this month's Showcase over on Rachel's blog.

Bye for now,

Tina
Wednesday 10 March 2021

Colour Creations: Purple Posy

 Hi!


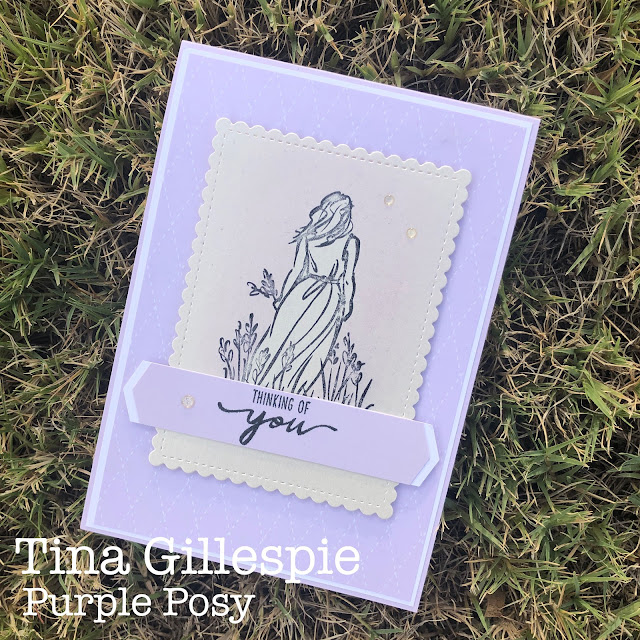
Thanks for once again joining me for the Colour Creations Creative Showcase. This week we have one of my all-time least favourite colours, Purple Posy. To me, it's just not a very interesting colour. My apologies if you're a big fan!

scissorspapercard, Stampin' Up!, Colour Creations, Beautiful Moments, Stitched So Sweetly Dies, In Colour DSP

I had the idea with this card to sponge some Purple Posy ink around the woman to give a bit of a sunset/dusk like glow. I still have my Purple Posy ink pad , and while it's not a great ink to stamp with, it's OK with sponging. I stamped the image of the woman and then masked her off before using a Blending Brush to add the ink all around her. It's very subtle!

scissorspapercard, Stampin' Up!, Colour Creations, Beautiful Moments, Stitched So Sweetly Dies, In Colour DSP

You can sort of see the effect in the second photo. I used the new Pearlescent Paper as my base. I think that it doesn't 'take' ink as well as plain Whisper White, which is why it's quite pale.

scissorspapercard, Stampin' Up!, Colour Creations, Beautiful Moments, Stitched So Sweetly Dies, In Colour DSP

Just a bit of simple stamping on the inside, no sentiment. This makes the card a bit multi-purpose, as the front sentiment, "Thinking of You" is generic enough for be suitable for a few different situations.

As always, you can find the rest of this week's cards over on Cathy's blog

Bye for now,

Tina

Sunday 7 March 2021

CTC 308: CASE The Sand And Sea Colours

 Hi!


Welcome back for the new CASEing The Catty Sunday Challenge Blog Hop. Although it doesn't really feel like a Sunday, as it's a long weekend here in South Australia. This week we are asking you to CASE the colours of the Sand & Sea DSP. There's six different colours in the papers, so plenty to choose from.


I'm very definitely a blue girl, so after my attempt using the pinks went into the bin, I went with my strengths and used the non-pink colours.

scissorspapercard, Stampin' Up!, CASEing The Catty, Pretty Perennials, Joy To The World, Stitched Triangles Dies, Stitched Rectangles Dies, Masculine Card

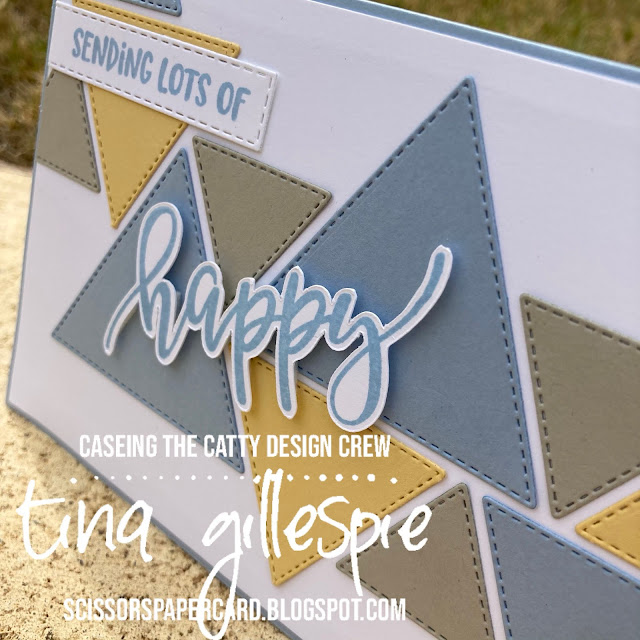
It's been a while since I played with my Stitched Triangles Dies, so I pulled them out for a play for this card. I cut a heap of Equilateral triangles from Seaside Spray, So Saffron and Sahara Sand and then just laid them on my Whisper White card front until I was happy with the positioning.

scissorspapercard, Stampin' Up!, CASEing The Catty, Pretty Perennials, Joy To The World, Stitched Triangles Dies, Stitched Rectangles Dies, Masculine Card

It was actually a lot of fun trying to find a pleasing arrangement. Once I was happy, I glued it all down. The sentiments over the top are from Pretty Perennials. The first part (sending lots of) actually covers a bit of a gap in the triangles that I could not make work. LOL, if you can't fix it, cover it up!

scissorspapercard, Stampin' Up!, CASEing The Catty, Pretty Perennials, Joy To The World, Stitched Triangles Dies, Stitched Rectangles Dies, Masculine Card

I had quite a few left over triangles, so they were put to use on the inside of the card. The sentiment on the inside is from the Joy To The World Paper Pumpkin kit, with the word 'Christmas' masked off and replaced with 'Birthday' from Pretty Perennials.

Our weekly challenge is run through our Facebook group, which means that to join in the fun all you need to do is post a photo of your card in our group. You don't need a blog, just. Facebook account.


Before you dash off to create, please do finish our blog hop - there's plenty of inspiration to be found. Next up is the lovely Rebecca, who did a much better job of getting the pinks to work than I did!


Bye for now,

Tina