Pages

Monday 24 December 2018

Merry Christmas!

Hi!

I just wanted to take this opportunity to wish you all a very Merry Christmas and a Happy New Year! I've been learning how to say this in AUSLAN (AUStralian Sign Language), so I probably should have shot a video to post. However, I'm a bit frazzled with all the Christmas preparations, so I would not have looked my best! Maybe next year 😉

Instead, here's a picture of Hudson wishing you a Merry Christmas in PODD. His teacher had these wonderful t-shirts made for the whole class.  PODD is an Alternative Communication Device used at his school.

scissorspapercard, PODD


See you in the new year, sometime around mid-January! In the meantime, I'm off to spend some quality tie with my family 💙

Bye for now,

Tina

Thursday 20 December 2018

JAI #439: Just Add A Gift Box

Hi!


It's time for the final Just Add Ink challenge of 2018 - it feels so weird to be saying that!! Patrice has challenged us to make a gift boxer very appropriate challenge for this time of year. Thos round will go for two weeks and is a just for fun round. The Design Team are taking a well earned break and will be back again in 2019 (another thing it feels weird to say!).


I struggled a bit with this challenge, in that I couldn't decide what to make! I had so many options, and in the end I reached for an old favourite, the Petal Cone Bigz Large Die. I can't remember how long ago it retired, but it's one I've not been able to part with.

scissorspapercard, Stampin' Up!, Just Add Ink, Santa's Workshop SDSP, Tags & Tidings Bundle, Petal Cone Big Die, SSS Double Stitched Circles

The tag is made using current Stampin' Up! product though. The DSP is the Santa's Workshop Specialty DSP, with all the lovely flocking on the designs. I also used a stamped and die cut image from the Tags and Tidings Bundle. My lovely friend Ros stamped and cut them for me. This tag was on Whisper White, but I wanted a blue colour so I coloured it with my Light Pool Party Blend.

scissorspapercard, Stampin' Up!, Just Add Ink, Santa's Workshop SDSP, Tags & Tidings Bundle, Petal Cone Big Die, SSS Double Stitched Circles

The box itself is also made from the Santa's Workshop SDSP. This piece has lots of flocking, so it was *just* heavy enough to use to make the box. If you recall, the box that the die makes comes to a point, which mine clearly does not have! I simply scored the cut pieces near the bottom and folded them in to make a flat bottom.

scissorspapercard, Stampin' Up!, Just Add Ink, Santa's Workshop SDSP, Tags & Tidings Bundle, Petal Cone Big Die, SSS Double Stitched Circles

I used a piece of the gorgeous Black Glittered Organdy ribbon from the Holiday Catalogue to wrap around the box. It doesn't actually hold it closed, as the overlapping top flaps do that, but it's a lovely way to add a touch of glimmer to the box. I will miss this ribbon when it retires in January!

Thanks for joining me for the current Just Add Ink challenge. Remember, it's a just for fun round that will go until January 2. Plenty of time for post-christmas crafting, hopefully with some new goodies left by Santa!

Bye for now,

Tina

Tuesday 18 December 2018

Getting Merry With Merlot

Hi!

Welcome to the final Colour Creations Blog Share for 2018. We are having a little break over the Christmas/New Year period, but we'll be back on January 8 with the next colour in our series. It's one of my favourites!


This wee, though, we are looking at the new Neutral, Merry Merlot. It's not a colour I've used much of - probably because my old high school uniform was maroon. I finished high school 25 years ago, so you'd think I'd be over it by now but apparently not! I did enjoy using it on my card though, so maybe I'm on my way to liking maroon.

scissorspapercard, Stampin' Up!, Art With Heart, Colour Creations, Incredible Like You, Varied Vases, Tin Tile 3DTIEF, SSS Double Stitched Rectangles

I tried and rejected all kinds of things until this card rose from the debris on my craft desk. Most of it was playing around with Stitched Rectangle dies, which are so much fun! I also used the new stamp set, Incredible Like You, available in January. Oh, and don't forget the Tin Tile 3DTIEF on the Sahara Sand layer - it's carrying over to the Occasions Catalogue, so we get it for at least a few more months. Yay!

scissorspapercard, Stampin' Up!, Art With Heart, Colour Creations, Incredible Like You, Varied Vases, Tin Tile 3DTIEF, SSS Double Stitched Rectangles

I'm still deciding if I like the flowers from the stamp set. They are pretty, and I love the way the two layers work together, but I find the flower to be a bit 'floaty'. I anchored this one by adding a Mint Macaron twine bow to the base.

scissorspapercard, Stampin' Up!, Art With Heart, Colour Creations, Incredible Like You, Varied Vases, Tin Tile 3DTIEF, SSS Double Stitched Rectangles

I used another flower and some more leaves on the inside. A couple of the leaves were stamped direct to the base cardstock and a few were fussy cut and layered underneath the flower. It adds a bit more dimension to the arrangement.

You can find the rest of this weeks cards over Catherine's blog. It's a small group on the Blog Share today, but still worth the look as everyone is so creative. Don't forget that we return on the 8th of January.

Bye for now,

Tina

Monday 17 December 2018

Well Said Butterflies

Hi!

On Saturday I held a stamping day for my class ladies who were able to attend. Sadly, I missed a lot as it's a busy time of year, but those who made it had a lovely time catching up and hearing about my trip to the USA. They also got to make a card using some of my new goodies from the Sale-A-Bration and Occasions Catalogues.

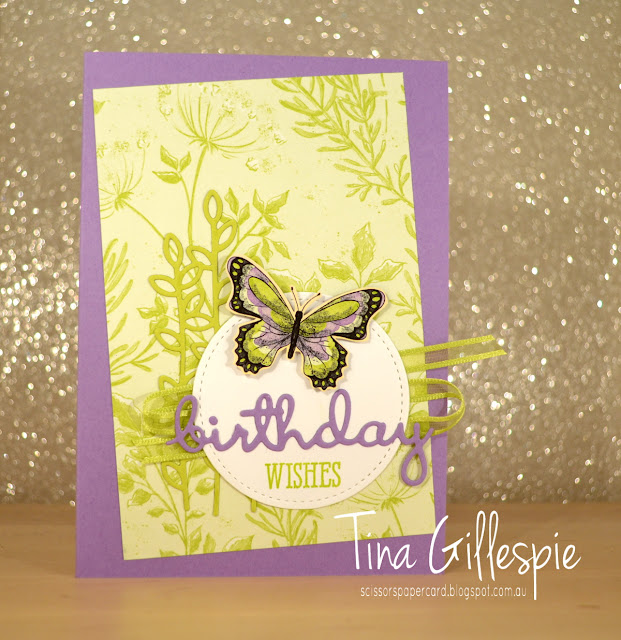
scissorspapercard, Stampin' Up!, Sale-A-Bration, Botanical Butterfly DSP, Well Said Bundle, Stitched Shapes Framelits

This was the card I made as a sample for them to follow. I was so pleased with how it turned out! I started with a base of Highland Heather and then added a piece of Lemon Lime Twist DSP from the Botanical Butterfly DSP, which is a free SAB reward option when you spend $90 on catalogue items. The butterfly was also fussy cut from another sheet of the DSP. There is a coordinating punch for it, but I don't own it (yet!).

scissorspapercard, Stampin' Up!, Sale-A-Bration, Botanical Butterfly DSP, Well Said Bundle, Stitched Shapes Framelits

The Lemon Lime Twist ribbon is another SAB reward option. There are a whopping five rolls of ribbon in the pack, that also includes Balmy Blue, Daffodil Delight, Grapefruit Grove and Highland Heather. The thing I love most about the ribbons is that the colours not only coordinate with the Botanical Butterfly DSP, but also the super sweet Gingham Gala DSP, which you can find in the Occasions Catalogue.

I can't forget the new Well Said bundle from the Occasions Catalogue. It's a huge bundle, with 51 stamps and 24 dies that all mix and match to create an endless array of sentiments for nearly every occasion you could think of. It's a must have bundle, and one that will never leave my collection!

scissorspapercard, Stampin' Up!, Sale-A-Bration, Botanical Butterfly DSP, Well Said Bundle, Stitched Shapes Framelits

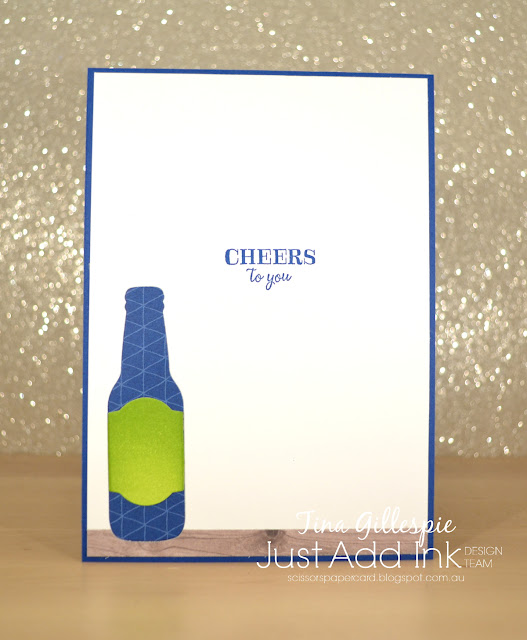
The inside was kept super simple, just another fussy cut butterfly (which also coordinates with the new punch) and another stamp from the Well Said stamp set.

I wanted to give my ladies some choices with the card they made, so I offered 3 different cards. The layouts were the same, I just switched up the colours and papers. Two of my ladies were kind enough to allow me to photograph their cards so that you could see the alternate versions. Thanks, Noreen (left) and Lillian (right).

scissorspapercard, Stampin' Up!, Sale-A-Bration, Botanical Butterfly DSP, Well Said Bundle, Stitched Shapes Framelits

Bye for now,

Tina

Thursday 13 December 2018

JAI # 348: Just Add Colour

Hi!

Welcome to Friday!


This week Nikki has set the new Just Add Ink challenge. Check out the colours she's chosen:


Hmmm, what will you add to Lovely Lipstick and Granny Apple Green? I chose Pacific Point to keep the colours (sort of) primary.

scissorspapercard, Stampin' Up!, Just Add Ink, Thoughtful Banners, Celebrate You Thinlits, Confetti Punch

I've had such a full on week that I had about half an hour to make my card, photograph it and edit it ready to go on my blog. I *had* to make something quick and simple, but I wanted a big impact. I think I achieved it! I stared by die cutting the 'amazing' from Lovely Lipstick cardstock, gluing it down and then stamping 'you are' in Pacific Point.

scissorspapercard, Stampin' Up!, Just Add Ink, Thoughtful Banners, Celebrate You Thinlits, Confetti Punch

I'd originally cut some stars with a retired star punch that came in a trio with a heart and a flower. Remember that one? It was too big though, so after a quick scrounge in my retired products basket I found the Sprinkles Confetti punch and used the star from that. Much better! You may not see in the photo, but I added some Wink Of Stella to the word and stars for a tiny touch of glimmer.

scissorspapercard, Stampin' Up!, Just Add Ink, Thoughtful Banners, Celebrate You Thinlits, Confetti Punch

I finished off the inside with a couple of Wink Of Stella'd stars after I'd stamped the thank you. It's from the Thoughtful Banners set, as was the 'you are' on the front.

So, which colour will you choose to pair with our two colour this week? I'll be very interested to see! You can add your blog to the list over at Just Add Ink, where you can also see what colours the Design Team chose to use.

Bye for now,

Tina

Tuesday 11 December 2018

Incredible Like Mambo

Hi!


Hello, and welcome to this week's Art With Heart Colour Creations Blog Share. This week we are looking at a former In Colour turned Core Colour, Melon Mambo. If my memory serves me, the South Pacific market got Melon Mambo, Rich Razzleberry and Soft Suede as In Colours at a time when SU was shifting to align their markets more closely. It's been a favourite ever since!

scissorspapercard, Stampin' Up!, Art With Heart, Colour Creations, Christmas Card, Incredible Like You, Merry Christmas To All, Glimmer Paper

Today's card is a super cute, fast and easy card. The front uses one stamp from a new stamp set called Incredible Like You. I simply repeatedly stamped the lines without reinking the stamp so that I got an ombre effect in Melon Mambo. I didn't use my Stamparatus for this, I just eyeballed it. I then trimmed the cardstock into a triangle shape that's 2 1/4 inches across the bottom and 4 inches tall. The star and trunk were just cut from scraps of Glimmer Paper and then all 3 pieces were popped up. Done!

scissorspapercard, Stampin' Up!, Art With Heart, Colour Creations, Christmas Card, Incredible Like You, Merry Christmas To All, Glimmer Paper

I didn't put a sentiment on the front as I didn't want to cover my tree. Therefore I went big on the inside! I think this has been my favourite inside sentiment stamp for Christmas 2018.

The rest of this week's cards can be found over at Catherine's Blog. I wonder if everyone else is still doing Christmas cards, or if they've moved on already? Only one way to find out!

Bye for now,

Tina

Monday 10 December 2018

CTC #207

Hi!

I'm playing along again with the CASEing the Catty Challenges, which this week was to CASE anything but a card from either of the current catalogues. After a quick flick through each, I decided to CASE the middle tag at the top of page 20.

scissorspapercard, Stampin' Up!, CASEing The Catty, Botanical Tags, Stitched Labels, Birds and Blooms, Wood Textures DSP, Notes Of Kindness, Soft Sayings, Sponge Brayer

I kept the basic parts the same - I used the same Botanical Tags die over the same piece of Wood Textures DSP, and used the same layout for the sentiment section, but otherwise I changed a lot around. If you have a look at your catalogue you can see that while I used all the same colours, I flipped a lot of them around - my tag is Fresh Fig, not Crumb Cake as in the catalogue.

scissorspapercard, Stampin' Up!, CASEing The Catty, Botanical Tags, Stitched Labels, Birds and Blooms, Wood Textures DSP, Notes Of Kindness, Soft Sayings, Sponge Brayer

I don't actually own the Botanical Bliss stamp set, so I had to improvise with what I had instead. I used the leaf die from the Botanical Tags set to create the textured base of my card. I simply cut a heap of the leaves in Crumb Cake and glued them to the base using my Fine Tip Glue. The Wood Textures DSP was brayered with Mint Macaron ink, as was the bird die from the Birds and Blooms Frameilts set. The button is from the True Gentleman pack, and sentiment label is from the Stitched Labels Framelits set. The stamp is from the Soft Sayings Kit. Finally, the Mint Macaron Twine is from the Nature's Twine set. it was took thick as it comes, so I simply pulled one of the strands out to use on the front.

scissorspapercard, Stampin' Up!, CASEing The Catty, Botanical Tags, Stitched Labels, Birds and Blooms, Wood Textures DSP, Notes Of Kindness, Soft Sayings, Sponge Brayer

I used the left over twine to finish off the inside, alongside the extra bird I cut from the scrap I'd brayered for the front. Sometimes it pays to think ahead to the inside when you're making the little bits and pieces for the front! The inside sentiment is from another card kit, this time it's the Notes Of Kindness kit.

Bye for now,

Tina

Thursday 6 December 2018

JAI #437:Just Add I

Hi!

Welcome to the end of the week, the start of the weekend (yay!) and a new challenge!


This week at Just Add Ink it's one of my alphabet challenges. The letter up for duty this week is the letter I, which *really* got the Design Team thinking!


After a bit of thought, I decided I'd go with the Inlaid Die Cuts technique. Once you get your head around it, it's not tricky, just a bit time consuming. Here's my card, and then I'll explain!

scissorspapercard, Stampin' Up!, Just Add Ink, Wood Textures DSP, Best Route DSP, Celebrate You Thinlits, Bottles and Bubbles Framelits, Itty Bitty Birthdays

It's called inlaid, because even with all of those die cuts (I think there were 8!), the card front is completely flat - nothing sticking out at all.

scissorspapercard, Stampin' Up!, Just Add Ink, Wood Textures DSP, Best Route DSP, Celebrate You Thinlits, Bottles and Bubbles Framelits, Itty Bitty Birthdays

After cutting the card base in Wood Textures DSP, I then die cut it using the largest Layering Circle. I then cut the same. circle from Best Route DSP and inlaid the circle into the base, holding it in place with washi tape on the back. Next was the two straws (you work from the back of the design to the front), then the brown bottle, red label, green bottle, orange label, and finally the white 'celebrate'. Each time you replace the piece you cut from the design with a fresh piece that is held in place at the back with washi. The hardest part was the sentiment, as there are a whole lot of little bits that have to be stuck back down - all the little bits in the loops of each letter. I was a little frightened to do the celebrate in case I stuffed up all the work before it, but thankfully it worked!

scissorspapercard, Stampin' Up!, Just Add Ink, Wood Textures DSP, Best Route DSP, Celebrate You Thinlits, Bottles and Bubbles Framelits, Itty Bitty Birthdays

I used the same technique on the inside to make the bottle. This time I just cut a bottle from DSP. On the front I cut them from Whisper White and brayered on the colour. The label on the inside bottle is the one I cut from the green bottle on the front. As it was one of the last layers it was one of the only useable pieces left!

You can see what the rest of the super imaginative Design Team have created over at the Just Add Ink blog. Pleas join in the fun - link up your "I" cards over there too.

Bye for now,

Tina

Wednesday 5 December 2018

CASEing Colour Combinations

Hi!

Papercrafters often talk about CASEing, but usually it refers to copying the design of a card and maybe changing a few things to make it a little more unique. Sometimes though, it's the colour combination that grabs you and begs to be made into something totally different. That's the challenge this week for CASEing The Catty - take a colour combo from a card in the Holiday Catalogue and use the colour combo to make a new card.

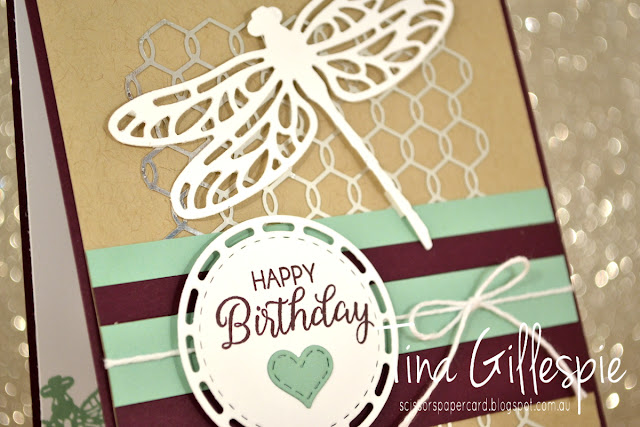
scissorspapercard, Stampin' Up!, CASEing The Catty, Beautiful Bouquet, Dragonfly Dreams Bundle, Stitched Labels Framelits

I flicked through the catalogue for inspiration and stopped on page 42 when I got to the Country Lane suite of products. I don't actually own any of it, apart from the Chicken Wire Elements, but the Blackberry Bliss, Mint Macaron, Crumb Cake and Whisper White combo on the first card was one I loved.

scissorspapercard, Stampin' Up!, CASEing The Catty, Beautiful Bouquet, Dragonfly Dreams Bundle, Stitched Labels Framelits

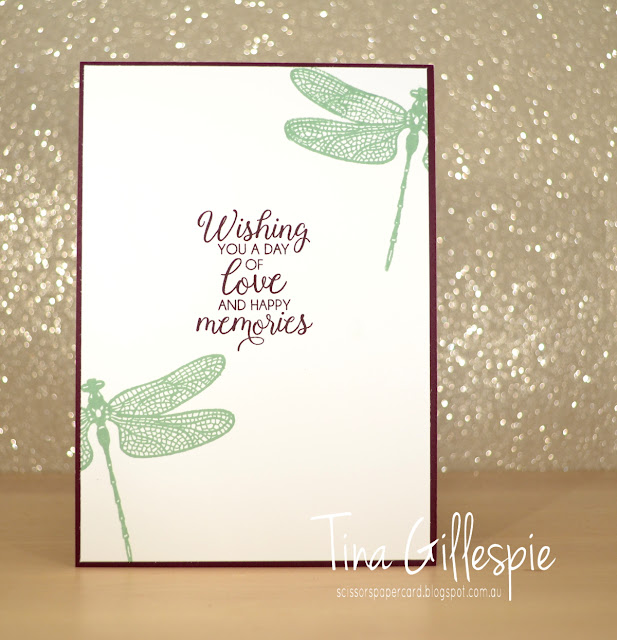
In the end the only things the same were the Chicken Wire Element and the use of a circle, but otherwise I went in a completely different direction with my card.

scissorspapercard, Stampin' Up!, CASEing The Catty, Beautiful Bouquet, Dragonfly Dreams Bundle, Stitched Labels Framelits

I hope this gets you thinking about looking at cards in a whole new way now. Another great reason to flip through the catalogue - colour inspiration!

Bye for now,

Tina

Tuesday 4 December 2018

Swiping Mango

Hi!

Wowee, these weeks are wizzing by so fast! Here it is, Tuesday again, and time for the new Colour Creations Blog Share.


We are up to the M's this week - more specifically Mango Melody. What perfect timing, just as summer and the mango season begins! Yum, I love a good, juicy mango!

scissorspapercard, Stampin' Up!, Art With Heart, Colour Creations, Thoughtful Banners, Delightfully Detailed LCP

Today's card features a technique that was showcased at OnStage in Orlando. It's not a new technique, but sometimes it's fun to revisit old favourites. The technique is ink pad swiping, where you turn an ink pad upside down and swipe it over your cardstock. The base of tonight's card was actually my second attempt, as the cardstock slipped the first time and I ended up with seriously wobbly lines! Not a bad look, just not the look I was after. Anyway, it's a fun technique that looks different every time you do it.

scissorspapercard, Stampin' Up!, Art With Heart, Colour Creations, Thoughtful Banners, Delightfully Detailed LCP

I then took one of the large pieces of the Delightfully Detailed Laser Cut DSP and snipped a few flowers from it. I chose three of the five pointed flowers so that I could layer them. The largest one was coloured Mango Melody with a sponge brayer, and I left the medium one white. The flower centre is a clear epoxy droplet that I coloured with my Dark Mango Melody Blend.

scissorspapercard, Stampin' Up!, Art With Heart, Colour Creations, Thoughtful Banners, Delightfully Detailed LCP

I ended up using the smallest flower on the inside of my card. I'd intended it to go on the front, but it got a bit lost among the other two. Instead, it's now the star of the inside!

As ever, the rest of the links to this week's cards are over on Catherine's blog. I always enjoy seeing what everyone else has done with each colour. Don't you?

Bye for now,

Tina

Monday 3 December 2018

An Inspired Christmas Card

Hi!

Today's card is a fun, bright Christmas card that has a little story to go with it.

A week or so ago, Just Add Ink had an Inspiration Challenge with a picture of snowy trees. We get the challenge list a while in advance, so I had a bit of time to think about what to do. Lucky, because I was a bit stumped by it! While I was in the USA, I saw this piece of Christmas decor in Joanns.


Straight away, I thought, why not use a card based on this for the Inspiration challenge? I wasn't sure about it, because it's quite a departure from the original photo. I let the idea simmer away in the back of my brain for the rest of the trip, but then when I got home I found that my JAI teammate, Jo had made this card! I decided not to make the card after all. I posted my Joanns photo in our FB group and Jo and I had a little laugh. Then she challenged me to make a card anyway, so here it is.

scissorspapercard, Stampin' Up!, Foxy Friends, Merry Christmas To All

I tried to colour match the original piece, so left to right I used: Poppy Parade, Lemon Lime Twist, Melon Mambo, Pacific Point and the retired Lost Lagoon.

scissorspapercard, Stampin' Up!, Foxy Friends, Merry Christmas To All

I used the two trees from Foxy Friends to stamp with - the large trees direct to the cardstock and the smaller trees on scrap pieces that I fussy cut out. The small trees are then popped up over the top with Dimensionals.

scissorspapercard, Stampin' Up!, Foxy Friends, Merry Christmas To All

So there you go - it's funny how two people can come up with similar ideas completely independently!

Bye for now,

Tina

Thursday 29 November 2018

JAI #436: Just Add A Sketch

Hi!


It's Friday - time for the new Just Add Ink challenge! This week we have a sketch deigned for us by Narelle, which is funny because as I was making my card I was thinking how very 'Narelle' this sketch is, not realising it was one of hers!

I straight away knew I wanted to use my Tropical Escape suite of products.

scissorspapercard, Stampin' Up!, Just Add Ink, Tropical Chic Bundle, Varied Vases, Tropical Escape DSP, Subtle 3DDTIEF

My first pick was the striped DSP from the Tropical Escape DSP pack. I then chose the darker colour DSP to help anchor the two papers. The circle that the flowers sit on is the reverse of the striped paper. I stamped the palm leaves and flowers in ink that coordinates with the DSP, except fo the pop of Berry Burst.

scissorspapercard, Stampin' Up!, Just Add Ink, Tropical Chic Bundle, Varied Vases, Tropical Escape DSP, Subtle 3DDTIEF

You can't see it in the picture, but the Blushing Bride layer (not the card base) is embossed with the Subtle 3DTIEF. Have you got this yet? It's such an awesome embossing folder.

scissorspapercard, Stampin' Up!, Just Add Ink, Tropical Chic Bundle, Varied Vases, Tropical Escape DSP, Subtle 3DDTIEF

I'd stamped and die cut some extra leaves and flowers for the front - there's nothing worse than cleaning your stamp or putting away your dies only to realised you need just one more! They never go to waste, as I just use the extras on the inside.

Why not pop on over to the Just Add Ink blog, where you can find the rest of this week's cards made by the Design Team? You can also link up your card - who could resist this awesome sketch?

Bye for now,

Tina

Tuesday 27 November 2018

Humming Along In Lipstick

Hi!


Its time once again for this week's Colour Creations Blog Share. This week we are looking at Lovely Lipstick. It's a colour I haven't used much as it intimidates me a bit! I can't decide if it's a red or a pink! What do you think? Today's card definitely leans towards pink. What ever you think, it's bold colour, and so I toned it down a little with a layer of vellum.

scissorspapercard, Stampin' Up!, Art With Heart, Colour Creations, Humming Along, Varied Vases, In Colour DSP, Smooshing

I have used a stamp set that was an All Attendee gift at OnStage, called Humming Along. It will be available from January when the Occasions Catalogue goes live. Isn't the flower gorgeous? It's a lovely big bloom, just right for colouring. Does anyone know the type of flower? I'm a bit horticulturally challenged! EDIT: My friend Rachel tells me it's a hibiscus!

 When we are at OnStage we get to see a lot of different stamping presentations. One which really stuck with me was Dale Hampshire's presentation on colouring for people who have problems with holding markers - maybe they have shaky hands, as Dale does. I've been thinking off and on about other ways to colour.

I decided to give smooshing as a method of colouring a go, and I was quite pleased with the results. Do you remember how to smoosh? You basically just transfer some ink to a clear block, spritz with some water, pick up the watery ink with a bendable plastic sheet and then smoosh the sheet onto your cardstock.

scissorspapercard, Stampin' Up!, Art With Heart, Colour Creations, Humming Along, Varied Vases, In Colour DSP, Smooshing

This time I stamped first in Stazon ink so that my outline wouldn't run. I was then able to be a bit more selective about where on my Shimmery White cardstock I smooshed each colour (Lovely Lipstick, Old Olive and Mango Melody). It looks quite messy like this, doesn't it? Look closer though - the water and the way you bend the plastic help to create colour variations in the different parts of the flower and leaves. It's not a perfect way of colouring, but it's not meant to be! Take a look at how it ends up once it's fussy cut (BTW: there's a gorgeous set of dies to match the stamp set, but I don't have them yet!):

scissorspapercard, Stampin' Up!, Art With Heart, Colour Creations, Humming Along, Varied Vases, In Colour DSP, Smooshing

I was so pleased with the results, and I can't wait to try it with my class ladies! It really is a cheat's watercolouring.

scissorspapercard, Stampin' Up!, Art With Heart, Colour Creations, Humming Along, Varied Vases, In Colour DSP, Smooshing

I finished off the inside with another of the blooms and a strip of DSP left from the front. The sentiment comes from the Varied Vases set. You may be interested to know that there's a new stamp set to match the lunch in the Occasions Catalogue too!

Why not pop on over to Catherine's blog, where you'll find the rest of this week's Lovely Lipstick cards? It's a bold colour, and I can't wait to see what the other girls have done with it.

Bye for now,

Tina