Hi!
Yay for Friday! It's been a long, wet miserable week here in Adelaide, and I'm ready for the weekend. Perhaps I can convince the family to snuggle on the lounge and watch a movie. Sounds like a good plan to me! Anyway, this week Nikki has given us our Just Add Ink challenge. It's this gorgeous Inspiration challenge.
Aren't those white on white daisies beautiful? Wouldn't that be a nice bouquet to receive on Mother's Day? Funnily enough, I didn't even think of doing a Mother's Day card for this challenge until just now. Too late for that now!
I made a thank you note card instead that is a little farewell to Lemon Lime Twist. Sob! It's a colour I've really come to love and will miss a lot, especially in gingham. I may have to put aside a little secret stash so that I can continue to enjoy it.
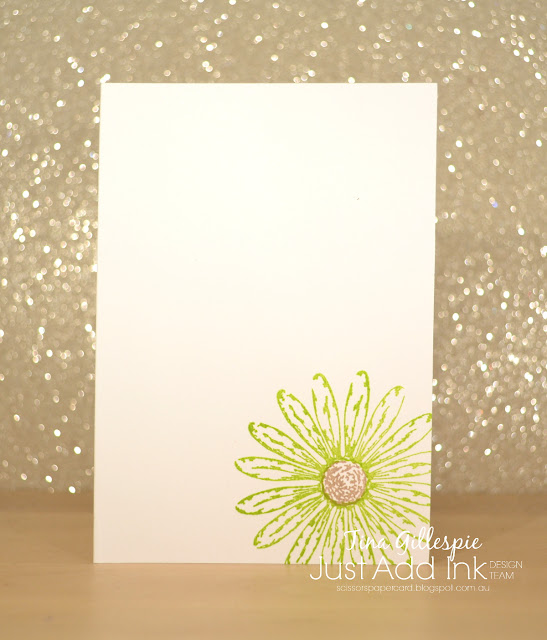
The daisy was made using two layers of the punched shape. I usually use three, but this time two worked nicely. I would have loved to have the new Medium Daisy punch to add another couple of layers, but alas, it's not available until June.
On the inside (and on the envelope too, even though it's not shown) I stamped the daisy twice to get the same look as the daisy on the front. Thankfully the stamp is photopolymer, so it's not too difficult to line up and stamp a second time.
Thanks for stopping by this week. Don't forget to also stop by the Just Add Ink blog, where you can see the rest of the Design Team cards, and also link up your card for the challenge.
Bye for now,
Tina
Showing posts with label Daisy Delight. Show all posts
Showing posts with label Daisy Delight. Show all posts
Thursday, 9 May 2019
Sunday, 20 January 2019
CTC# 212: Sale-A-Bration
Hi!
It's the end of another busy week, which makes it time for the CASEing The Catty Sunday Challenge Blog Hop!
I do love a good blog hop! The blog before mine belongs to the talented Judy May. You may have started there, or anywhere on the hop - it doesn't matter. Just keep on hopping until you get back to where you started. Hopefully by the end you'll be inspired to enter out challenge.
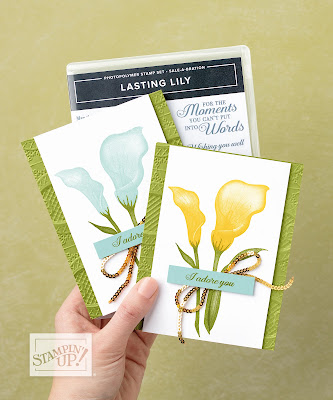
This week we are back to CASEing the Sale-A-Bration Catalogue. It's got heaps of great cards, so it was hard to narrow it down to just one. I CASEd a card from the front cover last time, so I decided to head for the back of the catalogue for inspiration this time. I decided I's CASE this card, from the bottom of page 18.
I don't have the Lasting Lily stamp set, but a few days ago I saw a card on the FB, where a demonstrator had punched some daisies from the Gingham Gala DSP. I was keen to give it a go, so this card seemed like a great way to do it.
I used the coordinating Daisy Delight stamp set to create the stem of the daisy. I don't like the tiny little leaves on the stem, so I just used a marker to ink the stem part. I then used the larger leaf stamp and the filler stamp to add the leaves. Much better proportions!
The daisy centre needed a little something, so I added this huge (retired) Iced Rhinestone. I think it finishes off the card quite nicely! How cute does the gingham daisy look? I just can't get enough of this DSP!
I often use 3 layers on my daisies, but this time it didn't look right. I'd already punched the third daisy, so I decided to use it on the inside rather than waste it. I just snipped it in half, layered it, and glued to it to corner of the cardstock, trimming it to fit.
That's it for me, now you're off to visit Siobhan's blog to see what fun she's had with the SAB Catalogue.
Don't forget to also pop by our Facebook group, where you can add your card to this week's challenge. See you there!
Bye for now,
Tina
Tuesday, 18 September 2018
The Early Bird Catches The Espresso
Hi!
Welcome to the new Colour Creations Blog Share.
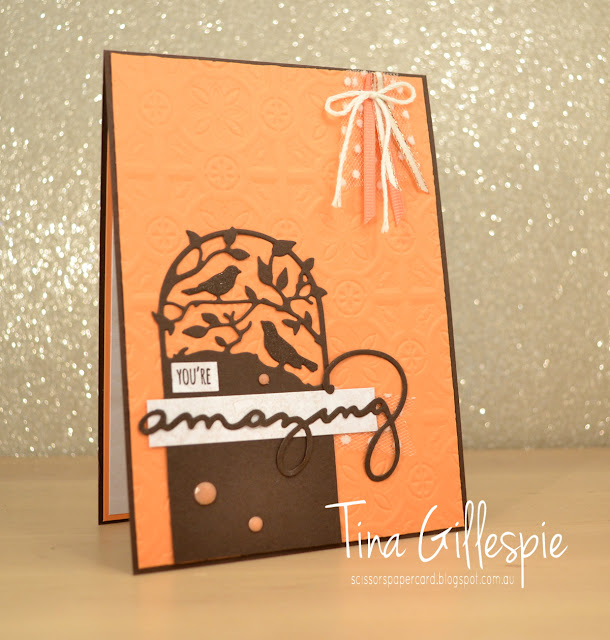
This week we are all using Early Espresso on our cards. It's a rich brown that works fabulously as an alternative to Basic Black when you're wanting a dark neutral colour. It took me a little while to warm to Early Espresso when it first came out - I was a Chocolate Chip girl - but now it's a colour I use a lot.
For my card today I've paired it with Grapefruit Grove and Very Vanilla. I recently purchased the Botanical Tags Thinlits, and thought that they'd look great as a silhouette effect on my card.
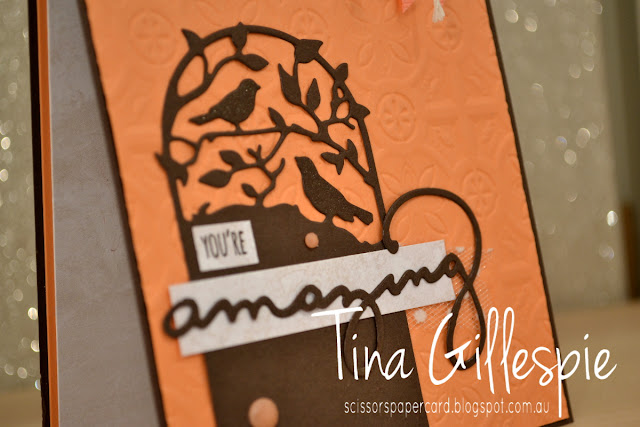
It might be a little difficult to see, but I've painted the two birds and the word 'amazing' with a layer of Wink Of Stella. Can you see the new Tin Tile Dynamic Textured Impressions Embossing Folder on my card? It's so pretty!
Again, it's difficult to see in the photo, but instead of using Very Vanilla cardstock on my card I've actually used a sheet of DSP from the Petal Promenade DSP pack. It's got a very subtle pattern that's perfect for stamping on. Can you see the swirls through the paper on the inside of my card? I also used it under the sentiments on the front of the card. It's a quick and easy way of creating a subtle effect on a card.
You can see the rest of this week's cards over at Catherine's Blog. Now I'm off to get stuck into making next week's card.
Bye for now,
Tina
Monday, 16 April 2018
Playing With Brushos
Hi!
Have you had a chance to play with the new Brushos powders yet? They are a lot of fun!
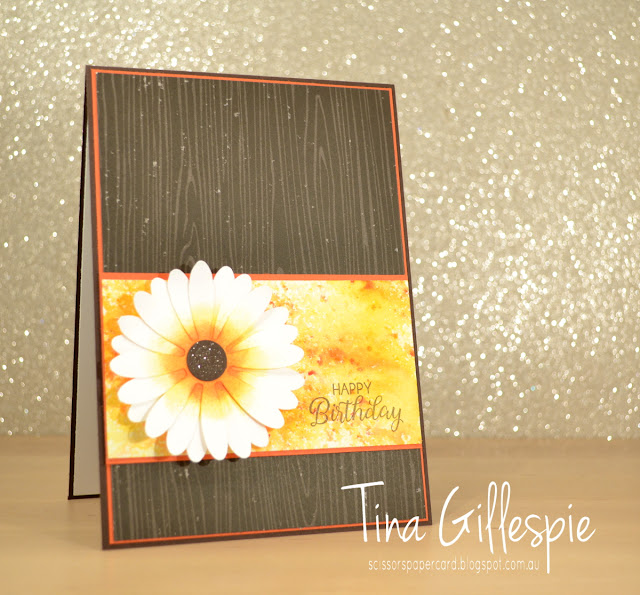
I was playing around with the Gamboge and Yellow powders to create this panel. I sprinkled the powders on Watercolour Paper, using mostly Yellow. A few spritzes of water and it's done! I didn't use too much water, as I wanted a speckled look.
The rest of the card was built around the Brusho panel. I quite like pairing orange with brown, so I chose Tangerine Tango and Early Espresso. Did you know that Tangerine Tango is one of our retiring colours? I think it's a colour I will miss! The woodgrain paper is from the Coffee Break DSP pack.
I love this sentiment! It's fabulous for so many occasions. It's from the Beautiful Bouquet stamp set, which is carrying over to the new Annual Catalogue. Yay!
Bye for now,
Tina
Labels:
Beautiful Bouquet,
Birthday,
Brusho,
Coffee Break DSP,
Daisy Delight
Tuesday, 30 January 2018
CTC #163: Sale-A-Bration
Hi!
I finally had the chance to play with the new Brusho Crystal Colour powders. They are a heap of fun - but messy! I started off slow with them to get a feel for them, and then ended up turning the panel I made into a card for the current CASEing The Catty Challenge. I love that my card ended up quite bold with the darker colours, as compared to the original card, which is much softer. You can find it on page 17 of the Sale-A-Bration catalogue.
I took Whisper White cardstock and brushed over the top half with an Aquapainter. I then sprinkled some Yellow Brusho over the top and spread the colour with the Aquapainter. I then repeated the process on the bottom half with the Prussian Blue Brusho. You can see a little touch of green under the banner where the two colours met.
I then die cut the word 'celebrate' into the panel, and turned it onto a shaker card using Silver and Black sequins. The balloons are punched from Silver Foil paper and Black Glimmer paper, which now that I think about it, may be retired. Oops! I then tied Black and Silver Metallic Thread around the balloons and left the ends messy.
I added another balloon to the inside to tie it all together. I was really thrilled with how well the Brusho colour turned out - I'll certainly be playing with it again!
Bye for now,
Tina
Thursday, 2 November 2017
JAI #384: Just Add Inspiration
Hi!
Is is really Friday already? Where did this week go?
It most certainly is Friday, which means it's Just Add Ink challenge day! This week we have an Inspiration Challenge, suggested by the lovely Jan.
Come on peeps - put aside the Christmas stuff, and get that Daisy punch out again!
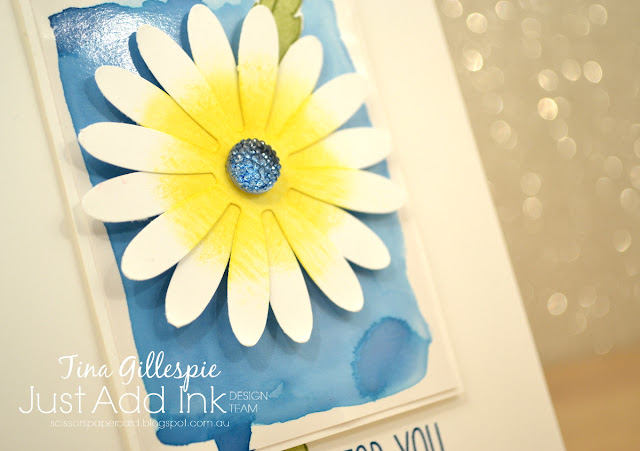
I really love the Inspiration photo, but had absolutely no idea what I was going to do for it. After pondering for a few days, I happened across a 'reject' on my craft desk. It was the watercolored panel underneath the daisy. It was a test piece for an ATC swap I'd done recently, but it hadn't quite turned out the way I'd hoped. Luckily for me, instead of chucking it as I'd usually do, I put it aside.
The panel is Dapper Denim ink on Glossy cardstock. It warped a little with the water, so I mounted it on some Thick Whisper White card to help straighten it out. I really love the imperfect, blotchy look of the panel. The silver Faceted Gem was coloured with a Copic marker in the closest colour to Dapper Denim that I had. I think I used B97.
I was really stumped with how to do the inside. I couldn't really replicate the glossy panel on the front, so in the end I went for super simple, to match the CAS look of the front of the card. I like how it turned out.
The Design Team have created a fabulous set of cards this week. Everyone has such a different take on the same picture, which is fabulous! You can see everyone's cards over on the Just Add Ink blog, where you can also link your card.
Bye for now,
Tina
Labels:
Birthday,
Challenge,
Daisy Delight,
Design Team,
Jar Of Love,
Just Add Ink,
Sunshine Sayings
Monday, 23 October 2017
Daisy Delight Bridge Card
Hi!
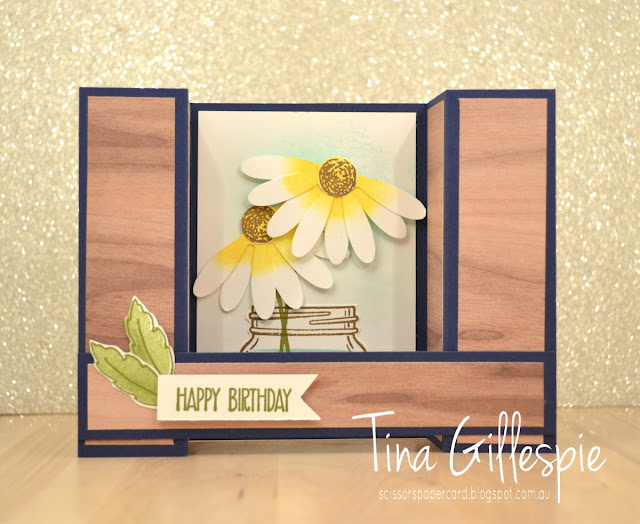
Have you jumped on the Bridge Fold card bandwagon yet? I have, and I had a lovely time making this card.
Aren't those half daisies so cute?! You just punch one daisy in Whisper White, use a sponge dauber to add a bit of Daffodil Delight ink to the centre, snip through the middle of the daisy, and glue the two halves back together so that the petals overlap. Finally, you stamp, crop and adhere a flower centre to the middle of the daisy.
I stamped a little jar with water on the back section of the front, and then sponged a little Soft Sky ink behind where the daisies sit. It really helps the white daisies to pop off the page.
There's not a whole lot of room on the back of the card for a sentiment, so I kept my stamping simple.
The best part about Bridge Fold cards is that they fold flat and still stay the correct size for an envelope. The recipient just needs to unfold the card for display. Too easy!
Bye for now,
Tina
Monday, 31 July 2017
Wood Texture Daisies
Hi!
Today's card was a fun little card that I made as a class sample, mostly to show off the gorgeous new Wood Textures DSP stack. It's one of my favourite DSP's in the new catalogue. I think it's so versatile. My immediate tendency is to hoard it, but I have to squash that impulse and chop it up!
In this case I've paired it with the new Thick Very Vanilla cardstock, a Dapper Denim scalloped border, and a So Saffron and Soft Suede daisy.
I really love this sentiment! Have you noticed it in the catalogue? It's in the new Soft Sayings Card Kit. You don't need to only use the stamps on the kit cards - they are great on any of your cards.
I think these little daisy stamps can be a little overlooked in favour of the large daisy, but they certainly deserve a bit of attention. I will certainly be using them more!
Bye for now,
Tina
Thursday, 25 May 2017
JAI #361: Just Add Two
Hi!
It's time for this week's Just Add Ink challenge, and I've taken a little trip down memory lane!
This week Kelly has challenged us to Just Add Two to our cards.
I love these challenges, they are so much fun! This week I chose to add flowers and watercolour to my card.
If you went through your preteen/teen years in the late 80's/early 90's, you probably had a pair of floral jeans. I wasn't quite girly enough for floral jeans, so I turned a pair of plain jeans into a statement piece by graffiti-ing all over them. Boy, did I love those jeans!
Anyway, today's card takes me back to those carefree days. I stamped the jeans pocket on Shimmery White cardstock and then watercoloured it with Night Of Navy ink. I stamped the pocket again on the Daisy print paper from the new Delightful Daisy DSP, fussy cut it right along the lines, and then adhered it to the full pocket. I love the look of the jeans pocket.
The border was stamped using the stitching and rivet stamps from Pocketful of Sunshine stamp set, which the pocket also came from. The border took a little bit of planning and masking to get right, but wasn't really too tricky. The background daisies, from Daisy Delight, were stamped three time per flower. I was meaning to stamp them off each time, but on the first flower I forgot to stamp off the third layer, so I ran with it for the rest of the flowers. One of those happy accidents!
The sentiment stamps are from another new set from the upcoming Annual Catalogue called Happy Birthday Gorgeous. It coordinates with the new Happy Birthday thinlit, and I'm guessing it's going to get a real work out this year!
Which two will you choose? Flowers, Washi or Watercolour? I'll find out when I see your card linked at the Just Add Ink blog, I'm sure.
Bye for now,
Tina
Thursday, 27 April 2017
JAI #357: Just Add Colour
Hi!
A little sad today, as it's the last day of the school holidays. I really enjoy the downtime and the lazy days. Anyway, it's Friday, which means it's Just Add Ink day!
I thought I'd give you a little sneak peek of a new stamp set that's from the upcoming Annual Catalogue. I was lucky enough to receive this set, Daisy Delight, at the On Stage event I attended in Perth recently.
It's so pretty! To get this flower, I stamped the outline three times on Very Vanilla cardstock in Rich Razzleberry and then watercoloured them in Sweet Sugarplum using a fairly dry Aqua Painter. Too much water makes the VV cardstock pill, and I certainly didn't want that! I then punched the flowers using the new Daisy punch and layered them so they were offset. It gives such a lovely, full flower, more like a Gerbera.
Can you see another sneak peek in the centre of the flower? The new Faceted Gems are gorgeous! They were certainly a must-have for me when I saw them at On Stage.
Did you notice the stamping under the daisy on the front of the card? I used my Timeless Textures stamp set, which is carrying over to the new catalogue. Yay!
Why don't you pop on over to the Just Add Ink blog to see what the rest of the team have created? I'm certain they will inspire you to stamp along with us this week.
Bye for now,
Tina
A little sad today, as it's the last day of the school holidays. I really enjoy the downtime and the lazy days. Anyway, it's Friday, which means it's Just Add Ink day!
This week we have a colour challenge, suggested by Jan. I really love the combination of Sweet Sugarplum and Rich Razzleberry, so I was happy from the start! The addition of Sahara Sand and Island Indigo adds a fresh take to the combo.
I thought I'd give you a little sneak peek of a new stamp set that's from the upcoming Annual Catalogue. I was lucky enough to receive this set, Daisy Delight, at the On Stage event I attended in Perth recently.
It's so pretty! To get this flower, I stamped the outline three times on Very Vanilla cardstock in Rich Razzleberry and then watercoloured them in Sweet Sugarplum using a fairly dry Aqua Painter. Too much water makes the VV cardstock pill, and I certainly didn't want that! I then punched the flowers using the new Daisy punch and layered them so they were offset. It gives such a lovely, full flower, more like a Gerbera.
Can you see another sneak peek in the centre of the flower? The new Faceted Gems are gorgeous! They were certainly a must-have for me when I saw them at On Stage.
Did you notice the stamping under the daisy on the front of the card? I used my Timeless Textures stamp set, which is carrying over to the new catalogue. Yay!
Why don't you pop on over to the Just Add Ink blog to see what the rest of the team have created? I'm certain they will inspire you to stamp along with us this week.
Bye for now,
Tina
Subscribe to:
Posts (Atom)


