Hi!
Here's the third and final part of my OnStage Presentation sample posts. This time I have my Avid Crafter samples for the gorgeous Beautiful Moments stamp set. An Avid Crafter is one who stamps nearly every day and has to have it all! Sound familiar? I am definitely an Avid Crafter!! They definitely want more difficult projects and are willing to spend a lot of time (and money) on one card.
This card, using the Reflection Technique on my Stamparatus, was the card I demonstrated live on the day. It was a little nervewracking, but I did it! The hardest part is getting the water wash over the reflection part of the image to look right. I used Blueberry Bushell ink and an Aqua Painter. The rest of the image was coloured beforehand with my Aqua Painter and ink pads.
Once the Blueberry Bushell was was dry, I flicked my Chalk Marker over the top to give the look of light reflecting off ripples in the water.
I finished the inside with the image again in Crushed Curry Ink.
This image was originally a 'just trying things out' sample that turned out nicely enough to go on a card. I stamped the image on Shimmery White card using a no-line stamping technique and then coloured them with my Watercolour Pencils and an Aquapainter.
I layered two of the Stitched Labels to go behind the image panel.
The girls were stamped in Coastal Cabana to finish off the inside.
I used the Bridge Fold to create this card. All of the colouring was done on Watercolour Paper using my ink pads and Aqua Painter. I stamped using Stazon Ink.
I added a second row of flowers to the middle of the card, between the front layer and the back, to give the card more depth.
The back of the card uses Shimmery White card, as it copes well with watercolouring, but is smooth to write on.
This card is my absolute favourite of all the cards I made. It was the very first idea I had when I saw Jacque's stamp set - how well it would work with A Good Man. 'Perfectly' is the answer!
I used my Stamparatus and stocky notes to stamp and mask the images, starting with the dad/girl, then the mum/girl, and finally the island - which is actually an outline of Rangitoto Island, just off Auckland. A nice homage to Jacque's adopted hometown! I stamped on watercolour paper using Stazon ink and then coloured with my ink pads and Aqua Painter.
Once again, I used Shimmery White cardstock on the inside so that I could watercolcour.
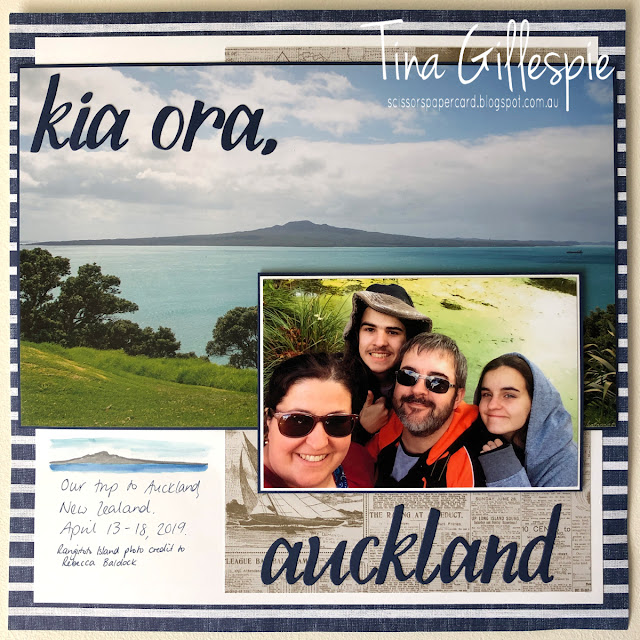
I also made a couple of scrapbook pages for the Presentation, to show how versatile the set is for all paper crafters. I'd recently been in Auckland for April's OnStage event, so I scrapped a photo of the family there, and another of Rangitoto Island. This will be the opening page of my album.
I also made a pocket page of my sisters and I when we were lots younger and entered a sandcastle building competition.
The two little girls on the beach were the perfect image for this page!
Thanks for checking out my samples. You can see my Beginner Samples here, and my Casual Samples here.
Bye for now,
Tina
Showing posts with label OnStage. Show all posts
Showing posts with label OnStage. Show all posts
Tuesday, 3 December 2019
OnStage Sydney Beautiful Moments Presentation: Casual Samples
Hi!
I'm back with part two of my posts about my recent presentation in Sydney. This time I have the Casual Stamper samples that I made to show off the gorgeous Beautiful Moments stamp set, co-designed by Jacque Williams.
A Casual Stamper is one who has been stamping a little while, but may not have a lot of supplies and probably doesn't stamp more than couple of times a month, and usually for a purpose rather than just for fun/relaxation. They want to try a bit trickier techniques, but nothing too tricky!
My technique of choice for this group was colouring and blending using Watercolour Pencils and a Wink Of Stella pen. It's colouring technique I use a lot, especially in classes. It's not as difficult as regular watercolouring, and you have the bonus of pretty, sparkly cards!
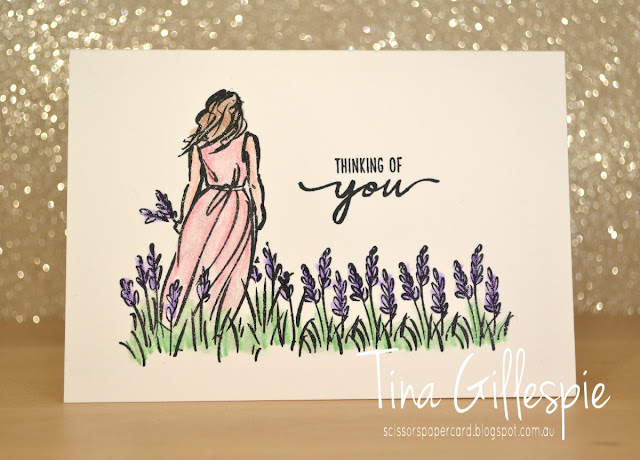
Hopefully you can see the shimmer in this photo! To colour this way, you stamp your image using Memento ink. Take your pencil and colour roughly along the lines in the image, and then take your Wink Of Stella brush and use it like an Aqua Painter, pulling the colour into the open areas of your image. I use circular motions with the WOS brush.
I kept forgetting to use the sweet little butterflies in the set - I wish I'd added a few above the flowers on this card, both inside and front. Oh well - next time!
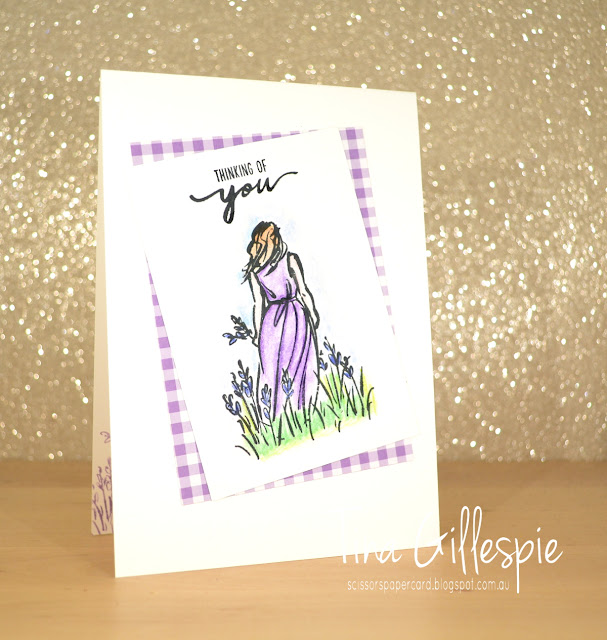
This card uses the same technique, I just used a Thick Whisper White card base and added some Highland Heather Gingham DSP under the main image.
You can see in her dress in this photo how the technique allows for a bit of shading in the image - the pencils lay darker colour and the WOS lightens it as it pulls away.
This next card is one of my favourites that I made for the presentation.
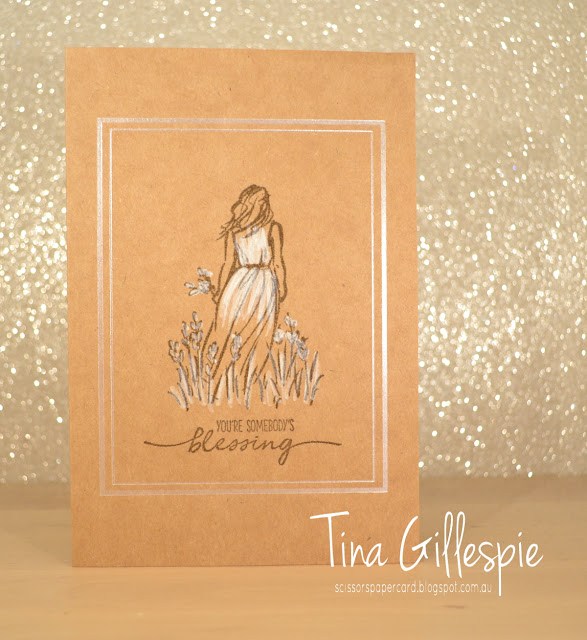
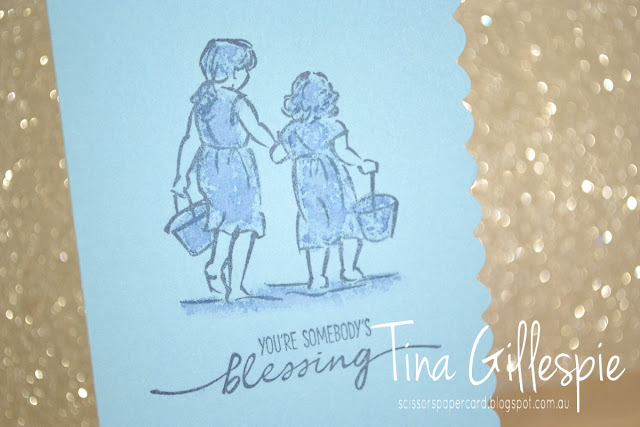
I stamped the image in Soft Suede on one of the large Magnolia Lane Notecards.
I then took my Chalk Marker and selectively coloured the image, using a quick flicking motion. On the dress, I flicked up from the waistline for the bodice, and then down for the skirt. It's such a dreamy looking card!
As always, I finished the inside with the same technique.
Thanks for stopping by again. You can find my post with my Beginner Samples here, and my Avid Samples here.
Bye for now,
Tina
Labels:
Beautiful Moments,
OnStage,
Subtles Patterns DSP,
Technique
OnStage Sydney Beautiful Moments Presentation: Beginner Samples
Hi!
I thought it was about time to start posting my samples from the recent OnStage event in Sydney. In case you didn't know, I was invited by Stampin' Up! to present Jacque Williams' Million CSV sales stamp set. Which, in non-SU lingo, means that Jacque sold a lot of SU stuff, won a trip to Head Office in Utah and was able to co-design a stamp set, which will go on sale in January.
Today I have for you the Beginner Stamper projects that I designed for Sydney. I will do follow up posts soon with my Casual and Avid Samples. There's just too much for one post!
Beginner Stampers are those that are very new to stamping, and so I wanted to create samples that would be very easy for them to recreate. I used some Very Vanilla Notecards and stamped an image and sentiment on both. The card on the left used Mossy Meadow, and the card on the right was Soft Suede.
I then took an Aqua Painter with a tiny bit of water in it, and lightly ran it over the areas of the image that I wanted to colour. In this case, the grass/flowers, dress and hair. The little bit of water lets the colour run slightly - just enough to give a lovely wash over the image. Too much water gets murky, which is why I only add a tiny bit to the Aqua Painter.
The inside of the card got the same treatment.
I then tried the same technique on the Scalloped Notecards. I stamped with Night Of Navy onto the Balmy Blue card and used the Aqua Painter to colour the image.
These cards must have a different coating than the plain notecards, as the water beaded a little on the surface, giving a marbled look to the finished image.
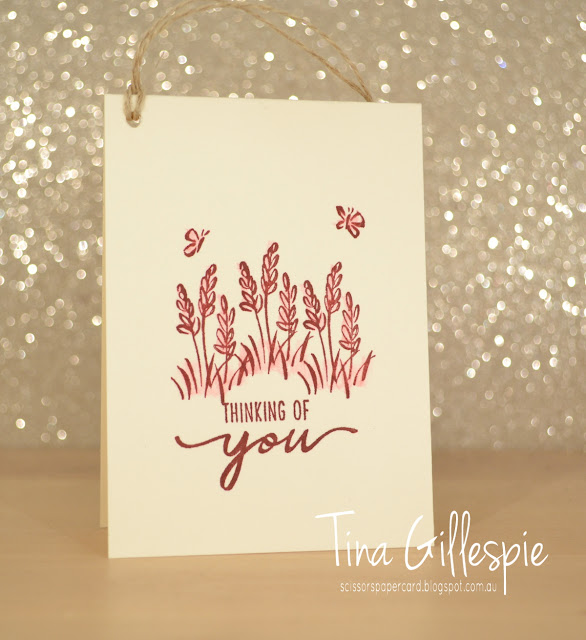
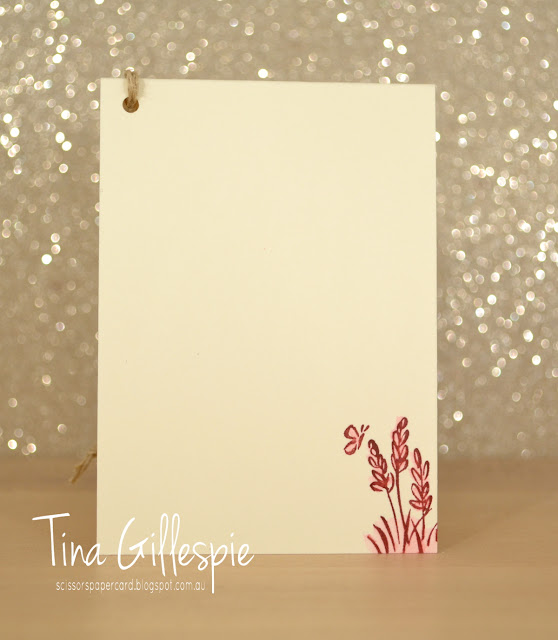
I used the same technique to make some gift tags. I simply cut a Very Vanilla Notecard in half and stamped the smaller flower image a few times in Merry Merlot. I also added some butterflies from the stamp set.
I added a hole and some twine to allow the gift tag to be added to a gift. I think it would go nicely around the neck of a bottle of wine!
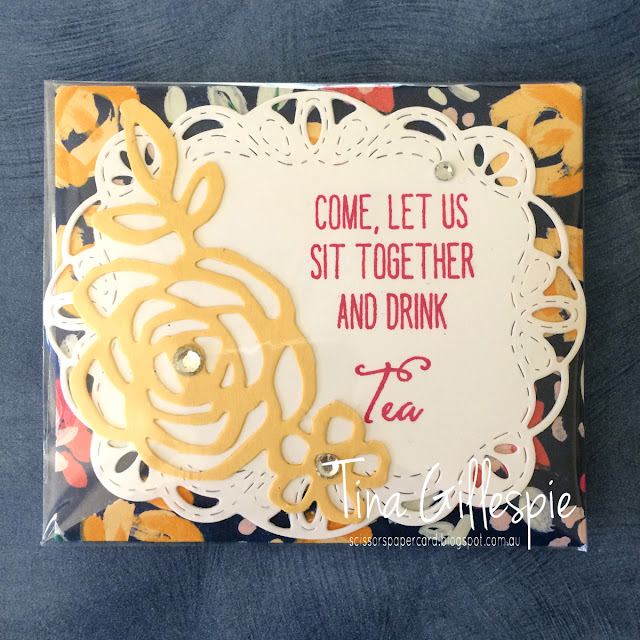
Here's another tag, stamped on half of a Whisper White Notecard in Pretty Peacock, but attached to the Pillow Box using Whisper White Baker's Twine.
I'll be back soon with the next level of stamper: Casual. You can see the Casual Samples here, and the Avid Samples here.
Bye for now,
Tina
I thought it was about time to start posting my samples from the recent OnStage event in Sydney. In case you didn't know, I was invited by Stampin' Up! to present Jacque Williams' Million CSV sales stamp set. Which, in non-SU lingo, means that Jacque sold a lot of SU stuff, won a trip to Head Office in Utah and was able to co-design a stamp set, which will go on sale in January.
Today I have for you the Beginner Stamper projects that I designed for Sydney. I will do follow up posts soon with my Casual and Avid Samples. There's just too much for one post!
Beginner Stampers are those that are very new to stamping, and so I wanted to create samples that would be very easy for them to recreate. I used some Very Vanilla Notecards and stamped an image and sentiment on both. The card on the left used Mossy Meadow, and the card on the right was Soft Suede.
I then took an Aqua Painter with a tiny bit of water in it, and lightly ran it over the areas of the image that I wanted to colour. In this case, the grass/flowers, dress and hair. The little bit of water lets the colour run slightly - just enough to give a lovely wash over the image. Too much water gets murky, which is why I only add a tiny bit to the Aqua Painter.
The inside of the card got the same treatment.
I then tried the same technique on the Scalloped Notecards. I stamped with Night Of Navy onto the Balmy Blue card and used the Aqua Painter to colour the image.
These cards must have a different coating than the plain notecards, as the water beaded a little on the surface, giving a marbled look to the finished image.
The inside reacted as the plain notecards did.
I used the same technique to make some gift tags. I simply cut a Very Vanilla Notecard in half and stamped the smaller flower image a few times in Merry Merlot. I also added some butterflies from the stamp set.
I added a hole and some twine to allow the gift tag to be added to a gift. I think it would go nicely around the neck of a bottle of wine!
Here's another tag, stamped on half of a Whisper White Notecard in Pretty Peacock, but attached to the Pillow Box using Whisper White Baker's Twine.
I'll be back soon with the next level of stamper: Casual. You can see the Casual Samples here, and the Avid Samples here.
Bye for now,
Tina
Monday, 19 November 2018
Orlando Roomie Gifts
Hi!
I'm back now from Orlando, and I had a wonderful time!
Today I have for you the gifts I made and had made for the ladies I shared a house with in Orlando. While on the hunt for Australian flag pencils for my swaps, I found these pens. Perfect!
I started with the same backing paper as I used for the pencils, but the only pieces I had left went sideways, not longways. I couldn't do a bag topper as I did for the pencils, so I went with a belly band instead.
I only had 6 to make, so I decided to stamp the kangaroos and colour them with my Blends. It was an extra special touch for some special people. I layered the kangaroos over a pair of Pool Party circles. I love the starry paper from the Twinkle Twinkle DSP pack, a bit of a nod to the American flag.
I wanted to make the gift extra special, and a little more personal, so I had some tote bags made up by Vistaprint to commemorate the trip.
Here's the tote. It's the perfect size for 12x12 papers, so I can see myself using it a lot - yes, I did have one made for me too. Hopefully the others find it just as useful!
Bye for now,
Tina
Monday, 12 November 2018
Orlando Swaps Part Two
Hi!
Today's post actually has my second and third swap items. I hadn't intended to make a third, but somehow I found it on the go before I'd even finished swaps one and two! Oops!
Let's start with swap two, which was actually my first idea. I had decided early on that I wanted to do something around an Australian flag pencil. Do you think I could find an Australian flag pencil without paying ridiculous prices? In the end I found these Aboriginal Art designs, which I think worked much better with my colour scheme.
I've used the Animal Expedition DSP again, as I wanted to use the large kangaroos this time. There are two leafy designs - this one with the frogs, and another with little birdies. I used a mix of the two as my backing piece. The bags are in the Annual Catalogue.
I used my Stamparatus to stamp the 'g'day mate' sentiment on the Stitched Circle. It's very cliche Australian, but I'm hoping that the American demos will love it! I made 24 of these swaps.
Finally, I have my last minute swap. I happened to be in Coles when my favourite Twinings Tea, Australian Afternoon, was half price. It was the smaller packs with individually wrapped bags. I grabbed two to take to the US, but when I realised they fit with the Australian theme of my swaps I decided to add them to the mix.
I didn't have enough Animal Expedition DSP left to use, so I decided to use some of my Garden Impressions DSP. I used my Envelope Punch Board to create a little tea bagged size envelope, which I topped with a Stitched Labels Framelit. I stamped a pair of sentiments from Balloon Celebration and then used part of the big floral die from Springtime Impressions for the little cluster of flowers. A few rhinestones finished off the design.
I wonder which of my swaps will be the most popular - the Tim Tam Slam, Pencil or Tea? What do you think?
Bye for now,
Tina
Friday, 9 November 2018
Orlando Swaps Part One
Hi!
How exciting - today is the first day of OnStage in Orlando. I wrote this post a couple of weeks ago, but still, I bet I'm going to be excited on the day!
Normally on a Friday I'd have the latest Just Add Ink post for you, but to cater for OnStage, last week's challenge actually runs for two weeks. Click on the link to check out the challenge details.
Instead I have for you one of the swaps I made to take to Orlando. Did you know that most Americans have never heard of the chocolatey goodness that is a Tim Tam? Did you also know that you can buy a box of 150 individually wrapped Tim Tams at Officeworks? What a perfect opportunity to educate some people on the delights of Tim Tams!
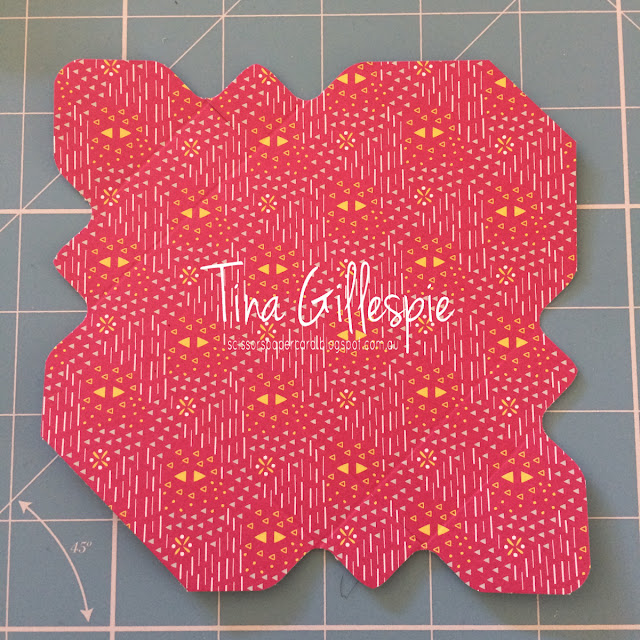
I started by working out how I was going to package the Tim Tam. I ended up deciding to use my Envelope Punch Board and the Crafty Owl's Box Buster to create a little box. This is the shape I ended up with, after starting with a 5 1/8" square piece of DSP.
I had to do some additional trimming on the bottom left and top right corners, as they wouldn't fold nicely into the box if I didn't. Once I'd folded along the score lines and snipped to create flaps, I turned the piece over and used my SNAIL to adhere some instructions to the inside of the box. Yep, I'm going to educate my fellow on how to do the Tim Tam Slam!
I then popped a Tim Tam into the box and folded the instructions over the top. I then started folding the box. I worked out that if I folded the larger long edge, followed buy the two short edges and finally the shorter long edge, I could get away with using one of my demo labels to hold the box closed.
If I tried folding in the short edges first there wouldn't be enough of the flaps exposed to stick to the label.
Here's the bottom of the box with my label attached. Now - how to decorate the top?
Aww, how cute! I made 40 of these swaps, as that's how many little kangaroos there are in two packs of the Animal Expedition DSP. I had very sore hands after hand cutting all 40 kangaroos and 80 branches! Thankfully, for the stamping I was able to use my Stamparatus for super quick production line stamping.
I'll be back on Monday with my other swap.
Bye for now,
Tina
Monday, 27 November 2017
My OnStage Swaps
Hi!
I realised over the weekend that I hadn't yet blogged the swaps I made to take to OnStage in Melbourne. I had a fun time making them!
I wanted to make a 3D swap using the Treat Tubes in the Holiday Catalogue. You can find them on page 53, hidden amongst the Halloween themed Spooky Night Suite. I based the swap on this project by Pootles, however, I had to adjust the size a bit to accommodate the different sized test tubes.
I also added an extra strip of DSP to wrap around the pieces that hold the test tube in the centre. This was just to add an extra bit of stability to the holder.
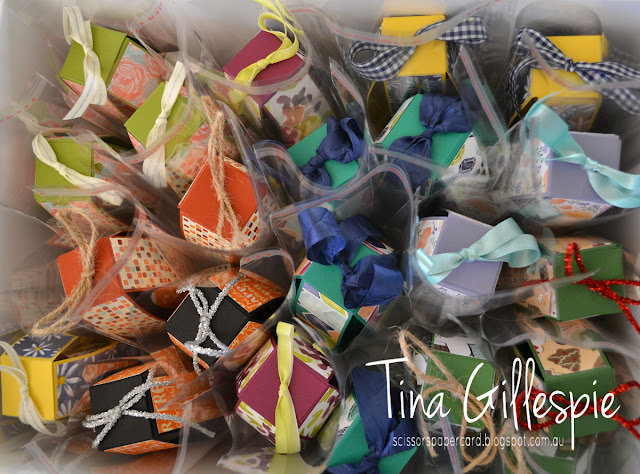
I made around 21 of the swaps, using a mix of different papers and ribbons.
Here they are, all together! I packed them in a hard sided box to take to Melbourne, as I was worried about them getting squashed in my luggage. Thankfully they survived the trip mostly OK.
Bye for now,
Tina
Subscribe to:
Posts (Atom)


