Pages

Showing posts with label Well Written Framelits. Show all posts

Thursday, 9 April 2020

JAI #500: Just Add A Die Cut Word

Hi!


Wow!! Just Add Ink is celebrating it's 500th Challenge with a massive Blog Hop! Thanks for joining us for the Hop, and hopefully the challenge. Are you starting here, or have you come from the lovely Kelly's blog? Her card is so beautiful! This week Jan has set the challenge, and it's an easy one!


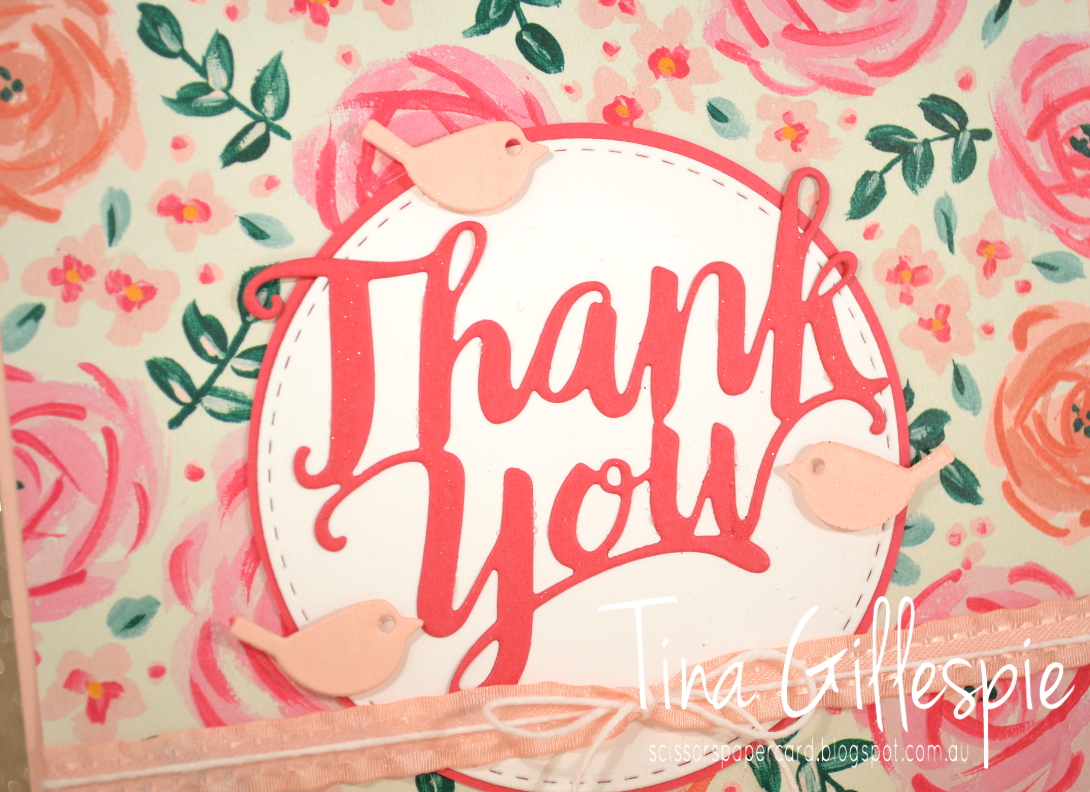
Yes, Just Add A Die Cut Word to your card. The hard part will be choosing which word to add!

scissorspapercard, Stampin' Up!, Three Room Studio, All In This Together, Well Written Dies, Copic Markers

I decided to use this free digi stamp by Three Room Studio, called All In This Together, on my card. I printed the image and then coloured it with my Copics. I didn't do any blending with the markers, it was all just straight colouring. I chose some darker colours at the top and the bottom of the card, for the sky and the road/grass/front of the houses. I chose a lot of lighter colours for the rest of the card, hopefully this kept all the speech bubbles as the focus of the card.

scissorspapercard, Stampin' Up!, Three Room Studio, All In This Together, Well Written Dies, Copic Markers

I used a scrap of Whisper White to create the speech bubble for the die cut words. It's really just a rectangle with a triangle at the bottom and rounded corners. I adhered the die cuts from the Well Written Dies  and popped the whole lot up on Dimensinals. The Die set doesn't actually have a letter I, so I just used the top of the exclamation mark for my I.

scissorspapercard, Stampin' Up!, Three Room Studio, All In This Together, Well Written Dies, Copic Markers

When I printed the digi stamp, the first attempt was a bit of a failure, as I forgot to alter one of the settings on my printer, and it was much too large. Oops! I was about to chuck out the mistake, but I noticed the three word bubbles and thought that they would work nicely for an inside sentiment. As a bonus, they match the front perfectly!

Our challenge is the same as it is every week, just make your die cut word card and add your link to the Just Add Ink blog. Before you go start making your card, don't forget to finish the rest of the Blog Hop! Next up is the fabulous Nikki, with her adorable card.


Bye for now,

Tina

Thursday, 28 November 2019

JAI #484: Just Add Colour

Hi!


It's the end of another busy week, but that means it's time for both the weekend and the new Just Add Ink challenge. Yay! This week Rachael has given us a sweet, soft colour combo to work with.


I don't know about you, but those colours scream 'baby card' to me. Ok, well maybe whisper so that we don't wake the baby! LOL!

scissorspapercard, Stampin' Up!, Just Add Ink, Witty-cisms, Peaceful Moments, Music From The Heart, Baby Card

I took the opportunity to use a new stamp set, called Witty-cisms. I was lucky enough to receive this stamp set in the bundle of goodies I got to present at OnStage recently. It's a cute little set with lots of funny images and sentiments. The text and image are actually one stamp, so I used a lot of masking to stamp the pram three times in Smokey Slate, and then just the text for the fourth square.

scissorspapercard, Stampin' Up!, Just Add Ink, Witty-cisms, Peaceful Moments, Music From The Heart, Baby Card

I stamped the images on Shimmery White cardstock so that I could watercolour the prams. The Shimmery paper copes with water much better than regular Whisper White card. The little hearts were cropped using the little heart die from the Well Written dies.

scissorspapercard, Stampin' Up!, Just Add Ink, Witty-cisms, Peaceful Moments, Music From The Heart, Baby Card

The congratulations sentiment is also from a new stamp set, called Peaceful Moments. The hearts I used on the inside are also a stamp, from the new Music From The Heart stamp set, which was also in my goodie bundle from OnStage. I just over a month they will be available for purchase.

Time for me to finish up, but you can head on over to the Just Add Ink blog, where you can see the rest of this week's Design team cards. You can also enter your card into our challenge by linking up your blog post.

Bye for now,

Tina

Tuesday, 23 July 2019

Diagonal Folded Perennial Essence

Hi!

Today I have a fancy fold card for you. I made it as a class sample. Every now and then I get a hankering to make a fancy fold, and the Diagonal Fold card was one I hadn't tried yet.

scissorspapercard, Stampin' Up!, Perennial Essence DSP, Well Said Bundle, Springtime Impressions Dies, Diagonal Fold Card

It's a fairly simple fold to make. You score a piece of A4 card in half in both directions and then cut it in half diagonally. Done! This gives you two card bases to decorate. The hardest part was the cutting, only because it didn't fit in my trimmer, so I had to use a ruler and craft blade to cut the card.

scissorspapercard, Stampin' Up!, Perennial Essence DSP, Well Said Bundle, Springtime Impressions Dies, Diagonal Fold Card

I took a piece of Perennial Essence DSP and cut it to card front size and then chopped it down the middle on the same diagonal as my card base. The butterfly and 'thanks' had a coat of Wink Of Stella for a little added glimmer.

scissorspapercard, Stampin' Up!, Perennial Essence DSP, Well Said Bundle, Springtime Impressions Dies, Diagonal Fold Card

Nice and simple on the inside, just a piece of matching DSP and a lovely sentiment. Have you tried a Diagonal Fold card? It not, do give it a go - it's a fun and easy card (or two) to make.

Bye for now,

Tina

Thursday, 18 July 2019

JAI #466: Just Add Inspiration

Hi!


It's time for the newest Just Add Ink challenge, and this week Kelly has given us our challenge. Just in time for Christmas in July, she's given us a festive Inspiration photo to work from.


Aww, how lovely is that? It's the kind of display I'd love in my house, but can never quite pull off! My eye was caught by that gorgeous black and white polka dot ribbon. I can't quite bring myself to start making Christmas cards just yet, so I ran with the polka dots for a card for my littlest great nephew's birthday.

scissorspapercard, Stampin' Up!, Just Add Ink, Well Written, Itty Bitty Birthdays, Large Numbers Framelits

These papers are actually old Creative Memories paper from my stash. I came across them while searching for something else, and I'm glad I did, because the polka dots are perfect for this challenge!

scissorspapercard, Stampin' Up!, Just Add Ink, Well Written, Itty Bitty Birthdays, Large Numbers Framelits

The paisley paper is from the same pack. I love how it's quite subtle. The best match for Stampin' Up! cardstock was Crushed Curry, which frames all of the Basic Black quite nicely. I used Black Foil for the sentiment and number die cuts.

scissorspapercard, Stampin' Up!, Just Add Ink, Well Written, Itty Bitty Birthdays, Large Numbers Framelits

I couldn't resist adding a second little birdie to the inside of the card, using a scrap of left over Black Foil. I like how it adds a little bit of whimsy to the card.

That's it from me this week - time to pop on over to the Just Add Ink blog to see the rest of this week's Design team cards.

Bye for now,

Tina

Sunday, 14 April 2019

CTC #224: Favourite Occasions Big Shot Project

Hi!


Hooray for a new CASEing The Catty Sunday Challenge Blog Hop! This week we are choosing our favourite Big Shot project from the Occasions Catalogue to CASE. You've arrived here from Siobhan's blog, or you may have started here. Doesn't matter, grab a cuppa and hop, hop, hop away!


A quick flick through the catalogue, and my eye caught on the card on the bottom left of page 27.


Part of the reason I selected this card to CASE was that I wanted to make a thank you card for my CTC teammate and New Zealand travel buddy, Judy May. She's a pink girl, and the splashes of Berry Burst in this card really appealed.

scissorspapercard, Stampin' Up!, CASEing The Catty, Incredible Like You, Well Written Framelits

As I mentioned, Judy loves pink, so I switched out the Pool Party panel for a Blushing Bride panel. I also added a couple of layers so that I could use a Berry Burst card base. All the stamping is the same as the catalogue sample, although I used Very Vanilla card to match the Tea Room ribbon.

scissorspapercard, Stampin' Up!, CASEing The Catty, Incredible Like You, Well Written Framelits

I also changed the sentiment on the front. It was my first cut into my Copper Foil paper - isn't it gorgeous? Why, oh why, did I take so long to use it? LOL!

scissorspapercard, Stampin' Up!, CASEing The Catty, Incredible Like You, Well Written Framelits

I repeated the same style of stamping on the inside. Still not a fan of the big flower, but I do like how it sits over the stamping. What do you think?


While that's it for me this week, it's not it for you! Continue on with the Blog Hop by hopping on over to Julia's blog!

Don't forget to stop by the Facebook group to join I the fun there too!


Bye for now,

Tina

Thursday, 28 March 2019

JAI #450: Just Add Babies

Hi!


Hello and welcome to the new week's challenge at Just Add Ink! This week Rochelle has challenged us to Just Add Babies to our cards. Sadly, my baby days are long gone, but I do enjoy making a sweet baby card every now and then.


I actually made this card a couple of months ago for a card class, but as we get the JAI schedule several months ahead, I was able to save it to use for this week. As my friend Rachel says - work smarter, not harder!

scissorspapercard, Stampin' Up!, Just Add Ink, Well Written Bundle, Elephant Builder Punch, Starburst Punch, Baby Card

I didn't usually buy the baby DSP in the catalogue, but I'm a bit of a sucker for stars, and this paper has the cutest star papers. I love this soft pastel version, perfect for a baby card.

scissorspapercard, Stampin' Up!, Just Add Ink, Well Written Bundle, Elephant Builder Punch, Starburst Punch, Baby Card

I've had the elephant punch since it was released, but hadn't used it yet. This challenge was the perfect time to add a cute elephant to my card. I've used Night Of Navy and  Soft Sea Foam, as they coordinate with the colours in the Twinkle Twinkle DSp. I thought the green made it a neutral card, but my class ladies thought it was more a boy card. What do you think?

scissorspapercard, Stampin' Up!, Just Add Ink, Well Written Bundle, Elephant Builder Punch, Starburst Punch, Baby Card

I used the smaller elephant on the front, so the large elephant was left for the inside. The eyes were drawn on with a Night Of Navy marker. I think the punch comes with a circle section for the eyes, but I find it easier to draw them on than fiddle with something so tiny!

How will you add Babies to your card? I can't wait to see! You can link your card over at the Just Add Ink, where you'll also find the rest of the Design Team cards.

Bye for now,

Tina

Tuesday, 26 March 2019

A Roaring Good Time With Pumpkin Pie

Hi!


Wowee, the Art With Heart team are ripping though the colours in the Stampin' Up! range. We are up to Pumpkin Pie this week. When deciding what to make I reached for my Brights cardstock tub, but I didn't find Pumpkin Pie. Oops! I forgot that in the last Colour Refresh, Pumpkin Pie was moved to the Regals.

scissorspapercard, Stampin' Up!, Art With Heart, Colour Creations, Foxy Friends Bundle, Birthday Cheer, Tropical Escape DSP, Well Written Framelits, Large Numbers Framelits, Punch Art

I have a great nephew turning two in a couple of weeks, and so this was a great opportunity to make a fun card for him. I was originally thinking a lion, but they are yellow, not orange! Tiger it was, then! I did a google search for tigers made using the fox builder punch and found a few. The one I followed was just marked as 'Alana'. How cute is he?

scissorspapercard, Stampin' Up!, Art With Heart, Colour Creations, Foxy Friends Bundle, Birthday Cheer, Tropical Escape DSP, Well Written Framelits, Large Numbers Framelits, Punch Art

He was a little fiddly to make, but soooo worth the effort. I made his stripes by stamping just the ear part of one of the heads in the Foxy Friends stamp set. I repeated this for the 2, which I think looks super cute!

scissorspapercard, Stampin' Up!, Art With Heart, Colour Creations, Foxy Friends Bundle, Birthday Cheer, Tropical Escape DSP, Well Written Framelits, Large Numbers Framelits, Punch Art

I had the foresight to make a second tiger at the same time as the first. Usually I only make one and then wish for a second one for the inside but can't be bothered as they are so fiddly. I got smart this time! You may notice that his tail is on the other side - that was a bit of an oops moment that worked out nicely.

Why not pop on over to Catherine's blog, where you can find the links for the rest of this week's Pumpkin Pie cards? They're gonna be great!

Bye for now,

Tina

Sunday, 24 March 2019

CTC #221: Needlepoint Nook

Hi!


Hooray for Sunday and the new CASEing The Catty Sunday Challenge Blog Hop. Not so much hooray for the end of the weekend, but you can't have it all. At least it's going out in style LOL.

The blog before mine was the wonderful Julia Quinn, if you started here, there, or anywhere - it doesn't matter, just keep hopping until you get back to where you started.


This week we are CASEing projects from the Needlepoint Nook section of the Occasions Catalogue. Would you believe that, despite me enjoying a bit of sewing and needlecraft, I don't own anything from this suite of products? I wish I could have it all! For today's card it just meant that I had to be a little bit inventive.


The inspiration for my card ended up being the word 'friend' on the Berry Burst card to the right in the photo. I like how it was stamped and fussy cut closely around the word. It seems to be a bit of a trendy look in the paper crafting world at the moment. And look, I managed to scrounge up a small piece of DSP out of a Make & Take pack from Orlando.

scissorspapercard, Stampin' Up!, CASEing The Catty, Needlepoint Nook DSP, Gingham Gala DSP, Thank You Thinlit, Well Said Bundle

I wanted to make a thank you card for a new friend who helped me a lot when I recently tried my hand at quilting. Sandra was one of my Orlando housemates and she is a very experienced quilter, only too happy to share her knowledge and experience as I made my first. The DSP was't anywhere big enough to cover the front of the card, so I had to get a little bit fancy. Then I realised it sort of looked like a patchworked piece, and that made me happy! The gingham is from the Gingham Gala DSP pack.

scissorspapercard, Stampin' Up!, CASEing The Catty, Needlepoint Nook DSP, Gingham Gala DSP, Thank You Thinlit, Well Said Bundle

I don't have the stamp set from the Needlepoint Nook suite, so I used a Well Written framelit instead. I adhered a piece of a Multipurpose Adhesive Sheet to the back of a scrap of Berry Burst and then sent it through the Big Shot. The adhesive sheets are awesome for these small die cuts! I then peeled off the backing, adhered the word to a scrap of Whisper White and got to work with my snips. I was so happy with how it turned out.

scissorspapercard, Stampin' Up!, CASEing The Catty, Needlepoint Nook DSP, Gingham Gala DSP, Thank You Thinlit, Well Said Bundle

I had one tiny scrap of the Needlepoint Nook DSP left, but it wasn't wide enough for a standard inside. Gingham Gala to the rescue again!

What catches your eye in the Needlepoint Nook section of the Occasions Catalogue? I can't wait to see your card in the CASEing The Catty facebook group.


Before you head on over there, don't forget to finish the hop! Next up is the lovely Kelly Kent. She's bound to blow you away with her creativity.


Bye for now,

Tina

Tuesday, 19 March 2019

Powered Up Powder Pink

Hi!


Gee whizz, another week has flown around again! Where are they going? This week for Colour Creations we are making cards using Powder Pink. I'm really not a pale pink fan, so I found this week's card a little difficult to start. I needed to make a second giant Thank You card (you can see the first one here), and so I pulled out my Garden Impressions DSP, which has a multitude of pinks.

scissorspapercard, Art With Heart, Colour Creations, Tropical Chic, Garden Impressions, Thank You Thinlit, Well Said Framelits

The lady I am making this card for is quite girly, so I thought this paper would be perfect for her. She has been running our support group for families of special needs kids while our regular coordinator has been on leave. One term ended up being one year and one term! We will miss her when she goes.

scissorspapercard, Art With Heart, Colour Creations, Tropical Chic, Garden Impressions, Thank You Thinlit, Well Said Framelits

How cute are these little birdies?  They are from the Well Written Thinlits set, and the answer is 'super cute'! Once again, I ran my Wink Of Stella pen over the die cut Thank You and the birdies for a bit of extra bling.

scissorspapercard, Art With Heart, Colour Creations, Tropical Chic, Garden Impressions, Thank You Thinlit, Well Said Framelits

As before, I added writing panels to both sides of the insides, as many people need to sign the card. It's a big one - nearly 6 inches square.

scissorspapercard, Art With Heart, Colour Creations, Tropical Chic, Garden Impressions, Thank You Thinlit, Well Said Framelits

The Powder Pink ruffle ribbon adds that final, girly touch to the card, don't you think?

As always, Catherine's blog is where all the rest of the Colour Creations magic is happening this week. Why not pop on over?

Bye for now,

Tina

Thursday, 14 February 2019

JAI #444: Just Add Colour

Hi!


Hooray for the new challenge at Just Add Ink. This week Nikki has given us a colour combo with a little difference - we get to pick one of the colours!


I really like this one! I was inspired by a top I purchased in Walmart in Orlando on my recent trip. It's a really sweet top - black with ruffles and lovely embroidered flowers all over it.


Whoops, the tilt on the pic is a bit extreme, but you can see the top at least! I loved the bold flowers on the black background, and used that as inspiration for my card.

scissorspapercard, Stampin' Up!, Just Add Ink, Picture Perfect Birthday, Bitty Blooms Punch Pack, Stained Glass Thinlits, Well Written Thinlits, Subtle DTIEF

I started by using my Stained Glass Thinlits to create the window in the card. I backed the opening with a window sheet and then adhered the die cuts to the sheet. There wasn't really another way to do it. I had a scrap piece of Powder Pink cardstock that had already been embossed with the Subtle DTIEF, so I trimmed it and layered it underneath the window.

scissorspapercard, Stampin' Up!, Just Add Ink, Picture Perfect Birthday, Bitty Blooms Punch Pack, Stained Glass Thinlits, Well Written Thinlits, Subtle DTIEF

The flowers were all punched using the new Bitty Blooms Punch pack. They were layered over a pair of Granny Apple Green (the colour I chose as my third!) vines, die cut from the Well Written Framelits. Some fo the flowers were popped up and others were adhered directly to the vines.

scissorspapercard, Stampin' Up!, Just Add Ink, Picture Perfect Birthday, Bitty Blooms Punch Pack, Stained Glass Thinlits, Well Written Thinlits, Subtle DTIEF

I repeated the vines and flowers on the inside of the card, along with a strip of the Subtle Embossed Powder Pink cardstock I trimmed from the piece that went under the window.

How do you like my clothing inspired card? Do you find yourself doing that? I see inspiration everywhere! Why not pop on over to the Just Add Ink blog to see how the other Design team members were inspired by these colours? Which third colour will you choose?

Bye for now,

Tina