Hi!
Welcome to my first post of the night - there'll be another one a bit later! For now though, I am hopping with my demonstrator friend, Kelly Kent. It's her birthday (hip hip hooray!) and she's celebrating by doing a blog hop. what a fun way to celebrate! The blog before mine was Shannon's, but we are all linked in a circle, so start wherever and end where you start! Confused? LOL!
Tonight's cards are the first I made using the technique that's going totally viral, especially after all us demo's went to New Zealand and cleared them out of Press & Seal! Yes, it's the Floating Frames technique. I hope you're not too sick of it yet!
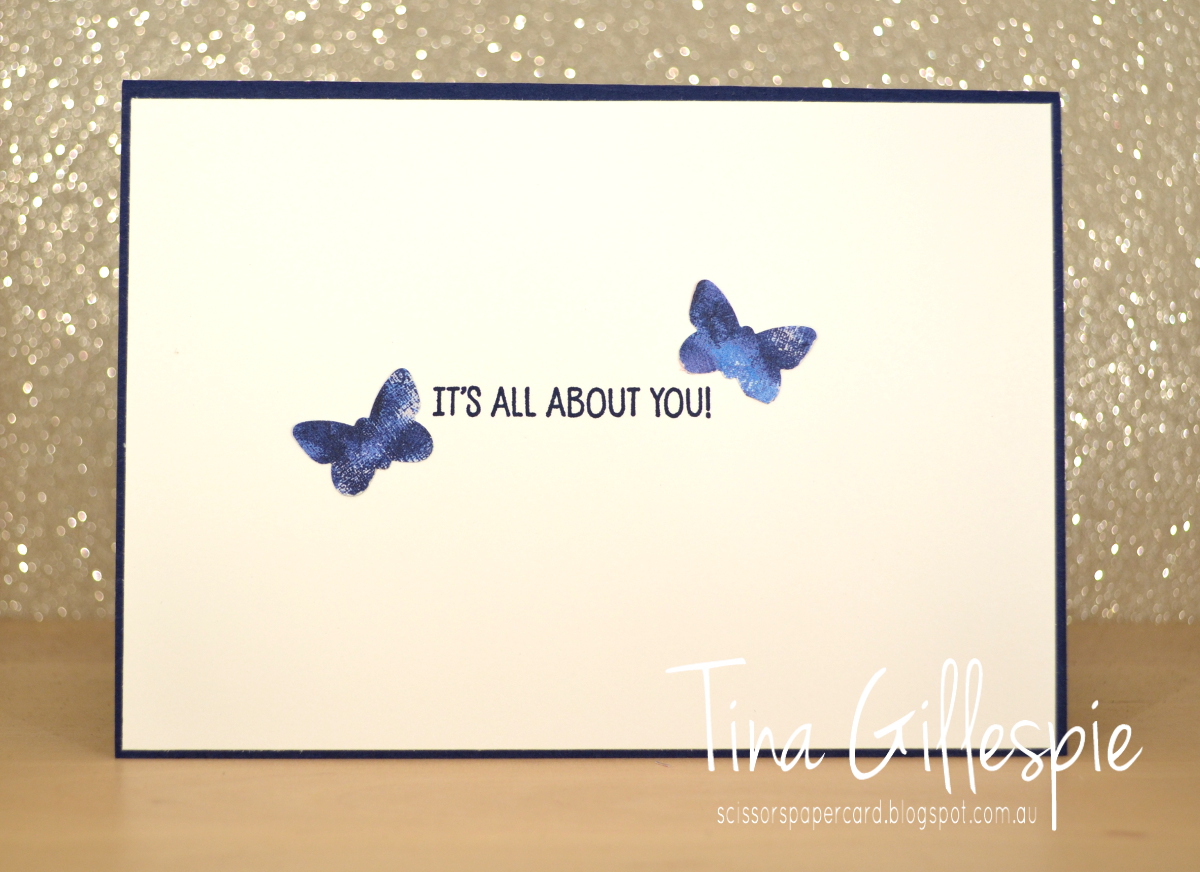
I made this card as a class sample and decided that it's far too hard for everyone to stamp, colour and cut a heap of flowers in a class, so we'd use punches with DSP instead. It really cuts down on the time involved but still makes a pretty awesome card! I used a sheet of 6x6 DSP from the Garden Impressions DSP pack combined with the Butterfly Duo punch for my card. One sheet of 6x6 gives plenty of butterflies for the front, with some left over to decorate the insides.
I'm not going to explain the technique, there are plenty of videos and tutorials out there. I will give you a few tips though. I didn't take a photo, but before I laid out my punched shapes on the copy paper, I traced the shape of the circle die onto the paper. This allowed me to see where I would cut and hopefully I could avoid teeny tiny pieces of butterfly to try to stick a dimensional to!
As it turned out, choosing a slightly mottled DSP worked well, as sometimes the Press & Seal sticks too well to the paper. If a little bit peels away, it's less obvious on a paper that already looks distressed!
Can you tell where the paper peeled away a little? Didn't think so! LOL
I kept the stamping simple by using the same sentiments on both cards, just switching the inside for outside to suit each one.
Slightly dodgy photo, but here's both cards together. I've made a few more Floating Frames cards since these, including a pair using the Balloon Duo punch. It's a bit addictive!
That's it for me, now you're hopping off to visit Monique's blog to see what gorgeous card she's made for Kelly's Birthday Hop.
Bye for now,
Tina
Showing posts with label Picture Perfect Birthday. Show all posts
Tuesday, 14 May 2019
Thursday, 11 April 2019
JAI #452: Just Add A Sketch
Hi!
Welcome to the new Just Add Ink challenge. This week it's a sketch challenged designed by me! This was a fun sketch to design, and I think it can be interpreted so many ways - don't just stick to circles, any shape is fine!
I think I designed this before Christmas and I had snowflakes in my head instead of circles. In the end, I used a mix of Pokeballs and stars.
I made this card for my oldest child, Alex, who is turning 16 (gulp!) in a few days. He's mad on Pokemon Go, and the Pokeballs are a big part of the game. The Crushed Curry DSP is from the Classic Garage DSP Pack, I loved the subtle grungy pattern in it.
To make the Pokeballs I punched 1 1/4 inch circles in Whisper White and Real Red, then snipped the red ones in half. I added a thin strip of Basic Black to the back of the red and then adhered the whole lot to the white. To get the little circles, I used a 1/4 inch circle punch and then punched a 1/2 inch circle over the opening to create a black 'donut'. I then adhered it over the top of a 1/2 inch white circle and then glued that to the larger circle. Done!
The numbers 16 were done in a similar way to the larger part of the Pokeball. The hardest part was lining up the black strip!
I made a fourth Pokeball for the inside of the card too - why not when I'm already making three? LOL. I hope Alex loves his card, I know I had fun making it.
Time to head on over to the Just Add Ink blog, where you can find the rest of the Design Team's cards and add your own to the challenge.
Bye for now,
Tina
Thursday, 14 February 2019
JAI #444: Just Add Colour
Hi!
Hooray for the new challenge at Just Add Ink. This week Nikki has given us a colour combo with a little difference - we get to pick one of the colours!
I really like this one! I was inspired by a top I purchased in Walmart in Orlando on my recent trip. It's a really sweet top - black with ruffles and lovely embroidered flowers all over it.
Whoops, the tilt on the pic is a bit extreme, but you can see the top at least! I loved the bold flowers on the black background, and used that as inspiration for my card.
I started by using my Stained Glass Thinlits to create the window in the card. I backed the opening with a window sheet and then adhered the die cuts to the sheet. There wasn't really another way to do it. I had a scrap piece of Powder Pink cardstock that had already been embossed with the Subtle DTIEF, so I trimmed it and layered it underneath the window.
The flowers were all punched using the new Bitty Blooms Punch pack. They were layered over a pair of Granny Apple Green (the colour I chose as my third!) vines, die cut from the Well Written Framelits. Some fo the flowers were popped up and others were adhered directly to the vines.
I repeated the vines and flowers on the inside of the card, along with a strip of the Subtle Embossed Powder Pink cardstock I trimmed from the piece that went under the window.
How do you like my clothing inspired card? Do you find yourself doing that? I see inspiration everywhere! Why not pop on over to the Just Add Ink blog to see how the other Design team members were inspired by these colours? Which third colour will you choose?
Bye for now,
Tina
Thursday, 24 January 2019
AWH January Blog Hop: Occasions Catalogue
Hi!
Tonight the Art With Heart team are sharing creative projects using product from the Occasions Catalogue. The Occasions Catalogue is current now until June 3rd. Be sure to request your copy of the catalogue today (along with the Sale-A-Bration brochure).Did you know that Sale-A-Bration is also a great time to join our fabulous team? Ask anyone on the blog hop if you’d like more details.
I decided to use one of the smaller items in the Occasions Catalogue for tonight's projects. It may even be one you've overlooked - the Sweet Pins and Tags, on page 15 of the catalogue. They are part of the How Sweet It Is suite of products. I'm not a big fan of that suite, and I'm not really even sure why I ordered the tags. Maybe to bump up an order so that I reached a SAB threshold for a freebie? Sound familiar? LOL
As I sat to craft, I looked at page 14 of the Occasions Catalogue and noticed that the samples had coloured tags. I was so excited by this - it makes the tags so much more interesting! The basic tags are white with iridescent foil edges - pretty, but a bit ho-hum. How much nicer does it look in Calypso Coral? The iridescent border stands out soooo much more, and you really get to see the features like the stripes on the corners.
To colour the tag, I simply used my sponge brayer, but you could probably just apply the ink with a spritzer, dauber or sponge. I completed the card with two more Occasions Catalogue products - Happiness Blooms DSP and Itty Bitty Birthdays stamp set. The flower on the tag was fussy cut from the DSP, as is the flower on the inside.
Now, once I'd coloured one tag, I couldn't stop there. The pack has three different shaped tags, and you get 8 of each, plus some cute little pins that you could use to attach them to ribbon, etc. I chose not to use the pins as they don't really make sense on a card.
This card features the round tag, brayered with Lovely Lipstick ink. Once again, the DSP is from the Happiness Blooms DSP pack. I love the bold colours and patterns in the papers!
The stamp set I used on the inside is also a new set from the Occasions Catalogue, called Incredible Like You. I really love the cursive font - what do you think?
I've cheated a little on this last card, as apart from the tag, it's mostly SAB products. As soon as I saw the tag I decided it would make a great resting spot for a butterfly from the Botanical Butterfly DSP. I was right!
This tag was brayered with Balmy Blue ink to match the colours in the DSP. Even though it's a softer colour it really makes the tag pop.
I returned to Itty Bitty Birthdays for the inside sentiment.
Here are all three cards together. Are you rethinking the tags now? At only $8.95 for a pack of 24, they are a value buy, and definitely worth another look, especially as they can be changed to any colour you desire. Just doing a spot of enabling there!
Phew! That's finally it from me, now you're off to visit Ros Davidson, who always creates something pretty amazing!
Here's the list of links in case you get lost or find a broken link along the way.
Bye for now,
Tina
Tuesday, 22 January 2019
Incredible Night Of Navy
Hi!
Time for this week's Colour Creations Blog Share. This week it's Night Of Navy, which recently got shifted to the Neutrals colour family. It makes sense if you think about things like clothing - navy items are often used as a neutral with other items.
I started my card by using my sponge brayer to colour the bottom corner of the card. I then used my Aqua Painter to drip and then flick some water over the coloured area. You can see the difference - the drips are big and round, while the flicks are much smaller. It's a fun way to add interest to a block of colour.
The flowers from Incredible Like You are stamped in Berry Burst. I didn't stamp off the colour - the more solid stamp in the two stamp pair is designed to transfer less ink to the card, giving a lighter shade. So clever! The leaf stamps are the same design as the flower. I stamped them in Old Olive, which incidentally, is next week's colour.
I recreated a mini version of the front on the inside. I realised after I'd stuck everything down that I'd forgotten to do the water flicks over the Night Of Navy. Oops!
Why not head on over to Catherine's blog, where you can see the rest of this week's Night Of Navy cards?
Bye for now,
Tina
Sunday, 13 January 2019
CTC #211: All My Love
Hi!
Hello again, and welcome to the new week's CASEing The Catty Blog Hop! This week the blog before mine is Peta's. It really doesn't matter where you start - just keep on going until you get back to where you started. When you're done, why not pop on over to the Facebook group to enter a card?
This week I picked a card from page 7. It can be a bit tricky to think about how to CASE a card when you don't have any of the same products. Actually, I probably shouldn't say tricky, as it's not really, it just takes a little more thought.
The card I CASEd is quite soft with its colours, but I went in the other direction and went bold so that I could play with the new Happiness Blooms DSP.
You can see that my card is essentially the same, I've just used what I have in my stash. The flowers were all fussy cut from the DSP as I don't yet own the Bloom By Bloom stamp set.
I also had to substitute for the Stitched Labels die, as I don't have the die used on the card, which is from the Rose Trellis set. It just goes to show that a CASE can be more than a direct copy.
I'm sorry I don't have my usual picture of the inside today - I'd mailed the card before I realised that the photo I'd taken was too blurry to be used. You'll just have to imagine that I stamped the tall, thin sentiment from Picture Perfect Birthday and adhered a few of the smaller flowers in a cluster beside it. Can you picture it? I hope so!
Now you're off to see the lovely Rebecca's card for the All My Love challenge.
Don't forget to check out our Facebook group when you're done!
Bye for now,
Tina
Tuesday, 13 November 2018
A Bike Ride Through The Highland Heather
Hi!
Time for the new Colour Creations Blog Share!
This week it's Highland Heather's turn. It's another new purple in the range. It's lighter than Gorgeous Grape, which we featured a few weeks ago, and they work wonderfully together.
My first thought was to use the purple to stamp a bike. I haven't used my Bike Ride stamp set much, so this was a good excuse. While I was stamping with a set I hadn't used much, I decided to use a few more from that same category - Handwritten and Pick A Pennant.
To make the pennant I first stamped the banner, stamping it off on some scrap paper first. I then stamped the letters over the top. I hand cut the banner because I haven't got the coordinating framelits. I found I had to snip right up between the sections on the 'birthday' banner so that I could bend it enough to fit on my card.
How cute is that little birdie? He's from the Pick A Pennant stamp set too. I couldn't resist adding him onto both the front and inside of the card.
Catherine is hosting this week's Colour Creations Blog Share as usual. You can pop on over to her blog to see the rest of this week's cards.
Bye for now,
Tina
Thursday, 18 October 2018
JAI #431: Just Add A Sketch
Hi!
Hello to everyone joining us for the new Just Add Ink challenge. This week it's a sketch challenge designed by me! I love designing sketches and then seeing how everyone interprets them.
How's that for a great sketch if I do say so myself? LOL! The leaf shape could be any shape really - let your imagination run free! I had a friend ask me to make a llama card for her daughter's birthday, so my leaf became a llama.
How much fun is this card? The llama stamps and papers are all retired now (thanks, Kelly, for sending me some samples!) and I had to dig deep into my cardstock stash for some Tempting Turquoise cardstock to match, but it was worth the effort.
Mr llama was coloured with my Early Espresso watercolour pencil and then blended with my clear Wink Of Stella pen. The sombrero was fussy cut from another sheet of the DSP, as was the blanket.
I used another stamped cactus and fussy cut sombrero to finish off the inside. I actually made two llama cards for my friend so that she had a choice, as I wasn't 100% certain the this one fit the brief of a blue llama card. I'll be back on Monday with the second card, and I'l let you know which got chosen then.
Until then, why not pop on over to the Just Add Ink blog where you can join in all of the fun with my sketch? See you there!
Bye for now,
Tina
Tuesday, 9 October 2018
Cat In The Garden
Hi!
Welcome to the new Colour Creations Blog Share. This week we are up to the g's - more specifically Garden Green. It's definitely an old favourite of mine!
The first thing I decided was that I was going to brayer the Garden Green ink. I had no idea on what I was going to do this braying though! I went looking through my DSP and found nothing suitable. Then I was looking through the items on sale for World Card Making Day and decided that the large black and white striped piece from the Lots Of Happy Card Kit would be perfect!
I CASEd myself by embossing the Gold Foil with the Subtle DTIEF and popping it behind the punched cat shape. Such a cool look! I used the stamp set from the Notes Of Kindness Card Kit to stamp the leaves behind the Gold Foil. The pearls are also left overs from the same kit - you definitely get plenty!
After I stuck down the Gold Foil on the inside I realised I should have embossed it to match the front. I probably would have lifted it up (the spatula blade on the new Take Your Pick tool is perfect for that!), but I'd already adhered the cat over the top, and it wasn't going anywhere. Typical cat! LOL!
You can see the rest of this week's Garden Green cards over at Catherine's blog. Next week is Gorgeous Grape - a lovely purple that I really haven't used much of, so this is a good chance to change that!
Bye for now,
Tina
Subscribe to:
Posts (Atom)