Pages

Showing posts with label Simply Scored. Show all posts

Sunday, 15 August 2021

CTC 331: CASE The Mini Catalogue

 Hi!


Welcome to the new CASEing The Catty Sunday Challenge Blog Hop. This week we are challenging you to CASE any project from the July-December Mini Catalogue.


Flipping through from the back of the catalogue, I came across this beauty in the Bundles Section of the catalogue.


I'm very much a blue girl, so this card and it's gorgeous colour combo appealed to me straight away. I modified it a little for my card, though.

scissorspapercard, Stampin' Up!, CASEing The Catty, Hand Penned Petals, Biggest Wish, Celebrate Sunflowers, Penned Flowers Dies, Stitched Shapes Dies, Simply Scored

I started with a dry embossed background, rather than embossing paste. I used my Score Board with the diagonal plate to score randomly spaced diagonal lines over my Balmy Blue cardstock. I then stamped the crosses image from Biggest Wish on the card in Balmy Blue ink. It's very subtle!

scissorspapercard, Stampin' Up!, CASEing The Catty, Hand Penned Petals, Biggest Wish, Celebrate Sunflowers, Penned Flowers Dies, Stitched Shapes Dies, Simply Scored

I used my Hand Penned Petals bundle for the flowers, with Misty Moonlight, Balmy Blue, Soft Succulent, Polished Pink and Fresh Freesia inks. I few In Colour gems in Polished Pink finished off the front.

scissorspapercard, Stampin' Up!, CASEing The Catty, Hand Penned Petals, Biggest Wish, Celebrate Sunflowers, Penned Flowers Dies, Stitched Shapes Dies, Simply Scored

I decorated the inside with the same stamps and colours, with just a sentiment from Celebrate Sunflowers to complete the card.

We'd love for you to join in our challenge, which is as easy as joining our Facebook group and posting a photo of your card. We can't wait to see what you CASE.


Please do continue on with this week's Blog Hop though. The next blog on the hop belongs to my lovely friend, Rachel. Her card took my breath away when I saw it - you really don't want to miss it!


Bye for now,

Tina

Wednesday, 4 May 2016

Night Of Navy Leaflets

Hi!


Some more retiring products today - this time it's the Hostess stamp set Happy Birthday Everyone and also the Corrugated Paper (sob!).


I quite like the stamp set for the big, bold Happy Birthday stamp. It's a great pair of fonts, and because it's so big you don't need to do much else on a card to make a big impact. I paired it with a duo of die cut leaves from the Leaflets Framelits. The Whisper White Leaf is actually cut from the inside and used on the front. The Corrugated Paper has been fabulous for using on masculine cards, so I think I'll be stocking up before it goes!


When I was making this card I had my upline, Sue Madex, in mind. Sue's a real whizz at making cards that look simple on the surface, but when you really look you can see a heap of extra little touches. One of them is scoring, like on this card of hers. My card has two score lines in the Night Of Navy base card on either side of the Whisper White panel. It's very hard to photograph on the dark base, but you can just see it in the photo above.


Here you can see where I've taken the Whisper White die cut to use on the front of the card!


Bye for now,


Tina

Friday, 13 March 2015

JAI #254 : Just Add Colour!

Hi!

This week at Just Add Ink we have put together a gorgeous colour combination to inspire your creativity.  The Design Team have put together a fabulous collection of gorgeous cards that you can see over on the blog.


Isn't it gorgeous? I love the combination of green and golden brown with the splash of orange.


I must say that I'm really thrilled with how this card came together.  I wanted to layer the Baked Brown Sugar base and matt, but they needed something to break it up a little.  The dry embossing frame worked a treat, and adds a bit of interest without shifting the eye from the main image.


I only used Tangelo Twist ink on the flower - I simply stamped it off to get the different shades.  The stem used the two shades of green in the colour combo.


If you know me, you know that I always 'do' the insides of my cards too.  Another Lotus Blossom finished it off perfectly!

What do you see in the colours? Make sure you share your creation with us over on the Just Add Ink blog.

Bye for now,

Tina

Monday, 17 November 2014

Layout 83: Hollywood Horrors

Hi!

Another layout for you, and it's another 'spooky' one.  I've done a few lately!


This photo was taken at the Royal Adelaide Show just before Rob and the kids went through the Hollywood Horrors ride. I had to laugh at how frightened Ada looks, even though she insisted she wanted to go on the ride.


I scored around the outside of the layout and then wrote most of my journalling along the score line.  If you'd like to know how I did it you'll need to sign up for my newsletter.  There's a sign up box over to the right on my sidebar.

Bye for now,

Tina

Wednesday, 30 October 2013

Epic Day Male Card

Hi!

On Monday I showed you a card I'd made as a sample for a Masculine Cards class that I'd run recently.  Here is one of the other cards we made at that class.


This card showed a great way to use up the multitued of little scraps of patterned paper you always seem to end up with.  I just cut them to the same height and adhered them to a piece of backing cardstock. The widths don't matter, in fact I think different widths look better than uniform widths.


A bit tricky to see, but I scored some lines between the sentiment and the DSP panel.  Scor
ing is a great way to add some interest to a card.


We used the Soda Pop Tops (now retired) to add a feature to the card.  We stamped the compass from The Open Sea to go into the Soda Pop Top and then covered it with a layer of Crystal Effects.  In hindsight I would have stamped it in a darker ink.


Bye for now,

Tina

Monday, 7 October 2013

A Christmas Gift

Hi!

Last month for my Holiday Catalogue launch I decided to prepare a 3D item for my guests to make. With Christmas not too far away a little Post-It Note Holder was the perfect project.


These were quite easy to put together, once we'd sorted out all the pieces.  I like my layers so there were quite a few!


I kept the stamp on the front fairly occasion-neutral so that if my guests wanted to give this away on an occasion other than Christmas it was still possible.


We also stamped on the first Post-It Note, but of course that's not the sample I photographed!!

I think I'll be making lots more of these for the kid's teachers at the end of the year.  Teachers always need more Post-It Notes!

Stamps: Label Love
Ink: Cherry Cobbler, Old Olive
DSP/Cardstock: Season Of Style DSP Stack, Cherry Cobbler, Old Olive, Very Vanilla
Other: Artisan Label Punch, Cherry Cobbler Seam Binding Ribbon, Sticky Strip, Simply Scored Scoring Tool, Dimensionals, Post-It Notes, Pencil

Bye for now,

Tina

Sunday, 8 September 2013

JAI Scrap #21: Just Add Washi

Hi!

Here we are again, it's time for another Just Add Ink scrapping challenge.


This month Kim has challenged us to use Washi Tape on our layout.  It's great timing, with 2 sets of washi tape available in the Annual Catalogue and another two sets in the Holiday Catalogue. You don't need to use Stampin' Up! washi though, any washi is fine.


I just had to have the Witches Brew Designer Washi Tape from the Holiday Catalogue when I saw it.  I'm not really into Halloween, but I loved the designs on the washi. The photos of my family Trick Or Treating last year worked well with the washi.


I used Gorgeous Grunge to create my background, including stamping the lines behind the title.  I used the coordinating ABC-123 alpha stamps to create the title, which is popped up on Dimensionals.


The zig-zag washi border took me a while to create, but it's worth the effort.  I first scored a very light zig-zag line using my scoring tool and then adhered the first row of washi along the score line.  I then added the second and third line of washi to complete the border.


Here you can see that I used more of the washi to create 'hinges' for my hidden photos and journalling. I applied the washi to both sides of the photo to make the hinges a little stronger.


Well, there you go - a couple of easy ways for you to incorporate washi tape into your layouts.

Stamps: Gorgeous Grunge, ABC-123 Outline Alphabet and Numbers, ABC-123 Sketch Alphabet and Numbers
Ink: Pumpkin Pie, Basic Black
Cardstock: Pumpkin Pie, Basic Black, Whisper White
Other: Sponge Daubers, Dimensionals, Sanding Block, Simply Scored Scoring Tool, Simply Scored Borders Plate

I hope you can play along this month with us at Just Add Ink.

Bye for now,

Tina

Friday, 7 June 2013

JAI #168: Just Add A Sketch

Hi!

Brrrr! It's been a cold end to the week here in Adelaide which is perfect stamping weather.  Luckily it's time for another Just Add Ink challenge.


This week Mae has designed a sketch to inspire our projects. The Design Team have interpreted the sketch in many different ways.


For my take on the sketch I decided to make a card for my eldest son Alex's 10th Birthday.  He's a big Star Wars fan so I decided to include something from the movies on the card.


For the punch art R2D2 I took my inspiration from two different sources. You can see them here and here.  I pretty much took the bits I liked or could easily recreate with my punches form each one and combined them to get my version.  I think it turned out well!


You can see in this close up that I dry embossed a zig zag feature across the bottom of the card.


I repeated the zig zag embossing on the inside too.  Sorry for the dark photos, the weather lately hasn't been good for photography.


You can see it a bit better in this photo.

Stamps: Sassy Salutations
Ink: Night Of Navy, Sahara Sand
Cardstock: Brushed Silver, Night Of Navy, Basic Black, Whisper White, Silver Glimmer Paper
Other: Big Shot, Timeless Type Alpha Dies (retired), Lots of Punches, Dimensionals, Simply Scored Borders Scoring Plate, Sponge Dauber

What will you do with the sketch? Make sure you link up at Just Add Ink so we can all see.

Oh, I should let you know that Alex loved the card!

Bye for now,

Tina

Friday, 9 November 2012

Festive Friday #44

Hi!

After a bit of an absence from my Design Team duties I'm back with a Festive Friday card.


This week Nicole has chosen a gorgeous candy cane and peppermint picture to inspire us.

I have been suffering from a serious lack of mojo over the past month.  I've had a lot going on and not much headspace for creating.  Some advice for these kinds of situations is to find a card you love and CASE it.  In this case I decided to CASE myself, so I went right back to the very first Festive Friday card I made. It was a Valentine's card and you can see it card here.


I used the large snowflake stamp from Snow Swirled  and my Real Red Inkpad to recreate the red and white striped look of the peppermint lollies in the inspiration photo.  The merry stamp is from For My Family.  Here's a closer look at the panel.


The scallop punchies are the new smaller Scallop Circle punch from the Holiday Catalogue. I also used some Rhinestones for a bit of bling.  Don't forget the score lines created using my Simply Scored Scoring Tool.


Nice, simple stamping on the inside to compliment the simplicity of the outside.

I hope you can play along with us this week!

Bye for now,

Tina

Monday, 10 September 2012

Heartfelt Event Reject Layout: Need 4 Speed

Hi!

Here is the last of my posts on the layouts I completed for Stampin' Up!'s Heartfelt Events.  I will show you the first layout I created, and eventually rejected, soon, but first a picture of me with two of my layouts at the Melbourne event.


I was pretty chuffed to have my work up along side some very well know Stampin' Up! scrappers!


This was the first layout I made with the Heartfelt Events in mind.  I like the layout, I just didn't feel it was quite up to the standard I was expecting of  myself.  I think I just strayed a little to far out of my usual style and I didn't feel it was quite working.


I used a lot of Silver Foil Smooch spray to simulate the mud and dirt that goes along with the quad bikes.  The spray is a great way to break up a background and give it more interest.


I hope you can see in the above photo, but I also scored lines around the photos to help highlight them.  I also sanded the edges to lift the photos out of the background.  It's a favourite technique of mine!


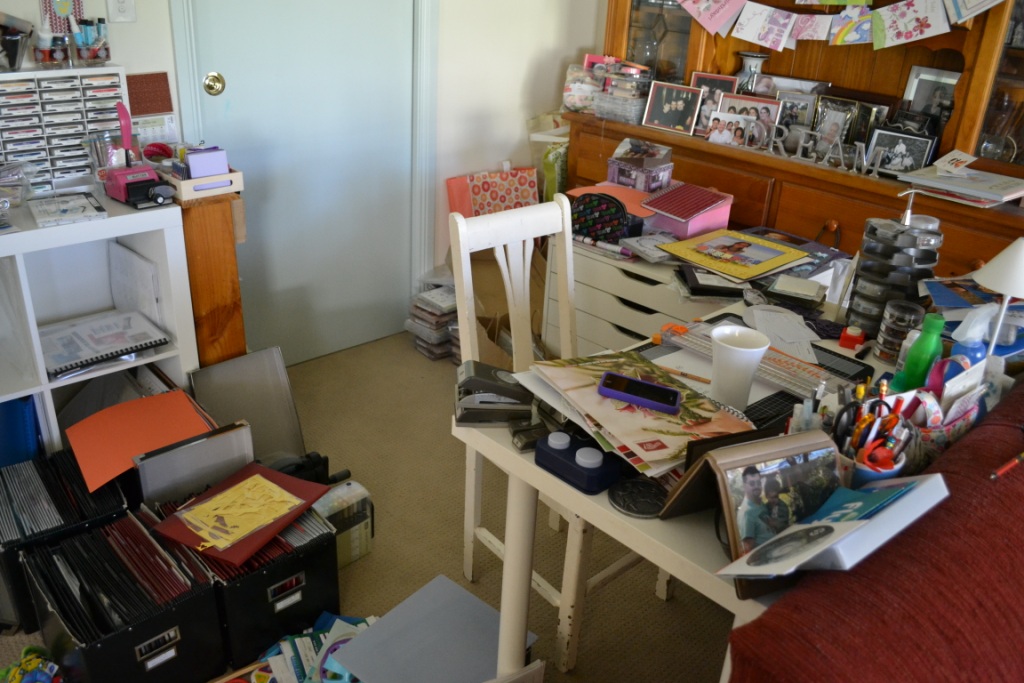
And here's how messy my scrap space got after a week of solid scrapping and not tidying up between layouts.  I had stuff everywhere!  I'm not usually quite so messy! 

Thank you to my beautiful husband for taking up the household slack while I was scrapping my heart out for the wonderful company I love being a part of, and thank you to Stampin' Up! for inviting me to submit some layouts.

Ink: Silver Foil Smooch Spray, Basic Grey Stampin' Write Marker
Cardstock: Garden Green, Brushed Silver
Other: Big Shot, Typeset Alpha Dies, Simply Scored Scoring Tool, Sanding Block

Bye for now,

Tina

Sunday, 2 September 2012

JAI Scrap #9: Just Add a Sketch

Hi!

Happy Spring!  I have been enjoying the wonderfully warm and sunny weather in Adelaide that has heralded the start of Spring.  I hope you are enjoying similar sunshine!  Well, not only is it spring, it's also the first Sunday of the month, which means it's time for a new scrapbooking challenge at Just Add Ink.


This month the very clever Ruthy has designed a sketch for the challenge.

 
Isn't it fantastic? There are so many different ways you could play with this sketch - we'd love to see your interpretation!  You could use one large photo, or you could use several smaller ones and cluster them together.  That's what I chose to do for my layout.
 
 
I used some of the gorgeous new Storytime DSP as the basis for my layout.  It has similar colours to those in the shirt Hudson is wearing in the photos, so it was a perfect match!  The colours I used are Riding Hood Red, Pool Party and Very Vanilla.  I simplified the sketch a little.  I ran out of room for the flags at the bottom, so I substituted some trim from the Tasteful Trims Die, as well as a smaller rosette.


You may be wondering about the title of my layout - The Fortress of Hudsontute.  The layout shows Hudson getting his first "big boy bed".  The fact that it's a ginormous disability friendly bed didn't escape the notice of Alex and Ada, who promptly got into it for a play and explore.  They named it the Fortress after the Fortress of Solitude in Superman, made a sign for the side of the bed and stuck it on.  Almost a year later the sign is still there and the name has stuck!


I had to include some photos of the sign and the big kids in the bed, so I made a pull out section that slips in under the main block of photos.  How happy does Hudson look to see and try out his bed in the photos!

Ink: Pool Party Stampin' Write Marker
DSP/Cardstock: Storytime DSP, Pool Party, Riding Hood Red, Very Vanilla
Other: Big Shot, Tasteful Trims Die, Alpha Die (non SU), Rosette Die (non SU), Round Tab Punch (retired), Boho Blossoms punch, Corner Rounder Punch, Pool Party Designer Printed Brads, Poppy Parade Glimmer Brads (retired), Simply Scored Scoring Tool, Crystal Effects, Sanding Block

I hope you can play along with us this month at Just Add Ink!

Bye for now,

Tina