Pages

Showing posts with label Waterfront. Show all posts

Thursday, 4 February 2021

JAI #540: Just Add Colour

 Hi!


Woo Hoo! It's Friday again, which means that it's not only the weekend, it's also time for the new Just Add Ink Challenge!


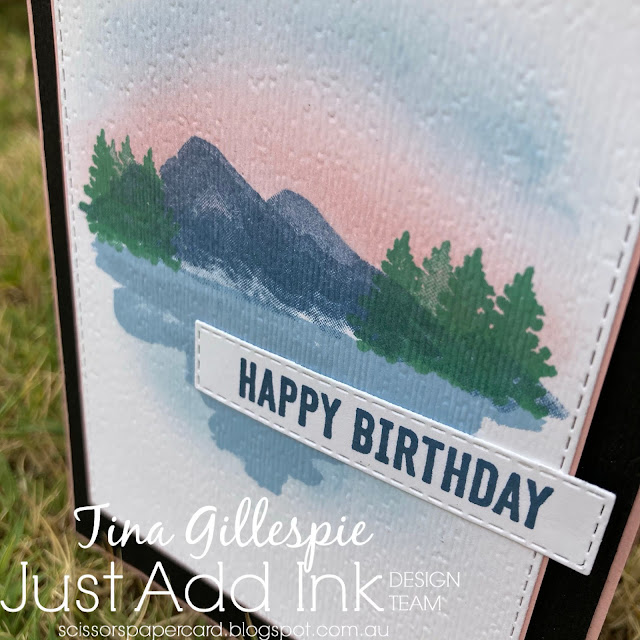
How good is this colour combo that Rochelle has put together for us to use? The blue/green tones with a pop of pink is stunning! I decided to use the colour combo to create a scene - the pink with the blues reminded me of an evening sky.

scissorspapercard, Stampin' Up!, Just Add Ink, Waterfront, Snow Front, Itty Bitty Birthdays, Subtle 3DEF, Stitched Rectangles Dies

I started by stamping the mountains from Waterfront in stamped-off Misty Moonlight. There are some grey tones in the deep blue, and stamping off helps to bring them out. I then stamped the lake in Seaside Spray and the trees, which are from Snow Front, in Just Jade. I then used a Blending Brush to add some Blushing Bride ink to the sky, just above the mountains, with a little bit of Seaside Spray above that. I was very pleased with how it turned out.

scissorspapercard, Stampin' Up!, Just Add Ink, Waterfront, Snow Front, Itty Bitty Birthdays, Subtle 3DEF, Stitched Rectangles Dies

I finished the front by running the panel though my Big Shot with the Subtle 3DEF. I love the way it makes the cardstock look like canvas, and a bit more like a watercolour painting.

scissorspapercard, Stampin' Up!, Just Add Ink, Waterfront, Snow Front, Itty Bitty Birthdays, Subtle 3DEF, Stitched Rectangles Dies

I repeated elements of the scene again on the inside of the card. It's so easy to do when you already have the stamps out and inky!

That's all from me for this week, you can find the rest of the Design Team's cards over on the Just Add Ink Blog. You will also find the Linky, so that you can join in the fun. What will you create with this gorgeous colour combo?

Bye for now,

Tina

Thursday, 10 December 2020

JAI #535: Just Add Magical Creatures

 Hi!


Thanks for joining me for the new Just Add Ink challenge. It's one I've been looking forward to doing since we got our schedule of challenges. It was a great idea from Kelly!


Just Add Magical Creatures - that's right up my alley! The hardest part for me was deciding which stamps to use. In the end I settled on a set that I hadn't used yet, called Forrest Elves from Kindred Stamps.

scissorspapercard, Stampin' Up!, Kindred Stamps, Just Add Ink, Forrest Elves, Wizard Friends, Waterfront, Lovely As A Tree, Copic Markers

I started by stamping my Elven Queen on a piece of Whisper White and then used a sticky note to mask her off. The big tree from the retired favourite, Lovely As A Tree, was stamped behind her to create a forrest. I then masked the area for the moon and used a blending brush to add ink for the sky and ground. The sentiment is from another Kindred Stamps set, called Wizard Friends.

scissorspapercard, Stampin' Up!, Kindred Stamps, Just Add Ink, Forrest Elves, Wizard Friends, Waterfront, Lovely As A Tree, Copic Markers

The moon had a tiny bit of Soft Suede ink added. I just used the dirty brush I'd used to create the ground, as I only wanted minimal ink. I then stamped some of the splatters from Waterfront over the top to give the look of craters in the moon. I used the same stamp for the forrest floor. The Queen was coloured using my Copic Markers in the softest blues, greens and yellows that I own. I went a bit bolder for her hair and her amulet. I liked that the masking left a bit of a halo around her, as it looks a little like she is glowing - very elvish!

scissorspapercard, Stampin' Up!, Kindred Stamps, Just Add Ink, Forrest Elves, Wizard Friends, Waterfront, Lovely As A Tree, Copic Markers

The inside sentiment says 'I love you' in Elvish, so I will likely give this card to my daughter or someone very close to me.

Which Magical Creature will you choose to add to your card? I nearly went with Santa, but I'm a little ready to be finished with Christmas cards, so I chose something fun instead. The Design team have had fun with this challenge, and you can see their cards over on the Just Add Ink blog, where you can also link up your card.

Bye for now,

Tina

AWH December Creative Showcase: Summer

 Hi!


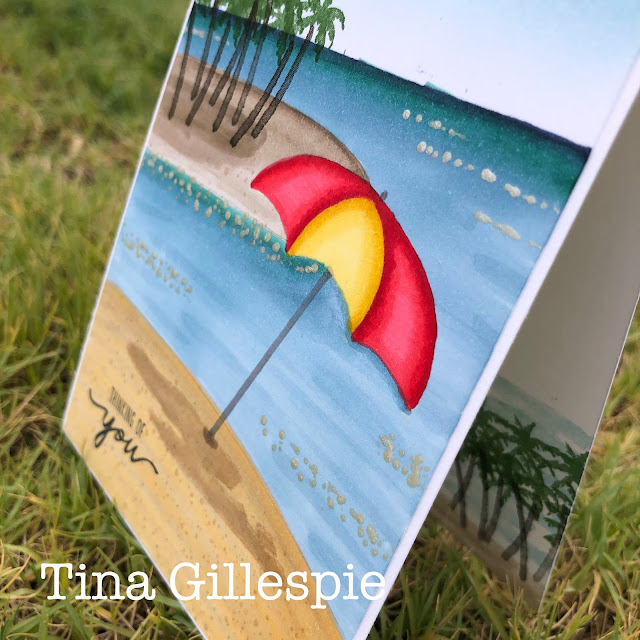
Thanks for joining me for the final Creative Showcase for 2020. Rachel has chosen a Summer theme for our projects tonight. For a lot of people, Summer means lazing on a beach, so that't what I decided to do for my card tonight. I've used a mix of Stampin' Blends, ink blending and stamping on my card.


I started this card by stamping my umbrella in stamped-off Soft Sea Foam. I then used a pencil to lightly draw in my lines for the beach, island and horizon. Then I got to the fun part - colouring! The beach was coloured with my Light Crumb Cake and So Saffron Blends. I stamped the shadow and the dotty stamp from Waterfront over the top with Crumb Cake Ink. The island was coloured with my Crumb Cake Blends, and the palm trees were stamped with Early Espresso and Garden Green, with the shadow in Crumb Cake. The umbrella, from Under My Umbrella, was coloured with Poppy Parade and Daffodil Delight Blends with a Dark Smoky Slate pole. The sky was coloured using my Blending Brush with Balmy Blue and Misty Moonlight inks.

scissorspapercard, Stampin' Up!, Creative Showcase, Waterfront, Under My Umbrella, Beautiful Moments, Stampin' Blends, Shimmer Paint

Finally, the ocean was coloured with lots of Blends. The horizon was drawn with my Light Night Of Navy Blend, and then a small section underneath was coloured with my Light Bermuda Bay Blend. The rest of the ocean was coloured with my Balmy Blue Blends. I finished it off by using my scoring tip to dot some Frost White Shimmer Paint to create some foamy water. I then stamped a few birds and a sentiment from Beautiful Moments.

scissorspapercard, Stampin' Up!, Creative Showcase, Waterfront, Under My Umbrella, Beautiful Moments, Stampin' Blends, Shimmer Paint

On the inside I used the Waterfront stamp set to create a little scene that matches the one on the front.

That's all from me for tonight, please do pop on over to Rachel's blog were you can find the rest of this month's Creative Showcase links.

Bye for now,

Tina

Wednesday, 9 December 2020

Colour Creations: Misty Moonlight

 Hi!


Welcome back for the second last Colour Creations Creative Showcase for 2020. We will be back in 2021 with the remaining colours, but we are taking a well deserved break for Christmas/New Year after we do Mossy Meadow next week. For this week, we are all making cards using Misty Moonlight. It's a gorgeous dirty blue, a bit like denim.

scissorspapercard, Stampin' Up!, Colour Creations, Waterfront, Peace & Joy, Joy To The World Paper Pumpkin, Home Together Dies, Shimmer Paint

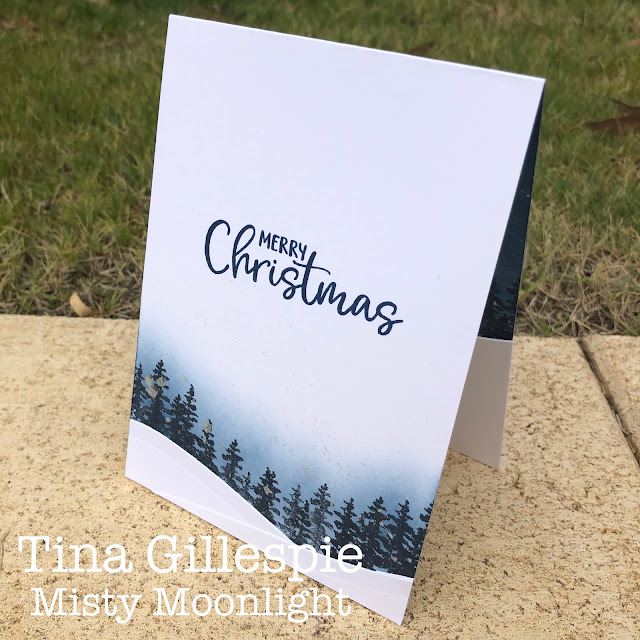
I started my card by cutting a Thick Whisper White card base and then two smaller pieces for the front. The curves were cut using the curved die from the Home Together Dies. I laid them over the top of the card and then used a pencil to draw along the top edges to give myself a guide for stamping the trees. The tree stamp is from Waterfront, and was stamped in Memento ink.

scissorspapercard, Stampin' Up!, Colour Creations, Waterfront, Peace & Joy, Joy To The World Paper Pumpkin, Home Together Dies, Shimmer Paint

I then used a sticky note and a 1 3/4" circle punch to mask off the moon. My blending brush was used to apply Misty Moonlight ink to the top half of the card, making sure I kept the colour very light around the moon and darker further out. I then splattered some Frost White Shimmer Paint over the inked area. The hill pieces were glued flat to the card front, after I'd stamped the top one with the sentiments from Peace & Joy.

scissorspapercard, Stampin' Up!, Colour Creations, Waterfront, Peace & Joy, Joy To The World Paper Pumpkin, Home Together Dies, Shimmer Paint

The offcuts from the hills on the front were used on the inside - I rarely waste anything! I related the same process as for the front, I just didn't do a moon. I was thrilled with how the card turned out, and I found it quite easy. The hardest part was waiting for the Shimmer Paint to dry!

That's all from me for tonight, but please do head on over to Catherine's Blog, where you'll find the rest of the links for this week's Misty Moonlight cards.

Bye for now,

Tina

Thursday, 28 May 2020

JAI #507: Just Add A Sketch

Hi!


It's been a bit of a cold and wet week in Adelaide this week, so perfect weather for crafting! I had a play day on Wednesday, where I watched both Mamma Mia movies and crafted the day away. It's been a long time since I've been able to do that, so it was heavenly! One of the cards I made was for the new Just Add Ink challenge. This week Jackie has designed a fun, funky sketch for us to use.


I love the quirk of the angled line at the bottom. While it would be easy to just go straight across the card, the diagonal adds a touch of fun to a card.

scissorspapercard, Stampin' Up!, Kindred Stamps, Sweet Stamp Shop, Just Add Ink, Waterfront, Snow Front, Legendary, Legendary Word Die, Stampin' Blends, Subtle 3DEF, Stitched Shapes Dies, Gold Foil

Speaking of fun, I took the opportunity to play with a Stamp set that I recently purchased from Kindred Stamps, called Legendary. The gamers out there may think that this character looks familiar. I'm not very 'up' with him, but my kids and hubby know exactly who he looks like! I created a forrest background for him, as it suits his outfit and pointy ears. I used a mix of Waterfront and Snow Front to create the scene. Did you notice the cloud? I stamped it with some First White Shimmer Paint to give the wispy look of a cloud.

scissorspapercard, Stampin' Up!, Kindred Stamps, Sweet Stamp Shop, Just Add Ink, Waterfront, Snow Front, Legendary, Legendary Word Die, Stampin' Blends, Subtle 3DEF, Stitched Shapes Dies, Gold Foil

The character himself was coloured sing my Stampin' Blends. I used both my Ivory and Bronze Blends to colour his skin - Ivory for the bulk of the area, and then the Bronze to add shadows around his hairline or the edge of his clothing. It's a great trick when the Ivory on its own is too flat. The legendary die is from Sweet Stamp Shop and it just called Legendary Word. It's a match made in heaven with this stamp set!

scissorspapercard, Stampin' Up!, Kindred Stamps, Sweet Stamp Shop, Just Add Ink, Waterfront, Snow Front, Legendary, Legendary Word Die, Stampin' Blends, Subtle 3DEF, Stitched Shapes Dies, Gold Foil

I recreated much of the same scene, including the wispy cloud, on the inside of my card. The female character has made her home here. I had assumed that she was the main character, and should be on the front of the card, but Rob tells me that the male character is the main character, even though the game is named for her. Go figure!

That's all from me this week. Did you like my card with Jackie's fun sketch? You can see what the rest of the Design Team made with it over on the Just Add Ink blog, where you can also link up your card to enter our challenge. Can't wait to see what you make of the sketch!

Bye for now,

Tina

Thursday, 6 February 2020

JAI #491: Just Add Inspiration

Hi!


Thanks for joining me for the new Just Add Ink challenge. This week Nikki has given us a tropical Inspiration Photo to work with.


Doesn't that look so pretty? If it weren't for the sand, I could quite happily relax on those cushions for hours.

scissorspapercard, Stampin' Up!, Just Add Ink, Waterfront, Timeless Tulips, Itty Bitty Birthdays, Stamparatus

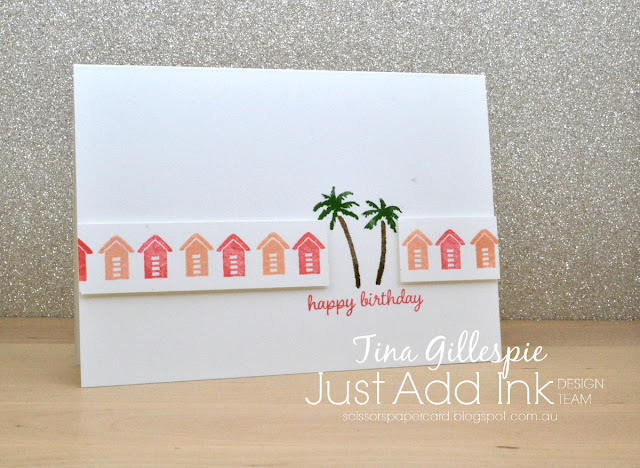
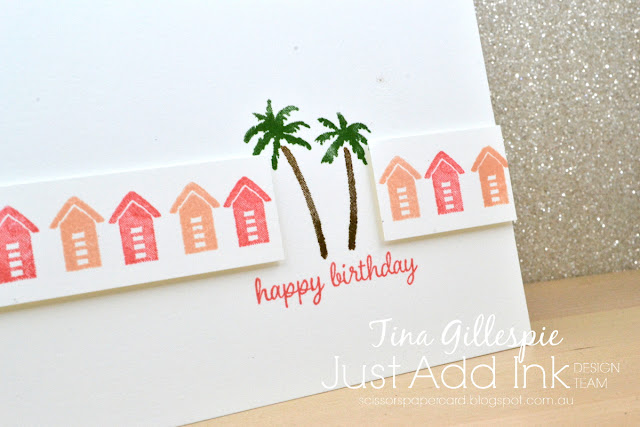
I decided to go for a clean, fresh look, so I kept my card fairly simple. I used my Stamparatus to stamp the beach hut from Waterfront on a strip of Whisper White. I stamped the Flirty Flamingo huts first, and then repositioned my cardstock so that I could stamp the Petal Pink huts in the gap.

scissorspapercard, Stampin' Up!, Just Add Ink, Waterfront, Timeless Tulips, Itty Bitty Birthdays, Stamparatus

The palm trees were stamped directly to the card base in Soft Suede and Garden Green. The strip of beach huts was then trimmed to fit around the trees and popped up using Dimensionals. The sentiment is from Timeless Tulips.

scissorspapercard, Stampin' Up!, Just Add Ink, Waterfront, Timeless Tulips, Itty Bitty Birthdays, Stamparatus

I stamped a smaller version of the front for the inside. I added the sand, as the hut and trees looked a little strange floating in the air!

What inspiration do you take from this week's photo challenge? You can see what the rest of the Design Team did with it over at the Just Add Ink blog, where you can also enter the challenge. I can't wait to see what you make!

Bye for now,

Tina

Thursday, 19 September 2019

JAI #475: Just Add Food

Hi!


Welcome back for the new Just Add Ink challenge. This week Kelly has asked us to add food to our cards - not real food, just the paper and ink kind! Although, you could probably get away with including a lollipop on your card. Hmm, now why didn't I think of that sooner?


I was a bit stumped by this for a while, until I remembered this cute Kindred Stamps set that I purchased about a year ago. It celebrates National Gingerbread Day - I didn't even know there was any such day!

scissorspapercard, Stampin' Up!, Kindred Stamps, Just Add Ink, National Gingerbread Day, Waterfront, Merry Christmas To All, Night Before Christmas DSP, Subtle EF

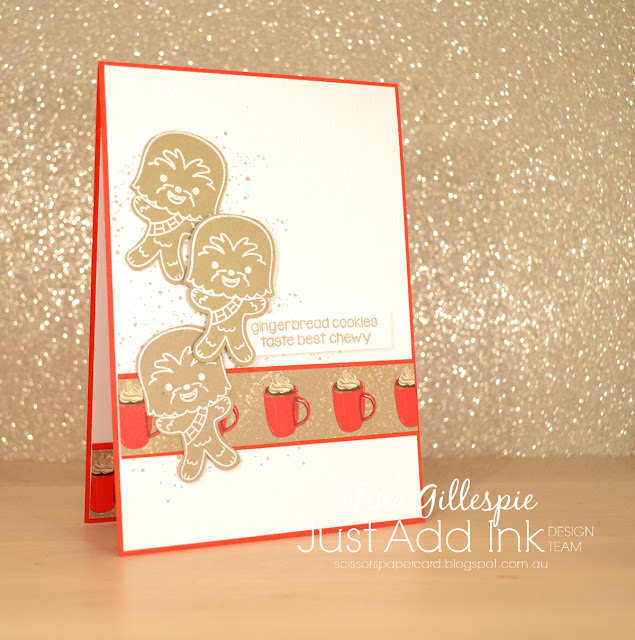
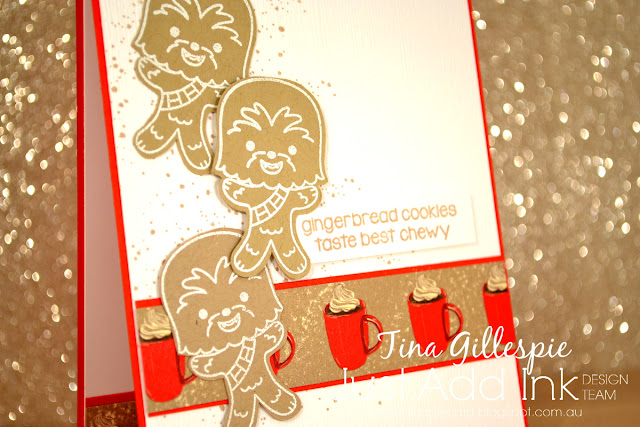
How funny is that gingerbread man/beast? LOL! I heat embossed the image four times on Crumb Cake cardstock using white embossing powder. I also cut a strip of DSP from the Night Before Christmas pack. I think a hot chocolate is the perfect combo with gingerbread, don't you agree?

scissorspapercard, Stampin' Up!, Kindred Stamps, Just Add Ink, National Gingerbread Day, Waterfront, Merry Christmas To All, Night Before Christmas DSP, Subtle EF

The card base was stamped with the splatters from Waterfront using Crumb Cake ink. I was hoping it looked like gingerbread crumbs under the cookies. I then used my Subtle folder to emboss the cardstock. I totally agree with the sentiment - gingerbread tastes way better chewy (which is also a hint to the identity of the gingerbread character!).

scissorspapercard, Stampin' Up!, Kindred Stamps, Just Add Ink, National Gingerbread Day, Waterfront, Merry Christmas To All, Night Before Christmas DSP, Subtle EF

I used my fourth gingerbread man on the inside, along wth some more hot chocolate. My kids think this card is hilarious - they don't want me to use it at Christmas. I will have to compromise by sending it to someone who will really appreciate the humour!

As we have arrived at the end of my post, it's time to pop on over to the Just Add Ink blog to see the rest of this week's Design Team cards. In the meantime, are you thinking about what food related stuff you have that you could use on a card? Can't wait to see it!

Bye for now,

Tina

Thursday, 29 August 2019

JAI #472: Just Add A Sketch

Hi!


Time for the newJust Add Ink challenge. This week it's a sketch challenge, and it's one designed by me!


I designed this sketch quite a while ago, so I can't even recall what I was thinking when I did it. Usually I already have some idea of the card I want to make and then base the sketch on that.  Oh well!

I recently purchased some Uniquely Creative Stitched Mountain Range Dies, and one of those dies gave the perfect shape for the angled lines in the sketch.

scissorspapercard, Stampin' Up!, Uniquely Creative, Just Add Ink, Waterfront, Manly Moments, Stitched Mountain Range Die

The two front sections of this card fold out to the side to eventually reveal the inside of the card. The first flap was sponge brayered in Granny Apple Green. The trees from Waterfront were stamped along the bottom in Garden Green, then the two shadowy bits were stamped in GAG, the one on the left stamped off first. The sentiment was heat embossed in Silver, and was from an old Paper Pumpkin kit, Manly Moments.

scissorspapercard, Stampin' Up!, Uniquely Creative, Just Add Ink, Waterfront, Manly Moments, Stitched Mountain Range Die

The next flap was sponge brayered in Gray Granite ink, despite it looking brown in the photo! The bottom part was stamped with the speckle stamp from Waterfront in GG ink. I flicked some Whisper White Craft Ink over the top half using my Aqua Painter. I hope it looks like snow to you! The sentiment was done in the same way as the front sentiment, and is from the same PP set.

scissorspapercard, Stampin' Up!, Uniquely Creative, Just Add Ink, Waterfront, Manly Moments, Stitched Mountain Range Die

The background was actually the first part I made! I masked off the mountain line just below where the top flap would lie and then sponge brayered the whole top in So Saffron. I then added a little Pumpkin Pie where the sun was going to sit. I then secured an old SU mask, from the Hooray It's Your Day kit, over the top. I used a sponge dauber to cover the yellow ink with Whisper White Craft Ink, and when it was dry I brayered Pacific Point ink over the top. Finally, I sponged some Blueberry Bushel ink at the edges of the Pacific Point bits to add some depth.

To assemble, I just adhered the flaps on each front section to the back of the sun piece, and then adhered the whole lot to a Basic Black base. There's no back, the writing will be on the hidden bit of the sun panel.

Wow, what a full on card to make, but I find this kind of creativity fun and so it was a real labour of love!

Why not pop on over to the Just Add Ink blog, where you can see the rest of this week's Design team cards, and link up your own for the challenge. What do you see in my sketch?

Bye for now,

Tina

Thursday, 11 July 2019

JAI #465: Just Add The Season

Hi!


Hooray for a new Just Add Ink challenge! This week Nikki has decided we should add 'The Season' to our cards. What do we mean by 'The Season'? Well, it can either be your favourite season (summer/autumn/winter/spring) or the current season where you live. For me in Australia, it's the depths of winter, and we are currently having a little cold snap. Not cold enough to snow, but certainly cold enough to just want to stay home snuggled in front of the TV during the school holidays!


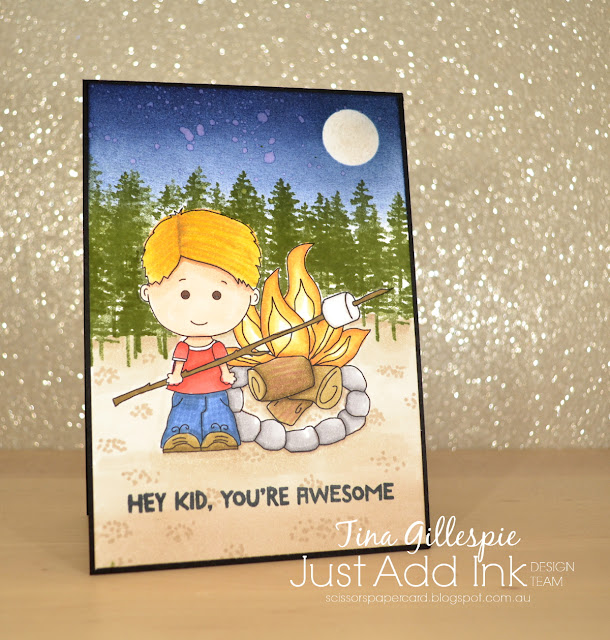
I decided I'd make a winter themed card, and then realised I had very little in my stash that was winter themed. Oops! I'm not one to back down from a self imposed challenge, so off I went to look for a winter themed digital stamp. I found this cutie by Graphics Dollar, called Linus Goes Camping. Even better, he was a freebie! I quickly printed him and then got colouring.

scissorspapercard, Stampin' Up!, Graphics Dollar, Just Add Ink, Linus Goes Camping, Waterfront, Treehouse Adventure, Stampin' Blends

I used my Stampin' Blends to colour Linus, the fire and his marshmallow stick. I also coloured the ground with my Light Crumb Cake Blend, and then added some pebbles using my Dark Crumb Cake Blend. This was a technique I saw Paula Dobson use in her brilliant Blends Colouring video.

The trees were stamped using the trees from Waterfront. Stamping them over and over and at different heights hides the trunks of some of the images and makes the trees look a lot taller than the stamps are! I used my sponge brayer to colour the sky (after masking off the moon) so that I could flick water over to create a starry sky.

scissorspapercard, Stampin' Up!, Graphics Dollar, Just Add Ink, Linus Goes Camping, Waterfront, Treehouse Adventure, Stampin' Blends

I had a bit of fun experimenting with my Blends and the Colour Lifter on this card. I used the Lifter to add some cross hatching to the jeans to add a bit of texture. I also added some strokes to the wood on the fire to give more of a rough look. I wasn't thrilled with how the hair turned out, but it was fun trying! I used a Soft Suede Blend to add streaks and then coloured over it with Daffodil Delight and Mango Melody.

scissorspapercard, Stampin' Up!, Graphics Dollar, Just Add Ink, Linus Goes Camping, Waterfront, Treehouse Adventure, Stampin' Blends

I didn't have many options for the inside, as I couldn't print Linus small enough for my liking. I made do with a row of trees, which I quite like!

That's it for me for this week's challenge. Now you can head on over to the Just Add Ink blog, where you can see the rest of this week's Design team cards, and also enter your own. Which season will you choose?

Bye for now,

Tina

Sunday, 30 June 2019

CTC #235: CASE A Card

Hi!


Hooray, time for the new CASEing The Catty Sunday Challenge Blog Hop! Hopefully you've arrived here from Liz's blog, as ever, just keep hopping until you get back to where you started.

This week we are trying a slightly new challenge. Instead of a whole section to CASE, we are giving you one card to CASE. That sounds a bit easy, but it's not really - don't just copy the card, put your thinking cap on and get inventive!


You can find the card to CASE on page 159. It's a fairly simple layout, with a couple of layers, the nice bow and a decorative edge. I decided I'd reverse the layers on my card, by using a window to a scene.

scissorspapercard, Stampin' Up!, CASEing The Catty, Sailing Home, Waterfront, Itty Bitty Birthdays, Sail Away DSP, Rectangle Stitched Framelits, Subtle TIEF, Masculine Card

I started by watercolouring the ocean and sky on a piece of Shimmery White cardstock. The lighthouse was from my Make and Take pack in Auckland, as was the DSP, twine and the metal anchor. The lighthouse was floating a bit in space, so I added the row of trees from Waterfront as a way of grounding it. The background was adhered to my card base with the lighthouse popped up over it.

scissorspapercard, Stampin' Up!, CASEing The Catty, Sailing Home, Waterfront, Itty Bitty Birthdays, Sail Away DSP, Rectangle Stitched Framelits, Subtle TIEF, Masculine Card

I used my Stitched rectangles to cut a window in the Come Sail Away DSP. The trees were adhered to the back of the window, and then the whole lot was affixed to the base using Foam Adhesive Strips. The top Night Of Navy layer was cut in half using another Stitched Rectangle so that I had stitched lines on both halves. I then embossed it with my Subtle folder and adhered it to the card base with more Adhesive Strips. The card was finished with the sentiment and the anchor.

scissorspapercard, Stampin' Up!, CASEing The Catty, Sailing Home, Waterfront, Itty Bitty Birthdays, Sail Away DSP, Rectangle Stitched Framelits, Subtle TIEF, Masculine Card

I had a small strip of the DSP and the Subtle embossed cardstock left, so they were used to decorate the inside. I'm still on the fence over the Come Sail Away suite. What do you think of it?

Once you've finished the hop, you can add your card to the challenge over in our Facebook group. It's fabulous to see how everyone interprets the challenge each week!


That's it from me, now you're off to see what my friend Judy has done with this card.


Bye for now,

Tina