Hi!
Ooops! I'm a bit late with my Just Add Ink post today. Not sure what went wrong, but better late than never! This week we have one of my Alphabet challenges.
You can add anything that's 'H' related to your card - it could be a colour, a theme, a stamp set or even a technique. Just make sure you specify what your H is in your post.
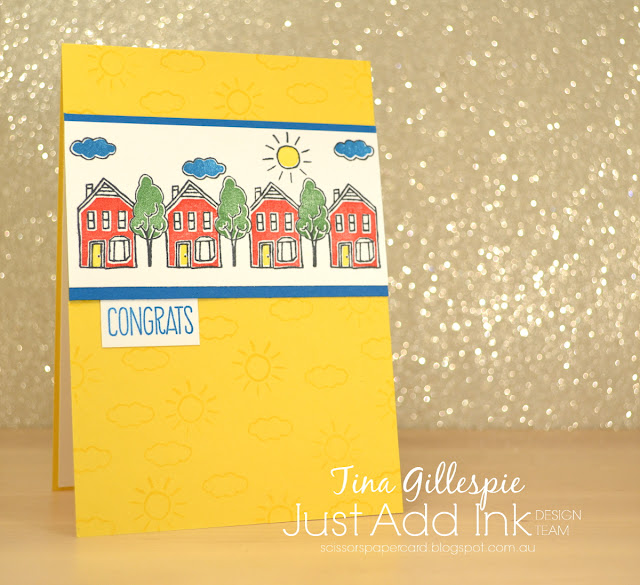
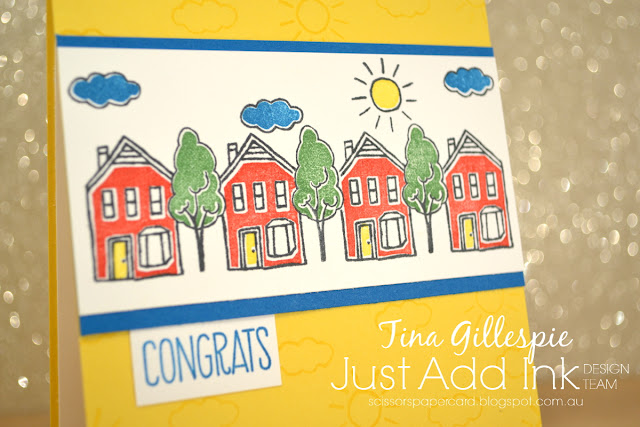
My H this week is houses on a housewarming card. I really love the In The City Hostess stamp set, but don't really use it much. I thought it was perfect for this challenge.
I used my Stamparatus to stamp the houses and trees, but everything else was free hand. There's no way I could have got the spacing so uniform without it. Can you see that I also stamped some suns and clouds on the Daffodil Delight base of the card? It looked a little plain without them.
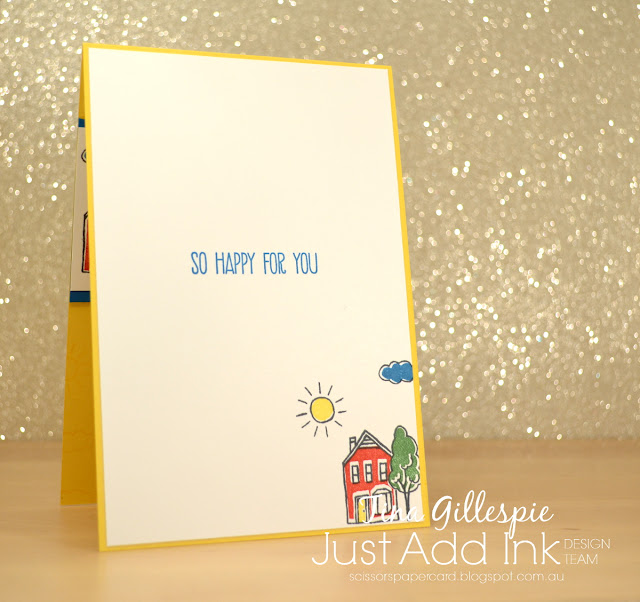
I alos made a little scene on the inside of the card. It's a bit strange stamping the clouds blue, but I think it would look even stranger to leave them as just an outline. What do you think?
You can join in the fun over at the Just Add Ink blog. Don't have a blog? Just email your cards and we can put them on our special challenge entries blog. You could also use a photo hosting site, just as long as your post is public so that we can see it.
Bye for now,
Tina
Thursday, 22 February 2018
AWH February Blog Hop: Sale-A-Bration
Hi!
Tonight the Art With Heart team are sharing creative projects using products from the Sale-A-Bration brochure. All Sale-A-Bration products are earned for FREE with sales of $90+ (AUD).
• If you spend $90, you get one free level 1 product.
• If you spend $180, you get one free level 2 product, OR two level 1 items.
• If you spend $270, you have the option to choose three level 1 items or one level 1 item and one level 2 item.
The Sale-A-Bration promotion is current now until March 31st. Be sure to request your copy of the brochure today.
Sale-A-Bration is also a great time to join our fabulous team. Ask any of the girls on the hop!
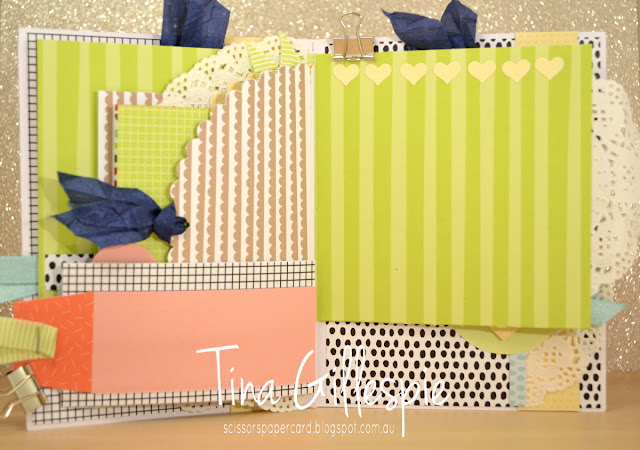
I decided to use the Tutti Frutti Cards and Envelopes to make a mini album for my Blog Hop project. I used 4 of the cards (one of each pattern) and 5 envelopes. You get 4 each of the 4 cards and envelopes, so there was still plenty left over from the set after I made my album. I also used another Sale-A- Bration item on the front of the album - the Celebrate You Thinlit dies - to cut the word celebrate.
This is the first page. The checked paper is from the inside of one of the envelopes. The right side page is formed from the Lemon Lime Twist card. I scored a line 1 1/2 inches from the bottom and folded it up to make a pocket.
I've followed a bit of a theme in decorating the album, using hearts in a circle on many of my pages as a decorative element.
The small blue dotty flaps on this page were made using another of the card bases. I cut a 2 inch section off to use as a page, and then used the rest of the card to make the tags for the LLT page pockets.
I used a retired Circle die to cut a scalloped circle from the Daffodil Delight card base. I edged the left side of the page with some doily offcuts I had floating around on my craft desk.
This middle page is the only page that doesn't use one of the Tutti Frutti Cards or Envelopes. It's a piece from the Tutti Frutti DSP pack. After I cut all my pages to size, I layered them and then used my sewing machine to stitch all of the layers together along the spine.
It was a lot of fun mixing and matching the patterns and colours for each of the pages.
The ribbons were a fun little touch to the pages to add to some of the pages. A lot of them I stapled to the page and covered with a circle/heart combo, but this Night Of Navy Seam Binding was threaded through a hole in the page.
I'm not sure yet how I'll use this album, but it will likely be for a birthday. I have kept all of the offcuts so that I can add more decoration to the photos once they are in place.
Well, that's it from me for now. I hope you enjoyed looking at my Mini Album. I can't wait to finish it with some photos. Now you're off to the blog of the lovely Monika O'Neill.
If you find a broken link or have come to this blog hop from a different entry point, you can view the participants below:
Bye for now,
Tina
Wednesday, 21 February 2018
Beautiful Bouquet CASE
Hi!
Today's card is a CASE of this card by BJ Peters. I made it sometime last year as a class sample, and just haven't gotten around to blogging it until now. It's too pretty to stay hidden on my hard drive though!
I loved BJ's card so much that I CASEd it nearly exactly. The only thing different is the embossing folder I used. I don't have the Ruffled 3D Dynamic TIEF, so I switched it for the Layered Leaves 3D Dynamic TIEF.
Once you've completed all of the Big Shotting, this is actually a fairly quick and easy card to put together. The fiddliest bit is attaching all of the pearls. I've just noticed that one of mine must have fallen off somewhere along the way. Oops!
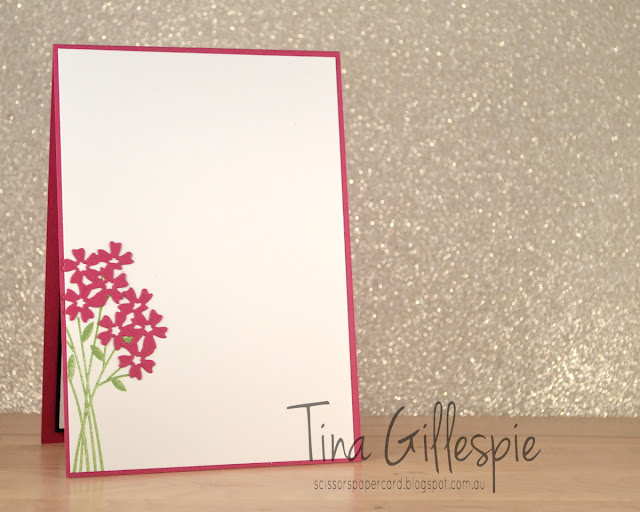
BJ didn't show the inside of her card, so I had to improvise for mine. I simply stamped the stems and then added a couple more flower die cuts. I didn't stamp an inside sentiment so that the card could be used for a variety of 'Congratulations' purposes.
Thanks for the inspiration, BJ!
Bye for now,
Tina
Monday, 19 February 2018
A True Gentleman Gift
Hi!
I recently found some gift box die cuts while I was sorting through some things in my craft room. I think they were from an Advent Calendar project that I never got around to completing. I decided to use on of the die cuts to make a box using the True Gentleman DSP from the Occasions Catalogue.
This was such a quick and easy box to make. I chose some complementary DSP patterns from the pack, cut them to size, and adhered to the box. I cut the piece for the bag just over an inch longer than the front piece so that I could fold it over to the front to create a flap closure. The tag was simply another piece of DSP that I punched using the Flag punch and adhered two Stitched Shapes Ovals to. The sentiment is from the Picture Perfect Birthday stamp set.
To close the box, I simply punched two holes through all the layers using my Crop-o-Dile. I threaded some Night Of Navy Corduroy Ribbon through the holes and through the hole in the tag before tying in a knot. I love how all of these coordinating products make creating a gift box so easy!
Bye for now,
Tina
Thursday, 15 February 2018
JAI #396: Just Add A Sketch
Hi!
Wowee! What a week! I got hit for 6 last Friday with a gastro bug, and Ive only just got back up on my feet. I don't think I've ever been hit with such a nasty bug. I'm still going slow, but at least I'm going!
Thankfully, I'd had my card for this week's Just Add Ink challenge made a few weeks ago! Kim gave us this fabulous sketch to work with.
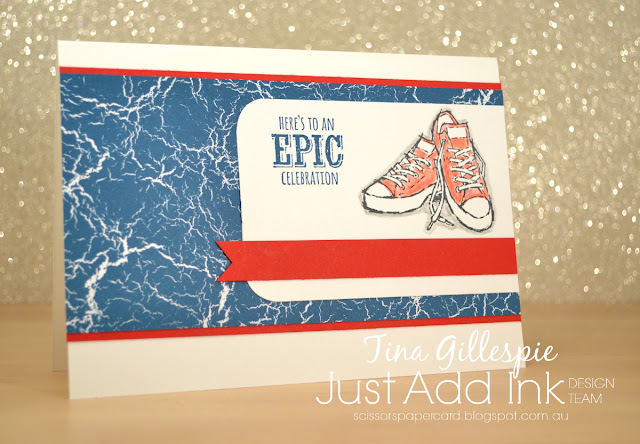
I wanted to use my Epic Celebration SAB stamp set to make a card for a teenage boy, so that's where I started.
I also grabbed my Colour Theory DSP. I'm not a big fan of the crackled paper, but I think it goes well on a teen boy card. Blue, red and white are a pretty classic boy colour combination, so I paired Real Red with the Dapper Denim/Whisper White DSP. The red adds a bold touch without overwhelming the card.
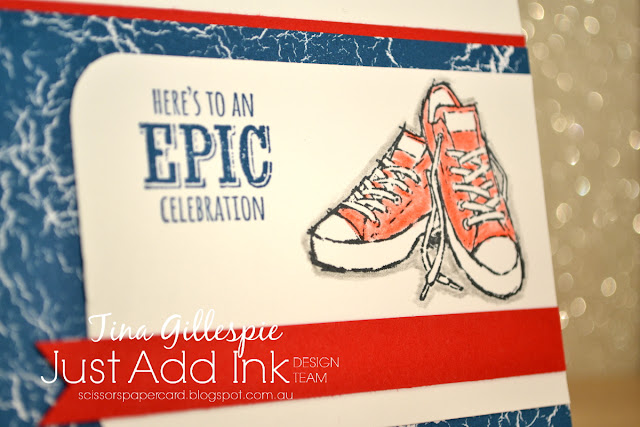
I coloured the kicks with my Real Red Watercolour Pencil. I didn't bother blending or shading too much. To make the white parts of the shoes pop, I outlined the image lightly with my Basic Grey pencil. Apparently keeping the white bits of the shoes white is pretty important for teens - Ada gets the Gumption into hers to keep them pristine!
I wanted to do something a bit different on this inside, so instead of shoes again I used the headphones. I don't like wasting little scraps, so the DSP that was an offcut on the front of the card was used to underline the inside sentiment.
The other girls on the Design Team have made some fabulous cards this week. You can see them, and join in the challenge, over at the Just Add Ink blog. See you there!
Bye for now,
Tina
Monday, 12 February 2018
Perfectly Straight Picture Perfect Birthday
Hi!
LOL, try saying that blog post quickly five times!
Today's card is one I made to show off one of the special features of the Stamparatus - the ability to move the plates along the hinge. It's one of the best features of the gadget in my opinion!
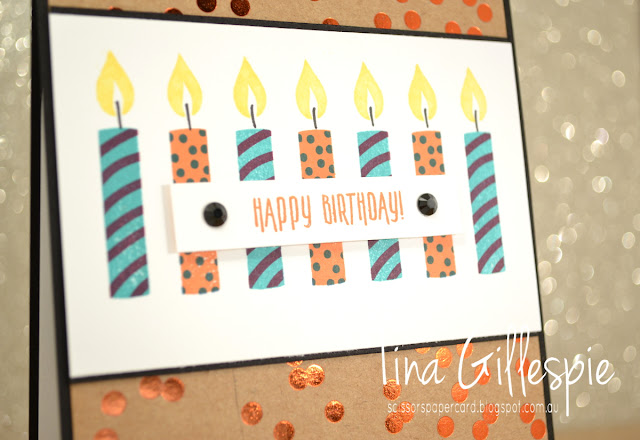
I first stamped the Tangerine Tango candle three times, then the Island Indigo dots, and finally the Daffodil Delight flame. I then moved my cardstock slightly on the Stamparatus base and stamped the Bermuday Bay/Rich Razzleberry candle. How cool is it that each candle is perfectly spaced and perfectly stamped? Imagine trying to do that by hand/eye!
The candle wicks were simply drawn on using a Journaling Pen, and then the sentiment panel was popped up over the top using Mini Stampin' Dimensionals. The black rhinestones are now retired, but they still make a cool addition to the card.
Would you believe I only used a 4 inch square of the Tangerine Tango Foil Frenzy SDSP for this card? I used a 4x1/2 inch strip for the inside, a 4x3/4 strip for the top of the front, and the rest on the bottom of the front. A great way to help your DSP stretch further. I could get 9 cards out of the one 12x12 sheet by doing this!
Bye for now,
Tina
Thursday, 8 February 2018
JAI #395: Just Add Inspiration
Hi!
Are you ready for a new Just Add Ink challenge? I am! This week Kelly found this gorgeous Inspiration photo for us to base our cards on.
Isn't it stunning? It made me think of two very special places - my hometown, where the cherry blossoms in Spring made the streets come alive with gorgeous pink colour. It also reminded me of my time with Rob in Paris, where we strolled through parks and gardens that were so lush with foliage and so immaculately maintained. Two sets of very happy memories!
The picture is very romantic to me, so I decided it was best to make a wedding card. The sentiment suits the picture so well!
Here's how I made it: first, I masked the top two thirds of the card and sponged Crumb Cake ink on the bottom third using my Sponge Brayer, trying to get the colour darker along the edge of the path. I then stamped the splatter from Swirly Bird over the top. Next, I masked off the middle section of the card. I used my sponge brayer to add Tranquil Tide ink, again trying to make it darker along the edges. I then removed the bottom mask and stamped the dotty stamp from Dragonfly Dreams along the edge of the colour, making sure that some of the stamping fell in the Crumb Cake section. I was trying to blur the hard lines created by the masking.
I then repeated the process with the top section of the card, this time with Flirty Flamingo ink. I used the largest floral stamp in Beautiful Bouquet over the top, and also the dotty stamp from Dragonfly Dreams to soften the edge. I then stitched around the vellum sentiment and the edge of the card. It still needed more, so I ended up adhering some clear heart shaped sequins to the front. You may just be able to see them to the bottom left and top right of the sentiment panel.
I was a bit sponge brayered out by the time I got to the inside, so a few of the dotty stamps had to do!
I've been astounded at the variety of ways the Design Team have interpreted this image, and I'm sure you will be too! Pop on over to the Just Add Ink blog to check it all out, and to link up your card.
Bye for now,
Tina.
Wednesday, 7 February 2018
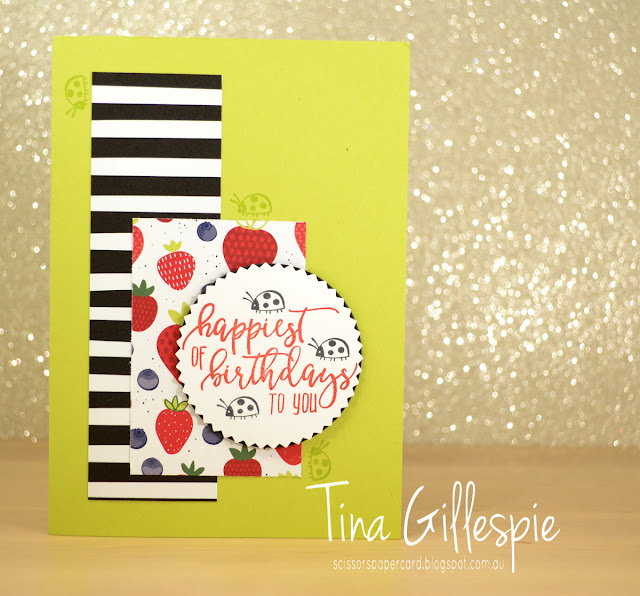
Sharing Sweet Thoughts in Tutti Frutti Lime
Hi!
Today I have a fun card for you that I made for one of my classes last month. It's such a fun, sweet card - I think it was one of my favourite class cards for January.
The new Tutti Frutti DSP has a mix of fun, colourful, fruity designs, with plainer patterns on the reverse side.
I added some Basic Black ladybirds to the sentiment, and then I decided to add some 'hidden' ladybirds too.
LOL, I couldn't resist adding a few more to the inside too. I kept thinking of ants at a picnic, but decided I'd rather have ladybirds than ants!
Bye for now,
Tina
Monday, 5 February 2018
CTC #164: Occasions Catalogue Kits
Hi!
EDIT: I was so excited to be a Crew Pick for this card!
I'm pretty happy to be 4 for 4 with the CASEing The Catty Challenges this year. They are announced each Sunday evening, and I've been mostly able to get straight into the challenge and get a card made pretty quickly. This week the challenge is the kit cards from pages 14-17 of the Occasions Catalogue. I don't have either kit, so I had to improvise. My card is a CASE of one of the trio at the bottom of page 17.
The card in the catalogue is square, but I decided to make a full sized card. I used exactly the same colours and ribbon, but I had to use different stamps. I remembered that the Soft Sayings kit had a similar flower stamp, and so I decided to use it.
I stamped the swoosh from Work Of Art, the flower and the leaves from Soft Sayings, and then I spritzed the cardstock lightly with some water. Once it dried I stamped the sentiment from Bunch Of Blossoms. I finished it off with the Berry Burst ribbon and some retired Pearls for the centre of the flower. The dotty stamp from Dragonfly Dreams provides a nice background for the main panel.
I used a few of the same stamps on the inside to finish off the card. It's always so much nicer to have a finished inside, don't you think?
Bye for now,
Tina
Thursday, 1 February 2018
JAI #394: Just Add Romance
Hi!
Welcome back to a new Just Add Ink challenge. This week Nikki has challenged us to Just Add Romance. Perfect timing, with Valentine's just around the corner!
Having said that, Rob and I don't usually make a big deal of Valentine's Day. Some years I make him a card, other years I don't. This year I received some new stamps that suit him perfectly, so it's definitely a year where he'll be getting a card LOL.
So you've probably guessed that these aren't Stampin' Up! stamps. I don't usually buy anything from other companies, but I couldn't go past these Back To The Future inspired stamps - Rob is a huge fan, and so are the kids.
I stamped the Delorean in Memento ink and coloured it with a mix of Copic grey, yellow and pale blue markers. I deliberately left the rest of the card simple, so that the focus was on the car. I couldn't resist adding the little '88' banner though!
Are you a BTTF fan? Would your significant other love a card like this? I hope mine does!
As always, you can join in the fun over at the Just Add Ink blog. Check out what the rest of the Design Team have created, and link up your card for our Just Add Romance challenge.
Bye for now,
Tina
Labels:
Challenge,
Copics,
Design Team,
Just Add Ink,
Kindred Stamps,
Text Ya Later
Subscribe to:
Posts (Atom)


