Pages

Showing posts with label Rectangle Stitched Framelits. Show all posts

Thursday, 11 June 2020

JAI #509: Just Add Colour

Hi!


Woo, it's Friday, which, as always, meant it's time for the new Just Add Ink challenge. This week Di has put together a very sweet colour combination for us to use.


As soon as I saw the combo, my first thought was 'baby card', but clearly the rest of the DT thought 'floral card'. LOL! I teased them that out 'F' challenge was last week, not this week.

scissorspapercard, Stampin' Up!, Just Add Ink, Peaceful Moments, Subtle 3DEF, Stitched Rectangles Dies, Elephant Builder Punch, Baby Card

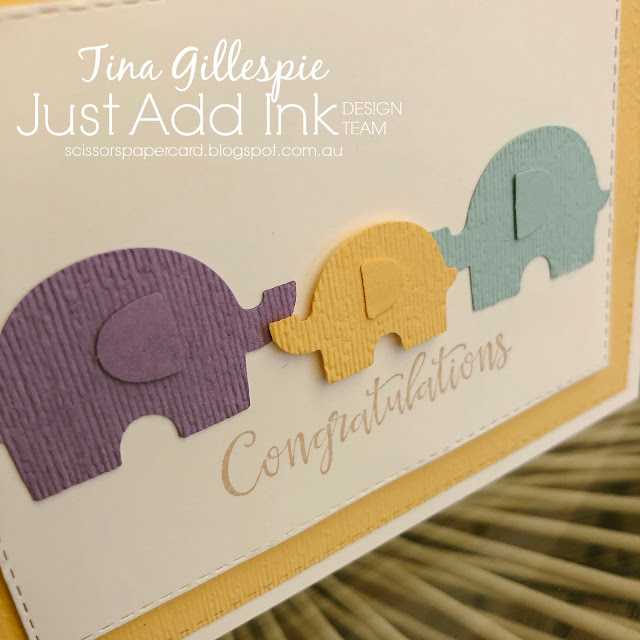
I've been chasing my tail all week, so quick and easy was definitely the go for this card. I used the just-retired Elephant Builder Punch for the card. It's so cute for baby cards! I think it will find a home in my stash for a while yet.
scissorspapercard, Stampin' Up!, Just Add Ink, Peaceful Moments, Subtle 3DEF, Stitched Rectangles Dies, Elephant Builder Punch, Baby Card

I embossed both the So Saffron layer (after I'd cropped it with the largest Stitched Rectangle Die) and the elephants with the Subtle 3DEF. You'll notice that I didn't emboss the elephant ears though. This was deliberate, to hopefully make them a little more visible from the elephant's bodies. The stamped sentiment is from the Peaceful Moments stamp set.
scissorspapercard, Stampin' Up!, Just Add Ink, Peaceful Moments, Subtle 3DEF, Stitched Rectangles Dies, Elephant Builder Punch, Baby Card

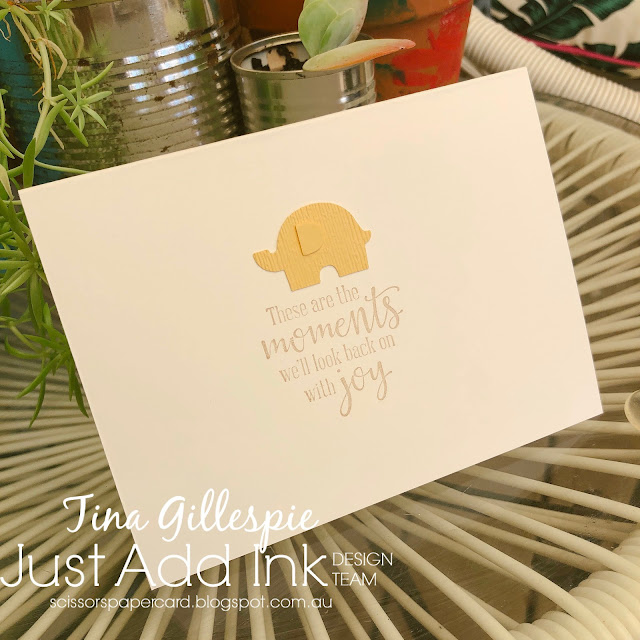
I used the same set for the inside sentiment too, along with another wee elephant. I stamped with Crumb Cake ink, but I think my ink pad needs reinking, as it's quite light. Luckily that works well for a baby card!

Time to head on over to the Just Add Ink blog, where you can see the rest of this week's Design Team cards. I hope you can find time to play along with us - it's a great colour combo to work with.

Bye for now,

Tina

Sunday, 7 June 2020

CTC #271 Week 2: CASE The Annual Catalogue

Hi!


Happy long weekend! I hope you're getting lots of crafting time in. I've been doing a bit of a tidy up and sell off of my retired products now that the new catalogue has begun. I think tomorrow will be a play day for sure!


This week at CASEing The Catty Sunday Challenge, it's the second week of our challenge to CASE the brand new Annual Catalogue. Last week we stuck to the front cover, but this week we can CASE anything! As always, I head to the back of the catalogue and flip forwards looking for inspiration. This card, using the new Stitched Triangles Dies, caught my eye. I love the colour and the geometry of the card.


I don't (yet) have the Stitched Triangle Dies, so I had to look for a different shape to use, one that would tessellate nicely. The Tailored Tag punch was perfect!

scissorspapercard, Stampin' Up!, CASEing The Catty, In Good Taste DSP, Itty Bitty Birthdays, Stitched Rectangle Dies

I cropped two each of three different papers in the  In Good Taste DSP pack, and then cut each one in half. They were then layered over Basic Black cardstock. I then cropped around the edges using my largest Stitched Rectangle Die and adhered it to a piece of Very Vanilla cropped using the same die.

scissorspapercard, Stampin' Up!, CASEing The Catty, In Good Taste DSP, Itty Bitty Birthdays, Stitched Rectangle Dies

The sentiment was stamped using the Itty Bitty Birthdays set, and cropped using the Stitched Rectangle die that doesn't layer with any others. I'm pretty sure the same die was used to crop the sentiment on the original card.

scissorspapercard, Stampin' Up!, CASEing The Catty, In Good Taste DSP, Itty Bitty Birthdays, Stitched Rectangle Dies

I cropped a second Stitched Rectangle shape from Very Vanilla for the inside. I don't usually cut my card bases to US size, but I did this time to suit the Stitched Rectangles. It's much more pleasing to have an even border right around the edges!

That's all from me for this challenge, but you still have a week to get your entry in. You just need to be a part of our Facebook group, where you can upload your photo with a description of which project you've CASEd. Easy!


Before you go, please do finish the hop, there's lots of fabulous inspiration for you! Next up is my very good friend, Judy, with what I'm sure will be another stunning card!


Bye for now,

Tina

Thursday, 4 June 2020

JAI #508: Just Add F

Hi!


Thanks for joining me for the new Just Add Ink challenge. This week it's one of my alphabet challenges. I love doing these, just because there's so much scope for what you could create!


I had so many ideas, it was hard to settle on just one. I tried a feline as a part of a fandom card, but I wasn't happy with the results, so it got binned. Then as I was doing my newsletter and writing about the upcoming global Paper Pumpkin kit, I remembered that I had a few past kits, and that one of them would work nicely!

scissorspapercard, Stampin' Up!, Just Add Ink, Friends Of A Feather, Paper Pumpkin, Pinewood Planks 3DEF, Stitched Rectangles Dies

The Friends Of A Feather Paper Pumpkin kit was perfect! I really love the laser cut feather card front. It's meant to be the front of a tri-fold card, with the Fresh Fig (ooh, there's another F!) as the next layer, but I cropped the two pieces and just layered them together.

scissorspapercard, Stampin' Up!, Just Add Ink, Friends Of A Feather, Paper Pumpkin, Pinewood Planks 3DEF, Stitched Rectangles Dies

I wasn't happy with the Coastal Cabana feather on top - it was just blending in too much. Backing it with vellum helped to make it stand out more. A few foliage layers (more F's!) and I was done with the front.

scissorspapercard, Stampin' Up!, Just Add Ink, Friends Of A Feather, Paper Pumpkin, Pinewood Planks 3DEF, Stitched Rectangles Dies

For the inside a simple Stitched Rectangle die cut, cropped from the Whiper White layer on the front, and one final Fresh Fig feather (say that 5 times, fast!) and the card was done!

What F element will you use on your card? Make sure you let us know in your post, especially if it's not obvious. You can link your card up over at the Just Add Ink blog, where you can also find the rest of this week's Design team cards.

Bye for now,

Tina

Wednesday, 3 June 2020

AWH Colour Creations: Balmy Blue

Hi!


You may remember that in 2018-19 I participated in the Art With Heart Colour Creations Blog Shares. Well, it's back again! This time it's the Colour Creations Showcase, but otherwise, it's the same. Each week on a Wednesday evening, we will all post cards using one of the Stampin' Up! colours. I used the last round as an opportunity to try out new techniques and styles, and I will try to do that again.

Week one is Balmy Blue!

scissorspapercard, Stampin' Up!, Art With Heart, Colour Creations Showcase, Snow Front, Blossoms In Bloom, Stitched Rectangles Dies

Very recently I purchased the Snow Front stamp set, as it was carrying over to the new Annual Catalogue. I've had a lot of fun with Waterfront, and hopefully I will with Snow Front too. Let's talk about the card base, though. On the top section I stamped the new Blossoms In Bloom stamp set. I just wanted it to look like random stamping, rather than the gorgeous flowers it is, which is why I stamped the spotty stamp around the edge. It's meant to be the flower centre.

The bottom half of the card base is simply narrow strips of Balmy Blue cardstock glued to a larger piece of Balmy Blue cardstock. I like the subtle texture this gives to the card - a bit like a wall with wood panelling on the bottom half. I don't know what it's called, but I do like the look, especially on cards!

EDIT: Kathryn tells me it's a dado rail, and she'd be right!

scissorspapercard, Stampin' Up!, Art With Heart, Colour Creations Showcase, Snow Front, Blossoms In Bloom, Stitched Rectangles Dies

To help the main panel stand out from the background, I matted it twice, once with Balmy Blue and then again with the new Misty Moonlight. It looks quite dark here, but it's more of a mid blue. I created the scene with Snow Front and then used a blending brush to add a little ink to the sky. It's a very wintery card!

scissorspapercard, Stampin' Up!, Art With Heart, Colour Creations Showcase, Snow Front, Blossoms In Bloom, Stitched Rectangles Dies

I repeated the scene on the inside, including the ink blending. The sentiments on the card are from Blossoms In Bloom.

I hope I didn't make you feel too cold looking at my Balmy Blue card!

Time now to pop on over to Catherine's blog, where you'll find the rest of this week's Colour Creations Showcase links. I think there are over 16, so plenty of inspiration to be had for Balmy Blue.

Bye for now,

Tina

Thursday, 7 May 2020

JAI #504: Just Add Colour

Hi!


Thanks for popping in for the new Just Add Ink challenge. This week it's a colour combo, set by me!


I really love the mix of greys with the dusky pink. I needed a Mother's Day card for my mum, and I thought this colour combo would work well for a feminine card, despite the greys.

scissorspapercard, Stampin' Up!, Just Add Ink, Dressed To Impress Bundle, Ornate Frames Dies, Stitched Rectangles Dies, Stampin' Blends, In Colour DSP

I only recently purchased the Dressed To Impress bundle, despite it being available since January. With the news that it was carrying over to the new Annual Catalogue, I decided to purchase while I could still get it at the discounted bundle price.

scissorspapercard, Stampin' Up!, Just Add Ink, Dressed To Impress Bundle, Ornate Frames Dies, Stitched Rectangles Dies, Stampin' Blends, In Colour DSP

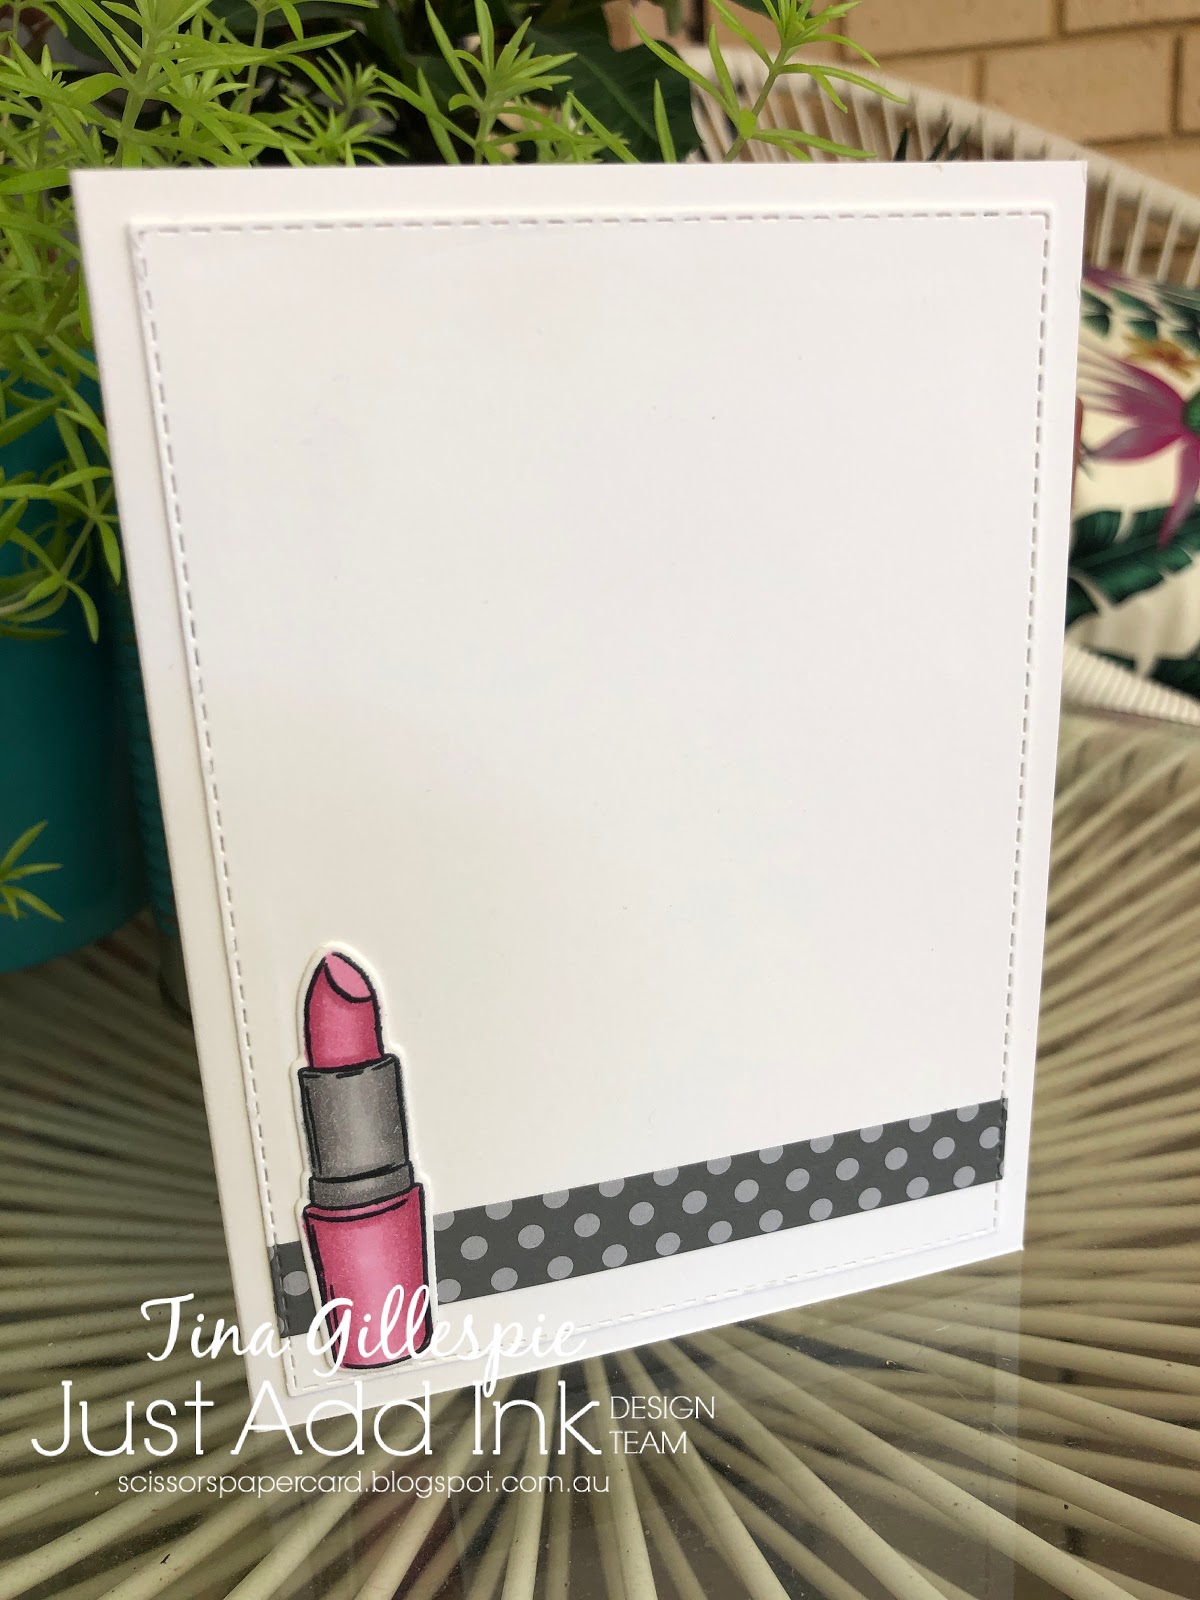
I started by stamping the lipstick in Memento and then colouring with my Rococo Rose and Smokey Slate Blends. The sentiment comes from the stamp stamp set, and was cropped using a die from the bundle. The Glimmer label underneath was cut from the Ornate Frames Die. A strip of Basic Grey DSP and some Rose Metallic Thread, all layered over some sponged Rococo Rose ink, finished the front of the card.

scissorspapercard, Stampin' Up!, Just Add Ink, Dressed To Impress Bundle, Ornate Frames Dies, Stitched Rectangles Dies, Stampin' Blends, In Colour DSP

I had stamped and coloured a second lipstick at the same the as the one on the front, knowing it would go to great use on the inside. I adhered the strip of DSP to the card before I cropped it with the largest Stitched Rectangle die. This added the stitching to the DSP without any extra effort on my behalf. I didn't stamp an inside message, as I chose to write a personal message to my mum instead.

Time now to pop on over to the Just Add Ink blog, where you can find the rest of this week's Design Team cards. When you've made your card using the challenge colours, you can link it up there as well!

Bye for now,

Tina

Thursday, 23 April 2020

JAI #502: Just Add A Sketch

Hi!


It's Friday again, which means it's nearly the weekend, but first it's time for the new Just Add Ink challenge. This time it's a sketch designed by me!


I must have designed it a while ago, as I didn't remember it at all! I really like it though, there's lots of fun stuff you could do with it. I actually flipped the sketch and then pushed the layers off-center, as it suited my plan better.

scissorspapercard, Stampin' Up!, Ink Road Stamps, Just Add Ink, Game On, Minecraft, Stitched Rectangle Dies

My oldest child, Alex, turned 17 this month. He had a quiet birthday while sheltering at home, but I made up for it by ordering him an Oreo cake from the Cheesecake Shop. We also toasted some marshmallows around our fire pit, so overall he enjoyed his birthday.

scissorspapercard, Stampin' Up!, Ink Road Stamps, Just Add Ink, Game On, Minecraft, Stitched Rectangle Dies

Today's card is an attempt to replicate one of his favourite games, Minecraft. To make the background, I just cut a heap of 1/2 inch squares from brown, grey and green cardstock. I then arranged them on a piece of Smokey Slate cardstock using Tombow glue. The stamps are from an Ink Road Stamps set called Game On. I stamped them in Call Me Clover, to match the vibrant green of Minecraft.

scissorspapercard, Stampin' Up!, Ink Road Stamps, Just Add Ink, Game On, Minecraft, Stitched Rectangle Dies

I had some left over squares, so they were perfect for the inside of the card. According to Alex, the sentiment on the inside belongs to a sneaky character called a Creeper, that sneaks up on you and explodes! They are hard to see, so all you usually get as warning is the sssss before the boom! Have you learnt something - I certainly did!

That's it from me today - I'm off to practice the Last Post so that I can play it on my driveway tomorrow morning for Anzac Day. Hopefully I don't mess it up too badly! While I'm practicing, why don't you pop on over to the Just Add Ink blog, where you can see the rest of this week's Design team cards? You can also link up your own for the challenge. I can't wait to see what you do with my sketch.

Bye for now,

Tina

Sunday, 19 April 2020

CTC #267 Week 2: Flowers Of The Ornate Garden Suite

Hi!


Welcome back for this week's CASEing The Catty Sunday Challenge Blog Hop. We are up to Week 2 of our current challenge, which is to make a card that is inspired by the flowers of the Ornate Garden Suite.

Last week I did a heap fo fussy cutting with the Peaceful Poppies DSP. This week I decided to go more literal and use one of the stamp sets from the suite, Ornate Style.

scissorspapercard, Stampin' Up!, CASEing The Catty, Ornate Style, Swirly Frames, Label Me Bold, Peaceful Moments, In Colour DSP, Stitched Rectangle Dies, Stampin' Blends

I started by stamping the frame from Swirly Frames on a piece of Whisper White cardstock. I also stamped it on a piece of copy paper and trimmed away the piece on the inside of the frame. I then used the copy paper as a mask and stamped the flowers through it.

scissorspapercard, Stampin' Up!, CASEing The Catty, Ornate Style, Swirly Frames, Label Me Bold, Peaceful Moments, In Colour DSP, Stitched Rectangle Dies, Stampin' Blends

I then coloured the image with my Stampin' Blends. I used Rococo Rose, Daffodil Delight, Purple Posy and Granny Apple Green. I coloured the outer areas with Light Pool Party. A sentiment from Label Me Bold finished off the front of the card.

scissorspapercard, Stampin' Up!, CASEing The Catty, Ornate Style, Swirly Frames, Label Me Bold, Peaceful Moments, In Colour DSP, Stitched Rectangle Dies, Stampin' Blends

For the inside, I stamped the same flowers as the front, I just turned the stamp on it's side. They are coloured the same was as the front of the card. The sentiment is from Peaceful Moments.

That's all from me this week. We are at the halfway point for our challenge, so you still have a week to make a card and post it to the Facebook Group. What inspires you from the flowers of the suite?


Before you dash off to get creating, don't forget to finish the Blog Hop! Next up is the lovely Bec!


Bye for now,

Tina
Tuesday, 31 March 2020

Wiggly Worm Pop Up!

Hi!

I often forget to blog early in the week, but I had a bit of extra time this week and I actually remembered to write a post! Today's card was one that I made using a Jennifer McGuire tutorial. I loved how her card had a cute little pop up element on the inside.

scissorspapercard, Stampin' Up!, Wiggle Worm, Stampin' Blends, Fancy Fold, Pop Up Panel Card

This card was made as a class sample, so that my ladies could try out the technique. I thought the Wiggle Worm bundle was a great choice for this card, as it's great for a younger child.

scissorspapercard, Stampin' Up!, Wiggle Worm, Stampin' Blends, Fancy Fold, Pop Up Panel Card

To create the pop up section, you just create two squares using narrow strips of cardstock. They are just glued together and then glued to the card base, lining up with the fold.

scissorspapercard, Stampin' Up!, Wiggle Worm, Stampin' Blends, Fancy Fold, Pop Up Panel Card

The two little panels on the inside just adhere to the rectangles. They need to be small enough to fit into the card when it is folded. How cute are those bugs? I really should play with this bundle some more!

Bye for now,

Tina

Sunday, 22 March 2020

CTC #265 Week 2: Second Release Sale-A-Bration

Hi!

https://www.facebook.com/groups/1625891621049580/

Welcome, and thank you for doing us for our new CASEing The Catty Sunday Challenge Blog Hop. We are mid way though our fortnightly challenge to CASE a project from the Second Release Sale-A-Bration Catalogue.


It's a wee little catalogue, but it's certainly packed with inspiration - sometimes in unexpected places! My card was CASEd from the picture of the Flowering Foils DSP on page 3. The way the papers were arranged in peaks, like mountains, caught my eye.

scissorspapercard, Stampin' Up!, CASEing The Catty, Happy Birthday Too You, Rectangle Stitched Dies, Masculine Card

I simplified quite a bit to only have one set of peaks, but I was really pleased with how it turned out. I cropped three of the largest Stitched rectangle dies, one each of Balmy Blue, Blueberry Bushel and Night Of Navy. I imagine this card would look just as great. in other colours too! The Happy Birthday was heat embossed in Silver.

scissorspapercard, Stampin' Up!, CASEing The Catty, Happy Birthday Too You, Rectangle Stitched Dies, Masculine Card

Here's how I started the layers on the Thick Whisper White card base. I glued the first layer down with Tombow, and then flipped the card to trim the excess away from the back. I then repeated the process with the other two layers. I did lay the three layers over the base first without glue so that I didn't glue the top layer too high, which would leave gaps at the bottom. I hope that makes sense!

scissorspapercard, Stampin' Up!, CASEing The Catty, Happy Birthday Too You, Rectangle Stitched Dies, Masculine Card

The inside was decorated using the offcuts from the front! I was left with very little waste, which always makes me happy!

Our challenge is run through our Facebook group. Pop on over there, after you've finished the hop, of course! You can upload your card and see everyone else's cards. Lots of inspiration to be found!


Next up in the Blog Hop is the lovely Bec. I absolutely adore her purple card - you certainly don't want to miss it!


Bye for now,

Tina

Thursday, 5 March 2020

JAI #495: Just Add A Rainbow

Hi!


Welcome back to the new Just Add Ink challenge. This week Rochelle has challenged us to add a rainbow to our projects. It can be a rainbow itself, or a rainbow of colour, perhaps even a quote about a rainbow - it's up to you!


I recently purchased a couple of stamp sets that celebrate diversity in sexuality, so I decided that this challenge would be the perfect time for them to get inky! Good timing too, as it was Mardi Gras weekend in Sydney recently.

scissorspapercard, Stampin' Up!, Kindred Stamps, The Ink Road, Full Of Pride, Love Wins, Stampin' Blends, Copics, Rectangle Stitched Dies

I started with my background rainbow. I cut 7/8" strips of Poppy Parade, Mango Melody, Daffodil Delight, Call Me Clover, Pacific Point and Gorgeous Grape cardstock. I adhered them to a piece of copy paper and then cropped them using my largest Stitched Rectangle die. I then adhered them to a piece of Thick Whisper White cut slightly smaller to give the piece more stability. This whole panel was then popped up onto a Thick Whisper White card base.

scissorspapercard, Stampin' Up!, Kindred Stamps, The Ink Road, Full Of Pride, Love Wins, Stampin' Blends, Copics, Rectangle Stitched Dies

The main image was stamped using the heart from The Ink Road stamp set Love Wins, with the sentiment from the Kindred Stamps set Full Of Pride. I coloured the heart with my Stampin' Blends, and a set of Copics, as there's no bright blue Blends: Poppy Parade, Pumpkin Pie, Daffodil Delight, Call Me Clover, Copics B28 and B24, Highland Heather.

scissorspapercard, Stampin' Up!, Kindred Stamps, The Ink Road, Full Of Pride, Love Wins, Stampin' Blends, Copics, Rectangle Stitched Dies

I had a few scraps of the front cardstock colours on my desk, and so I punched a row of hearts for the inside. They just fit nicely! The sentiment is from the The Ink Road stamp set called Love Wins. I'm not sure who I will give this card to. It just made me happy to make it, and I hope that eventually it will make someone happy to receive it!

That's all from me this week, now it's time to pop on over to the Just Add Ink blog, where you can find the rest of this week's Design team Rainbow cards. You can also link up your rainbow card. I can't wait to see how you interpret this theme!

Bye for now,

Tina