Pages

Showing posts with label Letters To Santa DSP. Show all posts

Wednesday, 5 September 2012

25 And Counting Christmas Card

Hi!

I had a party today where I demonstrated some Christmas cards to the lovely ladies present.  It reminded me that I had a Christmas card in my 'To Blog' file that I hadn't shown you yet.


This card is a bit of a mix of old and new.  I used the old Letters To Santa DSP, and also the retired stamp set Season of Joy.  The new is a brand new stamp set from the Annual Catalogue called 25 And Counting.  It's the perfect set for Advent Calendar type projects, but I thought the lovely 25 image worked beautifully as a tag on my card.


Some lovely, simple stamping on the inside - lots of space for writing a Christmas message to your recipient!

Stamps: 25 And Counting, Season Of Joy (retired)
Ink: Old Olive
DSP/Cardstock: Letters To Santa DSP (retired), Old Olive, Riding Hood Red, Whisper White
Other: 1 1/4" Circle Punch, 1"Circle Punch,1/16" Circle Punch, White Baker's Twine, Whisper White Satin Ribbon (retired)

Bye for now,

Tina

Friday, 3 August 2012

Festive Friday #30

Hi!


Who's ready for another round of Festive Friday goodness?  Me!  This week Nicole has designed a cute sketch to use on our cards.  It's a very versatile sketch, with lots of room for playing.


I changed the sketch from rectangle to square for my card, which is a cute little 4 1/4" size.


Love, love, love Dasher for Christmas cards.  He's been a bit neglected lately, so it was way past time for him to see some ink.


More of the gorgeous Letters To Santa DSP on the inside.  I'm not worried about not much room for writing in my card, as I usually send out a newsletter with my cards.

Stamps: Snow Swirled, Dasher, Season Of Joy
Ink: Early Espresso, Marina Mist
DSP/Cardstock: Letters To Santa DSP, Early Espresso, Whisper White
Other: Word Window Punch, Modern Label Punch, Early Espresso Baker's Twine, Basic Jewels Rhinestones, Dimensionals

Bye for now,

Tina

Friday, 20 July 2012

Festive Friday # 28

Hi!


Festive Friday time again!  This week Nicole has given us this gorgeous picture to use as inspiration for our cards.


Lol, if you look really closely you can see the photographer in the shiny bauble!  Am I the only one who notices things like that? Anyway, here's the card I made that was inspired by the picture.


I am really loving the Letters for Santa DSP for my Christmas cards.  I think it's one of those DSP's that grows on you over time.  I cut the large bauble from the DSP and used a scrap for the panel down the side.  I also used some red Glimmer Paper down the side to represent the string of beads in the photo.  I carried this over to the inside of the card too.


What a gorgeous inspiration picture we have to work with this week.  I hope it inspires you to get out your Christmas supplies and get stampin'! See you over at Festive Friday.

Stamps: Snow Swirled, Baroque Motifs
Ink: Old Olive
DSP/Cardstock: Letters To Santa DSP, Red Glimmer Paper, Early Espresso, Old Olive, Whisper White
Other: 1" Circle Punch, 1/8" Early Espresso Taffeta Ribbon, Mini Glue Dots, Sponge Dauber, Paper Snips

Bye for now,

Tina

Friday, 6 July 2012

Festive Friday #26

Hi!


How are you going on your Christmas card stash?  How about a colour combination to inspire you to make some more?  Nicole has challenged us to make a card using these gorgeous colours.


They aren't colours that immediately scream "Christmas", but I guess that's sometimes a good thing!  Here's my card.

I decided to focus on the browns and create a natural looking Christmas card.  Isn't this tree from Lovely As A Tree perfect as a Christmas tree?  After I stamped it I added some Dazzling Diamonds to the image using my Two-Way Glue Pen.  It adds a lovely shimmer that I hoped looked a little like snow.  Here's a closer look.

Hmm, a bit hard to capture the shimmer in a photo!

Nice and simple stamping on the inside to finish off the card.

Stamps: Lovely As A Tree, Snow Swirled, Season of Joy
Ink: Early Espresso, Crumb Cake
DSP/Cardstock: Letters To Santa DSP, Blushing Bride, Crumb Cake
Other: Dazzling Diamonds, Paper Snips, Two-Way Glue Pen, Dimensionals

I hope you can play along this week at Festive Friday Challenges - it's a lovely colour combination for Christmas cards!
Bye for now,
Tina

Friday, 25 May 2012

Festive Friday #20

Hi!


Here we go again with another Festive Friday Challenge. This week Nicole has selected an absolutely gorgeous inspiration photo for us to work with.


Wouldn't an arrangement like that look just stunning on your table on Christmas Day?  I took my inspiration from the roses and used the largest image from Apothecary Art on my card.


Don't you love it when you can find an unexpected use for an image from a stamp set? I never would have thought that this image would work on a Christmas card, but here it is!


I gave a little nod to the candy canes on the inside of my card by stamping some red and white striped baubles.


I hope you can play along this week at Festive Friday Challenges.  I'd love to see how this picture inspires you.

Stamps: Apothecary Art, Perfect Punches, Snow Swirled, Tree Trimmings
Ink: Riding Hood Red, Old Olive
DSP/Cardstock: Letters To Santa DSP, Riding Hood Red, Old Olive, Whisper White
Other: Big Shot, Lables Framelits, Circle Punches, Old Olive Satin Ribbon, Dimensionals, Paper Snips

Bye for now,

Tina

Friday, 11 May 2012

Festive Friday #18: Christmas Cards

Hi!


 This week at Festive Friday Challenges Nicole has a fantastic colour combination to inspire us.


Isn't it a yummy combination?  A bit different to the traditional colours of Christmas, but it had me thinking of gingerbread and reindeer! Here's my Design team card for the challenge.


I inked up Dasher in Crumb Cake ink and then used my Early Espresso Marker to colour the antlers.  Poor Dasher was a little dusty - it was nice for him to see ink again!


Just a simple inside for this one - lots of room for writing a special Christmas message.

Does this colour combination inspire you to create a Christmas card?  I hope so!  Please come and play along with us at Festive Friday Challenge.

Stamps: Dasher, Snow Swirled, Season Of Joy
Ink: Crumb Cake, Early Espresso, Real Red
DSP/Cardstock: Letters To Santa DSP, Real Red, Early Espresso, Whisper White
Other: Real Red Satin Ribbon, Dimensionals

Bye for now,

Tina

Friday, 13 April 2012

Festive Friday #14

Hi!

It's Festive Friday time again, and we're back onto the Christmas cards again.  Are you going to play along this week?  I hope so, because if Nicole gets at least 5 entries there will be a prize up for grabs!  What a bonus - not only do you get a head start on your Christmas cards, but you could win a prize just by doing so!  Awesome!

This week we have a sketch to inspire your card making.


Here's my take on the sketch.


I love, love, love the Letters To Santa DSP.  I wasn't keen on it at first, but once I started playing with it I was hooked!  I used a section of DSP that you'd normally think was for a layout and made it a feature part of my card.


I also love the smaller patterns in the DSP.  For the inside I fussy cut an ornament and used a Rhinestone brad to jazz it up a little.


Can't wait to see how the sketch inspires you this week at Festive Friday Challenges!

Stamps: Snow Swirled
Ink: Marina Mist
DSP/Cardstock: Letters To Santa DSP, Marina Mist, Blushing Bride, Whisper White
Other: Blushing Bride Stitched Poly Ribbon, Rhinestone Brads, Dimensionals, Paper Snips

Bye for now,

Tina

Friday, 17 February 2012

Festive Friday #6

Hi!

I'm back with another Design Team card for Nicole Derendorf's Festive Friday Challenge #6.  We're still on the Christmas cards.  I'm loving getting my Christmas cards done one by one like this - I can spend more time on each and it won't be a mad rush to churn out the cards at the end of the year.  Here's my card for this week's challenge:

Here's a closer look at the front.  I used the new Postage Stamp punch, layered with our square punches.  The fussy-cut ornament was popped up on Dimensionals and adorned with some Rhinestones.

And of course the inside, done to match the outside.

I hope you can find time to play along at Festive Friday Challenges this week.  I can't wait to see your Christmas card.

Stamps: Snow Swirled, Tree Trimmings
Ink: Old Olive, Early Espresso
DSP/Cardstock: First Edition Specialty DSP, Letters To Santa DSP, Early Espresso, Old Olive, Riding Hood Red, Very Vanilla
Other: Big Shot, Petal Cone Die, Postage Stamp Punch, 1 1/4" Square Punch, 1" Square Punch, Early Espresso Baker's Twine, Basic Jewels Rhinestones, Dimensionals, Paper Snips, Chit Chat Rub Ons (retired)

Bye for now,

Tina

Friday, 27 January 2012

Festive Friday Challenge #3


Hi!

Welcome to the third of Nicole Derendorf's Festive Friday Challenges.  This week is our first round of Christmas Cards.  I'm so pleased to be on the Design Team because it gives me a kick start on my Christmas cards for the year.  No more mad rush in November (or December!).  If you play along too you could get a good head start on the task.


I love it when you can make a card and let the DSP to all the 'talking'.  Some days I just can't be bothered getting out my stamps and ink pads, and so cards like today's are perfect for such occasions.


In the end I did get out one stamp and one inkpad for the inside!

Stamps: Curly Cute
Ink: Old Olive
DSP/Cardstock: Letters to Santa, Riding Hood Red, Old Olive, Whisper White, Red Glimmer Paper
Other: Ornament Punch, Cherry Cobbler Baker's Twine, Dimensionals

Why don't you pop on over to Nicole's blog and see what the rest of the Design Team have made to inspire you.  I hope you can play along with us.

Bye for now,

Tina

Tuesday, 3 January 2012

Just Add Ink Scrapbook Challenge #1

Hi!

After my sprint to the finish of 100 layouts in 2011 I was expecting to have a bit of a rest from scrapbooking for a couple of weeks at least.  Then JAI started doing scrapbooking challenges!  The first challenge is to scrap about firsts, so I chose a photo of my eldest son's first Christmas.


The photo is very green,  so I decided to go very neutral for the layout with just a few little splashes of colour.  I chose Sahara Sand and stamped in the same ink to keep it subtle.


The flowers are paper ones I had in my stash from before I was a Stampin' Up! Demonstrator.  I used a Basics Glimmer Brad for each of the centres.


The title is a combination of a few different rub on packs I had in my stash, also from my pre-demo days.

Stamps: Snow Swirled
Ink: Sahara Sand
DSP/Cardstock: Beau Chateau DSP, Letters To Santa DSP, Sahara Sand
Other: Very Vanilla Velvet Ribbon, Scallop Trim Border Punch, Basics Glimmer Brads, Sponge Dauber, Rub-Ons (non SU) and Paper Flowers (non SU)

Bye for now,

Tina

Tuesday, 20 December 2011

Layout 87: Naughty or Nice

Hi!

I was very organised this year and made my Santa photo layout before I had the Santa photo.  You can see the layout here.  Well, I guess karma decided to have a bit of a laugh because when we went to have the photo taken, we couldn't get it done at our usual place.  So off we went to the next place and had the photo taken.  It wasn't until later that I realised I'd scrapped for a portrait oriented photo and I had a landscape oriented photo in my hands.  Sigh.  It just shows that some things are best left 'til the last minute!


I used the Letters To Santa DSP on my layout.  I cut out a heap of words and phrases and then couldn't decide on how to include them on my layout.  I eventually noticed that they were all different lengths and so I arranged them in a Christmas tree shape.


Look at those children - butter wouldn't melt in their mouths!


Ink: Early Espresso Stampin' Write Marker
DSP/Cardstock: Letters To Santa DSP, Old Olive 12 x 12 textured, Red Glimmer Paper
Other: Postage Stamp Punch, Small Star Punch (retired), Paper Snips, Paper Doily (non SU!)

Catch you later,

Tina

Saturday, 26 November 2011

Christmas Blog Hop

Hi!

Welcome to our last blog hop of the year.  We're doing a Christmas theme this month to give you some inspiration in the final charge into Christmas.  Did you know there are only 29 days to go????

The blog before mine was Ros Davidson's, but you can start anywhere and just keep hopping 'til you get back to where you started.  I'm sure you're going to see a heap of lovely ideas along the way.

I decided to do a scrapbook layout of the family putting up the Christmas tree. In Adelaide it seems to be the tradition that the tree goes up on Pageant Day (the second Saturday in November).  Most families either go into the city to watch the parade and then come home to put up the tree, or they stay at home and watch the parade on TV while putting up the tree.  The advantage of putting the tree up this early is that you have plenty of time to scrap the photos before the craziness that is December!


There are some sneak peeks on this layout of products coming out in the upcoming Summer Mini Catalogue.  The postage stamp shaped layout was inspired by a new punch.  I just used my 1" Circle punch to create the 'perforations' aroun d the edge of the layout.


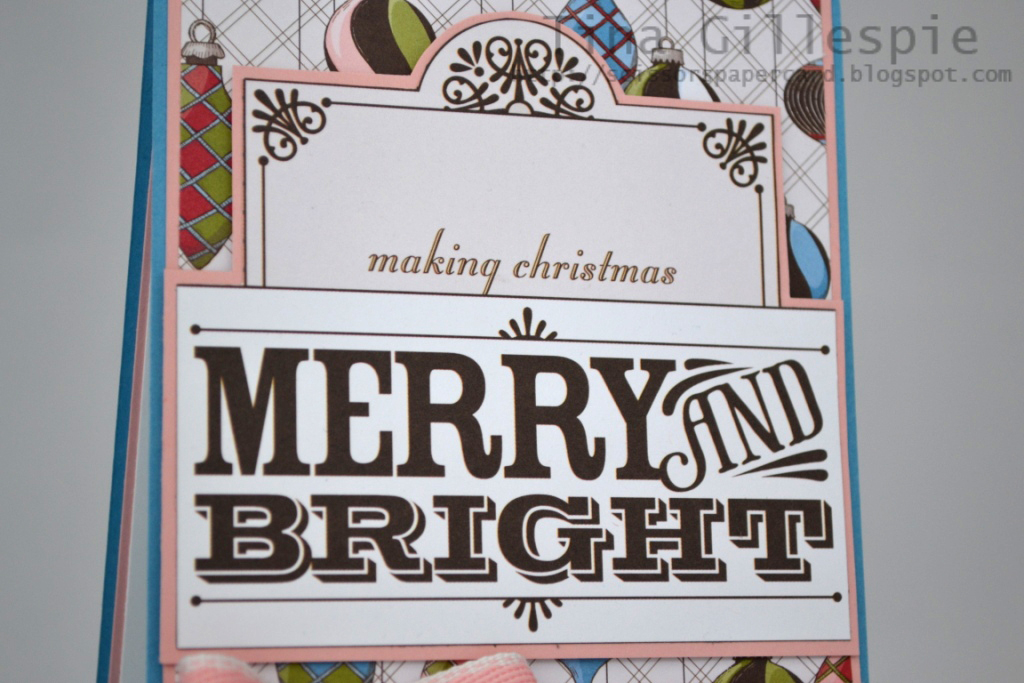
I kept the postage stamp theme going with a fussy cut postage stamp image from the Letters To Santa DSP.  The baubles were also fussy cut from the same DSP pack, and there's another peek - some gorgeous Baker's Twine from the Mini catalogue.


More fussy cut baubles and Baker's Twine to decorate the journalling spot.  I decided to 'hang' one of the baubles from the letter 'e' in the title.


A little more Baker's Twine and another bauble to finish off the layout.  Can you tell how much I love the twine?

Ink: Early Espresso Stampin' Write Marker
DSP: Letters To Santa DSP, First Edition Specialty DSP, Early Espresso, Riding Hood Red, Whisper White
Other: Big Shot, Timeless Type Junior Alphabet Dies, Top Note Die, 1" Circle Punch, Early Espresso Baker's Twine, Early Espresso Taffeta Ribbon,  Paper Snips, Dimensionals
Digital: PS5, Photo Booth Photo Frame

I'd love for you to hop off to Nikki Sadler's blog now to continue the Blog Hop.

Catch you later,

Tina

Blogs in the hop:

Nikki Sadler
http://www.inkyart.com.au/

Sue Madex
http://www.madexcreations.com/

Di Dunk
http://www.stampartbydi.typepad.com/

Judy May
http://www/judymay.typepad.com

Kathryn Mangelsdorf
http://klm55.blogspot.com/

Alisha Watson
http://www.ratherbstampin.typepad.com/

Christine Blain
http://www.christineblain.blogspot.com/

Ros Davidson
http://www.rosdavidson.typepad.com/