Pages

Showing posts with label Home Together Dies. Show all posts

Sunday, 13 December 2020

CTC #298: CASE An Embossing Folder Project

 Hi!


Thanks for joining me again for the new CASEing The Catty Sunday Challenge Blog Hop. 


This week Bec has challenged us to CASE a project that features an embossing folder. You can choose a project from either of the two current catalogues, so there's plenty to choose from!


I chose my project to CASE from the back of the August-December Mini Catalogue. It's a card designed to show off the Coming Home bundle, but it features the Winter Snow Embossing Folder.

scissorspapercard, Stampin' Up!, CASEing The Catty, Tag Buffet Project Kit, Joy To The World Paper Pumpkin, Winter Snow EF, Home Together Dies, Christmas Card

I recently purchased the Tag Buffet Project Kit, and at the end there are 5 of these Christmas Tree laser cut pieces left. I couldn't let them go to waste, so I made a set of cards for them. The sentiment banners were also left over pieces from the kit. I used the plain curved die in the Home Together Dies to cut the Balmy Blue Glimmer Paper. It's the same curve as on the original card, just upsized!

scissorspapercard, Stampin' Up!, CASEing The Catty, Tag Buffet Project Kit, Joy To The World Paper Pumpkin, Winter Snow EF, Home Together Dies, Christmas Card

I used the inked embossing folder technique to add a little something to my card. I simply tapped my Balmy Blue inkpad all over the indented side of my embossing folder, placed my cardstock in it and ran it through my Big Shot. The ink stays on the flat sections of the cardstock, leaving the raised snowflakes white. It's so pretty!

scissorspapercard, Stampin' Up!, CASEing The Catty, Tag Buffet Project Kit, Joy To The World Paper Pumpkin, Winter Snow EF, Home Together Dies, Christmas Card

The stamped sentiments are both from the Joy To The World Paper Pumpkin kit. I am getting so much use out of them!  I also added a little offcut from the embossed panel to the inside.

scissorspapercard, Stampin' Up!, CASEing The Catty, Tag Buffet Project Kit, Joy To The World Paper Pumpkin, Winter Snow EF, Home Together Dies, Christmas Card

I forgot to trim one of the snowflake pieces, so I ended up with one card with a narrow border rather than the wider border, as in the CASEd card. I'm not sure which I like best! What do you think? The Balmy Blue Glimmer Paper looks much nicer in this photo too!

To join in with our challenge, just make your card, take a photo and upload it to our Facebook group. It's that easy!


I'm the last stop on this week's Blog Hop if you started with Julia or in the Facebook group. If you started mid way though, please hop on over to Julia's blog. Her cards are stunning!

Bye for now,

Tina

Wednesday, 9 December 2020

Colour Creations: Misty Moonlight

 Hi!


Welcome back for the second last Colour Creations Creative Showcase for 2020. We will be back in 2021 with the remaining colours, but we are taking a well deserved break for Christmas/New Year after we do Mossy Meadow next week. For this week, we are all making cards using Misty Moonlight. It's a gorgeous dirty blue, a bit like denim.

scissorspapercard, Stampin' Up!, Colour Creations, Waterfront, Peace & Joy, Joy To The World Paper Pumpkin, Home Together Dies, Shimmer Paint

I started my card by cutting a Thick Whisper White card base and then two smaller pieces for the front. The curves were cut using the curved die from the Home Together Dies. I laid them over the top of the card and then used a pencil to draw along the top edges to give myself a guide for stamping the trees. The tree stamp is from Waterfront, and was stamped in Memento ink.

scissorspapercard, Stampin' Up!, Colour Creations, Waterfront, Peace & Joy, Joy To The World Paper Pumpkin, Home Together Dies, Shimmer Paint

I then used a sticky note and a 1 3/4" circle punch to mask off the moon. My blending brush was used to apply Misty Moonlight ink to the top half of the card, making sure I kept the colour very light around the moon and darker further out. I then splattered some Frost White Shimmer Paint over the inked area. The hill pieces were glued flat to the card front, after I'd stamped the top one with the sentiments from Peace & Joy.

scissorspapercard, Stampin' Up!, Colour Creations, Waterfront, Peace & Joy, Joy To The World Paper Pumpkin, Home Together Dies, Shimmer Paint

The offcuts from the hills on the front were used on the inside - I rarely waste anything! I related the same process as for the front, I just didn't do a moon. I was thrilled with how the card turned out, and I found it quite easy. The hardest part was waiting for the Shimmer Paint to dry!

That's all from me for tonight, but please do head on over to Catherine's Blog, where you'll find the rest of the links for this week's Misty Moonlight cards.

Bye for now,

Tina

Monday, 19 October 2020

Heart Of Christmas: October

 Hi!


Once a month in the lead up to Christmas, the Art With Heart team participate in the Heart Of Christmas Creative Showcase. It's a great opportunity for me to build up my stash of Christmas cards - you can never have too many, I always seem to be scrambling to make extras right before Christmas.

scissorspapercard, Stampin' Up!, Heart Of Christmas, Trimming The Town DSP, Home Together Dies, Subtle 3DEF, Layering Circles Dies

If you haven't guessed by now, my favourite Christmas DSP (I think ever) is the Trimming The Town DSP. It has so many possibilities! This time I used the sentiment sheet as a feature. I like chopping it up to use the individual sentiments, but I wanted to stretch myself to use it in different ways. I laid a section of it over a Pool Party base, which I've embossed with the Subtle 3DEF.

scissorspapercard, Stampin' Up!, Heart Of Christmas, Trimming The Town DSP, Home Together Dies, Subtle 3DEF, Layering Circles Dies

I've also added a partial circle of Pool Party, over which I've adhered another circle of the same size in Whisper White that I've cropped with the coordinating Home Together Dies. The house was fussy cut from the Trimming The Town DSP and popped up over the snowy hill. I wasn't in the mood to stamp and colour today, and I love that the Coming Home Suite gives us both options - there's definitely something for all levels of crafters in the suite.

scissorspapercard, Stampin' Up!, Heart Of Christmas, Trimming The Town DSP, Home Together Dies, Subtle 3DEF, Layering Circles Dies

Something a little different on the inside - I usually decorate the bottom of the insert, but the dies are more compatible with decorating the top! Another house and a sentiment, both fussy cut from the DSP, were all that were needed.

As always, my wonderful friend Judy is hosting the Creative Showcase. Please hop on over to her blog, where you will find the rest of the links for this month. There's a lot of talent in the AWH Team, so you won't be disappointed!

Bye for now,

Tina

Sunday, 11 October 2020

CTC #289: CASE a Halloween Project

 Hi!


Welcome back for the new CASEing The Catty Sunday Challenge Blog Hop. This week we are asking you to CASE a Halloween Project from either of the catalogues.


After a quick flick through both catalogues, I settled on this card from the August-December Mini Catalogue. I really liked the simplicity, and I'm a real sucker for a flicked ink background!


If you're like me, and don't do Halloween, you can still join in - you just need to be inspired by a card. It could be the colours, or a technique, or the layout, it does not have to be the theme. I changed the theme to make a Christmas card.

scissorspapercard, Stampin' Up!, CASEing The Catty, Coming Home, Itty Bitty Christmas, Home Together Dies, Trimming The Town DSP, Balmy Blue Glimmer Paper, Stampin' Blends

My card ended up not looking like the owl card at all! There are still elements of it, though. The flicked background became a Glimmer Paper sky. The moon turned into a house, and the sentiment banner became a sentiment strip. And if I really want to stretch it, there are trees on both cards, LOL.

scissorspapercard, Stampin' Up!, CASEing The Catty, Coming Home, Itty Bitty Christmas, Home Together Dies, Trimming The Town DSP, Balmy Blue Glimmer Paper, Stampin' Blends

Each of the elements were stamped using the Coming Home stamp set, coloured with Blends and then cropped using the Home Together Dies. I finished the front of the card with a sentiment cropped from the Trimming The Town DSP.

scissorspapercard, Stampin' Up!, CASEing The Catty, Coming Home, Itty Bitty Christmas, Home Together Dies, Trimming The Town DSP, Balmy Blue Glimmer Paper, Stampin' Blends

The inside was completed with left overs from the front of the card - an extra little strip of Glimmer Paper trimmed from the front and a few extra trees that I'd coloured but not used. The sentiment is from Itty Bitty Christmas. 

Our challenge is run though our Facebook group, which means that you don't need a blog to enter. Just make your card and upload a picture in the group. Easy! Which Halloween project will you choose to CASE - and how will you choose to CASE it? All the big questions this week!


Next up is the wonderful Siobhan, I wonder which direction she has gone with her Halloween CASEing? Only one way to find out - hop on over to her blog!

Bye for now,

Tina

Thursday, 8 October 2020

October Creative Showcase: Using DSP

 Hi!


Welcome to the monthly Art With Heart Creative Showcase. Stampin' Up! are holding a DSP sale this month, and so we have chosen to feature the DSP packs that are on sale in this month's Showcase. There are quite a number of packs to choose from at a 15% discount, but I couldn't go past my all-time favourite Christmas DSP: Trimming The Town. I think I will need to purchase a second pack before the sale ends!

scissorspapercard, Stampin' Up!, Creative Showcase, Trimming The Town, Home Together Dies, Christmas Card

This card was inspired by the sentiment sheet of DSP. I've only ever used individual sentiments cut from the sheet. I decided it was about time to use a larger piece of it. Because I've mounted it against a bit of a busy background, I've matted the sentiment piece in white. I also used a Thick Whisper White card base, to help balance all of the darker colours.

scissorspapercard, Stampin' Up!, Creative Showcase, Trimming The Town, Home Together Dies, Christmas Card

Each of the elements on the front of the card were cropped from the DSP. To give them a bit more stability, especially for the ones getting popped up, I adhered each roughly cut piece to Thick Whisper White cardstock before cropping them with the coordinating Home Together Dies.

scissorspapercard, Stampin' Up!, Creative Showcase, Trimming The Town, Home Together Dies, Christmas Card

The inside scene is a bit snowier! The snowy hill on the inside is simply the offcut from the snowy hill on the front. I just added some extra fussy cut elements from the DSP to finish off the scene. I have not used ink at all on my card, but I think that it would also look nice to have sponged a little Balmy Blue ink as a sky on the inside.

That's all from me tonight. Please pop on over to Rachel's blog, where you will find the links for the rest of this month's DSP Creative Showcase cards.

Bye for now,

Tina

Thursday, 24 September 2020

JAI #524: Just Add Colour

 Hi!


Hooray for Friday - and even better, this Friday marks the start of school holidays here in South Australia. I'm very much looking forward to lazy mornings/days with the kids!

This week for the new Just Add Ink challenge, Jo had given us a fabulous colour combination to work with.


I like the two different shades of pink with the mint green. I decided to do a sponged background with the pinks, and go from there with my card.

scissorspapercard, Stampin' Up!, Just Add Ink, Warm & Toasty, Itty Bitty Christmas, Home Together Dies,

I used blending brushes to add the colour to a piece of Whisper White card, starting with the Rococo Rose. I then added Merry Merlot around the edge and finished by flicking some Frost White Shimmer Paint over the top.

scissorspapercard, Stampin' Up!, Just Add Ink, Warm & Toasty, Itty Bitty Christmas, Home Together Dies,

The tree/hill die is from the Home Together Dies. I coloured the trees using my Dark Mint Macaron and Bronze Stampin' Blends (just a little colour cheat there!). Finally the sentiment and polar bear from Warm & Toasty finished off the card.

scissorspapercard, Stampin' Up!, Just Add Ink, Warm & Toasty, Itty Bitty Christmas, Home Together Dies,

I couldn't resist using the baby polar bear on the inside. I used the blending brushes again to add a little colour to the corner of the card and layered the bear over the top. This certainly isn't my usual style Christmas card, but I love how it turned out.

The rest of this week's Design Team cards can be found over on the Just Add Ink blog, were you can also link up your entry. Don't have these exact colours? That's ok - just use the closest match that you have.

Bye for now,

Tina

Sunday, 30 August 2020

CTC #283: CASE The Colours Of The Trimming The Town DSP

 Hi!


Thanks for joining me on a cold and wet Sunday evening, or at least it's cold and wet here in Adelaide, which is doubly rude of the weather gods after giving us a very Spring-like day yesterday! Hopefully we starting having more of those sorts of days as we come out of Winter.


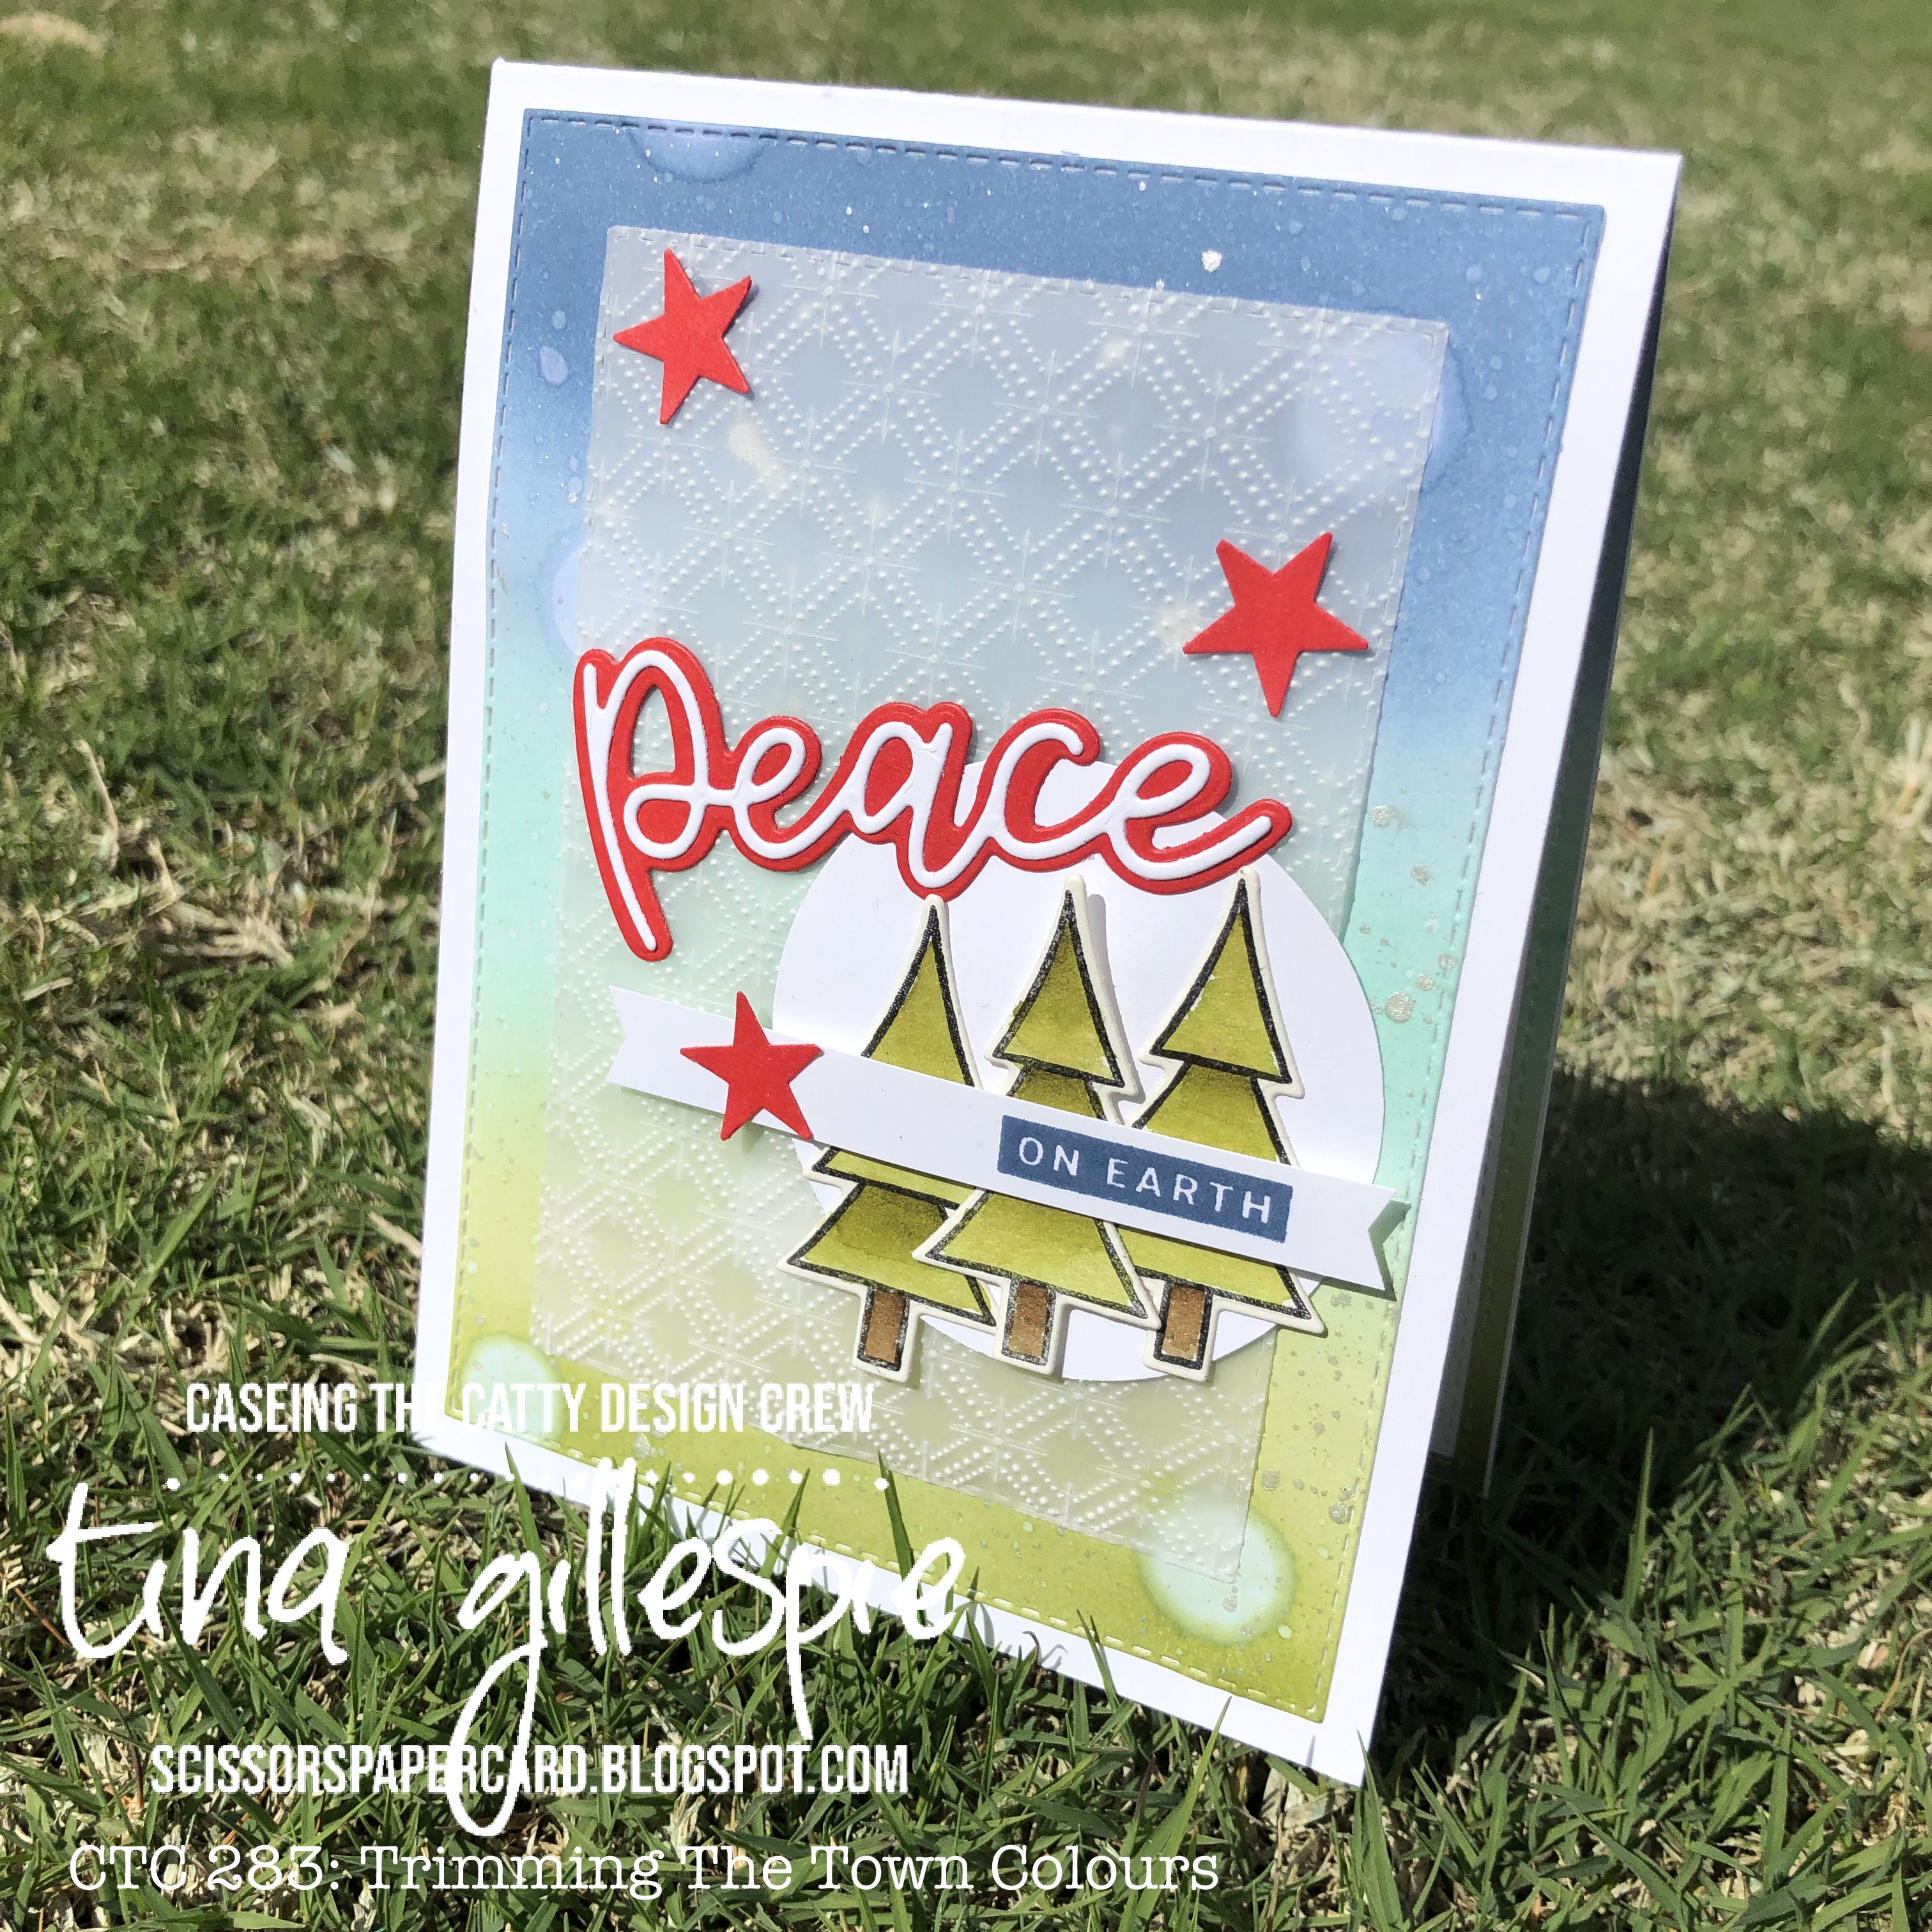
This week the CASEing The Catty Sunday Challenge Crew are asking you to CASE the colours in the Trimming The Town DSP. This simply means make something using Misty Moonlight, Old Olive, Pool Party, Poppy Parade, Early Espresso and Whisper White. You can use all of the colours, or just a few. I managed to get all the colours on my card.

scissorspapercard, Stampin' Up!, CASEing The Catty, Peace & Joy Bundle, Coming Home Bundle, Stitched Rectangles Dies, Dainty Diamonds 3DEF, Stampin' Blends

I started by creating my background, which used blending brushes to apply ink to Whisper White card. I started with Pool Party in the middle third, then added Old Olive to the bottom third and Misty Moonlight to the top third. I then splattered some water over the top, followed by some Frost White Shimmer Paint. I did some big blobs of water, which I regretted straight away, so I've tried to hide them under my Dainty Diamonds embossed Vellum layer!

scissorspapercard, Stampin' Up!, CASEing The Catty, Peace & Joy Bundle, Coming Home Bundle, Stitched Rectangles Dies, Dainty Diamonds 3DEF, Stampin' Blends

I had originally planned to have the 'peace on earth' sentiments on my circle layer, but then I realised that the only colour I hadn't used was Early Espresso. The trees from Coming Home solved that problem! They were stamped on watercolour paper and watercoloured, as there aren't Early Espresso Blends.

scissorspapercard, Stampin' Up!, CASEing The Catty, Peace & Joy Bundle, Coming Home Bundle, Stitched Rectangles Dies, Dainty Diamonds 3DEF, Stampin' Blends

When I was making my background for the front, I made it slightly larger so that I could use the offcut for the inside. I die cut a Whisper White Stitched Rectangle the same size as the background and then nestled it inside the offcut on the inside of the card. This time I used Blends on the trees on the inside. I cheated a little and used Bronze for the trunks!

That's all from me for tonight. As always, you can join in with the fun over in our Facebook Group. You just need to make a card based on the challenge, take a photo and upload it to the group. Easy!


Please do continue on with the Blog Hop. Next you're off to see the absolutely adorable card that Siobhan has made. It really is cute!


Bye for now,

Tina

Sunday, 23 August 2020

CTC #282: CASE Your Favourite Mini Catalogue Bundle

 Hi!


Wowee! Where did that weekend go? I had a very lovely weekend, because it was my birthday yesterday, but gee, it has flown by! The end of the weekend means that it's time for the new CASEing The Catty Sunday Challenge Blog Hop. Woo Hoo!


This week we are asking you to CASE your favourite bundle from the August - December Mini Catalogue. Don't have one of the bundles? Then just CASE your favourite project made with that bundle, but using what you have. Easy!


My favourite bundle (suite, actually!) is the Coming Home bundle. I really love house stamps and dies, and this is one of the best that Stampin' Up! have released. Even better, for every stamp set sold, SU is donating money to charities that support people through adoption, foster care and infertility.

scissorspapercard, Stampin' Up!, CASEing The Catty, Coming Home Bundle, Trimming The Town DSP

I decided to use this opportunity to try something that I've wanted to do since seeing the bundle - a double opening card. It's a great way to make a scene with a lot of dimension, but it can still be flat enough to mail easily. I started with a slightly smaller than card front pice of Whisper White card. I then  cut a flap from Pear Pizzazz cardstock using the sloped die with no trees. I folded a small section of the right side of the card around to the back and adhered it to the bottom right side of the Whisper White piece, ensuring that it lined up at the bottom. I then decorated with the house, wreath and trees.

scissorspapercard, Stampin' Up!, CASEing The Catty, Coming Home Bundle, Trimming The Town DSP

The second flap was cut from Old Olive cardstock using the sloped die with trees. It was scored on the left and adhered to the left side of the Whisper White card, and again decorated with a house, wreath, trees and a card on a road. Most of the elements on the card were cropped from the DSP, but the car and wreaths were stamped and coloured before being added to the card.

scissorspapercard, Stampin' Up!, CASEing The Catty, Coming Home Bundle, Trimming The Town DSP

When both side flaps are opened, the card reveals yet another house, this time with the mountains as a backdrop. The second storey of the house was cropped from the edge of the DSP. It was missing it's bottom half, but by turning it into a second level of another house it can still be useful. Conveniently, the stripes on both houses matched! 

scissorspapercard, Stampin' Up!, CASEing The Catty, Coming Home Bundle, Trimming The Town DSP

All of these layers were attached to a card front sized piece of Misty Moonlight cardstock. It isn't a folding card base, just a flat piece. The flaps on the front will support the card to stand up, so it didn't need a folding base. I created another little scene on the back so that there was somewhere to write a message. It's not your usual card, but I'm thrilled with how it turned out.

As always, you can join in with our challenge by taking a photograph of your card and adding it to our Facebook Group. You don't need a blog or any fancy equipment, so it's super easy to enter!


Before you race off to get creating, don't forget to finish the blog hop! Next up is the wonderful Michelle, who just happened to have celebrated her birthday yesterday, too!

Bye for now,

Tina