Pages

Friday 31 May 2013

JAI #167: Just Add Fabric!

Hi!

I'm certainly back into this swing of things with my blogging this week, and how about we round off the week with another Just Add Ink challenge? Perfect!


This week I chose the theme and it's fabric!  Yes, we want you to add some fabric to your projects.  Please note that it must be fabric and not ribbon.  I used the Summer Smooches Fabric on my project.


This piece of fabric is such a cheerful, happy print and I have been hoarding it saving it for a special project. I decided it was time to cut into it.


You can see here I used a narrow strip of the coordinating fabric to make a ruffle for the front.  I also used some of the Canvas Creations sheet to make a label for the front. I love the textured look it gives to the stamped sentiment.


Did you notice that my project wasn't actually a card? It's a little notebook, and it's been something that I've been wanting to try for a couple of months now.  You see, I made the WHOLE thing from scratch!  I cut the papers, bound them using needle and thread and then created the cover to go around them.  I thoroughly enjoyed making it, and I can see myself making lots more in the future.


One final photo of the inside of the note book.  I used some of the matching Summer Smooches DSP for my end pages.  The actual pages are from my stash and are plain white for ease of writing on.

Stamps: Feel Goods
Ink: Real Red
DSP: Summer Smooches DSP
Other: Summer Smooches Fabric, Canvas Creations, Crystal Effects, Sewing Machine, Chipboard

What do you think you'll make for the Just Add Ink challenge this week? Can't wait to see it.

Have a great day,

Tina

Wednesday 29 May 2013

Shimmery Field Flowers

Hi!

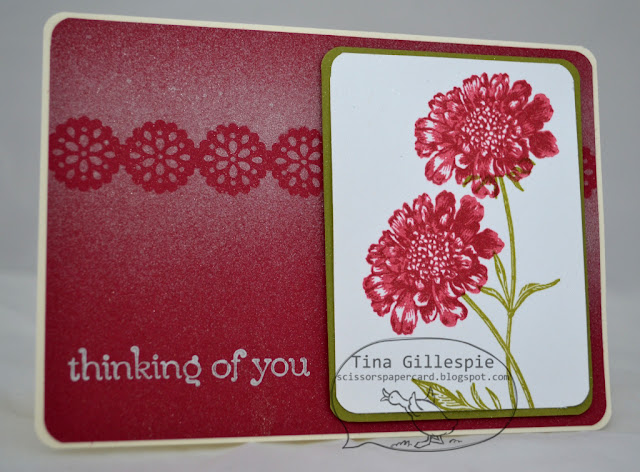
Last week my Stamping Ladies asked to make a card using Two Step Stamping.  They also wanted to give spritzing a go, so I decided to combine the two on one card.


We used the smaller of the Delicate Details Lace Tape as a mask for our spritzing.  I used a mix of Isocol and Platinum Shimmer Paint on my card.  Some of the ladies tried a Isocol/Frost White mix instead.  The trick to the spritzing to achieve this look is to give a quick sideways spritz along the length of the Lace Tape.  I wanted the shimmer to be stronger over the mask and then fade off down the card.


When we finished the card we then gave it another spritz all over, but with the Isocol/Champagne Mist mix.  It gives a lovely subtle shimmer that doesn't detract from the masked shimmer at all.

Stamps: Field Flowers, Sweet Essentials
Ink: Raspberry Ripple, Old Olive
Cardstock: Raspberry Ripple, Old Olive, Very Vanilla
Other: Delicate Details Lace Tape, Corner Rounder Punch, Shimmer Paint, Isocol, Stampin' Misters, Dimensionals

Have a great day,

Tina

Monday 27 May 2013

Button Buddies Baby Card

Hi!

I'm having a rare Monday morning at home today and I realised I hadn't posted a card today so I thought I'd jump on the computer quick smart to rectify the situation!

 
This card was commissioned by my mother-in-law to give to a couple in the family who had just announced they were expecting their first baby.  As gender was obviously unknown at that point I had to go with a fairly neutral colour theme. I decided to use bright colours as I think they capture the excitement of a first baby.


Isn't that saying so appropriate for this card?  I hope they liked it.

Stamps: Button Buddies, Feel Goods, Itty Bitty Banners
Ink: Wild Wasabi, Melon Mambo, Pumpkin Pie, Marina Mist
DSP/Cardstock: Floral District DSP, Wild Wasabi, Melon Mambo, Pumpkin Pie, Marina Mist, Whisper White
Other: Big Shot, Bitty Banners Framelits, White Baker's Twine, Circle Punches, Dimensionals

Have a great day,

Tina

Friday 24 May 2013

Just Add Ink #166: Just Add Colour

Hi!

Yes, Friday again, so time for the Just Add Ink challenge.

 
Sadly, I am at home while most of the rest of the Just Add Ink team are having a wonderful time in Brisbane at the annual Stampin' Up! Convention.  Mae has just posted a photo on the Just Add Ink blog of the girls with Shelli Gardner.
 
As a result of everyone being at Convention the team have decided to extend last week's challenge for another week.  So the lovely colour combination from last week is ongoing.


I haven't made a card for this challenge, but you'll see lots of fabulous cards over on the Just Add Ink blog.
 
Don't forget too that we are on the lookout for some more Design Team members.  The guidelines are here if you'd like to apply.

Bye for now,

Tina

Wednesday 22 May 2013

Another Secret Garden

Hi!

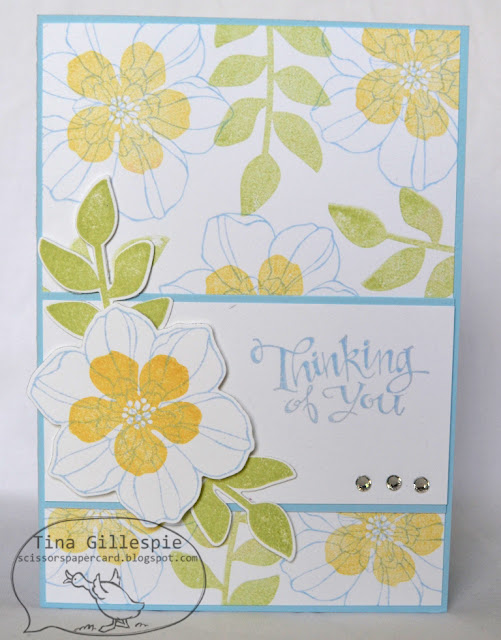
Today I have the second Secret Garden card I made as a sample for my Stamping Ladies. Once again I did an internet search and found this gorgeous card to CASE.

Here's my version.


I loved the way the original card had layered the flower stamps on the base card. On my card the larger flower was stamped in Bashful Blue and the centre was stamped in So Saffron that had been stamped off once.  The leaves were also stamped off before stamping on the card in Certainly Celery.
 

The flowers and leaves on the main panel weren't stamped off, just to give them a bit of difference between the flowers and leaves on the base.

As I sit here typing I'm watching news stories coming out of Oklahoma, it's all so very sad.  My heart goes out to those who have lost so much.

Bye for now,

Tina

Monday 20 May 2013

Secret Garden

Hi!

Today I have another card I made as a sample for my Stamping Ladies.  They had asked for some cards using the Secret Garden bundle. After a quick google search for some inspiration I found this card and decided to CASE it.


I kept a similar layout for the card, but I simplified it by omitting the sponging and piercing. I also decided to use the leaf Framelit to add a bit of interest to the card. Here's a closer look.

 
As you can see, the top leaf is the die cut negative and the bottom leaf is stamped.
 
Bye for now,
 
Tina

Tuesday 14 May 2013

JAI #165: Just Add Woodgrain

Hi!

I know, it's Tuesday and I'm really late with posting my current Just Add Ink card - 5 days late! Oops! I'll blame the very nasty gastro bug my son bought home from school and decided to share with me.  Thanks Alex!

 
So, this week Christine has challenged us to add woodgrain to our cards. I must have known this was coming as recently I gave in and purchased the woodgrain embossing folder.
 

I decided to CASE myself this week.  The original card can be seen here, and it was a CASEd card, so this card is a CASE of a CASE.  Confused yet?

 
I used another new embossing folder on the top half of the card. I can't think what it is called right now - my brain is still recovering from the bug! Anyway, it's in the current Mini Catalogue.
 

I highlighted the woodgrain in the embossing folder by dragging my Crumb Cake ink pad across the cardstock after I'd embossed it.

Ink: Crumb Cake, Gumball Green, Daffodil Delight
Cardstock: Crumb Cake, Gumball Green, Daffodil Delight, Pacific Point, Melon Mambo, Basic Black, Whisper White, Blushing Bride (retired, but soon to return!)
Other: Big Shot, Timeless Type Sizzlits (retired), Embossing Folders, Lots of Punches, Basic Jewels Pearls, Dimensionals, Sponge Daubers

Hope you can play along at Just Add Ink!

Bye for now,

Tina

Wednesday 8 May 2013

Clean and Simple Flowering Flourishes

Hi!

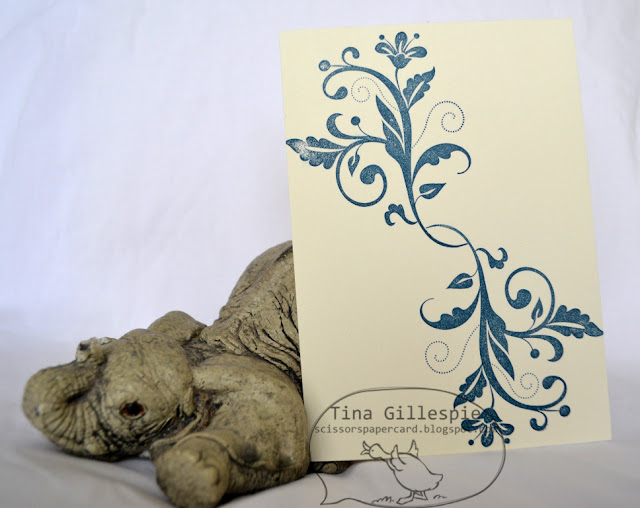
Today I have a very quick and easy card that I made as a sample for my stamping ladies.


I love the simplicity, but also the drama in the stamping.  I used Midnight Muse on Very Vanilla cardstock.


A closer look at the sentiment shows that I used 4 different punches. The layering adds just a little extra to the card.  You could jazz it up a bit further if you wished by adding rhinestones or pearls to the punchies.


This panel was the first one I stamped, but I rejected it as I felt it didn't flow across the card as well as the panel on the final card.  The lines in the flourish are too vertical - they look much better when they are more diagonal.

Stamps: Flowering Flourishes, Just Believe
Ink: Midnight Muse
Cardstock: Midnight Muse, Very Vanilla
Other: Decorative Label Punch, Circle Punch, Modern Label Punch, Word Window Punch

Bye for now,

Tina

Sunday 5 May 2013

JAI Scrap #17: Just Add Colour

Hi!

Oops! I'm a bit late with this post, but better late than never!

 
This month Ruthy has set the challenge and it's to use this gorgeous picture as the colour inspiration for your layout.  All those lovely purples, white, silvers and greys - they look fabulous together!


Wouldn't you love to sit down to eat at that table? A real feast for the senses!  I chose to complete another My Digital Studio layout for this challenge.  I love how convenient is - I don't have to find time to go and print some photos to scrap.

 
I also love that nothing digital ever retires, so I was able to use an old favourite paper pack - Cottage Wall. The colours in the papers work beautifully with the colours in the Inspiration Photo. I took this photo of Ada late last year on the final day of a Manual Photography course I was doing.
 
Here's a closer look at some of the details.


The straight Baker's Twine, the bow and the button were all separate elements. It was easy to layer the three elements to get the arrangement in the layout.  The hardest part was lining up the bow on the button but I think I did a pretty good job of it.

My Digital Studio Elements: Family Reunion Stamp, Cottage Wall DSP, Rich Razzleberry Baker's Twine Straight and Bow, Rich Razzleberry Button

I hope you can play along with us at Just Add Ink this month.  You can scrap a traditional layout or a digital layout, just use the colours in Ruthy's photo as your inspiration. Can't wait to see what you come up with.

Bye for now,

Tina

Friday 3 May 2013

JAI #164: Just Add A Sketch

Hi!


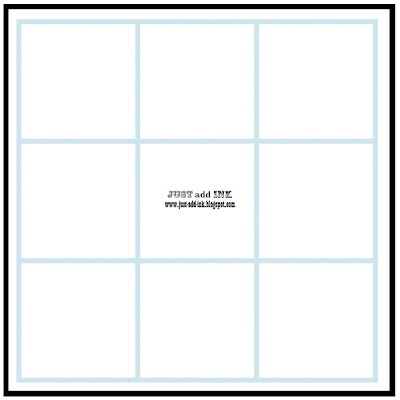
Woo Hoo! Friday again!  I missed joining in the Just Add Ink Challenge last week, so I'm super excited to be back this week. Mae has designed a fantastic sketch to inspire us all this week.  I loved it and knew immediately what I wanted to use it for.


We had been out bowling during the school holidays with the kids and so I created a MDS layout using some photos I took on the day.


I used a page from the Bookstagram Photo Book as the basis for my page. It was really easy to click and drag the photos into the squares and then customise the page to suit the photos.

I hope you can play along this week at Just Add Ink.

Bye for now,

Tina

Wednesday 1 May 2013

A Special Wedding Card

Hi!

Earlier this month Rob and I went to Canberra for a very special wedding. The bride, Annabelle, was a uni friend of mine and she was one of my bridesmaids when Rob and I got married.  In a lovely coincidence Annabelle and Aaron chose to marry on the same day that Rob and I wed 11 years ago.  Every time we drive into Canberra we drive past the church where we married, this time we decided to stop and take some photos to mark the occasion.


11 years before this photo was taken Rob and I were preparing to make our way to this church to pledge our lives to each other.

 
Anyway, on to the card I made for Annabelle and Aaron. I wanted something really special for them. I decided to go a bit vintage, as I know Annabelle is a fan of the vintage look.
 

Here's a closer look at the cluster on the front of the card.


The inside I kept fairly simple as I knew I would write a fair bit in the card.  I added a little Linen Thread bow near the bottom to help tie in with the front of the card.

Stamps: Pleasant Poppies, A Word For You
Ink: Primrose Petals, Old Olive, Sahara Sand
DSP/Cardstock: Print Poetry DSP Stack, Primrose Petals, Very Vanilla, Watercolour Paper
Other: Big Shot, Apothecary Accents Framelits, Artisan Embellishment Kit, Vintage Faceted Button, Linen Thread, Blender Pen

Bye for now,

Tina