Pages

Sunday 31 January 2021

CTC #303: CASE The Sale-A-Bration Catalogue

 Hi!


Thanks for joining me for the new CASEing The Catty Sunday Challenge Blog Hop. I nearly missed the deadline for this, as the Australia Day public holiday has thrown my week right out! Does that happen to you, especially when the holiday is in the middle of the week?


This week we are challenging you to CASE any project from the Sale-A-Bration Catalogue. It's a lot smaller than the Mini or the Annual, but it is still chock a block full of gorgeous projects to CASE.


I'm still in a tricky mood, so once again I started flicking from the front of the catalogue. This little gift box on the third page caught my eye because it uses flowers that are die cut from DSP rather than cardstock or stamped images. I think it's really clever, and a great way to get slight variations in colour without the mess of watecolouring or smooshing, or other techniques.

scissorspapercard, Stampin' Up!, CASEing The Catty, Perennial Petals Dies, Well Written Dies, Stitched Nested Labels Dies, Dainty Diamonds 3DEF, Ice Cream Corner DSP

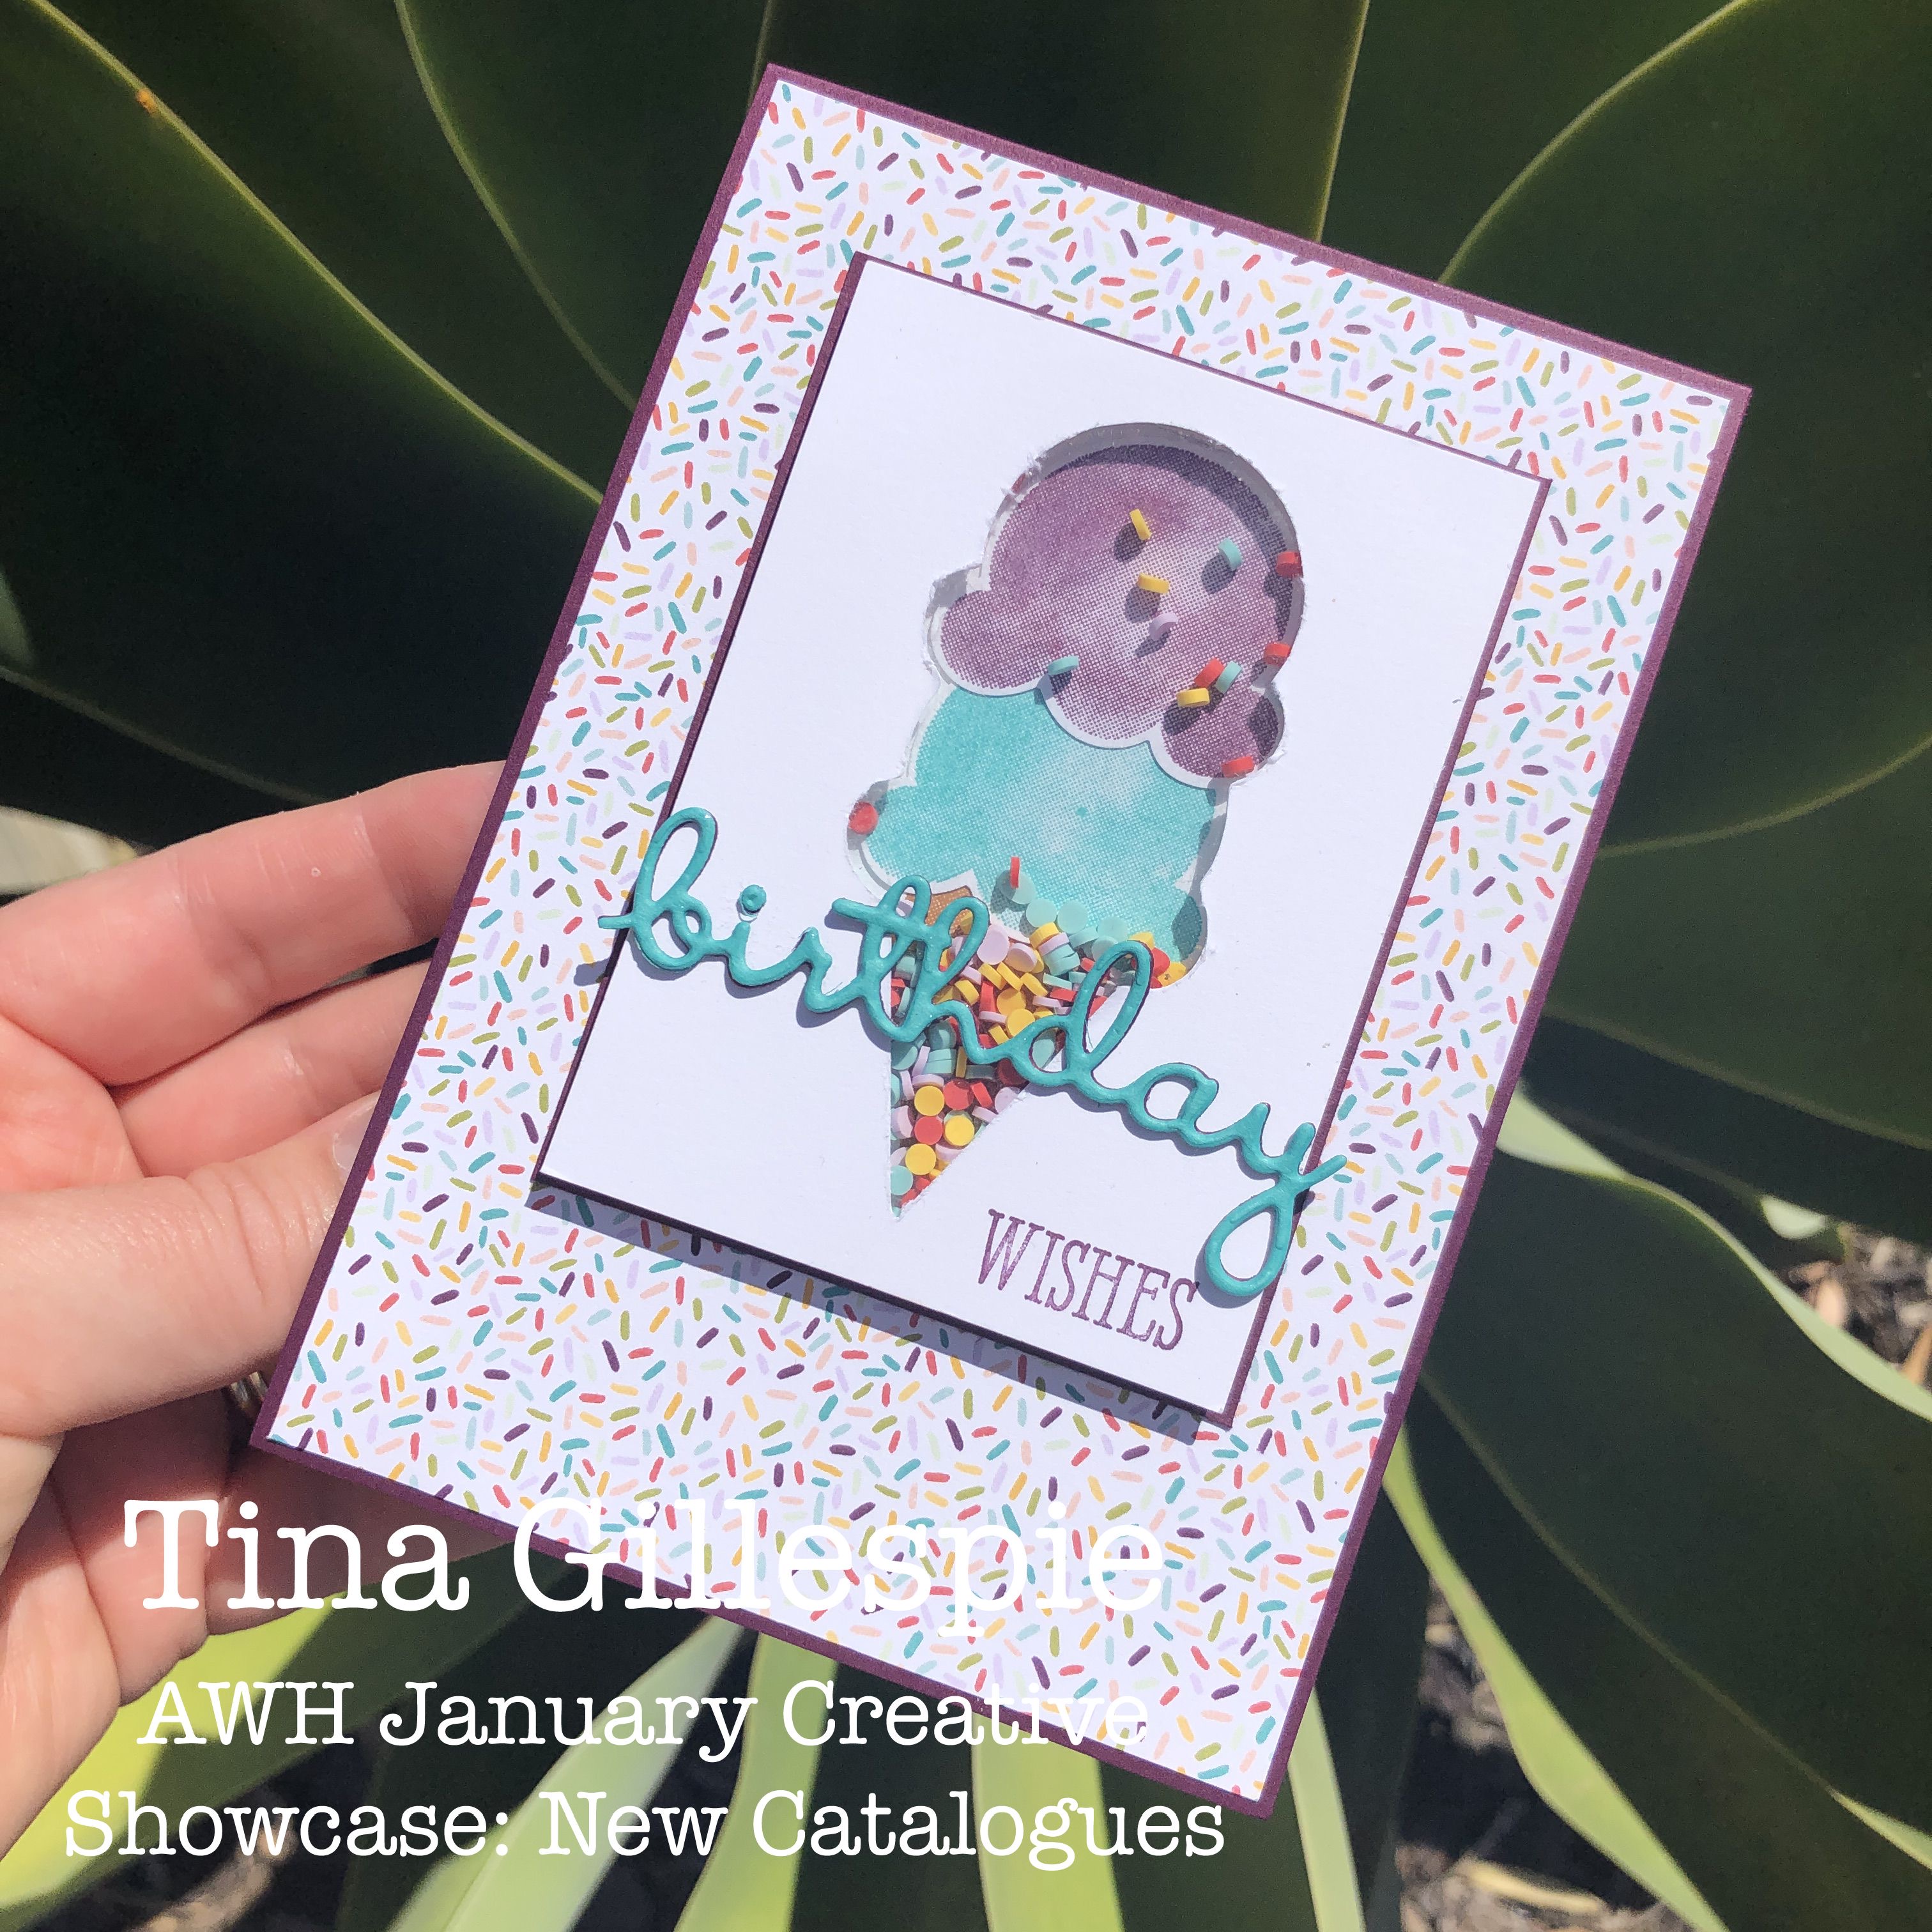
The sample used flowers cropped from the Sale-A-Bration freebie DSP, Paper Blooms. I don't have that DSP, but the Ice Cream Corner DSP has pages with similar patterns. I'm guessing so that you can punch some ice cream shapes from it, but flowers and leaves work just as well! I used my Perennial Petals Dies to crop the flowers and leaves from the DSP. The white loopy bits layered over the flowers were cropped from Whisper White cardstock. A Rhinestone finished off each flower.

scissorspapercard, Stampin' Up!, CASEing The Catty, Perennial Petals Dies, Well Written Dies, Stitched Nested Labels Dies, Dainty Diamonds 3DEF, Ice Cream Corner DSP

I used my Dainty Diamonds Embossing Folder for the background, and my Well Written and Stitched Nested Labels Dies for the sentiment panel.

scissorspapercard, Stampin' Up!, CASEing The Catty, Perennial Petals Dies, Well Written Dies, Stitched Nested Labels Dies, Dainty Diamonds 3DEF, Ice Cream Corner DSP

Another flower and strip of embossed card finished off the inside. I didn't stamp anything on the inside - in fact, there's no stamping at all on this card!

What inspires you from the Sale-A-Bration Catalogue? I can't wait to see what you make. Just add your photo to our Facebook group.


Before you dash off the get stamping, please do finish our Blog Hop! Next up is the lovely Sandra with her super adorable card! Hop on over *wink*!


Bye for now,

Tina

Thursday 28 January 2021

JAI #539: Just Choose Two

 Hi!


It's Friday, which means that it's once again time for the new Just Add Ink Challenge! This week Di has challenged us to Just Choose Two.


We get to choose from Banners, Borders or Bows. Which two will you choose? I went for the banner and bow combination.

scissorspapercard, Stampin' Up!, Just Add Ink, Sweet Ice Cream, Ice Cream Corner DSP

I haven't played nearly enough with the Ice Cream Corner Suite, so it seemed natural to reach for it for tonight's card. That gorgeous Blackberry Bliss ribbon was just dying to be turned into a bow! It's so soft and easy to tie.

scissorspapercard, Stampin' Up!, Just Add Ink, Sweet Ice Cream, Ice Cream Corner DSP

The triple scoop ice cream was fussy cut from the DSP. I cut it roughly first and then adhered it to some Whisper White cardstock. This gives it a bit more strength when you pop it up on Dimensionals. We wouldn't want a saggy ice cream! The banner was created using my Triple Banner Punch. I used liquid glue at the top of the banner, but Dimensionals at the bottom, just for something different!

scissorspapercard, Stampin' Up!, Just Add Ink, Sweet Ice Cream, Ice Cream Corner DSP

Hehe, I really like this combination of sentiments from the Sweet Ice Cream stamp set, which coordinates perfectly with the strip of sprinkles DSP at the bottom of the card.

So! Banners, Borders and Bows - which two will you choose? You can see what the rest of the Design team chose, and add your card to our challenge over on the Just Add Ink blog. See you there!

Bye for now,

Tina

Wednesday 27 January 2021

Colour Creations: Pear Pizzazz

 Hi!


Welcome back to another week of the Colour Creations Creative Showcase. It's time to look at Pear Pizzazz. It's one of Stampin' Up!'s softer greens, sitting in the Subtles Colour Family.

scissorspapercard, Stampin' Up!, Colour Creations, Heal Your Heart, A Touch Of Ink, Sale-A-Bration, Sympathy Card

I'm not entirely sure if I like the card I made this week, or if it's because I had to make it and send it straight away. Sadly, one of Hudson's schoolmates passed away after battling illness in intensive care for five weeks. His little body just couldn't fight anymore.

scissorspapercard, Stampin' Up!, Colour Creations, Heal Your Heart, A Touch Of Ink, Sale-A-Bration, Sympathy Card

I've used two Sale-A-Bration sets: Heal Your Heart and A Touch Of Ink. I've kept the card very simple so that the message is the focus, just a bit of Pear Pizzazz ink applied over the stamped leaves using a Blending Brush.

scissorspapercard, Stampin' Up!, Colour Creations, Heal Your Heart, A Touch Of Ink, Sale-A-Bration, Sympathy Card

As always, you can find the rest of this week's Pear Pizzazz cards over on Cathy's blog. She does such a wonderful job of keeping us all organised.

Bye for now,

Tina

Sunday 24 January 2021

CTC #302: CASE Any Floral Project

 Hi!


Phew! Are you sweltering today? It's about day four of really hot weather here in Adelaide, but thankfully a cooler change (and hopefully some rain) is due tomorrow. My craft space is on the south east corner of the house, so thankfully it stays cool during the day.


But, let's get on with the show! This week we are asking you to CASE and Floral Project from ANY catalogue - the Annual, Mini or SAB. There are lots and lots of projects to choose from, so definitely no shortage of inspiration.


Just for a change, I found my inspiration at the front of the Mini Catalogue! This card is featured on both the front cover and on page 2. I'm not a big one for florals, but there were a few elements on this one that appealed to me - the blue background behind the flowers, the gold border and the sentiment on a narrow strip.

scissorspapercard, Stampin' Up!, CASEing The Catty, Pretty Perennials, Joy To The World Paper Pumpkin, Perennial Petals Dies, Stitched Rectangles Dies, Smooshing Technique

I started my card with a Gold Foil Card. I purchased a heap of packs of these cards when they were on the Clearance Rack recently, as they are a great (and cheap!) way to add a Gold Foil layer to a card. For my card background, I used the Smooshing Technique with Pool Party ink on Shimmery White card. It's such a fun technique, and in this heat it dries very quickly!!

scissorspapercard, Stampin' Up!, CASEing The Catty, Pretty Perennials, Joy To The World Paper Pumpkin, Perennial Petals Dies, Stitched Rectangles Dies, Smooshing Technique

I then stamped a heap of flowers and leaves from the Pretty Perennials stamp set on Whisper White cardstock and die cut them with the coordinating dies. I find it's easier to stamp a few more images that you think you'll need, as invariably you will need more after you've cleaned and put away your stamps! I just layered them on the front until I was happy and glued them down, some with Dimensionals. The colours I used were the colours in the Fine Art Floral DSP.

scissorspapercard, Stampin' Up!, CASEing The Catty, Pretty Perennials, Joy To The World Paper Pumpkin, Perennial Petals Dies, Stitched Rectangles Dies, Smooshing Technique

Some of the left over flowers and leaves were used to decorate the inside of the card. I layered a Stitched Rectangle die cut over a piece of Night Of Navy card, as an echo to the front of the card.

It's been great seeing more entries in our challenges lately, and I hope that you will join in too! All you need to do is join our Facebook group and post a photo of your card to the group. Easy!


Next up on this week's blog hop is the lovely Rebecca. Her card is so pretty - you won't want to miss it!

Bye for now,

Tina

Thursday 21 January 2021

JAI #538: Just Add A Sketch

 Hi!


Yay, it's Friday, which means it's time for the new Just Add Ink Challenge! This week Patrice has designed a fabulous sketch to guide our creativity.

I started by trying to play around with the new Ice Cream Corner Suite stuff, but I just couldn't make anything work to my satisfaction. Then I remembered some new fun stuff that I'd received from the USA recently. Perfect!

scissorspapercard, Stampin' Up!, Just Add Ink, Ink Road Stamps, Kindred Stamps, The One With All The Stamps, The One With All The Stamps Icons, The One With The Friend, Friendly Frames Dies, Subtle 3DEF

Do you recognise this yellow frame on a purple door? It's from the very iconic TV show, Friends. Oh, how I loved that show! So naturally, I couldn't resist when Ink Road Stamps released a line of stamps and dies. The coffee image was stamped twice - once in Shaded Spruce and again in Memento. I then cropped it with circle punches and layered the black part of the image over the green part to get the two colours.

scissorspapercard, Stampin' Up!, Just Add Ink, Ink Road Stamps, Kindred Stamps, The One With All The Stamps, The One With All The Stamps Icons, The One With The Friend, Friendly Frames Dies, Subtle 3DEF

The Gorgeous Grape cardstock was run through my Big Shot with the Subtle 3DEF - I thought that made it look a little more like the door upon which the frame hangs in the TV show. The sentiment is a die that I've run through the Big Shot with Black cardstock, backed with a piece of White card.

scissorspapercard, Stampin' Up!, Just Add Ink, Ink Road Stamps, Kindred Stamps, The One With All The Stamps, The One With All The Stamps Icons, The One With The Friend, Friendly Frames Dies, Subtle 3DEF

If you never watched Friends, you may not get the lobster reference. Phoebe believed that lobsters mated for life, and so she tells Ross to be patient, because Rachel is his lobster. Phoebe's quirky way of saying they were meant to be together. So guess when this card will be used? I'll give it to Rob for Valentine's Day. We don't usually 'do' Valentine's, but he will like getting the card.

Please head on over to the Just Add Ink Blog, where you'll find the rest of this week's Design Team cards. You'll also be able to link up your card for our challenge. What will you make with the sketch?

Bye for now,

Tina

AWH January Creative Showcase: New Catalogues

 Hi!


Thanks for joining me for the first monthly AWH Creative Showcase for 2021. This month we are focussed on the two new catalogues: The January-June Mini Catalogue, and the Sale-A-Bration Catalogue. There is a wealth of inspiration and gorgeous product in both. 

A couple of months ago, when I first saw the catalogue, my eye was immediately caught by the new Ice Cream Corner Suite. It's rare that I buy a whole suite, but I couldn't resist this one. I especially like the cute Ice Cream Corner Sprinkles. They aren't sequins, but more a tiny rubbery disc. They look cute glued on as sprinkles on an ice cream, but I wondered how they'd go in a shaker card.

scissorspapercard, Stampin' Up!, Creative Showcase, Sweet Ice Cream, Well Said, Ice Cream Corner DSP, Well Written Dies, Shaker Card

Wonder no more - they are great! They don't have the static issues that a lot of other shaker 'fillers' have. To create the opening for my shaker element, I punched some of the ice cream shapes and used temporary adhesive to hold them to my Thick Basic White Cardstock. I used my electronic cutting machine to scan the shape and then cut it out. If you don't have a machine, you could trace around the shape with a pencil and use your Snips to cut it out.

scissorspapercard, Stampin' Up!, Creative Showcase, Sweet Ice Cream, Well Said, Ice Cream Corner DSP, Well Written Dies, Shaker Card

The trickiest part was getting the ice cream and the cone I'd stamped and punched for the back of the shaker lined up with the opening. This is where liquid glue is very handy, as it gives you time to adjust the position of the piece. I finished the front with a die cut from Well Written Dies. You may see that I tried it first in Blackberry Bliss, but I didn't like it so I just adhered a Bermuda Bay die cut over the top. The Blackberry layer is a bit like a shadow.

scissorspapercard, Stampin' Up!, Creative Showcase, Sweet Ice Cream, Well Said, Ice Cream Corner DSP, Well Written Dies, Shaker Card

Hehe, I couldn't help but use this combination of sentiment and sprinkles on the inside. It was just too cute to resist!

That's all from me for tonight, but please pop on over to Rachel's Blog, where you'll find the rest of the links for this months' Creative Showcase. There's lots of wonderful ways to see the new products used.

Bye for now,

Tina

Wednesday 20 January 2021

Colour Creations: Pacific Point

 Hi!


Welcome back to the new Colour Creations Creative Showcase. This week we are up to Pacific Point, a lovely bright mid-blue from the Brights colour family. I was scrolling through google images this week, looking for inspiration for my card, and I noticed a few cards that had used floral images to create a sort of china-like pattern. Delft, I think it's called? Hopefully you know what I'm talking about - the blue and white designs on crockery.

scissorspapercard, Stampin' Up!, Colour Creations, Ornate Style, Pretty Perennials, Itty Bitty Birthdays, Stitched Shapes Dies, Stamparatus

I didn't have any suitable floral images, so I settled on this scroll image from Ornate Style. I used my Stamparatus to stamp the image repeatedly on a piece of Whisper White cardstock. I made the cardstock slightly longer and wider than I wanted to that I could trim it down. This allowed me to get the piece nice and symmetrical.

scissorspapercard, Stampin' Up!, Colour Creations, Ornate Style, Pretty Perennials, Itty Bitty Birthdays, Stitched Shapes Dies, Stamparatus

I used my new Pretty Perennials stamp set for the sentiment. The rhinestones aren't Pacific Point, they are retired Blueberry Bushell rhinestones, as they were the closest match that I had.

scissorspapercard, Stampin' Up!, Colour Creations, Ornate Style, Pretty Perennials, Itty Bitty Birthdays, Stitched Shapes Dies, Stamparatus

The bonus to making your DIY DSP a little bigger that you need is that you have left over pieces that you can use to decorate the inside! Just a simple strip was all I needed, matted on a scrap of Pacific Point cardstock.

Don't forget to head on over to Catherine's blog now, where you'll find the rest of this week's Pacific Point cards.

Bye for now,

Tina

Sunday 17 January 2021

CTC #301: CASE The Sale-A-Bration Catalogue

 Hi!


Thanks for joining me for the new CASEing The Catty Sunday Challenge Blog Hop. Sunday evening has rolled around very quickly this weekend, probably because my littlest boy is in respite for the weekend! We took our big kids to the drive in cinema last night, which was a whole lot of fun.


This week we are challenging you to CASE any project from the Sale-A-Bration Catalogue. It's a little catalogue, at only 20ish pages, but it packs a lot of samples into those pages!


I absolutely adore the colours in this sample, from page 17. I love the bright pop of colour against the dark background. It's such a sweet, happy card! I used exactly the same colours on my card, but I opted for a fresh, white background.

scissorspapercard, Stampin' Up!, CASEing The Catty, Pretty Perennials, Perennial Petals Dies, Stitched Shapes Dies, Stamparatus

I used my new Pretty Perennials bundle to create my card. I kept the base to a Night Of Navy square, but layered a piece of White cardstock on top. The background was stamped using my Stamparatus and the stamping in the round technique. It makes stamping backgrounds like this so much easier!

scissorspapercard, Stampin' Up!, CASEing The Catty, Pretty Perennials, Perennial Petals Dies, Stitched Shapes Dies, Stamparatus

I stamped an extra Real Red flower, which I die cut using the coordinating die. You can just see an extra set of leaves tucked under the flower too.

scissorspapercard, Stampin' Up!, CASEing The Catty, Pretty Perennials, Perennial Petals Dies, Stitched Shapes Dies, Stamparatus

I stamped the inside of the card by hand rather than using my Stamparatus, but I stuck to a similar arrangement as on the front. I decided to omit an inside sentiment, as it's a small card (4 inches square), and I didn't want to take away from space for writing my message.

Has a particular project from the SAB Catalogue caught your eye? Perhaps prompted you to place an order so that you can earn the product? Why not CASE the project and join in our challenge? You can do that in our Facebook Group.


Before you do, please do finish the Blog Hop! I was first cab off the rank this week, so there's plenty of inspiration to go before you get to the end. Next up is the lovely Sandra. Her card is gorgeous!


Bye for now,

Tina

Thursday 14 January 2021

JAI #537: Family

 Hi!


It's time for Just Add Ink to resume for 2021! Yay! As always, we start the new year of challenges with a Blog Hop featuring the entire Design Team.


This year our chosen theme is Family. 2020 was such a crazy year for most of us, whether you spent more time with family due to lockdowns, or you were separated from family by border closures and travel restrictions. For me personally, I enjoyed the time at home. We were very lucky in South Australia that it was for a relatively short time. I also had weekly zoom calls with my mum and sisters, as we are scattered all over Australia. It was wonderful to connect with them more regularly.

I thought for a long time about what I could make for the Blog Hop, and then I saw a bookmark that a friend had made for her diary and though that it would be the perfect choice for the theme. My diary is a vital part of my life, and my family's life, as I keep track of everyone's appointments and schedules. The number of times that I get asked "Can you check your diary?" or, "Am I free on xxx day?" is huge!

scissorspapercard, Stampin' Up!, Just Add Ink, Rainbow Builder Dies, Ribbon Of Courage

I started by looking at the outside cover of the diary, and particularly the colours of the stripes. I thought that they would work well for a rainbow, so that's where I started. I used the retired Rainbow Builder Dies to cut the arcs. Real Red, Bumblebee, Shaded Spruce, Pacific Point and Melon Mambo were the colours that matched the best.

scissorspapercard, Stampin' Up!, Just Add Ink, Rainbow Builder Dies, Ribbon Of Courage

I used an old SU stencil to create the sun's rays with a Blending Brush and Daffodil Delight ink. Have you used the new brushes yet? They are lovely to use, and I quite like the larger head. The clouds were created using one of the lines of cloud dies in the Rainbow Builder Dies and another Blending Brush with my Balmy Blue ink. The die cut rainbow was adhered over the top, with a die cut cloud hiding the ends of the arcs.

scissorspapercard, Stampin' Up!, Just Add Ink, Rainbow Builder Dies, Ribbon Of Courage

The phrase I stamped in the sun is from the retired stamp set, Ribbon Of Courage. I thought that it was very uplifting, and a good reminder every time I open my dairy. The sun and the rainbow are also a reminder that after the storms come the rainbows. The sun will always shine again.

Next up on your Blog Hop is the wonderful Narelle. You won't want to miss her gorgeous cards, nor the rest of the Blog Hop, so do keep hopping around until you get back to where you started. I hope you can join in with our Just Add Family challenge, too.


Bye for now,

Tina