Pages

Showing posts with label Balloon Celebration. Show all posts

Monday, 12 November 2018

Orlando Swaps Part Two

Hi!

Today's post actually has my second and third swap items. I hadn't intended to make a third, but somehow I found it on the go before I'd even finished swaps one and two! Oops!

Let's start with swap two, which was actually my first idea. I had decided early on that I wanted to do something around an Australian flag pencil. Do you think I could find an Australian flag pencil without paying ridiculous prices? In the end I found these Aboriginal Art designs, which I think worked much better with my colour scheme.

scissorspapercard, Stampin' Up!, Animal Expedition DSP, Animal Friends Thinlits, Stitched Shapes Thinlits, Labeler Alphabet

I've used the Animal Expedition DSP again, as I wanted to use the large kangaroos this time. There are two leafy designs - this one with the frogs, and another with little birdies. I used a mix of the two as my backing piece. The bags are in the Annual Catalogue.
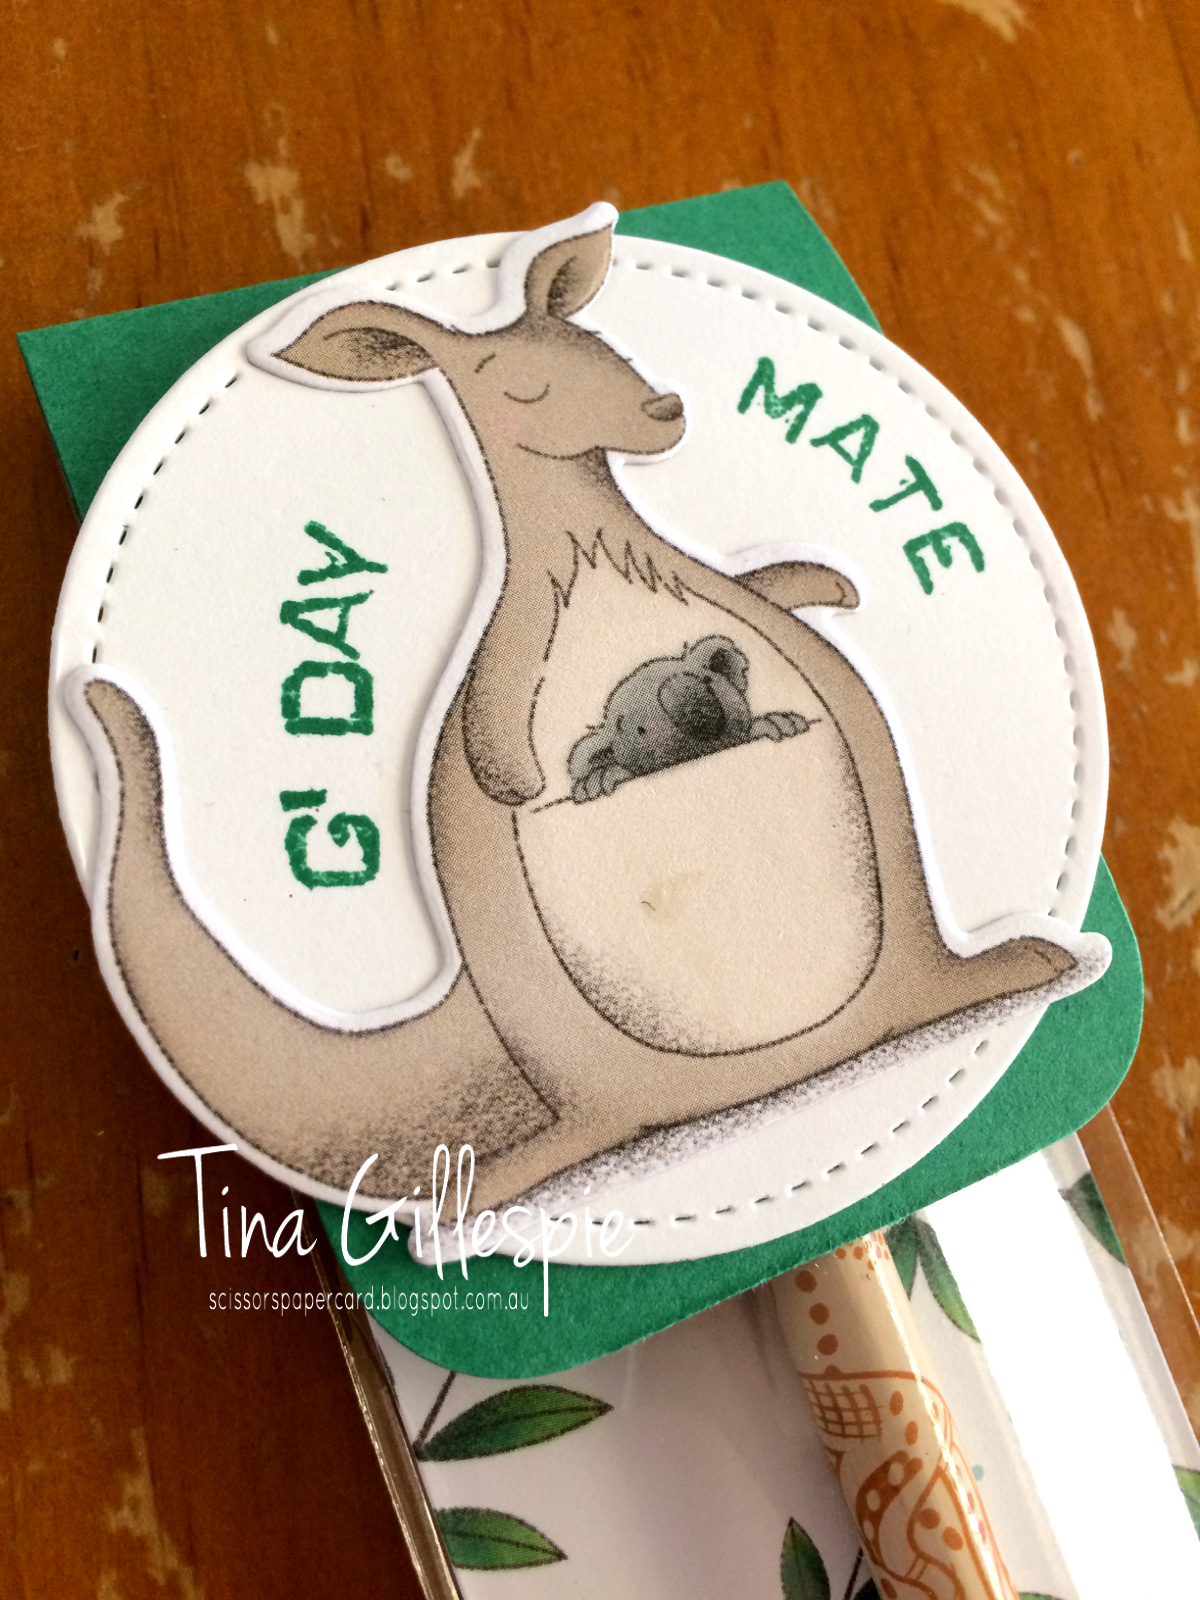
scissorspapercard, Stampin' Up!, Animal Expedition DSP, Animal Friends Thinlits, Stitched Shapes Thinlits, Labeler Alphabet

I used my Stamparatus to stamp the 'g'day mate' sentiment on the Stitched Circle. It's very cliche Australian, but I'm hoping that the American demos will love it! I made 24 of these swaps.

Finally, I have my last minute swap. I happened to be in Coles when my favourite Twinings Tea, Australian Afternoon, was half price. It was the smaller packs with individually wrapped bags. I grabbed two to take to the US, but when I realised they fit with the Australian theme of my swaps I decided to add them to the mix.

scissorspapercard, Stampin' Up!, Garden Impressions DSP, Springtime Impressions Thinlits, Stitched Labels Thinlits, Balloon Celebrations

I didn't have enough Animal Expedition DSP left to use, so I decided to use some of my Garden Impressions DSP. I used my Envelope Punch Board to create a little tea bagged size envelope, which I topped with a Stitched Labels Framelit. I stamped a pair of sentiments from Balloon Celebration and then used part of the big floral die from Springtime Impressions for the little cluster of flowers. A few rhinestones finished off the design.

I wonder which of my swaps will be the most popular - the Tim Tam Slam, Pencil or Tea? What do you think?

Bye for now,

Tina

Tuesday, 23 October 2018

A Balloon Celebration For Granny

Hi!

Are you enjoying seeing the different colours each week in the Colour Creations Blog Share? I am!


This week we are looking at Granny Apple Green, one of the new greens in our colour range. It's a lovely, bright green that is true to the Granny Apple Green name. It's a softer bright green, if that makes sense to you!

scissorspapercard, Stampin' Up!, Art With Heart, Colour Creations, Balloon Celebration, Celebrate You Thinlits, Shimmer Paint

I had a lot of fun with the colour this week, seeing how many shades I could get from the colour. I've seen this style of card with the ombre balloons around the Internet a bit and I've been wanting to try it. This seemed like the perfect time. I started with the colour full strength at the top, and slowly worked my way down the cardstock each time I stamped it, so that it got lighter as it got closer to the bottom. Here's a hint if you want to try this: if you stamp a balloon half way off the cardstock, don't stamp the second generation balloon completely on the cardstock - you'll end up with a balloon that is part ark and part light. Not a good look! To get around it, I either stamped off on scrap paper or made sure that when I stamped second or third generation I stamped less of the balloon, so that the darker areas were always off the cardstock.

scissorspapercard, Stampin' Up!, Art With Heart, Colour Creations, Balloon Celebration, Celebrate You Thinlits, Shimmer Paint

To give the card a bit more zing to go with the Silver Foil edges, I also stamped some balloons over the top using Frost White Shimmer Paint on my stamp. I've darkened the photo a little so that you can see it better. The 'celebrate' die cut was cut from vellum, and I hid chopped up Mini Dimensionals behind the sequins. I didn't want to go to all that effort with the balloons and then hide them behind a big sentiment!

scissorspapercard, Stampin' Up!, Art With Heart, Colour Creations, Balloon Celebration, Celebrate You Thinlits, Shimmer Paint

Some more balloon-y fun on the inside. Once I got going on the balloons, I really couldn't stop!

As always, you can find the rest of this week's cards over at Catherine's blog. I can't wait to see what fun everyone has had with Granny Apple Green!

Bye for now,

Tina

Monday, 8 October 2018

Broadway Bound CASE

Hi!

Today I have a card for you that I CASEd from another SU Demonstrator. I love how demos from all around the world share their work so that we can all be inspired!

scissorspapercard, Stampin' Up!, Broadway Bound SDSP, Celebrate You Thinlits, Balloon Celebration, Picture Perfect Birthday

The demo I CASEd from is Kristi Grey, and you can see her original card here. I didn't really change a lot, I just made it a little more 'class friendly' as I made it as a sample for a card class I ran.

scissorspapercard, Stampin' Up!, Broadway Bound SDSP, Celebrate You Thinlits, Balloon Celebration, Picture Perfect Birthday

How fabulous is the Broadway Bound SDSP? The Gold Foil accents through the paper are gorgeous. I especially love the confetti paper.

scissorspapercard, Stampin' Up!, Broadway Bound SDSP, Celebrate You Thinlits, Balloon Celebration, Picture Perfect Birthday

Kristi didn't show the inside of her card, so I just did what I liked there. It's a little tricky stamping on the Gold Foil paper as it's a glossy surface, so we used Stazon ink. The effort is worth it though - who doesn't like a bit of glam on a card?

Bye for now,

Tina

Thursday, 23 August 2018

JAI #423: Just Add Colour

Hi!


This week at Just Add Ink we have a colour challenge for you. Kim has given us the following colours to work with.


Just a note that our Colour Challenge rules have changed slightly. Where previously we allowed the addition of any of the Neutrals to the challenge colours, with the Colour Revamp at Stampin' Up! we are now only allowing the addition of any of the Basics or Metallics.

scissorspapercard, Stampin' Up!, Just Add Ink,A Little Wild, Animal Outing, Star Of Light, Balloon Celebration, Tufted DTIEF

I loved this colour combo, but I found Soft Suede the hardest to include. In the end, I decided to use it to make some earth for my sweet little elephant to stand on. Once I go my head around that, the rest came together easily! I used my Basic Grey Watercolour Pencil to colour the elephant and then blended (as usual!) with my Wink Of Stella pen. I think I've forgotten how to use the pencils with water!

scissorspapercard, Stampin' Up!, Just Add Ink,A Little Wild, Animal Outing, Star Of Light, Balloon Celebration, Tufted DTIEF

To bring some silver into the mix, I heat embossed some stars and the sentiment. I didn't feel like it was enough silver, so I decided to add some to the edges of the main panel and the card base. To do this I swiped my Versamark inkpad over the edges of the cardstock and then tipped the embossing powder over the edges. I then heat set the powder as usual. It's such a cool effect, as it's not uniform all the way around the edge. It was my first time trying this technique, but certainly not the last!

scissorspapercard, Stampin' Up!, Just Add Ink,A Little Wild, Animal Outing, Star Of Light, Balloon Celebration, Tufted DTIEF

I just had to include the back side of the elephant on the inside. It's hard to see in the photos, but I used my new Tufted DTIEF to emboss the Bermuda Bay cardstock on the front. I also embossed the smaller strip for the inside to tie them together.

That's ti for me today - you can see the gorgeous cards the rest of the team have created with Kim's colours over at the Just Add Ink blog. Don't forget our rules have changed slightly when you are making your masterpiece!

Bye for now,

Tina

Thursday, 26 July 2018

JAI #419: Just Add A Twist

Hi!

I've survived the first week back at school, but barely! They kids are always a little cranky in the first week - I think it's the shock of having to get up early again. No more lazy sleep ins every day!


Luckily, I have the new Just Add Ink challenge to look forward to every Friday! This week Kelly has challenged us to Just Add A Twist by using a product in a way that it's not usually intended to be used. Hmmm, thinking caps on for this one!


Really, it's not that tricky when you think about it. At the most basic level you could apply some ink to any non-stamp surface and stamp with it. See, not so hard! I'm sure you can think of something vastly more exciting than that though!

scissorspapercard, Stampin' Up!, Just Add Ink, Pattern Party Masks, Sunshine Sayings, Picture Perfect Birthday, Balloon Celebrations

I decided to complete this challenge by using one of my masks as a stamp. I took the cloud mask from the Pattern Party Decorative Masks pack, repeatedly pressed my Balmy Blue inkpad onto the mask and then pressed a piece of Whisper White cardstock to the inked mask. As you can see, it leaves behind a blue sky and white clouds rather than blue could on a white sky if I'd used the mask as intended. Isn't it a cool effect?

scissorspapercard, Stampin' Up!, Just Add Ink, Pattern Party Masks, Sunshine Sayings, Picture Perfect Birthday, Balloon Celebrations

Don't you love the textured look this technique gives? If you wanted a smoother look you could spritz the mask a little after adding the ink and before pressing the cardstock to it. Or maybe brayering the ink on would smooth it? Time to experiment!

All it took to finish the card was some stamped strings and punched balloons in Granny Apple Green, Gorgeous Grape, Mango Melody and Daffodil Delight. Such a happy card!

scissorspapercard, Stampin' Up!, Just Add Ink, Pattern Party Masks, Sunshine Sayings, Picture Perfect Birthday, Balloon Celebrations

No blue skies on the inside - just a lone balloon carried over from the front.

So do you have your thinking cap on? You're bound to find plenty of inspiration when you check out the rest of the Design team cards at the Just Add Ink blog. These ladies know how to think out of the square!

Bye for now,

Tina

Tuesday, 26 June 2018

Smooshed Berry

Hi!

Hooray for a Colour Creations Blog Share with one of my favourite colours!


This week we are featuring Berry Burst. It's such a luscious, rich pink - very aptly named! I needed to make a card for one of my nieces, so I decided to make it a little special.

scissorspapercard, Stampin' Up!, Art With Heart, Balloon Celebration, Bunch Of Blossoms, Daisy Punch

Have you tried the smooshing technique? That's how I created my background. I used an Aqua  Painter to spread some water over my 'F' clear block (that's the background stamp sized one), and then picked up some Berry Burst ink and mixed it around in the water. I kept going until I was happy with the pink colour, and then I took my cardstock and smooshed it onto the block. I love the variations in colour you get, and the little runs where some water has pooled.

scissorspapercard, Stampin' Up!, Art With Heart, Balloon Celebration, Bunch Of Blossoms, Daisy Punch

Once it dried, I roughly sponged some more Berry Burst through the diamond mask in the Pattern Party set.  I then finished with some Pear Pizzazz Shimmer ribbon, Black sequin trim, and some Basic Black Faceted Gems. With all that colour, I left the daisy crisp Whisper White on top. I layered three of the punched daisies to give a very full look, probably more of a gerbera.

scissorspapercard, Stampin' Up!, Art With Heart, Balloon Celebration, Bunch Of Blossoms, Daisy Punch

To finish the inside, I sponged with the mask again and then dragged my wet Aqua Painter over the sponged area to spread the colour.

As usual, you can find the links to the other blogs over at Catherine's blog. Berry Burst is a popular colour, so there's bound to be plenty of inspiration to be found!

Bye for now,

Tina

Monday, 28 November 2016

A Bloomin' Hearts CASE

Hi!


Today is the last day to grab a bargain in the Online Extravaganza - have you had a look yet? Today's card uses one of the products that is discounted by 30%, the Bloomin' Heart Thinlit Dies. I also used the coordinating stamp set Bloomin' Love.


The card is actually a CASE of this card made by Valerie Moody, a member of Stampin' Up!'s Artisan Design Team. I loved the white on white elegance of Valerie's card.


The Real Red heart was stamped with the heart from Bloomin' Love before being cropped with the Sweetheart punch, The little birdie comes from the Tree Builder punch.


I'm not usually one for lovey-dovey cards, but it can be handy to have a few in your stash for the odd occasion that you need one.


Bye for now,


Tina

Friday, 17 June 2016

JAI #316: Just Add Stripes

Hi!


How's your Friday going? I must say that I love a quiet Friday at home, where I can gear up for the busyness of the weekend. Hudson is in respite for the weekend, so it's going to be a big 'getting things done' weekend. Hopefully the weather will cooperate!


http://just-add-ink.blogspot.com.au/2016/06/just-add-ink-316stripes.html

I'm hoping to sneak in some crafting time, as I have a huge pile of new stuff on my desk waiting to get inky.  How about you? Hopefully you'll find time to play along with our Just Add Stripes challenge at Just Add Ink.


I decided to use a piece of striped DSP from the new Pop Of Pink SDSP pack. It's so cute, and the perfect backdrop for this sweet little girl. She's a LaLa Land stamp, coloured with Copics.


Does my card remind you a little of my JAI card from a few weeks ago? You can see it here. That would be because the cards are for my twin nieces, and they were deliberately designed to match, but not be exactly the same. I hope they like them!


You can see that I made the insides pretty much the same too.


Have a great weekend, hopefully it's one that involves some craft time so you can play along with us at Just Add Ink.


Bye for now,


Tina

Friday, 3 June 2016

JAI #314: Just Add Inspiration

Hi!


As always, Friday at Just Add Ink is new challenge time!


This week Di has picked a gorgeous citrus image for our inspiration. The colours in the pic are fabulous, so that's where I decided to go with my card.


This little cutie has been sitting on my desk for a week or so, waiting for the right card. I think she's a LaLa Land stamp, and I coloured her with a mix of Copics and Blendabilities.


Her dress is a bit more vibrant than it appears in this photo - I just couldn't get Photoshop to get the colour accurate without distorting the other colours.


You can see that I used the retired Have A Cuppa DSP on my background as a nod to the citrus in the photo. Don't you just love it when you have the perfect piece of DSP in your stash?


LOL, I'm not sure why I put a balloon on the inside, as there aren't any balloons on the front. It just seemed appropriate for a birthday card!


What inspiration do you take from the photo? Why don't you pop on over to see what the rest of the Just Add Ink Design Team have made?


Bye for now,


Tina

Monday, 16 May 2016

A Nice Cuppa CASE

Hi!


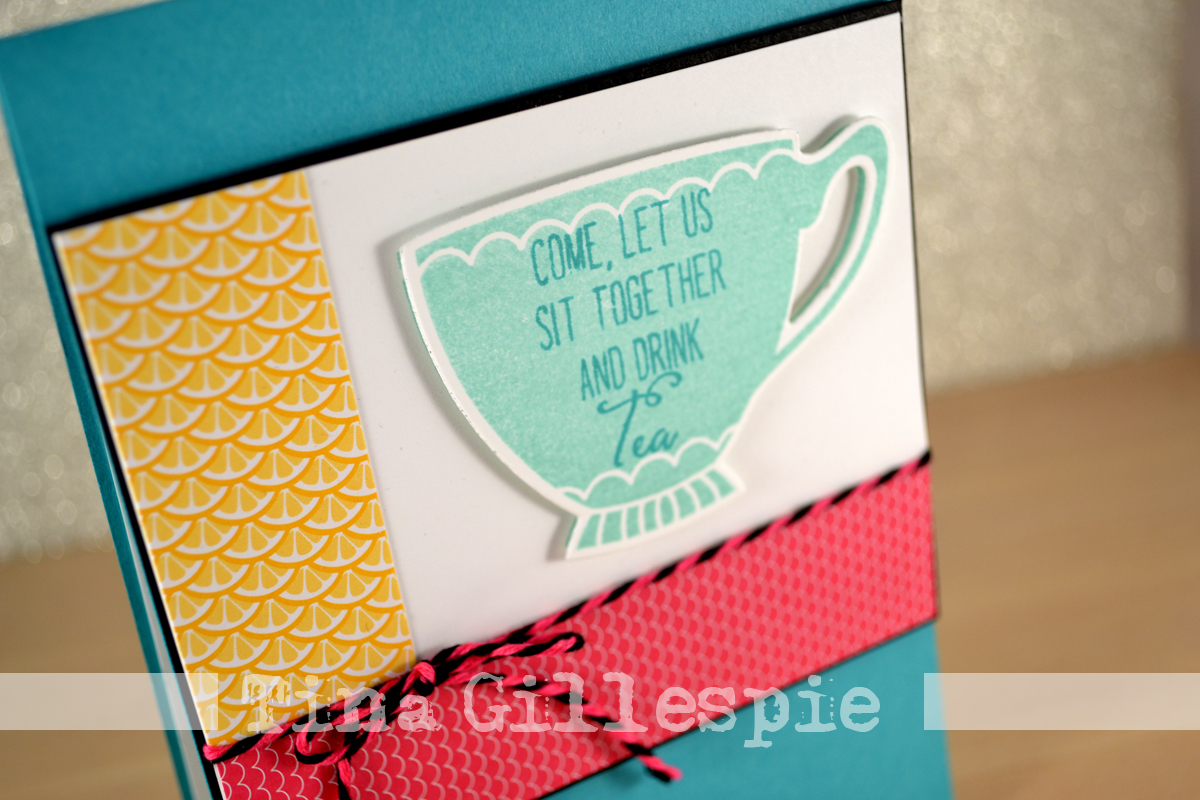
The Have A Cuppa bundle can be found in the Occasions Catalogue. It was one I fell in love with instantly, as I'm a big tea drinker, as are quite a few of my friends. My first cup of tea was loose leaf, made in a teapot and sipped from one of my Grandmother's gorgeous tea cups. I had good company that day - two of my sisters and my aunt - so it's a lovely memory for me.


Anyway, I digress! Today's card is a CASE of one by Teneale Williams. She used the Tap, Tap, Tap stamp set, which is also retiring with the Have A Cuppa Bundle.


This card was made as a sample for a card class. Some of the ladies made some variations, including stamping 'coffee' instead of 'tea', and even stamping the sentiment in the bottom right hand corner of the card. I really enjoy seeing the variations they come up with!


When I first made the card I didn't use the Basic Black layer on the main panel, but when I went to put the card together it didn't look quite right, so I ended up adding it. The black adds a little definition to the main panel.


And of course, you can't have tea without cake!


Bye for now,


Tina

Monday, 4 April 2016

An Easel Card Just For You

Hi!

Even though Sale-A-Bration has finished now, I still have a couple of cards to show you, so I'm going to blog them this week.  Today's card uses the Wildflower Fields DSP and the Botanical Gardens Designer Vellum.


It's a sweet little card, just 4 inches or so square. The vellum is attached to a square of Old Olive, just to help it pop a little more.


The flowers were stamped in Calypso Coral, a colour I selected from the list of colours used in the Wildflower Fields DSP.


Another little cluster of flowers serves the purpose of both decoration and to hold the card open.

Bye for now,

Tina

Friday, 26 February 2016

JAI #300: Just Add A Sketch

Hi!


WOW, what an exciting milestone for Just Add Ink - this week marks our 300th Challenge. So many fabulous cards, Design Team members, and most importantly - you, the challenge entrants! We wouldn't have made it this far without the gorgeous cards you enter into our challenge week after week, so thank you.

As an extra special thank you, we are giving away some prizes to the people who are voted our Winner and two Honorable Mentions. Make sure you read the rules carefully on the Just Add Ink blog to ensure you are eligible for the prizes.

So, let's get to the challenge! This week Kim has designed a sketch for us all to interpret how we will.


I quite enjoyed this sketch, and thought the bold stripe across the bottom was the perfect opportunity to break out some of my new Sale-A-Bration Glitter Tape. It's so cool - all the fun of glitter without the mess!


I did stuff up a little and put the banner the wrong way around on my card. Whoops! Just goes to show that I should refer to the sketch while I'm creating and not after!


The balloons and sentiment are from a new Occasions Catalogue stamp set called Balloon Celebration. The matching punch is super cool and makes cropping the balloon shapes super easy.


Well, there you have it, my card in the 300th Challenge. I just had a quick look at my computer archives and I think I started on the Design Team way back in late 2012, at around the 144th challenge. I can't believe it's been that long! Time certainly does fly when you're having fun.

See you over at Just Add Ink.

Bye for now,

Tina