Pages

Tuesday 30 December 2014

Just Add Ink #246: Just Add Giving

Hi!

I know, I'm a little late with my post for the newest Just Add Ink Challenge.  I've been away having a lovely break over Christmas with my mum, sisters and their families.  We've had two brand new additions to the family recently, two baby boys who are my Great Nephews.  It was really lovely to meet them, and also to spend lots of fun times with my family.

So, back to the new JAI Challenge.  For the last challenge of the year we are challenging you to Just Add Giving.  The challenge was suggested by Mae, and it's a perfect way to end the year. You still have another 8 days or so to enter the challenge before the Just Add Ink team take a break and return later in January.


I designed this gift box to hold a Red Balloon Gift Voucher, some Party Lite tea light candles and a handful of chocolates. The voucher was hidden under the chocolates in the middle section so that it becomes a little surprise.


I made the box from Early Espresso cardstock and included dividers so that the contents all stayed in place.  I then used a piece of window sheet as a belly band to ensure that the contents didn't fall out of the box.


I finished off the box with some DSP from the Trim The Tree DSP stack and a huge bow in the gorgeous Cherry Cobbler Ribbon from the Holiday Catalogue.  It's such lovely ribbon and adds the perfect finishing touch to the box.

I'm pleased to say that the recipient loved the gift and is busily planning her Red Balloon experience!

I hope to see you over at Just Add Ink!

Bye for now,

Tina

Friday 19 December 2014

JAI #245: Just Add Inspiration

Hi!

Here we are again with another Friday (which just about has to be the second best day of the week. Saturday's the best, being the first day of the weekend!) so it's time for another Just Add Ink Challenge. This week the lovely Nikki has put together an inspiration board of pictures to inspire our creativity,


Isn't it pretty?  I love all of the soft neutrals with the touches of gold throughout.  So peaceful and calming.


By coincidence, I have used the same colours two weeks in a row on my JAI cards! Oh well, other than the colours they are very different cards, so it doesn't matter too much I guess.


I stamped the full wreath stamp with Crumb Cake ink and then stamped over the top with the highlight wreath stamp in Crumb Cake also.  I was very impressed with how well I managed to line up the two stamps!  The berries were then stamped in Early Espresso.


I think I said last week how much I like the snowflake paper from the Trim The Tree DSP Stack.  I couldn't resist adding a strip of it to the inside of the card.

I hope you can find time to play along this week, we'd love to see your cards over at Just Add Ink.

Bye for now,

Tina

Friday 12 December 2014

JAI #244: Just Add A Sketch

Hi!

Here we are again on another Friday, so it must be time for another Just Add Ink Challenge.  This time it's my turn to provide the challenge and I have designed a sketch to follow.


Now, just remember that a sketch doesn't need to be followed exactly - you can have a lot of fun and play with it a bit.  Having said that, I did follow the sketch exactly!


Just for a change I decided to go with a neutral colour palette. The DSP is from the Trim The Tree DSP Stack.  I'm not usually a snowflake person, but I thought the pattern on this DSP was sweet.


The trees were stamped and then the tinsel was heat embossed in Gold over the top.  I love how easy the photopolymer Festival Of Trees stamps are to line up perfectly!


I stamped and embossed a fourth tree to finish off the inside of my card, along with a little strip of the DSP from the front.

Why don't you pop on over the the Just Add Ink blog to see what the rest of the Design Team have done with the sketch? Make sure you take some time out from the Christmas madness to play along with us, we all love to see the cards you make for our challenges.

Bye for now,

Tina

Monday 8 December 2014

Memory Keeping With PLxSU: December

Hi!

On the first Monday of each month I participate in a challenge hosted over at the Memory Keeping With PLxSU Facebook group.  The Design Team are based in countries all around the world and we are all SU Demonstrators and Project Life fans.  This month we are challenging ourselves (and you of course!) to complete a page or pages around a December theme.  It's important to note that this doesn't necessarily mean a December Daily page - it can be absolutely anything to do with December.

Having said that, my pages today are from my December Daily album.  This is the third year I have started a December Daily album.  My first year I didn't complete the album until the following September.  Last year I finished the album in January.  Not too bad!  This year keeping up will be so much easier with the Hello December PLxSU Collection.


Now, you might notice that I have actually started my December Daily with a November entry. That's because in Adelaide the Christmas season officially begins with the Annual Christmas Pageant.  This year Rob took the big kids into the city and they watched from his office window.


Another November entry, simply because we attended our first Christmas party for the season in November.  The party had a Super Hero theme, and Rob and Hudson didn't need much encouragement to dress in their Superman t-shirts!


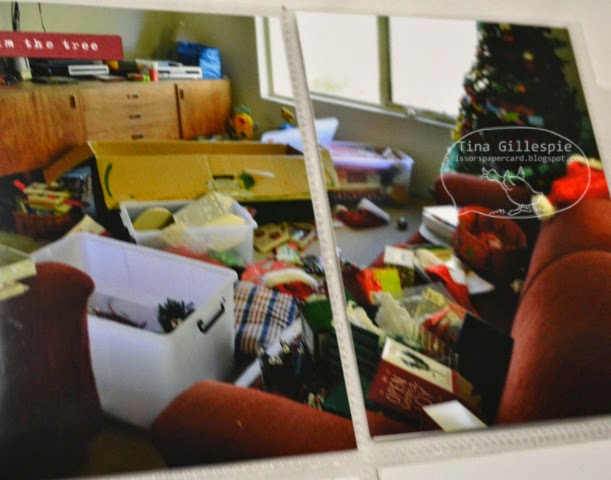
December 1st is the day we put up our Christmas tree.  It fell on a Monday this year, and it felt really strange doing it on a weekday.  From my perspective it was great though, as I could assemble the tree without any 'helpers' or whining kids!  I did briefly regret allowing the big kids to decorate the tree by themselves as they made a huge mess and left it for me to clean up!


Here's a little trick for pocket pages: don't be afraid to cut photos to fit them across multiple pockets.  It makes planning your pages a little easier.  If you are cutting a photo of people though, place the photo on a flat surface and lay the pocket page over the top.  This way you can see if you are going to cut through someone's head BEFORE you start chopping up the photo.


My husband was on call and got called out on Monday, so we decided to wait for him to be home on Tuesday to finish decorating the tree.  All the kids have name baubles and they take turns putting Santa on top of the tree each year.  The tree is so tall that Rob needs to lift them up so that they can reach!  It worked out well that we did the tree over 2 days, as I didn't have anything else 'planned' for my DD that day.


It's not Christmassy at all, but it was the 'story' for the day - the surgery I had on my head. A DD doesn't necessarily need to be all about Christmas, you just pick a story for the day and tell it!


Sometimes, no matter how much you try, you just can't make a back to back page work.  In this case I had one landscape photo and one portrait photo.  Thankfully in each pack of Photo Pocket Pages you get one page that is a single 6x8 inch pocket.  I just cut a piece of Cherry Cobbler cardstock to size and adhered the photo, date card, journalling and embellishments to the cardstock and slid it into the page.  Easy!


I really like the addition of the Cherry Cobbler Glimmer Paper to the date cards.  I saw this somewhere, but I can't remember where.  I quite liked it, so I've decided to use it through my album.  It helps the cork numbers you get in the Hello December Accessory Pack to stand out.

So, that's it from me for now.  I have a few more pages to show you, but I will do it in batches through the month.  You can see what the rest of the MKWPLxSU Design Team have come up with by clicking on the links to their blogs listed below.

Claire Daly, Australia – http://www.clairedaly.typepad.com
Delys Cram, New Zealand - http://delysc.wordpress.com/
Constanze Wirtz, Germany - http://conibaer.blogspot.com.au/
Janet Morrow Wakeland,  USA - http://remarkablycreated.com/
Kim Holterman,  Netherlands  - http://kims-scrapbooking.nl/

Kimberly VanDiepen - http://stampinbythesea.com/

Bye for now,

Tina

Friday 5 December 2014

JAI #243: Just Add Colour!

Hi!

Wow, where did that week go?  It seems like only yesterday that I was sitting at my computer typing up last week's Just Add Ink post.  I swear that time goes faster at this end of the year.  Anyway, this week at Just Add Ink Kim has challenged us to use a colour combination in our papercrafting.


Now, I don't know about you, but I was always taught that you don't mix red and pink, or blue and green for that matter.  The best part of being a grown up is that you get to break the rules whenever you like, and this combination ended up being really fun to work with.


I should add that I'm really not much of a rebel, so when I break the rules it's more like I bend them, or dip a toe over the line.  In this case I decided to opt for a tiny splash of Real Red, Strawberry Slush and Wild Wasabi.  By keeping most of the card Tempting Turquoise and Whisper White I was able to avoid the colours clashing with each other.


The card didn't look quite finished with just the hearts and the sentiment on the circle, so I added a row of piercing to the circle and some rhinestones to the hearts.  Done!


So I guess I cheated a little by leaving the Strawberry Slush and Wild Wasabi out of the middle, but I was nearly in hives over my rule breaking on the front of the card so I decided to go simple on the inside.

How are you going to bend or break the rules?  Are you a rebel or not?  I can't wait to see over at Just Add Ink.

Bye for now,

Tina

Friday 28 November 2014

JAI #242: Just Add Inspiration

Hi!

Apologies for the blog absence, both Hudson and I have been sick, so blogging had to take a back seat.  We are on the mend now though, just in time for the new Just Add Ink challenge.

This week Trish has challenged us to use this inspiration picture to shape our creations.


Isn't it pretty? I love the watercolour look on the left side, but I ended up taking my inspiration from the flowers on the right side.


This card was made for a very special lady who turned 60 recently.  I know she loves having flowers in the house, so I decided to make her a card full of daisies.


It was a big hit! The flowers were super easy to create using my Flower Patch stamp set and the matching Flower Fair framelits.


I even added some daisies to the back of the card. I think that there can't be many people who don't smile when they see daisies, they are such a cheerful flower.

So, what direction will this inspiration picture send you in?  I can't wait to see over at the Just Add Ink blog.

Bye for now,

Tina

Thursday 20 November 2014

JAI #241: Just Add A Sketch!

Hi!

Woo Hoo, it's Friday! Yes, it's been one of those weeks! Let me forget it all and jump into the new challenge at Just Add Ink.  This week we have a sketch for you.  It's one I designed for the challenge, and I hope it inspires you all.

 
I decided to stamp a whole panel of flowers, colour them with my Blendabilities and then chop it up to create the three vertical panels in the sketch.  I think chopping up the cardstock after colouring them was the hardest part of this card - it wasn't something I wanted to mess up after spending so long colouring!


It all turned out beautifully though! I used Wisteria Wonder, Old Olive and Daffodil Delight Blendabilities to colour the flowers and then coordinating ribbon and cardstock.


I couldn't get the horizontal panel working to my satisfaction as it was in the sketch, so I decided to abandon it and try something different.  The ribbon/die cut are a great substitute I think.


I really love these flowers from the I Like You Hostess stamp set - they are great for colouring!

I hope you can find time to play along with my sketch this week at Just Add Ink.  I'd love to see how you interpret it!

Bye for now,

Tina

Monday 17 November 2014

Layout 83: Hollywood Horrors

Hi!

Another layout for you, and it's another 'spooky' one.  I've done a few lately!


This photo was taken at the Royal Adelaide Show just before Rob and the kids went through the Hollywood Horrors ride. I had to laugh at how frightened Ada looks, even though she insisted she wanted to go on the ride.


I scored around the outside of the layout and then wrote most of my journalling along the score line.  If you'd like to know how I did it you'll need to sign up for my newsletter.  There's a sign up box over to the right on my sidebar.

Bye for now,

Tina

Friday 14 November 2014

JAI #240: Just Add Texture!

Hi!

On the JAI Design Team we get our challenge lists a bit in advance, which is often quite useful.  The new challenge is to Just Add Texture on your projects, and I was glad I had a bit of thinking time for this one!  Not because I was stuck for ideas, but more because I needed time to choose which option I was going to use to add texture to my project.


In the end I decided to go with a bit of 'bandage' from Rob's Halloween costume on my layout.  Rob has been planning this costume for years, but every year he leaves it to the last minute and runs out of time.  This year he got organised and was able to pull the mummy look together.  He wanted to use real bandages, but after finding out the cost he decided to make fake bandages with cheesecloth died in tea.


I pinched a short section and adhered it to my layout using a Stampin' Glue Stick.  I made sure I frayed the edges a little more before adhering for a bit of added texture.  I think it looks great!

So how will you add texture to your project?  There are a heap of options - why don't you check out the rest of the Design Team's work over at Just Add Ink to get some inspiration?  Don't forget that we also have a Design Team call on at the moment.  It's a fabulous, close team that is lots of fun to work with, so why don't you check out the requirements and apply?

Bye for now,

Tina

Wednesday 12 November 2014

Happy Birthday Hudson!

Hi!

Nearly 2 months ago my not-so-baby boy turned 7. Today I have for you the card I made for him.  He did get it on the day, I just haven't blogged it yet!


I saw this card made by Alison Barclay and decided I would CASE it to make Hudson's card.  I used similar colours to Alison's card, but changed her star to a 7 for Hudson.  I used copy paper and a ruler to make a template to sponge through.


I decided to add some paper piercing to give the card some extra oomph.  I pierced 7 holes each time - 1 hole for each year!


I thought this sentiment was great for the inside.  It's very cheerful, plus it leaves lots of room for a special message for my boy.

Bye for now,

Tina

Monday 10 November 2014

Memory Keeping With Stampin' Up! Project Life: Gratitude

Hi!

Today I have for you a 6x8 PLxSU layout that I completed for the new Gratitude challenge.  The Design Team for the Memory Keeping with Stampin' Up! Project Life Facebook group are challenging you to create a page about Gratitude.  What are you grateful for?


No, I'm not grateful for the tissue box in my car.  Actually, sometimes I am, but not for the purposes of this layout!


I used cards from the Happiness Is PL Card Collection. The journalling card was perfect for this challenge!


I saw this quote about a week or so ago on Facebook.  I took a screen cap of the quote and then recreated it for my page using another Happiness Is card and my Alphabet Rotary Stamp.

I hope you can play a,long with this challenge.  You can upload your layouts to the Facebook group here.

You can see the layouts that the rest of the Design Team have created by popping on over to their blogs.


Tina

Saturday 8 November 2014

Layout 82: Halloween 2014

Hi!

I've had a little burst of scrapping lately, mostly back to the more traditional 12x12 instead of Project Life.  It's been a while since I've done any 12x12 and I'm really enjoying it.


Rob took the kids Trick or Treating last week.  They really enjoy the dressing up part of it.  Ada plans her outfit for weeks, while Alex just throws something together at the last minute!  Lucky he and Rob had built a 'Steve' head (from Minecraft) for a birthday party earlier in the year, so it wasn't too difficult for him to put together his outfit.


The house is from the Set Holiday Homes.  You can purchase it as a Photopolymer set out of the current Holiday Catalogue, or you can do as I did and purchase the MDS download.  I opted for the download as I wanted the flexibility of being able to resize the images.  In this case I printed the house at approximately 3 1/2 inches by 4 1/2 inches, printed it and then coloured it with my Blendabilities.


I did a lot of soft collage stamping in the background of my layout.  I deliberately used softer colours so that I didn't take too much focus away from the photos and the house.  A bit different from more traditional Halloween colours, but I love the effect.  I used Soft Sky, Crumb Cake and Daffodil Delight and Pumpkin Pie.

Bye for now,

Tina

Friday 7 November 2014

JAI #239: Just Add Colour

Hi!

Today we have a new challenge for you at Just Add Ink.  It's a gorgeous colour combination out forward by Nikki.  I really love this combination, it's so classic and can be either masculine or feminine.


I had been asked to make a sympathy card, so I thought I'd use the challenge colours.


I used some DSP from the Trim The Tree Stack, which is in the current Holiday Catalogue as the base of my card.  I like that this DSP has a mix of Christmassy patterns and plainer patterns that could be used for a range of cards.


I like the combination of Flowering Flourishes and Petite Petals. The coordinating punch makes cropping the flowers so easy!


I hope you can play along with us at Just Add Ink this week.  The Design Team have made a gorgeous range of cards for your inspiration.

Bye for now,

Tina

Wednesday 5 November 2014

Layout 80: Sweet Moments

Hi!

I've been a bit slack in keeping up with my scrapping lately, and my self-challenge to scrap 100 layouts this year.  I am getting close to my target, but the end of the year is rapidly approaching!  Today's layout came about as I had a left over photo from a recent mini album project that I didn't want to waste.


I started with a base of the Typeset Specialty DSP and then used the Dots Decorative Mask, my Lost Lagoon inkpad and marker and a sponge dauber to create a background.  I tilted the mask a bit so that the dots weren't too evenly lined up and then I randomly daubed a few, traced a few with the marker, and on some dots I did both.  I wanted a fairly rough look to the background.  I then stamped over the top with some of the stamps from Kinda Eclectic.


In a couple of places I punched the side of the SDSP with my trusty Spiral Border Punch.  I'm so pleased that this punch has made a come back - it was one of my old favourites that I could never bear to part with.


I wanted to do a little journalling, but I couldn't work out where to place it, so I ended up going with the old hidden journalling trick by creating a tag to pop in behind the photo.  Easy!

Bye for now,

Tina