Pages

Thursday, 14 February 2019

JAI #444: Just Add Colour

Hi!


Hooray for the new challenge at Just Add Ink. This week Nikki has given us a colour combo with a little difference - we get to pick one of the colours!


I really like this one! I was inspired by a top I purchased in Walmart in Orlando on my recent trip. It's a really sweet top - black with ruffles and lovely embroidered flowers all over it.


Whoops, the tilt on the pic is a bit extreme, but you can see the top at least! I loved the bold flowers on the black background, and used that as inspiration for my card.

scissorspapercard, Stampin' Up!, Just Add Ink, Picture Perfect Birthday, Bitty Blooms Punch Pack, Stained Glass Thinlits, Well Written Thinlits, Subtle DTIEF

I started by using my Stained Glass Thinlits to create the window in the card. I backed the opening with a window sheet and then adhered the die cuts to the sheet. There wasn't really another way to do it. I had a scrap piece of Powder Pink cardstock that had already been embossed with the Subtle DTIEF, so I trimmed it and layered it underneath the window.

scissorspapercard, Stampin' Up!, Just Add Ink, Picture Perfect Birthday, Bitty Blooms Punch Pack, Stained Glass Thinlits, Well Written Thinlits, Subtle DTIEF

The flowers were all punched using the new Bitty Blooms Punch pack. They were layered over a pair of Granny Apple Green (the colour I chose as my third!) vines, die cut from the Well Written Framelits. Some fo the flowers were popped up and others were adhered directly to the vines.

scissorspapercard, Stampin' Up!, Just Add Ink, Picture Perfect Birthday, Bitty Blooms Punch Pack, Stained Glass Thinlits, Well Written Thinlits, Subtle DTIEF

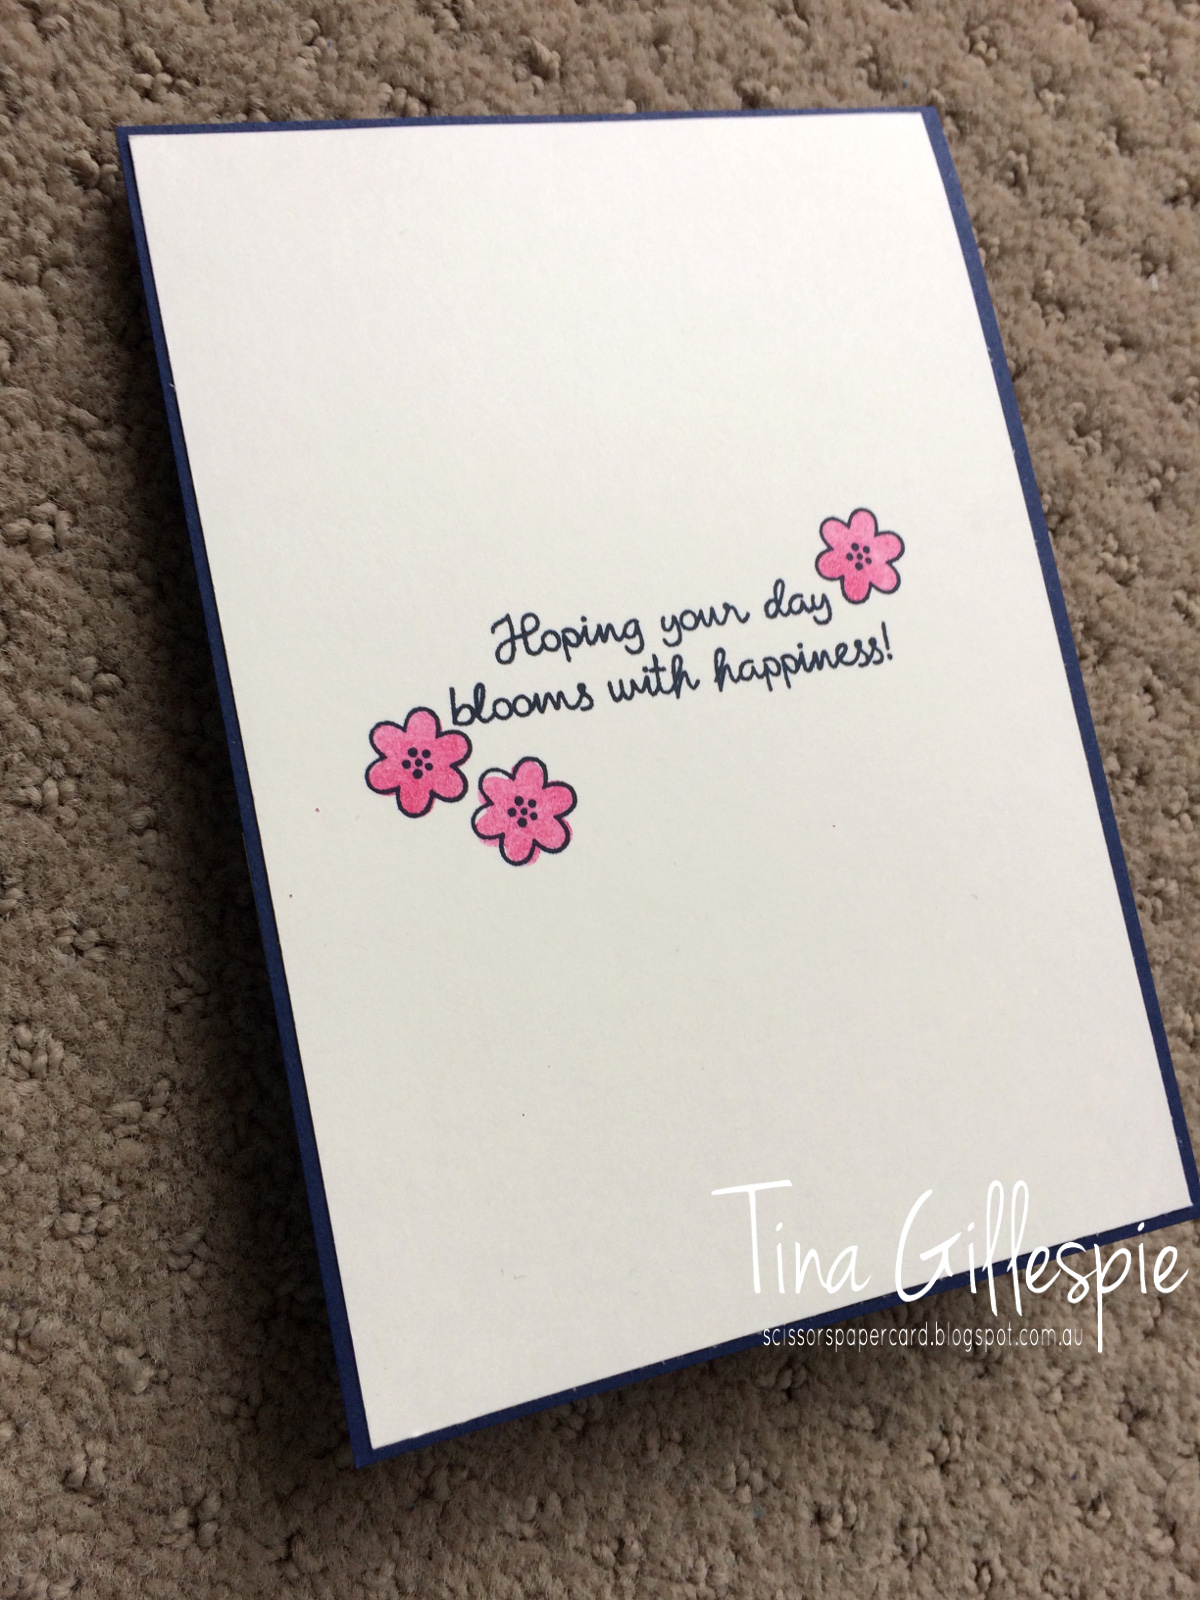
I repeated the vines and flowers on the inside of the card, along with a strip of the Subtle Embossed Powder Pink cardstock I trimmed from the piece that went under the window.

How do you like my clothing inspired card? Do you find yourself doing that? I see inspiration everywhere! Why not pop on over to the Just Add Ink blog to see how the other Design team members were inspired by these colours? Which third colour will you choose?

Bye for now,

Tina

Tuesday, 12 February 2019

Pizzazz With Pear

Hi!


Welcome to another week's Colour Creations blog share, where we are looking at Pear Pizzazz. It's been a bit of a mixed up week for me, and nearly everything that could go wrong with this card has gone wrong! Oh well, I got there in the end!

scissorspapercard, Stampin' Up!, Art With Heart, Colour Creations, Varied Vases Bundle, Detailed Floral Thinlits, Bitty Blooms Punches

I haven't used my Detailed Floral Thinlits much, so I decided to pull them out for a play. I cut the top and bottom of some pear Pizzazz cardstock and then popped it up over a base of Night Of Navy. I love the dark colour peeping though.

scissorspapercard, Stampin' Up!, Art With Heart, Colour Creations, Varied Vases Bundle, Detailed Floral Thinlits, Bitty Blooms Punches

The stamping was all done using the Varied Vases stamp set and coordinating punch. You might notice that the punch only has a section for a tulip. The Melon Mambo flowers were actually cropped using one of the flower punches from the Bitty Blooms Punch pack. It's not an exact match, but it's close enough!

scissorspapercard, Stampin' Up!, Art With Heart, Colour Creations, Varied Vases Bundle, Detailed Floral Thinlits, Bitty Blooms Punches

One of the things that went wrong was my camera battery dying as I needed to take the photos. I had to make do with my iPhone and lay the card on the carpet in my front (west facing) window. Thank goodness I'd vacuumed earlier!

That's it for now, why not pop on over to Catherine's Blog, where you'll find the rest o this week's cards. It's a small group tonight, but I'm sure it will be big on inspiration!

Bye for now,

Tina

Sunday, 10 February 2019

CTC #215: How Sweet It Is

Hi!


Time for the new CASEing The Catty blog hop! I do love these hops - don't you? Hop, hop, hopping around in a circle until you get back to where you started, seeing lots of yummy Stampin' Up! inspiration as you go. What could be better? Did you come from the lovely Kelly's blog, or start here at mine? Doesn't matter, just keep on clicking!


This week we are CASEing the projects from the How Sweet It Is section of the Occasions Catalogue, which runs from pages 14 to 23. Lots of pages in which to find a project, technique or idea to CASE. What will you choose?


I didn't go any further than the first page of the section. I didn't CASE a card, this time I used a technique on several different cards. Have you noticed the Sweet Pins and Tags in the catalogue on page 15? What are you waiting for, they are sooo much fun! Look at the two front jars and the bag of yellow lollies. They come in three different shapes, each white with an iridescent border. Here comes the fun part - you can colour them! I pulled out my sponge brayer and went to town!

scissorspapercard, Stampin' Up!, CASEing The Catty, Well Said, Incredible Like You, Well Written Framelits, Rectangle Stitched Framelits, Subtle DTIEF, Classic Garage DSP, Neutrals DSP, Sweet Pins & Tags

I chose the medallion shaped tag and coloured it with Tranquil Tide ink using my sponge brayer. When I had the colour I wanted I took a piece of towel and wiped over the iridescent border to remove any excess ink. Then I was set to decorate! The tags on page 14 are layered with strips of ribbon, DSP and stamped images, so I did the same.

scissorspapercard, Stampin' Up!, CASEing The Catty, Well Said, Incredible Like You, Well Written Framelits, Rectangle Stitched Framelits, Subtle DTIEF, Classic Garage DSP, Neutrals DSP, Sweet Pins & Tags

The motorbike was fussy cut from a piece of the Classic Garage DSP and the birthday was cut from Black Foil using my Well Written Framelits. I have used them so much! The front was completed with a length of Flax ribbon, a piece of Smokey Slate DSP from the Neutrals pack, Basic Grey cardstock, cut with a Rectangle Stitched Framelit, and a Tranquil Tide base, embossed with the Subtle DTIEF.

scissorspapercard, Stampin' Up!, CASEing The Catty, Well Said, Incredible Like You, Well Written Framelits, Rectangle Stitched Framelits, Subtle DTIEF, Classic Garage DSP, Neutrals DSP, Sweet Pins & Tags

I used a scrap of the Classic Garage DSP to finish off the inside, which also includes a sentiment from the new Incredible Like You stamp set.

That's it from me, next is the wonderful Rose Packer!


Don't forget to also check out our Facebook group, where you can add your card inspired by something in the How Sweet It Is Suite of the Occasions Catalogue.


Thursday, 7 February 2019

JAI #443: Just Choose Two

Hi!


Welcome back to our new Just Add Ink challenge.This week Jan has asked us to Just Choose Two.


We have the choice of two of: embossing paste, colouring or sequins. I didn't feel like getting messy this week, so I went for colouring and sequins.

scissorspapercard, Stampin' Up!, Just Add Ink, Birthday Cheer, Detailed Birthday Edgelits, Stampin' Blends

This is a bit different from my usual style, but I do like how it turned out. My first attempt at a background for the gift went into the bin, but the second time was the charm. I pulled out my heat embossing equipment to emboss the sentiment. I like the soft look of the white text on pink cardstock, don't you? It's layered over some of the new Flax ribbon from the Occasions Catalogue, which is soooo much nicer than it looks!

scissorspapercard, Stampin' Up!, Just Add Ink, Birthday Cheer, Detailed Birthday Edgelits, Stampin' Blends

To create the background, I simply sponged some Petal Pink ink to a size just a little bigger than the gift. I then stamped the confetti/sprinkles stamp from Birthday Cheer over the top, stamping off once first to soften the colour. Everything else was just layered over the top and finished with some iridescent sequins.

scissorspapercard, Stampin' Up!, Just Add Ink, Birthday Cheer, Detailed Birthday Edgelits, Stampin' Blends

I followed a similar process on the inside underneath the cupcake. The cake and gift were both coloured with my blends. I used the Granny Apple Green, Highland Heather, Petal Pink and Real Red combos. I really love the bold colours sitting on top of the softer pink. What do you think?

Why not head on over to the Just Add Ink, where you can see the cards the rest of the design team have made for this week's challenge? You won't be disappointed!

Bye for now,

Tina

Tuesday, 5 February 2019

Pacific Point To The Rescue

Hi!


You should know what Tuesday night means by now - Colour Creations time! This week the team are looking at Pacific Point, a lovely mid blue that's been part of the colour line up for a long time now. And why not, as it's a great blue.

scissorspapercard, Stampin' Up!, Art With Heart, Colour Creations, Birthday Cheer, Tailored Tag Punch

You can see I had a lot of fun this week with my Tailored Tag punch. It's such a great shape, and I wanted to make a tessellated card with the punched shapes. I started by layering them on a piece of Whisper White, but it didn't look right. I switched to Night Of Navy, and bingo!

As I laid the shapes out, I got to thinking that it looked a little like armour plating, possibly a bit scaly, like a certain watery superhero that's in the cinema's right now. It's the wrong colour, but hopefully you see what I saw.

scissorspapercard, Stampin' Up!, Art With Heart, Colour Creations, Birthday Cheer, Tailored Tag Punch

I added the Navy strip to the top to give it a bit of a utility belt feel to go along with the scaly armour. What do you think? A bit superhero-ish? I hope so! I started with the Whisper White punched shape and adhered it to the navy base before adding the Pacific Point punches around it. The hardest part was getting the gaps even, but I think I did a pretty good job!

scissorspapercard, Stampin' Up!, Art With Heart, Colour Creations, Birthday Cheer, Tailored Tag Punch

I couldn't resist adding another row of the punches on the inside. It really finishes off the card, don't you think?

That's it from me, so why don't you pop on over to Catherine's blog, where you can see the rest of this week's Pacific Point cards? It's definitely worth a look!

Bye for now,

Tina

Sunday, 3 February 2019

CTC #214: Sale-A-Bration

Hi!


Sigh, the end of the weekend is always a little sad, but not anymore, as it's also when the CASEing the Catty blog hop happens! This week you may have come to me from Lauren's blog, or you may have started here. Does't matter, just keep hopping until you've visited everyone.


This week we are CASEing from the Sale-A-Bration catalogue. This card, with it's stunning colouring, caught my eye.


Isn't it gorgeous? I don't have that stamp set, nor any stamp set to replicate the card, so I had to think a bit laterally this week. The card uses the Spotlight Technique, where you cut away part of the image and just colour that part, so that's where I went with my card.

scissorspapercard, Stampin' Up!, CASEing The Catty, Soft Sayings, Botanical Butterfly DSP, Stampin' Blends, Spotlight Technique

I've been wanting to colour this sheet of the Botanical Butterfly DSP since I first saw it, but found it very overwhelming to start - it's such busy paper! This was the perfect way to do it. After cutting my front piece, I used the Stitched Shapes Circle die to crop a section and then sat with my Blends to colour.

scissorspapercard, Stampin' Up!, CASEing The Catty, Soft Sayings, Botanical Butterfly DSP, Stampin' Blends, Spotlight Technique

I didn't bother with shading using the Blends, it's just straight colouring. I ended up with quite a pile of markers after I'd finished! I then cropped another circle in Balmy Blue and popped up the two circles on Dimensionals. The sentiment banner is a nod to the original card.

scissorspapercard, Stampin' Up!, CASEing The Catty, Soft Sayings, Botanical Butterfly DSP, Stampin' Blends, Spotlight Technique

I trimmed a small part of the DSP for the inside, and just decided to colour a couple of flowers rather than attempt the Spotlight Technique on such a small strip of paper!

Are you going to play along this week? I hope so! You can join in the fun over at our Facebook group, where you can add your card for the challenge.


But first, you need to hop on over to the next blog, which belongs to the wonderful Kathryn Mangelsdorf.


Bye for now,

Tina

Thursday, 31 January 2019

Jai #442: Just Add A Sketch

Hi!


It's time for the new Just Add Ink challenge! This week Kim has designed a sketch to kick of our creativity!


I really love this sketch, and the Design Team have done some fabulous things with it, so clearly they love it too! What comes to your mind when you see it? The elegant curls to the side made me think of a wedding card, so that's what I decided to make.

scissorspapercard, Stampin' Up!, The Ink Road, Just Add Ink, As You Wish, Beautiful Bouquet, Petal Promenade DSP, Well Written Framelits, Subtle 3DTIEF, Stitched Shapes Framelits

I wanted to go really subtle with the curls, so I cut them from Soft Sea Foam Cardstock, which is the same as the layer underneath, which was embossed with the Subtle 3DTIEF. The little flourishes were from the new Well Written Framelits dies. Aren't they pretty? I wanted to add a little splash of colour, so I used some of the Petal Promenade DSP on the card. The gorgeous rose paper is perfect for a wedding card, as it looks just like a bouquet of roses.

scissorspapercard, Stampin' Up!, The Ink Road, Just Add Ink, As You Wish, Beautiful Bouquet, Petal Promenade DSP, Well Written Framelits, Subtle 3DTIEF, Stitched Shapes Framelits

How much fun I this stamp set? It's a new purchase from Ink Road Stamps, and it's called 'As You Wish' and is full of quotes and fun images inspired by the movie The Princess Bride. In case you're not familiar, the priest doing the wedding ceremony in the movie has a speech impediment and can't pronounce the letter r. Now I just need to find a bride and groom who love the movie so I can give them this card!

scissorspapercard, Stampin' Up!, The Ink Road, Just Add Ink, As You Wish, Beautiful Bouquet, Petal Promenade DSP, Well Written Framelits, Subtle 3DTIEF, Stitched Shapes Framelits

On the inside I used one of my favourite sets for sentiments - Beautiful Bouquet. There wasn't another quote in the As You Wish set that would work on the inside, so I thought a simple congratulations would be best. Oh, and more of that gorgeous DSP!

The Just Add Ink team have had a lot of fun with this week's sketch. You can see all the cards, and then link up your own over at the blog. See you there!

Bye for now,

Tina