Pages

Thursday, 29 April 2021

JAI 552: Just Add Inspiration

 Hi!


It's time for the new Just Add Ink challenge. Yay! This week Nikki has found a really sweet Inspiration Photo to guide our creativity.


How much would it lift your mood, going in and out of that yellow door every day? It took a little bit of thinking to work out how I was going to translate the Inspiration Photo into a card, but I was pleased with my result in the end.

scissorspapercard, Stampin' Up!, Ink Road Stamps, Just Add Ink, Pretty Bizarre, Itty Bitty Birthdays

Anyone else have 'Hey, hey, hey, hey' going through their heads right now? LOL! Such an iconic song and movie from the mid 80's, reinvented for a new generation in the early 2010's. Do you remember the movie of the kids managing to have fun in a library while doing a weekend detention?

scissorspapercard, Stampin' Up!, Ink Road Stamps, Just Add Ink, Pretty Bizarre, Itty Bitty Birthdays

I started the card by masking off an area and using my Blending Brush to create an ombre panel, with Daffodil Delight and Mango Melody ink. I flicked with a little bit of water, and after it was dry I used my Stamparatus to stamp the main image in Memento ink. I'm glad I thought to do this, as it took 4 goes to get a solid black image. The stamps are from an Ink Road Stamps set, called Pretty Bizarre. 

scissorspapercard, Stampin' Up!, Ink Road Stamps, Just Add Ink, Pretty Bizarre, Itty Bitty Birthdays

I repeated the ombre section on the inside. I had to use a sentiment from Itty Bitty Birthdays, but I paired it with another image from Pretty Bizarre. It's such a fun stamp set!

What do you see in the Inspiration Photo? Is it the door, the flowers, the colours? So many possibilities! Please jump on over to the Just Add Ink blog, where you can see the rest of this week's Design Team cards. You can also link up your card to enter the challenge. Can't wait to see what you make!

Bye for now,

Tina

Wednesday, 28 April 2021

Colour Creations: Shaded Spruce

 Hi!


Welcome back to a new Colour Creations Creative Showcase. This week we are highlighting Shaded Spruce. It took me a long time to warm up to this darker bright green, but now it's a colour I quite like.

scissorspapercard, Stampin' Up!, Colour Creations, Forever Gold Specialty Paper, A Good Man

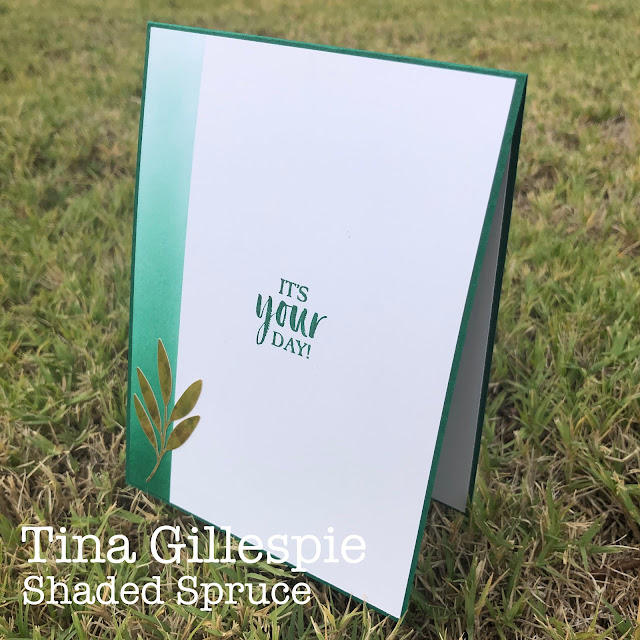
I kept my card quite simple this week. I masked off the edges and used my Blending Brush with Shaded Spruce ink to create an ombre panel through the middle of the card. I love the larger head of the SU Blending Brushes for a task like this - the ink goes on so much quicker than with a smaller-headed brush.

scissorspapercard, Stampin' Up!, Colour Creations, Forever Gold Specialty Paper, A Good Man

The big fern leaf from the Forever Gold Laser Cut Paper was adhered over the top. This layout is a CASE of another card that I made last year for Christmas. It's such a cool way of showing off the gorgeous gold foil laser cut piece.

scissorspapercard, Stampin' Up!, Colour Creations, Forever Gold Specialty Paper, A Good Man

I repeated the ombre look on the inside, with another, smaller, piece of the laser cut paper over the top. The sentiments are from A Good Man.

That's all from me tonight, but please do head on over to Cathy's blog, where you'll find the rest of this week's Shaded Spruce cards for your viewing pleasure.

Bye for now,

Tina

Sunday, 25 April 2021

CTC 315: CASE A Kit

 Hi!


Welcome back to my blog for the latest CASEing The Catty Sunday Challenge Blog Hop. I hope you're full of energy - I'm a tad tired after getting up early to play in my band at our local dawn service for ANZAC Day. I don't mind this tired though, as it comes from remembrance. 


This week for our challenge, we are asking you to CASE a Kit from either catalogue. Do you have a favourite kit? I often like to buy them and admire the pretty box and contents, but never get around to putting them together!


The pretty box from the Looking Up kit was definitely one that caught my eye, so that's what I chose to CASE this week. The geometric design really appeals to my logical, ordered brain.

scissorspapercard, Stampin' Up!, CASEing The Catty, Itty Bitty Birthdays, Gold Foil

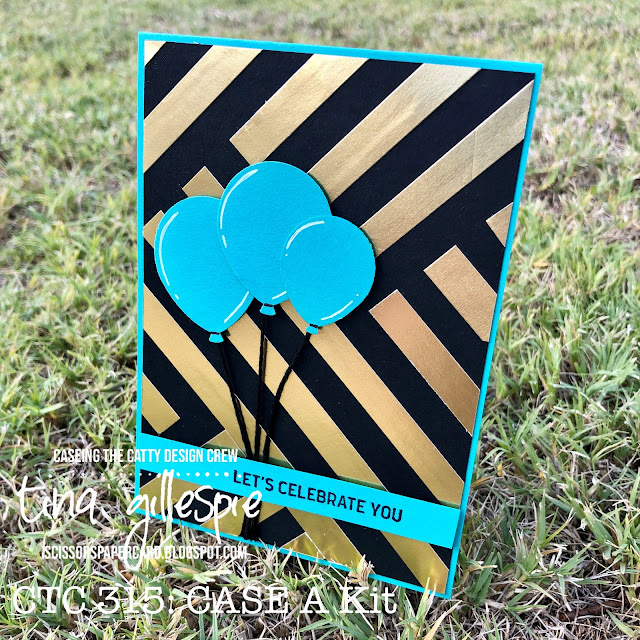
That same brain was a little lacking in power this week, so instead of attempting the 60° angles on the box, I went for the far easier 90°. I cut a heap of 1cm wide Gold Foil strips and glued three down before changing angles and gluing another three down. I used a spare strip as a spacer. It's a bit fiddly to do, but I have fun doing this kind of stuff!

scissorspapercard, Stampin' Up!, CASEing The Catty, Itty Bitty Birthdays, Gold Foil

After I'd completed the front panel, I got a bit stuck. I wasn't sure how to incorporate it into a card, so it sat on my craft desk for a few days. I finally decided that adding a pop of colour was the way to go, so I chose Bermuda Bay, as it's one of the kit colours. The balloons, while they are not hot air balloons, were still in keeping with the kit, I think!

scissorspapercard, Stampin' Up!, CASEing The Catty, Itty Bitty Birthdays, Gold Foil

As always, I made the front panel wider than it needed to be so that I could chop off a section to using on the inside. It's much easier than trying to make two separate pieces. Another balloon completes the card.

That's all from me for tonight - I'm off to bed now, so I will do my hopping tomorrow. Yay for a Long Weekend! Do you have a LWE? Perfect for crafting time! You can make a card for our challenge and post it in the Facebook Group.


But first, please do continue on with our Blog Hop. My fellow South Aussie, Michelle is up next. Hmm, I wonder which kit was her favourite?

Bye for now,

Tina

Thursday, 22 April 2021

JAI 551: Just Add 3D

 Hi!


Thanks for joining me for the new Just Add Ink challenge. This week Rachael has challenged us to add 3D. Hmmm! Thinking cap on!


I decided that this might be a good opportunity to make a 3D card. I was originally searching for a tutorial for that card that looks like a stack of blocks. As you can probably guess, I had no luck as I couldn't think of the name of it, and Google wasn't helpful with the descriptors that I was using to search for it. I did come across a Bay Window card, though, and as it's another Fancy Fold I've wanted to try for a while, it was the winner.

scissorspapercard, Stampin' Up!, Just Add Ink, Peaceful Moments, In Good Taste DSP, Forever Gold SP, Fancy Fold, Bay Window Card

Most Bay Window cards that I've seen don't actually have a window in the front, which seems a little strange to me! I had the idea of using one of the Forever Gold laser cut pieces to frame the window. Great idea, but as I only had hexagonal ones left, it did make it a little more trickier to cut the opening. I got there in the end though. I was even able to get the sentiment in the right spot to be seen through the window. Go me!

scissorspapercard, Stampin' Up!, Just Add Ink, Peaceful Moments, In Good Taste DSP, Forever Gold SP, Fancy Fold, Bay Window Card

Here you can see how the front of the card sits out from the back. The Forever Gold leaf to the side holds it in place, but the card also folds flat for easy postage. I think that it would be really cool to create a little scene on the inside to view through the window - I will have to try that another time.

scissorspapercard, Stampin' Up!, Just Add Ink, Peaceful Moments, In Good Taste DSP, Forever Gold SP, Fancy Fold, Bay Window Card

Here's the inside of the card. I used another of the Forever Gold leaves on the inside. It's funny how you can be a bit stingy using these during the year, but when you realise that they are about to retire you are suddenly throwing them around like confetti, LOL! Luckily, the In Good Taste DSP is carrying over.

That's all from me tonight, but please do head on over to the Just Add Ink blog to see the rest of this week's Design Team 3D projects. There's a fabulous mix of dimensional projects! You can also enter your 3D project up using our Linky. Can't wait to see what you make!

Bye for now,

Tina

Wednesday, 21 April 2021

Colour Creations: Seaside Spray

 Hi!


Phew, we are getting close to the end now! The Colour Creations Creative Showcase is up to Seaside Spray this week. I had to laugh a bit when I realised that I made my Seaside Spray card while watching Prince Philip's funeral - he was in the Navy, so it's kind of fitting. 

scissorspapercard, Stampin' Up!, Colour Creations, Pretty Perennials, Perennial Petals Dies, Dainty Diamonds 3DEF

I chose Basic Black as the main basis for my card, as I thought that the Seaside Spray flowers would really pop against it. I think that the extra Seaside Spray layer frames the card nicely, too. The flowers and leaves were cropped using the Perennial Petals dies.

scissorspapercard, Stampin' Up!, Colour Creations, Pretty Perennials, Perennial Petals Dies, Dainty Diamonds 3DEF

I embossed the topmost Basic Black layer with my soon-to-be-retired Dainty Diamonds embossing folder. I struggled for a long time over adding a sentiment - nothing I tried seemed to work. Finally, I just went small and simple and I think it works nicely. The sentiment is from the coordinating Pretty Perennials stamp set.

scissorspapercard, Stampin' Up!, Colour Creations, Pretty Perennials, Perennial Petals Dies, Dainty Diamonds 3DEF

I had one left over flower, so it was perfect for the inside. I also had a partial leaf die cut, so I put it to use with the flower. The white on white is not quite as impactful as white on black, but I like the look.

That's all from me, but please do pop on over to Cathy's blog, where you'll find the links for the rest of this week's Seaside Spray cards. I like this dusky blue, and will be a little sad when it retires.

Bye for now,

Tina

Sunday, 18 April 2021

CTC 314: Favourite Retiring Punch

 Hi!


Welcome back to me log for the new CASEing The Catty Sunday Challenge Blog Hop. Do you like CASEing projects from Stampin' Up! catalogues? If so, this is the challenge for you! Each week we are set a challenge to CASE some aspect of the catalogue. This week we are farewelling our Favourite Retiring Punch.


I had a hard time choosing  a punch this week, but I ended up going for my 2" Circle punch. It's one that I use a lot, and will stay in my collection even though it's retiring from the SU range. It's a convenient punch to own!


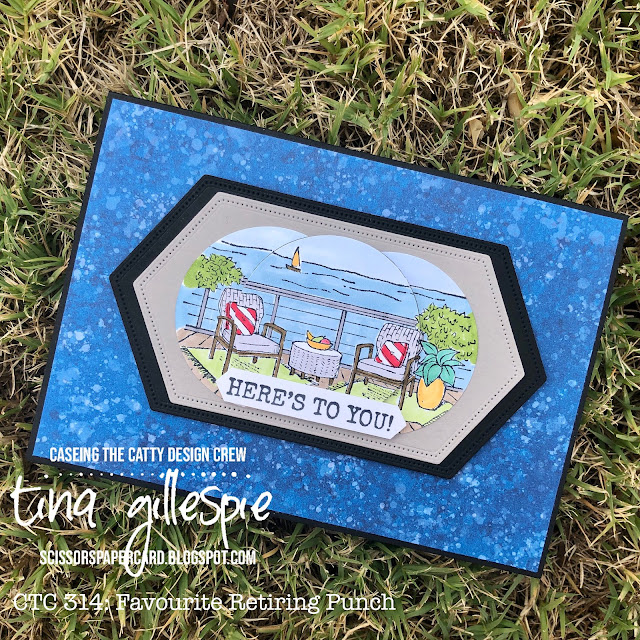
Flipping through the catalogue, I found the High Tide card above that uses circles so nicely! I love how different parts of the scene are in the different circles. I found a few images from the retiring stamp set, Seaside View, floating around on my stamp desk, so I decided to see how they'd go using the technique.

scissorspapercard, Stampin' Up!, CASEing The Catty, Seaside View, Seaside Notions, Whale Of A Time DSP, Stitched Nested Labels Dies, Stampin' Blends

I started by colouring the whole image with my Stampin' Blends. I then took my 2"Circle punch and cropped the middle section of the image. I then used the same punch to crop the rest of the image on both sides of the middle These were then layered over layers of Grey Granite and Basic Black cardstock cropped using my Stitched Nested Labels Dies, which are also retiring.

scissorspapercard, Stampin' Up!, CASEing The Catty, Seaside View, Seaside Notions, Whale Of A Time DSP, Stitched Nested Labels Dies, Stampin' Blends

Here you can see how I popped the middle circle up on Dimensionals, while the two outside pieces are flat. Another retiring punch, Classic Label, cropped the sentiment from the retiring Seaside Notions stamp set. The final piece of the card was the DSP from the Whale Of A Time pack which, you guessed it, is also retiring.

scissorspapercard, Stampin' Up!, CASEing The Catty, Seaside View, Seaside Notions, Whale Of A Time DSP, Stitched Nested Labels Dies, Stampin' Blends

For the inside, I sponged a little Pacific Point ink into the corner and then layered another image from the Seaside View set over the top. I didn't stamp a sentiment on the inside, as I think the card is more versatile without an inside sentiment. It could be a retirement card, birthday card, or just a congrats card as it is.

That's all from me tonight, but the fun is just starting for you. Which retiring punch is your favourite? Is there one that you can't bear to let go of? We'd love to see the card you make using it. Just add your photo to our Facebook group before next Sunday night and you're all set!


In the meantime, though, please do continue on with the Blog Hop, as there's still lots to see. Next up is the lovely and talented Julia. She's got a pair of super sweet cards for you.

Bye for now,

Tina

Thursday, 15 April 2021

JAI 550: Just Add Colour

 Hi!


Hello, and welcome to the new Just Add Ink challenge. This week Jo has put together a really pretty colour combination for us to use.


My first thought was a Christmas card, but I was too lazy to pull my Christmas stuff out of hibernation, so I had to go with something else. My new Butterfly Brilliance stamp set caught my eye!

scissorspapercard, Stampin' Up!, Just Add Ink, Butterfly Brilliance, Itty Bitty Birthdays, Brilliant Wings Dies, Stitched Rectangles Dies

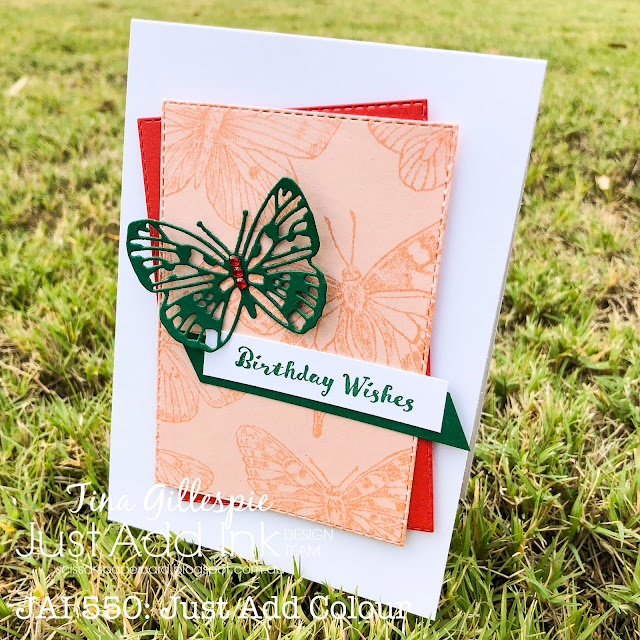
I started by stamping the butterflies in Petal Pink ink onto Petal Pink cardstock. I then cropped it with a Stitched Rectangle Die and layered it over a second rectangle, cropped from Poppy Parade. These were popped up on my Whisper White card base.

scissorspapercard, Stampin' Up!, Just Add Ink, Butterfly Brilliance, Itty Bitty Birthdays, Brilliant Wings Dies, Stitched Rectangles Dies

I had hoped to find some Shaded Spruce ribbon in my ribbon drawer to layer under the sentiment, but I came up empty-handed. I had to make do with a piece of cardstock instead. The Shaded Spruce butterfly was adorned with a few Red Rhinestones to finish off the front.

scissorspapercard, Stampin' Up!, Just Add Ink, Butterfly Brilliance, Itty Bitty Birthdays, Brilliant Wings Dies, Stitched Rectangles Dies

The inside of my card makes use of the outside frame left over from the stamped butterfly panel. I just layered it underneath a smaller piece of Whisper White. I probably should have stamped a few extra butterflies around the edge, but it's too late now. Next time!

Speaking of time, t'snow time for you to pop on over to the Just Add Ink blog, where you can see the rest of this week's Design team cards. We've had a lot of fun with these colours. You can also find the Linky, where you can enter our challenge. What will you do with the colours?

Bye for now,

Tina

Wednesday, 14 April 2021

Colour Creations: Sahara Sand

 Hi!


Welcome back to the new Colour Creations Creative Showcase. This week was a challenge for me, as we tackled Sahara Sand. At the start of this Colour Creations series, I decided that I was only going to use the focal colour, plus Basics colours. It's really hard to make a Sahara Sand card with only Black, White or Vanilla to go with it!

scissorspapercard, Stampin' Up!, Colour Creations, A Good Man, Basic Borders Dies, Stitched Shapes Dies, Subtle 3DEF, Neutrals DSP

My idea started with a new set of dies that I received in my preorder this week - Basic Border Dies. It's a super versatile set of border dies with stitched features and a variety of shapes for adding borders to a piece of card or DSP. For my card, I chose a banner-like die, that cut the bottom edge of the Sahara Sand DSP.

scissorspapercard, Stampin' Up!, Colour Creations, A Good Man, Basic Borders Dies, Stitched Shapes Dies, Subtle 3DEF, Neutrals DSP

I layered the DSP over a piece of Subtle-embossed Whisper White card. The main image was stamped and sponged while the Stitched Shapes circle die was still in place. This leaves a nice, crisp white edge around the outside.

scissorspapercard, Stampin' Up!, Colour Creations, A Good Man, Basic Borders Dies, Stitched Shapes Dies, Subtle 3DEF, Neutrals DSP

I've left the inside sentiment free, as it means that it could be either a birthday card or a Father's Day card. I will stamp an appropriate sentiment when I use it. Can you see that I used the off-cut from the front at the bottom? The Basic Borders Dies give a stitched feature on both sides of the cut edge, so it was an easy task to add the off-cut to the inside.

It's time now to head on over to Cathy's blog, where you'll find the rest of this week's Sahara Sand links. I'm curious to see if anyone else had a hard time like me!

Bye for now,

Tina

Sunday, 11 April 2021

CTC 313: Favourite Retiring Stamp Set

 Hi!


Hello, and welcome to the new CASEing The Catty Sunday Challenge Blog Hop. Our challenges around this time of year are always a little sad, as we CASE products that are retiring from the Stampin' Up! lineup. Some products you're happy to wave goodbye to, as they've been around a while, but others you are left wishing for a little longer with them.


This week our focus is on retiring stamp sets. I'm losing about half of my collection this year. Some will shift shelves to my permanent collection, others will find a new home with someone else. The stamp set I've chosen today, Beautiful Friendship, is definitely a favourite of mine that may just find it's way into my permanent collection.


I selected this sample, from page 115, to CASE as I really liked the layering down the left hand side of the card. However, I rotated the design to flow down the right hand side of my card.

scissorspapercard, Stampin' Up!, CASEing The Catty, Beautiful Friendship, Itty Bitty Birthdays, Stitched Shapes Dies

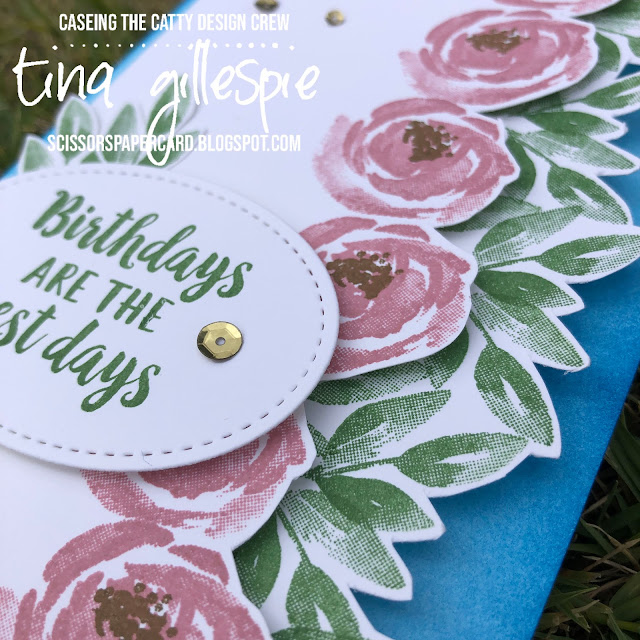
I started with a Thick Whisper White base, and stamped the Garden Green leaves down the right side of the front, making sure that they overlapped each other. I then fussy cut along the edge. I repeated this process for the Rococo Rose roses, on a separate piece of Whisper White cardstock.

scissorspapercard, Stampin' Up!, CASEing The Catty, Beautiful Friendship, Itty Bitty Birthdays, Stitched Shapes Dies

I used a Blending Brush to apply some Pacific point ink to the right side of the inside of the card, and the left side of the front of the card. I love how this gives the illusion that the blue is on one piece of card. The roses were then popped up over the top and the sentiment added.

scissorspapercard, Stampin' Up!, CASEing The Catty, Beautiful Friendship, Itty Bitty Birthdays, Stitched Shapes Dies

I'm not sure that I like the inside - it looks a bit unfinished. I'll probably go back and change it before I send the card.

What is your favourite retiring stamp set? It's soooo hard to choose! I hope that you can decide so that you can play along with us this week. Pop on over to our Facebook Group to check out all the action.


Before you go, though, please do finish our Blog Hop! Next up is my lovely friend, Rachel. I was lucky enough to spend some time with her when she visited SA recently.

Bye for now,

Tina