
Hi!

Thanks for joining me on a Sunday evening for the new CASEing The Catty Sunday Challenge Blog Hop. This week we are CASEing the colours of the Plaid Tidings DSP.

There are a lot of colours in the DSP, so there are plenty to choose from! I decided to go with some of the more jewel-like colours of Mango Melody, Melon Mambo, Rich Razzleberry and Pretty Peacock.

I created a template from a piece of Window Sheet by die cutting a couple of circles from the sheet. I used the retired Circles Dies, as the smaller circles were the size I was after. I then just used blending brushes to apply the ink to the cardstock through the template. It's really interesting how the colours interacted where they overlapped.

I cropped three of the 'birthday' dies, from my Well Written Dies, and stacked them to give them depth. I made sure I added a piece of Adhesive Sheet to the back of the Pretty Peacock cardstock before cutting so that I could layer them quickly and easily, without the fuss of liquid glue.
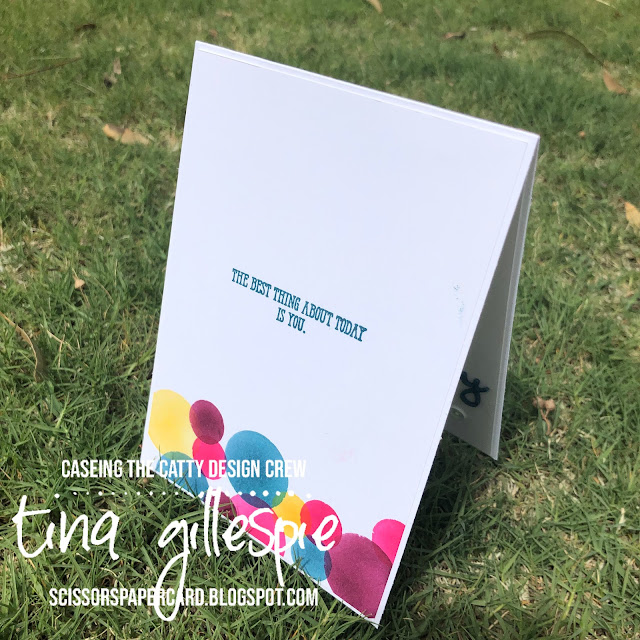
I created the inside at the same time as the front so that I didn't have to keep cleaning the template. I can be a really lazy (or is it efficient?) crafter at times! The stamped sentiments (both on the front and inside) are from Well Said.
EDIT: I was asked about the Window Sheet template that I'd made to use in the creation of my circles. I just used circle dies to cut holes in the Window Sheet, and then applied the ink through the openings. I then shifted the template to add more circles, cleaning between each colour that I used. I hope that helps to explain a little better!

Our weekly challenges are so easy to enter - you just need a Facebook account. Make your card, join our Facebook group if you haven't already done so, and add your photo to the group. Done! We'd love to see what you make each week for our challenges.

I'm officially the last stop on the blog hop this evening, but if you've started part way though you can go back to the start to see what the lovely Siobhan has made. If I'm the last stop for you, go get creating!

Bye for now,
Tina
Oh yes, the layered circles are glorious!! And I love the colour changes with the overlaps. I really must try your idea of the adhesive sheets rather than the glue - this is such a great tip!! Thankyou!!
ReplyDeleteI love this Tina! My first thought was to use heaps of circles but I was going to punch them and then didn't - but your sponged circles are perfect!! I may have to CASE you. Fab card inside and out :)
ReplyDeleteI love your choices of colours as well as how they change when overlapped! I love the layered birthday sentiment too.
ReplyDeleteCould you put a scan of the window sheet with the holes that you cut on your blog? I love this card and am having a difficult time trying to figure out how to do it myself. If I could see the stencil type thing you made it would be a big help. Thanks
ReplyDeleteThe inked circles really add a punch to your card. I love the colours. They are so bright and vibrant.
ReplyDeleteFabulous card, Tina! It's a simple, but really clever idea and I love the bright colour palette.
ReplyDelete