Pages

Wednesday, 19 August 2020

Colour Creations: Crumb Cake

Hi!


It's that time of week again - the Colour Creations Showcase! This week we are featuring everyone's favourite Neutral, Crumb Cake. Well, It's certainly my favourite Neutral!

I've been toying with the idea of doing a sort of sepia toned card for a couple of months now, and this seemed like the perfect opportunity to play.

scissorspapercard, Stampin' Up!, Colour Creations, Bloom and Grow, Blossoms In Bloom, Ornate Layers Dies, Stitched Rectangles Dies, Subtle 3DEF, Stampin' Blends, Neutrals DSP, Chalk Marker

I started by stamping the floral image from Bloom And Grow in Memento ink on Crumb Cake cardstock. I tried Crumb Cake ink, but I just couldn't get it to work. I then coloured the image with my Light and Dark Stampin' Blends. I have to say that I was pleasantly surprised with how well the Crumb Cake cardstock stood up to the colouring that I did with the markers. I then used my Chalk Marker to add some highlights to the berries and to outline the image so that it popped from the page. I wish I had the confidence to add some more highlights to the flowers with the Chalk Marker. A good excuse to play with the technique some more!

scissorspapercard, Stampin' Up!, Colour Creations, Bloom and Grow, Blossoms In Bloom, Ornate Layers Dies, Stitched Rectangles Dies, Subtle 3DEF, Stampin' Blends, Neutrals DSP, Chalk Marker

The Whisper White card base was stamped with the same floral image in stamped-off Crumb Cake. I then ran it through my Big Shot twice using the Subtle 3DEF, once in each direction. The main image was cropped using a die from the Ornate Layers Dies.

scissorspapercard, Stampin' Up!, Colour Creations, Bloom and Grow, Blossoms In Bloom, Ornate Layers Dies, Stitched Rectangles Dies, Subtle 3DEF, Stampin' Blends, Neutrals DSP, Chalk Marker

The sentiments on this card are both from the Blossoms In Bloom stamp set.

I had a lot of fun with the sepia effect. I think it would look great with larger floral images, like Ornate Style, or the large sunflower stamp (I forgot the name!). Hopefully I get a chance to try it out.

The links to the rest of this week's Crumb Cake cards can be found at the lovely Catherine's blog. She does a wonderful job of hosting the Showcase each week.

Bye for now,

Tina

Monday, 17 August 2020

Heart Of Christmas: August

Hi!


Welcome to August's Heart Of Christmas Showcase! The Art With Heart team are participating in a Monthly event in the lead up to Christmas. It's never too early to start on our Christmas cards, and so we hope we can inspire you to get creating!

This month I have a group of four cards that were once again inspired by my friend, Rachel Palmieri. She's been amazing at getting out of her comfort zone and doing Facebook videos, and I saw this technique in one of her videos.

scissorspapercard, Stampin' Up!, Heart Of Christmas, Brightly Gleaming SDSP, Joy Dies, Painted Labels Dies, Subtle 3DEF, Christmas Card

Basically, you take a 6 inch (15cm) square piece of DSP (non-directional is best), and measure in about 1 3/4 inch (3-4cm) from each side. You then cut the piece in half twice, from mark to mark, skipping one mark. You end up with four pieces of DSP that are a fun shape, ready to glue onto a card base. I went one step further and cut some cardstock the same way (but slightly bigger) to matt the DSP.

scissorspapercard, Stampin' Up!, Heart Of Christmas, Brightly Gleaming SDSP, Joy Dies, Painted Labels Dies, Subtle 3DEF, Christmas Card

I embossed the Thick Very Vanilla card base with my Sublte 3DEF before gluing on the DSP. I then used my Painted Labels and Joy Dies to create the sentiment panel. The label was cut from Copper Foil, which matches the DSP. I cut the word 'Joy' from the inside of the label, where I knew it would be covered by the layered die cuts. You can see that on the inside I used a little strip of the same DSP and Pretty Peacock cardstock as decoration.

scissorspapercard, Stampin' Up!, Heart Of Christmas, Brightly Gleaming SDSP, Joy Dies, Painted Labels Dies, Subtle 3DEF, Christmas Card

The best part about this cutting method is that, for not much more effort than it would take to make one card, you get four cards! It's a great way to boost your card stash very quickly. I will certainly be trying it with other papers. This paper is the gorgeous Brightly Gleaming SDSP, which has carried over from last year's Holiday Catalogue.

Tat's all from tonight, but please do pop on over to my lovely friend, Judy's blog, where you can find the rest of this month's cards.

Bye for now,

Tina

Sunday, 16 August 2020

CTC #281: CASE The Punch Bundles

Hi!


Is it just me, or did this weekend go by super quickly? I had a busy day yesterday, sewing the backing for a quilt for my son, Alex. It's all packed up, ready to go off to the quilter now. Today I decided to have a lovely relaxing day reading on the lounge. So relaxing, the I nearly forgot to write this blog post! I've started it with 40 minutes until it is due to go live. Oops!


This week the CASEing The Catty Sunday Challenge are looking at the Punch Bundles section of the Annual Catalogue, which is on pages 168 and 169. I settled on this gorgeous floral card fro the bottom of page 169.


My friend, Rachel Palmieri has made a few cards lately with the Bloom and Grow bundle, which had me itching to pay with mine again. This was the perfect opportunity.

scissorspapercard, Stampin' Up!, CASEing The Catty, Peaceful Blooms, Bloom and Grow, Subtle 3DEF, Budding Blooms Dies, Stitched Shapes Dies, Stampin' Blends, Banners Pick A Punch, Champagne Foil

I started with a Thick Whisper White card base, and used my paper trimmer to score two lines at the top and bottom of the card. I then used a blending brush to apply some Pool Party ink to the space in between, but only in the centre, under where the flowers were going to sit.

scissorspapercard, Stampin' Up!, CASEing The Catty, Peaceful Blooms, Bloom and Grow, Subtle 3DEF, Budding Blooms Dies, Stitched Shapes Dies, Stampin' Blends, Banners Pick A Punch, Champagne Foil

The flowers were colour with Stampin' Blends, but just straight colouring. I wasn't in the mood for fancy blending, so I didn't! I used Purple Posy, Petal Pink, Highland Heather, Pear Pizzaz and So Saffron, and then went around the edge with Pool Party. I went for softer colours than I usually use, but I really liked how it turned out. A bit of Champagne Foil and some Champagne Rhinestones finished off the front.

scissorspapercard, Stampin' Up!, CASEing The Catty, Peaceful Blooms, Bloom and Grow, Subtle 3DEF, Budding Blooms Dies, Stitched Shapes Dies, Stampin' Blends, Banners Pick A Punch, Champagne Foil

I stamped and coloured the inside of the card at the same time as I coloured the front. I realised about half way through that the alcohol ink would probably show through to the back. Thankfully my decision to use straight colours rather than blending meant that the ink didn't bleed though. Phew!

Our challenge is hosted through our Facebook group. It's easy to join, and then you can add your photo to the group for the week's challenge.


That's all from me tonight. I have about 50 pages left in my book, so I'm off to finish that! But I'd love for you to finish the Blog Hop, starting with the wonderful Peta. She's been in Christmas card mode! I wonder what Marvi thinks of that?


Bye for now,

Tina
Thursday, 13 August 2020

JAI #518: Just Add T

Hi!


Yay for Friday and the new Just Add Ink challenge. This week it's one of my Alphabet challenges, and the letter selected for this week is T.
I recently received a stamp set from Kindred Stamps that I have been wanting for a long time - Strong Maiden. I used it to make a Triple Easel Card for my sister's birthday. I'm a bit ashamed to say that her birthday was back in March - that's how long I've been waiting for the stamp! She's a big fan of the TV show that this stamp is a homage to.
scissorspapercard, Stampin' Up!, Kindred Stamps, Just Add Ink, Strong Maiden, In Good Taste DSP, Rainbow Builder Dies, Stampin' Blends
I started by using my cloud template to create the stormy clouds on the back piece of the card. I used Smokey Slate ink and a blending brush. The next two sections were created using the In Good Taste DSP. I used my blending brush to apply Early Espresso ink to the DSP, as it was far too white for the look I was after.
scissorspapercard, Stampin' Up!, Kindred Stamps, Just Add Ink, Strong Maiden, In Good Taste DSP, Rainbow Builder Dies, Stampin' Blends
The footpath was hand drawn and coloured using my Smokey Slate Stampin' Blends. I added another little homage to the TV show - a hidden sentiment!
scissorspapercard, Stampin' Up!, Kindred Stamps, Just Add Ink, Strong Maiden, In Good Taste DSP, Rainbow Builder Dies, Stampin' Blends
Here you can see how the card lays flat for posting. Starting with the front section, you just lay each one down flat. Easy! This sentiment is also a little hidden when the card is open, but it adds a little weight to hep the easel part of the card sit nicely.
scissorspapercard, Stampin' Up!, Kindred Stamps, Just Add Ink, Strong Maiden, In Good Taste DSP, Rainbow Builder Dies, Stampin' Blends
The base of the card is the best place for writing a message. I decorated it with another character from the TV show. I hope my sister loves the card, and forgives me for it being so very late!

That's all from me for now, please pop on over to the Just Add Ink blog, where you can find the rest of this week's T cards. What will you make? You can use a technique, stamp set, colour, theme, embellishment - anything as long as it starts with T! I can't wait to see what you make.

Bye for now,

Tina

August Creative Showcase: Rainbows

Hi!


With all that’s happening worldwide at the moment the Art With Heart Team are here with a Rainbow Creative Showcase to brighten your day. Every month the talented ladies share their inspirational ideas in a monthly Showcase and this month our projects are inspired by Rainbows.


I recently cracked open my new Stitched Triangles Dies, and have been having a wonderful time playing with them ever since. I decided that I could quite easily use them to create my rainbow for tonight's Showcase.

scissorspapercard, Stampin' Up!, Art With Heart, Creative Showcase, Stitched Triangles Dies, Stitched Shapes Dies, Beautiful Friendship, Itty Bitty Birthdays, Rainbow Card
I used the largest isosceles triangle die to cut tow triangles in Poppy Parade, Daffodil Delight, Pacific Point, Granny Apple Green and Gorgeous Grape. I decided upon my focal point and then glued the triangles onto a piece of Basic Black cardstock, cut slightly smaller than my card base. I was aiming for rainbow order, but my daughter pointed out that I got blue and green the wrong way around. Oops!
scissorspapercard, Stampin' Up!, Art With Heart, Creative Showcase, Stitched Triangles Dies, Stitched Shapes Dies, Beautiful Friendship, Itty Bitty Birthdays, Rainbow Card
The sentiment is from Beautiful Friendship, and was stamped in Memento Tuxedo Black so that it didn't compete with the colour on the rest of the card. The ribbon was added to try to hide the evidence that I didn't quite line up the triangles correctly!
scissorspapercard, Stampin' Up!, Art With Heart, Creative Showcase, Stitched Triangles Dies, Stitched Shapes Dies, Beautiful Friendship, Itty Bitty Birthdays, Rainbow Card
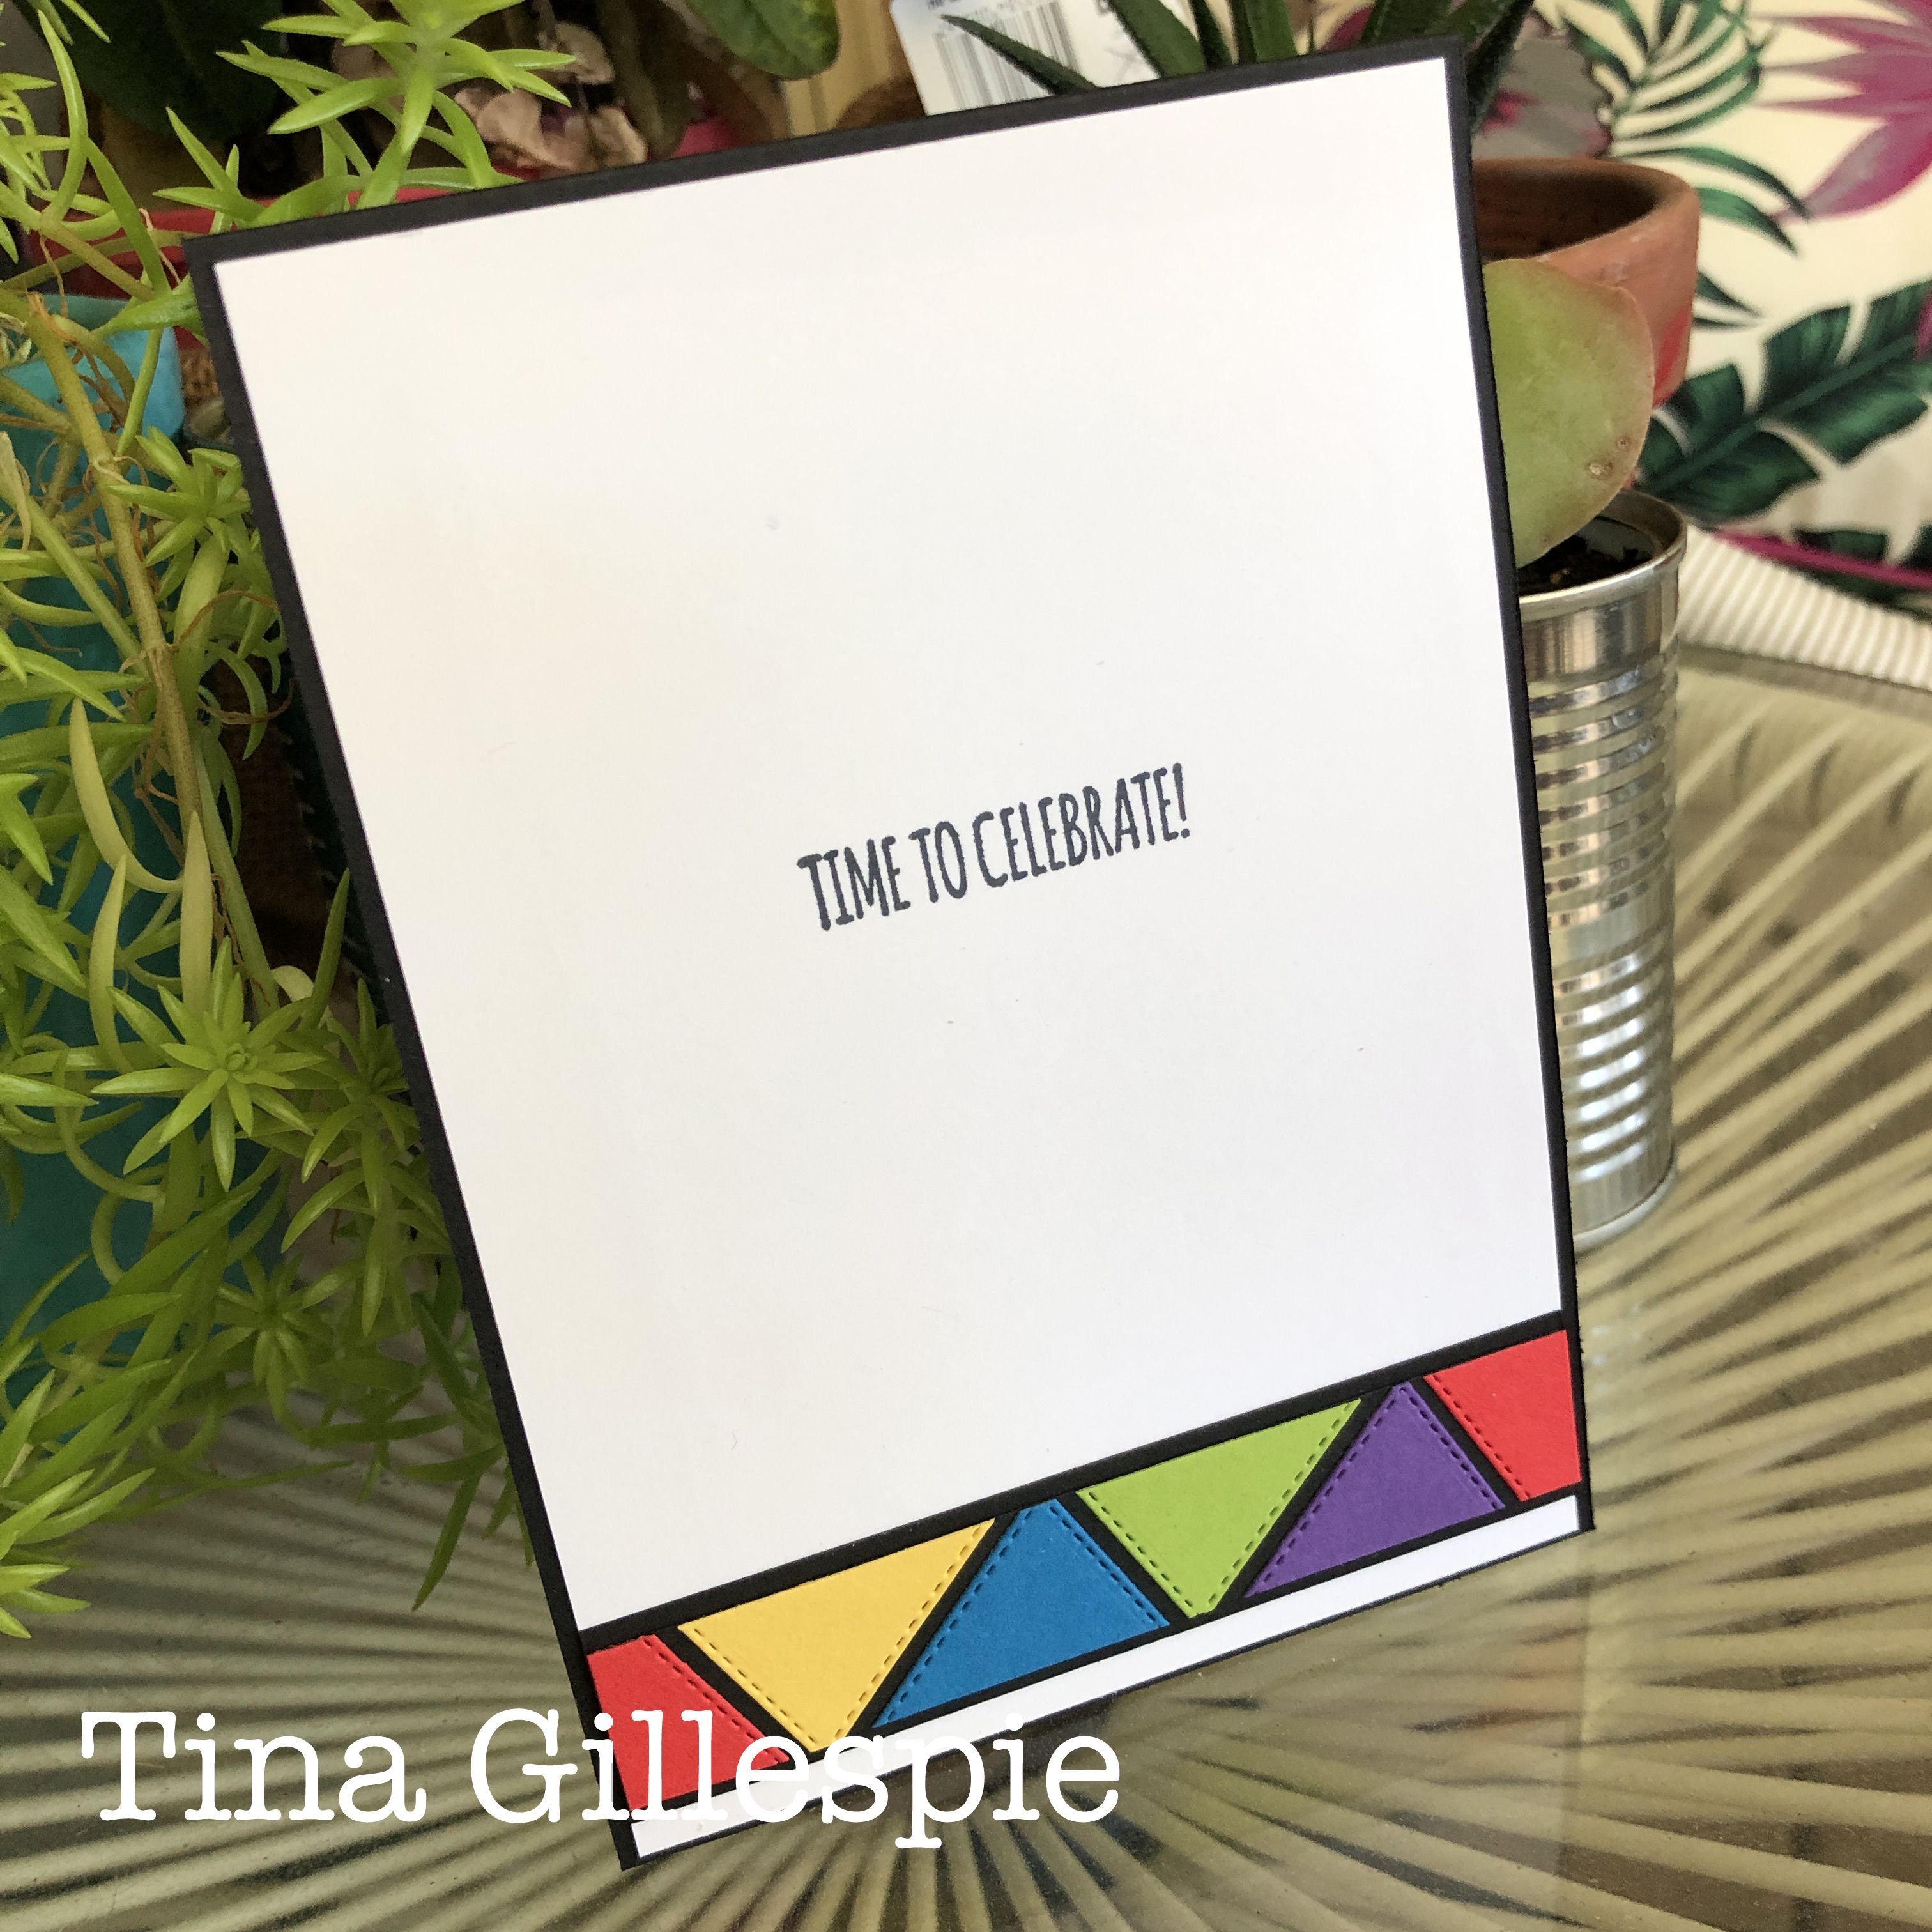
I used the offcuts from the front of the card to create the little strip along the bottom of the inside. I was quite pleased with how that bit turned out! The sentiment here is from Itty Bitty Birthdays.

The next stop on the Rainbow Tour is the lovely Vicki Boucher. LOL, now I have the Evita soundtrack playing in my head!


If you have a broken link or have come to this blog hop midway, you can view all the participants below:


Rachel Woollard

Tina Gillespie

Vicki Boucher

Sharon Davern

Ros Davidson

Catherine Proctor

Caroline Manwaring

Michele Taylor


Bye for now,


Tina

Wednesday, 12 August 2020

Colour Creations: Coastal Cabana

Hi!


It's time once again for this week's Colour Creations Showcase. This week we are up to Coastal Cabana, the second of the Brights in the alphabetical order list of colours. It's a colour that I love, so I was excited to see it pop up in the list.
scissorspapercard, Stampin' Up!, Colour Creations, Beautiful Moments, Poppy Moments Dies, Stitched Rectangle Dies, Subtle 3DEF, Faux Mother Of Pearl
I recently participated in an ATC swap, where we used the Faux Mother Of Pearl technique. I quite enjoyed doing my ATC, and thought that Coastal Cabana was the perfect colour for the technique. Basically, you use scrunched up plastic wrap to 'pounce' Frost White Shimmer Paint over your cardstock and then, once dry, use a Sponge Brayer to apply your chosen ink over the top. You can see the gorgeous shimmer better in the next photo.
scissorspapercard, Stampin' Up!, Colour Creations, Beautiful Moments, Poppy Moments Dies, Stitched Rectangle Dies, Subtle 3DEF, Faux Mother Of Pearl
The poppy was cropped from Whisper White card using the Poppy Moments Dies. To colour the solid layer I laid the outline die over the top and watercoloured each of the petals individually. I coloured quickly and didn't try to be too neat as I like the messy look.
scissorspapercard, Stampin' Up!, Colour Creations, Beautiful Moments, Poppy Moments Dies, Stitched Rectangle Dies, Subtle 3DEF, Faux Mother Of Pearl
On the inside I used a trick learned from my wonderful friend, Judy May. I deliberately made my Faux Mother Of Pearl Panel larger than I needed for the front so that I could use the offcuts on the inside. I made sure that when I cut the piece for the front I cut it from the centre of the panel. I then just inset a second piece of Whisper White, cut with the same sized Stitched Rectangle Die, for the inside of my card. A smaller poppy finishes it off nicely.

That's all from me tonight. The lovely Catherine is once again hosting the Showcase, so you can find the links for the rest of our Coastal Cabana cards over on her blog.

Bye for now,

Tina

Sunday, 9 August 2020

CTC #280: CASE The Cover Of The Aug-Dec Mini Catalogue

Hi!


It's time once again for the new CASEing The Catty Sunday Challenge Blog Hop. The new August-December Mini Catalogue went live to customers this week, and so we chose to CASE the cover of the catalogue for our first challenge.
There's so much inspiration to be found! You could CASE the colour scheme, one of the cards, or take elements from a few. Turn a card into a tag, or a tag into a card - the possibilities are endless!

I chose this card on the far right of the cover to CASE. I liked that the whole front was covered in DSP, and that the die cut layer under the bells butted up to the edge of the card.
scissorspapercard, Stampin' Up!, CASEing The Catty, Peace & Joy Bundle, Heartwarming Hugs DSP, Stitched Nested Labels Dies, Glimmer Paper, Christmas
I don't have the DSP used on the front, but I do have the Heartwarming Hugs DSP. The paper I used on my card today is one of my favourites in the pack. It's not a really obvious Christmas pattern, but a pretty one nonetheless.
scissorspapercard, Stampin' Up!, CASEing The Catty, Peace & Joy Bundle, Heartwarming Hugs DSP, Stitched Nested Labels Dies, Glimmer Paper, Christmas
I used the largest Stitched Nested Labels Die as my base and the Peace & Joy bundle to decorate it. Sadly, the Red Glimmer Paper is retired, but I can't help using it on my Christmas cards. How lovely is the Gold Trim? It's from the Forever Greenery Trim Combo pack. The ends fray very easily - but I think that's meant to be a feature. I like it!
scissorspapercard, Stampin' Up!, CASEing The Catty, Peace & Joy Bundle, Heartwarming Hugs DSP, Stitched Nested Labels Dies, Glimmer Paper, Christmas
I stamped the smaller of the stylised star images on the front, and carried it over to the inside. The two greens in the DSP are Pear Pizzazz and Mossy Meadow, so I stamped some in each colour and then added some Red Glimmer Paper to the centres.

As always, we'd love for you to join in with the fun by creating a card for our challenge. Just join our Facebook group, if you haven't already, and then add your card to the group. Easy!


In the meantime though, don't forget to continue on with the Blog Hop. Next up is Michelle, with a very clever card that I absolutely adore!


Bye for now,

Tina