Pages

Friday, 31 January 2014

JAI #200: Just Add Inspiration

Hi!

How are you all on this lovely Friday?  Have your children survived the first week back at school? Have you survived your children's first week back at school?  It can be a bit of a shock to the system after the lazy days of summer holidays!  How about trying the new Just Add Ink challenge to give you back your sanity?


Nikki found these gorgeous images to inspire our card making this week.  Wouldn't you just love to sit at that table and enjoy a cup of tea?


I saw this gift box and tutorial by Connie Collins a long time ago and have been meaning to try out the flower ever since.  This challenge seemed the perfect time.  Isn't it a beautiful flower?  It's not difficult to make at all, but it does take a while as you need to wait for it to dry.


This isn't a card you would want to post as the flower sits out quite a way from the card. Sending it in the post would squash that beautiful flower. Luckily I have plenty of friends I can hand deliver this card to.


I was a bit stumped as to what to do on the inside. I don;t have any daisy stamps, so I ended up stamping a leaf from Peaceful Petals and lightly coloured it with a blender pen.

Stamps: Field Flowers, Sassy Salutations, Peaceful Petals
Ink: Wild Wasabi, So Saffron
Cardstock: Pistachio Pudding, So Saffron, Wild Wasabi, Chocolate Chip, Whisper White
Other: Big Shot, Floral Frames Collection Framelits, Decorative Dots TIEF (SAB), Scribbles Swirls Sizzlit (retired), White Baker's Twine, 1 1/4" Circle Punch, 1" Circle Punch, Blender Pen

I hope you can join in this week at Just Add Ink, we'd love to see what you create.

Bye for now,

Tina

Thursday, 30 January 2014

CPC Challenge #31

Hi!

It's been a while since I entered a card challenge, so I thought it was time to do just that! The challenge is over at Craft Project Central and it's a lovely sketch challenge.


Isn't it a great sketch? Here's my take on it.


The washi tape is the new Retro Fresh designs from the Occasions Catalogue.  It's so lovely and bright, a great focal point for this card.


The Essentials Wooden Elements are also new in the Catalogue.  There are a heap of great shapes in the pack.  I just have to let myself use them rather than hoard them!


Of course I had to finish off the inside of the card to match the outside!

Stamps: Off The Grid, Teeny Tiny Sentiments, Make A Wish
Ink: Baked Brown Sugar, Tangerine Tango
Cardstock: Baked Brown Sugar, Whisper White
Other: Retro Fresh Designer Washi Tape, Essentials Wooden Elements, Star Punches (retired), Glue Dots

Bye for now,

Tina

Wednesday, 29 January 2014

Modern Medley Gift Box

Hi!

As a change from the cards I thought I'd show you a gift box I made to house a Secret Santa gift.  The recipient has guessed I was their Secret Santa, so I'm going to go ahead and show you the gift box as it won't ruin any surprise.  The idea for this box came from Shelli Gardner (CEO and founder of Stampin' Up!) herself - she showed us a similar project at the very first Convention I went to in 2011.


This gift box started life as a roll of packing tape.  Once I had used all the packing tape I kept the cardboard roll, thinking that it might come in handy one day.  I'm a bit of a hoarder of things like that!  The roll was a little tall for my purposes so I drew a line around it in pencil and then trimmed it down with a strong pair of scissors.  I then coloured the edges black using a permanent marker and covered the inside and outside with a layer of Modern Medley DSP.  A circle of Basic Black card stock was glued to the bottom and a second circle was scored and partly glued to the top to provide a lid.


I made the flower on the top from about 10 layers of Creped Filter Paper, held together with a black Glimmer Brad and then scrunched up.  It's such a pretty, soft flower.  I also tied a bow around the gift box with a length of 1/8" Basic Black Taffeta Ribbon.


Here is the box open.  I placed a small tub of lovely smelling hand cream inside it for my recipient.

I love upcycling, although I probably should do some more as my pile of things that might come in handy is getting quite big!

Bye for now,

Tina

Monday, 27 January 2014

One Final Christmas Card

Hi!

Today's post is a bit of a reminder that the current Holiday catalogue is about to end, and a lot of the products in it will be gone forever. You have until February first to place any orders.


The products I used on this card were some of my favourites from the Holiday Catalogue.  They include Colour Me Christmas stamp set, Christmas Messages stamp set and the Season Of Style DSP stack.


The design of this card came from a thank you card I received from a fellow Stampin' Up! Demonstrator, Angela Footit.  I liked how easy it was to recreate as a Christmas card.


Well, that's it for Christmas cards for now. I doubt I'll make any more for a while - I'm a bit Christmassed out!

Tomorrow the new Occasions Catalolgue begins, as does the Sale-A-Bration brochure. Sale-A-Bration is always exciting, but this year it's even better as the minimum spend requirement has been lowered.  You now only need to spend $90 to receive a freebie! There are lots of gorgeous freebies on offer.  You've seen some on my blog, and I will continue to post more in the coming weeks.

Bye for now,

Tina

Saturday, 25 January 2014

Layouts 3 and 4

Hi!

Are you ready for a bit more scrapbooking?  Today I have the third and fourth layout from my Paris album to show you.


We flew into Paris at dawn, but we were too excited (and knew better) than to sleep off the flight.  Instead we hit the streets and started exploring, trying to get our bearings in the city.  These photos are some of the first I took of things that interested us.  The photo of me was the first (and worst!) food I had on Paris - a hotdog.  Very different to ours as it was on a toasted baguette and not very nice.


One of the first monuments we saw was this statue dedicated to the memory of Jeanne d'Arc.  It was located in front of a ginormous church, a very beautiful one.  We stopped briefly to take some photos, but we were eager to see the Paris of travel brochure photos, so on we went.

I'll be back with some more layouts next Saturday.

Bye for now,

Tina


Friday, 24 January 2014

JAI #199: Just Add A Sketch

Hi!

It's Friday again, time for another Just Add Ink challenge.  This time it's a sketch, and it's one I designed for the team to use.


As I'd just received my preorder for Sale-A-Bration and the upcoming Occasions Catalogue I decided to have a play with some of the new products.


There's a few sneak peeks there!  Not long now 'til the catalogues go live and you can get your hands on this stuff too.


It's a bit hard to tell, but once I'd finished the front of the card I spritzed it all with some shimmer mist for a bit more 'pretty'.


There's that belated birthday stamp again!

I hope you can play along this week. Interpret the sketch as you will - it's just a guide for your creativity.

Bye for now,

Tina

Wednesday, 22 January 2014

A CASE of Myself

Hi!

Today's card was, as my blog post title says, a CASE of myself. You can see my original card here.


The central panel of this card was a left over from my original card.  It was too pretty to throw out, so I decided to build another card around it.


I went for a prettier look this time, rather than the more aged, vintage look on the original.


Bye for now,

Tina

Monday, 20 January 2014

Sanded Six Sided Sampler

Hi!

Try to say that blog post heading 5 times fast! lol

Today's card was made a little while ago as a thank you for a party hostess and her guests.


I'd had my eye on the Alphabet Press Embossing Folder since the start of the new catalogue, but it took me nearly 6 months to actually purchase it.  I'm glad I did in the end.


I teamed it with Six Sided Sampler and the Hexagon Punch for a feminine card.  I really like the pink/brown/vanilla combo on female cards.


Bye for now,

Tina

Saturday, 18 January 2014

Layouts 1 and 2

Hi!

A few years ago, after my friend Claire Daly challenged herself to scrap 100 layouts in a year, I decided to undertake the same challenge.  I made it by the skin of my teeth, but I did make it.  Since then I have scrapped a lot less, usually only for my Just Add Ink Scrapbooking commitments.  So this year I have decided to reignite the challenge - 100 layouts scrapped in 2014.  This is also part of a desire to scrap my trip to Paris, which was nearly 2 years ago now.

100 layouts works out to around 2 layouts a week.  I know it's achievable as I've done it before.  I have a bit of a headstart as for the past few days during the Adelaide heatwave I've got stuck in and completed 16 layouts.  I'll be showing you 2 or so a week, hopefully all year.


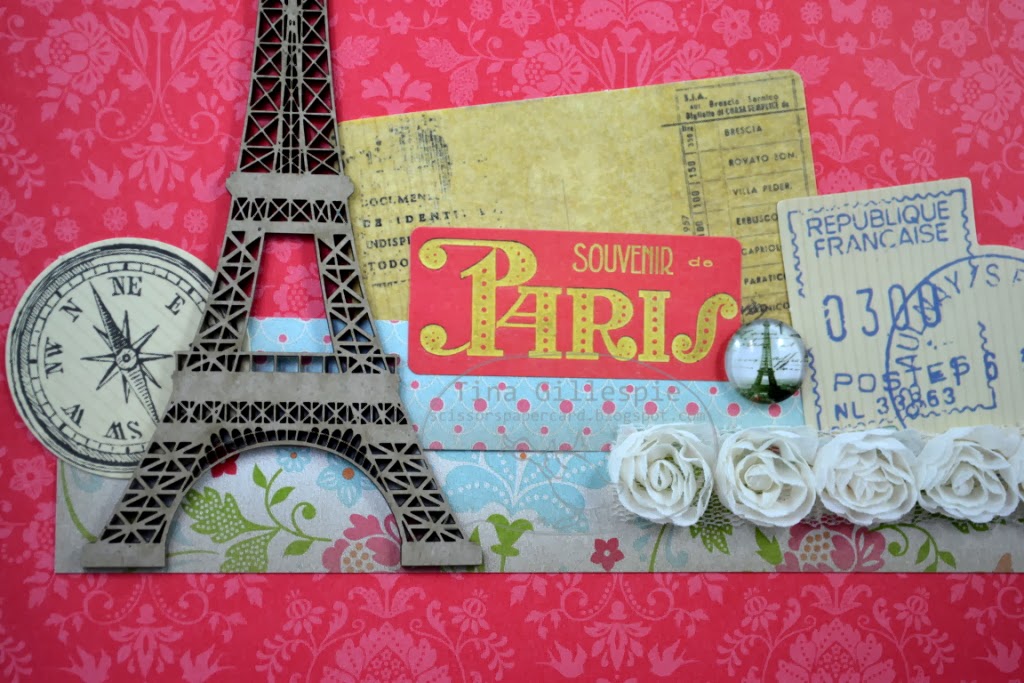
I decided to do a title page for the album rather than jumping straight in to the photos.  I've been collecting bits and pieces to complete this album even while we were in Paris.  I wanted to make this page pretty and elegant, as the beautiful city deserves.


The Paris sticker was actually purchased as a part of a set in the gift shop at Notre Dame.  Funny how you remember such little things!


The next page is actually a double of the journey to Paris. Saying goodbye to the kids in Adelaide, an eye opening visit to Changi Airport in Singapore and finally landing in Paris just before dawn.  For Rob and I both it was our first trip overseas and it was all very exciting and overwhelming.  I had to include the photos of Rob on the planes.  He wanted the window seats as he likes to look out as we are flying, but on the Adelaide to Singapore leg his 'window seat' was actually a wall seat!  He was not very impressed! Thankfully he got his window seat for the flight from Singapore to Paris.


I am using Stampin' Up!'s retired 12x12 divided page protectors for a lot of my album.  I'm finding it a great way to scrap this album as it seems to lend itself to travel scrapping quite nicely.  I'm beginning to realise that travel scrapping is very different to other scrapbooking.  Can't quite put my finger on it, but I think it's the storytelling aspect.

Bye for now,

Tina

Thursday, 16 January 2014

JAI 198: Just Add A Blog Hop!

Hi!

Welcome back to the start of challenges for 2014 at Just Add Ink. We are kicking off the year with a Blog Hop.


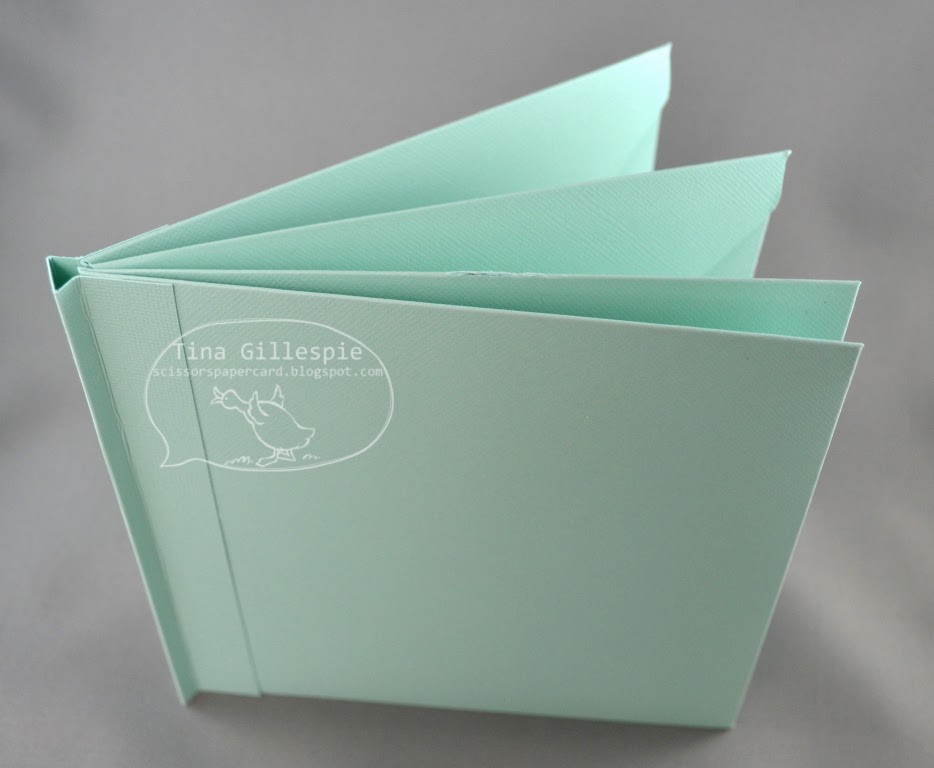
The theme of the blog hop, as you may have guessed, is the Envelope Punch Board and the Thinlints Dies.  You can use either, or both, in your creation.  I chose to use the Envelope Punch Board to create an Envelope Mini Album.


The album is full of photos of my daughter Ada and her BFFs (best friends forever).  I started off with four 6x6" envelopes created with the Envelope Punch Board and adhered them together to create the base of the album.


In the photo below you can see that not all of the envelope flaps were adhered down.  They are used as the basis of a pocket.


The middle pages ended up with two pockets.


The next few photos show the album decorated with DSP.  It's a bit of a sneak peek of the new Sale-A-Bration DSP.  It's so gorgeous!


Pretty, soft, feminine papers, perfect for little girls.


Here's the album fully decorated with the DSP.  Lots of cute patterns to choose from.


Here is a decorated page, showing one of the inserts from the pockets.  I ended up using a circle punch to create a little spot for your fingers to go to make it easier to pull out the insert page.


If you are keen to give this album a go, you can find the tutorial video here.

The next stop on the Blog Hop is the very talented Trish Rayfield.


Bye for now,

Tina


Wednesday, 15 January 2014

Melon Mambo Birthday Card

Hi!

Are you ready for some more Sale-A-Bration and Occasions Catalogues sneak peeks?


Hmm, what new things can you see? There are 2 new products used on the front of this birthday card that I made for my niece.


Here's a closer look at one of them! It's so cute - I just love it.


Here's the inside.  No sneak peeks here, just a blast from the past in Happiest Birthday Wishes.  I pretty much keep this set just for that one stamp, as I am often late getting birthday cards sent.

See you on Friday for the first JAI challenge of the year and some more sneak peeks!

Bye for now,

Tina
Monday, 13 January 2014

Thank You In Blue

Hi!

It's good to be back blogging again after a bit of a break over Christmas and New Year's.  I meant to be back a bit sooner, but school holiday play dates and illness scuttled those plans.  I received my preorder goodies from the upcoming Sale-A-Bration and Occasions Catalogues and I've been dying to have a play.  I finally found some time over the weekend.

Today's card was made on commission.  The brief was a thank you card for a girl who likes blue.


Look hard for the sneak peeks!  There's a new stamp set, DSP and twine.


The flower was stamped in Coastal Cabana and then given a very gentle wash with Pool Party using an Aqua Painter.  I say a very gentle wash because if you use too much water you're just going to end up with a blurry mess.  Ask me how I know!


Here's the inside with an old favourite, Sweet Essentials.  The orange cardstock is Tangerine Tango. Not colours I would have put together, but I really like the combo with the blues.

Bye for now,

Tina

Thursday, 2 January 2014

Just Add Ink Year In Review

Hi!

At Just Add Ink we are having a break from challenges for another couple of weeks.  Instead we thought we'd do a Year In Review post, where we have each chosen our favourite projects for the past year.  A very hard task to do!

After much thought I've chosen this card as my favourite.


I really loved the soft, vintage feel of the card.  A bit different to my usual style, but it's a style I enjoy dabbling in.  You can see the original post here, with more photos of the card.

Why don't you pop on over to the Just Add Ink blog to see the projects the rest of the team have chosen?

Bye for now,

Tina