Pages

Wednesday, 1 November 2017

AWH HOC Week 23

Hi!


Not many more weeks before Christmas now! I've been steadily building up my stash of Christmas cards - how about you?

scissorspapercard, Stampin' Up!, Art With Heart, Year Of Cheer, Merry Patterns

This week's card features the stamp set that was available on promotion for the last two months - I forgot that it would be retired by the time this post went live! It's called Merry Patterns, and included these candles, a reindeer and a fabulous set of sentiments.

scissorspapercard, Stampin' Up!, Art With Heart, Year Of Cheer, Merry Patterns

I've also used the Year Of Cheer DSP from the Holiday Catalogue. It features yardstick weight paper that has metallic designs. The sheet I selected had both gold and silver foil snowflakes, so I decided to use some plain gold and silver foil with it. Oh, and a Silver Foil Snowflake. I'm really loving them - I've nearly finished my second pack!

scissorspapercard, Stampin' Up!, Art With Heart, Year Of Cheer, Merry Patterns

I loved the look of the candles on the front with the foliage in front, so I repeated it on the inside. The foliage is a great way to hide the fact that you may not have lined up the second candle stamp very well!

Why don't you pop on over to Claire's blog, where you can find links to the cards that the rest of the team have made this week?

Bye for now,

Tina

Thursday, 26 October 2017

JAI #383: Just Add Cake

Hi!


Welcome back to another challenge this week at Just Add Ink. This week Chloe has challenged us to Just Add Cake to our cards.


Pardon the pun, but I thought this would be a piece of cake! Then I had a look through my stash..... Nothing! No cake related stamps, dies or punches. What?!? Thankfully the ole thinking cap was working well this week, and I eventually came up with the brilliant idea (if I do say so myself!) of making a cake topper.

scissorspapercard, Stampin' Up!, Just Add Ink, Happy Birthday Gorgeous, Eclectic Layers, Support Ribbon, 3D

I wanted to go with something ultra feminine and girly, so I decided that I'd start with pink and go from there. The Gold Glimmer paper adds a touch of glam to the topper, don't you think?

scissorspapercard, Stampin' Up!, Just Add Ink, Happy Birthday Gorgeous, Eclectic Layers, Support Ribbon, 3D

I love the look of the layered ribbon streamers at the base of the topper. I just selected a few different trims that worked well together, cut them the same length and then stapled them to the bottom layer of the topper. Too easy!

The topper was adhered to a long bamboo skewer using a strong glue. A second Powder Pink scalloped circle was glued to the back to hide the skewer.

scissorspapercard, Stampin' Up!, Just Add Ink, Happy Birthday Gorgeous, Eclectic Layers, Support Ribbon, 3D

I chopped off around a third of the skewer so that the topper didn't sit too high off the cupcake. I really hate wasting anything, so I decided I'd make a mini topper to go with the main one. I already had a couple of stars cut from the Gold Glimmer paper, so it was easy enough to make. Then I thought that two cupcakes looked a little lonely, so I made three more mini toppers. Now it looks like a party of cupcakes! My 12yo daughter Ada gave her tick of approval, so I guess I hit the mark!

The rest of the Design Team have come up with some cracking great ideas this week. You can see their cards over at the Just Add Ink blog, where you can also link up your Just Add Cake creation. Can't wait to see what you do!

Bye for now,

Tina

Wednesday, 25 October 2017

AWH HOC Week 22

Hi!

Welcome to Week 22 of The Heart Of Christmas.


This week I have another card for you that I've made by modifying a card from the Watercolour Christmas Project Kit. I've taken the Pool Party watercolour card base and chopped it up to create a new card. Well, you'd actually be able to get two cards from the one base.

scissorspapercard, Stampin' Up!, Art With Heart, Heart Of Christmas, Watercolour Christmas

I cut the card base in half, and then trimmed a half inch from the bottom. I stamped the piece with the trees from Watercolour Christmas. The trees were then coloured using my Wink Of Stella Pen.

scissorspapercard, Stampin' Up!, Art With Heart, Heart Of Christmas, Watercolour Christmas

I added some little scallops here and there on the card. I recently saw someone use a scalloped circle on top of a plain circle for their sentiment, so I decided to use the same look on this card. I love the effect it gives! I also used some Gold Metallic Enamel Shapes to finish off the front.

scissorspapercard, Stampin' Up!, Art With Heart, Heart Of Christmas, Watercolour Christmas

I used the half inch piece I trimmed from the front of the card to finish off the inside. A couple of Christmas trees and another row of tiny scallops ties the inside to the front of the card.

I've really enjoyed giving the old brain a bit of a work out by coming up with new ideas for the Watercolour Christmas Project Kit. You can see what the rest of the Art With Heart team have created over at Claire Daly's blog.

Bye for now,

Tina

Monday, 23 October 2017

Daisy Delight Bridge Card

Hi!

Have you jumped on the Bridge Fold card bandwagon yet? I have, and I had a lovely time making this card.

scissorspapercard, Stampin' Up!, Daisy Delight, Sunshine Sayings, Jar Of Love, Wood Textures DSP, Bridge Fold Card

Aren't those half daisies so cute?! You just punch one daisy in Whisper White, use a sponge dauber to add a bit of Daffodil Delight ink to the centre, snip through the middle of the daisy, and glue the two halves back together so that the petals overlap. Finally, you stamp, crop and adhere a flower centre to the middle of the daisy.

scissorspapercard, Stampin' Up!, Daisy Delight, Sunshine Sayings, Jar Of Love, Wood Textures DSP, Bridge Fold Card

I stamped a little jar with water on the back section of the front, and then sponged a little Soft Sky ink behind where the daisies sit. It really helps the white daisies to pop off the page.

scissorspapercard, Stampin' Up!, Daisy Delight, Sunshine Sayings, Jar Of Love, Wood Textures DSP, Bridge Fold Card

There's not a whole lot of room on the back of the card for a sentiment, so I kept my stamping simple.

scissorspapercard, Stampin' Up!, Daisy Delight, Sunshine Sayings, Jar Of Love, Wood Textures DSP, Bridge Fold Card

The best part about Bridge Fold cards is that they fold flat and still stay the correct size for an envelope. The recipient just needs to unfold the card for display. Too easy!

Bye for now,

Tina
Thursday, 19 October 2017

JAI #382: Just Add Colour

Hi!

I hope you've had a lovely week. We've had a few hot days here in Adelaide, and I've loved it! Bring on summer!


During the week, I also created a card for this week's Just Add Ink challenge. It's a colour combo this week, suggested by Patrice.


Isn't it lovely - the yummy neutrals with the pop of Fresh Fig.

scissorspapercard, Stampin' Up!, Just Add Ink, Oh So Eclectic, Timeless Textures, Jar Of Love, Soft Sayings, Eclectic Layers

There's lots of different bits and pieces on this card. Do you create like that, or do you stick to one stamp set? I do a bit of both. In this case I've stamped with the flourish from Timeless Textures, the flowers from Oh So Eclectic and the sentiment from Jar Of Love. Chuck in some vellum, Black Thread, silver sequins, some Pick A Pattern Washi tape and leaf dies from Eclectic Layers, and you have a card!

scissorspapercard, Stampin' Up!, Just Add Ink, Oh So Eclectic, Timeless Textures, Jar Of Love, Soft Sayings, Eclectic Layers

I coloured the flowers with my Fresh Fig ink pad and a Blender Pen. I wanted a heavy concentration of colour at the base of the flower, fading to a super pale shade near the tips of the petals.

scissorspapercard, Stampin' Up!, Just Add Ink, Oh So Eclectic, Timeless Textures, Jar Of Love, Soft Sayings, Eclectic Layers

I used a lot of the same elements on the inside, but I opted to leave out the black elements, as they dominated too much in the smaller space I was decorating.

This was such a fun colour combination. You can see what the rest of the team have created over at Just Add Ink. You can also link up your card there when you're ready.

Bye for now,

Tina

Wednesday, 18 October 2017

AWH HOC Week 21

Hi!

Are you ready for your weekly dose of Christmas inspiration with the Art With Heart team? If so, welcome to this week's The Heart Of Christmas post!


This week I have a card for you that was made using the Watercolour Christmas Project kit. I'm a big fan of this kit. You can stamp and assemble the cards as directed, and make 20 Christmas cards in a very short time, or you can do as I've done - have a play, make some cuts, and make many more cards using bits and pieces of the kit.

scissorspapercard, Stampin' Up!, Art With Heart, Watercolour Christmas Project Kit, Merry Patterns

For this card I chopped up one of the striped card bases to make the feature strip on my new card. To get a piece long enough, I had to chop it sideways across the card base, which meant that there was score line through the card. This was easily hidden under the sentiment panel,

scissorspapercard, Stampin' Up!, Art With Heart, Watercolour Christmas Project Kit, Merry Patterns

I took one of the gold foil envelope liners in the kit and chopped it up to make a mat for the sentiment. I love how it gives a bit of extra glitz to the card. The front was still looking a little plain, so I popped a gold Foil Snowflake under the sentiment. Problem solved!

scissorspapercard, Stampin' Up!, Art With Heart, Watercolour Christmas Project Kit, Merry Patterns

For this inside, I used another off cut from the chopped up card front to add a little strip at the bottom of the card. Once again, a piece of Gold Foil from the  envelope liner added the necessary glitz to the inside.

You can see what the rest of the Art With Heart ladies playing along today have created by popping on over to Claire's blog. You'll find all of the links there.

Bye for now,

Tina
Monday, 16 October 2017

A Beautiful Bouquet CASE

Hi!

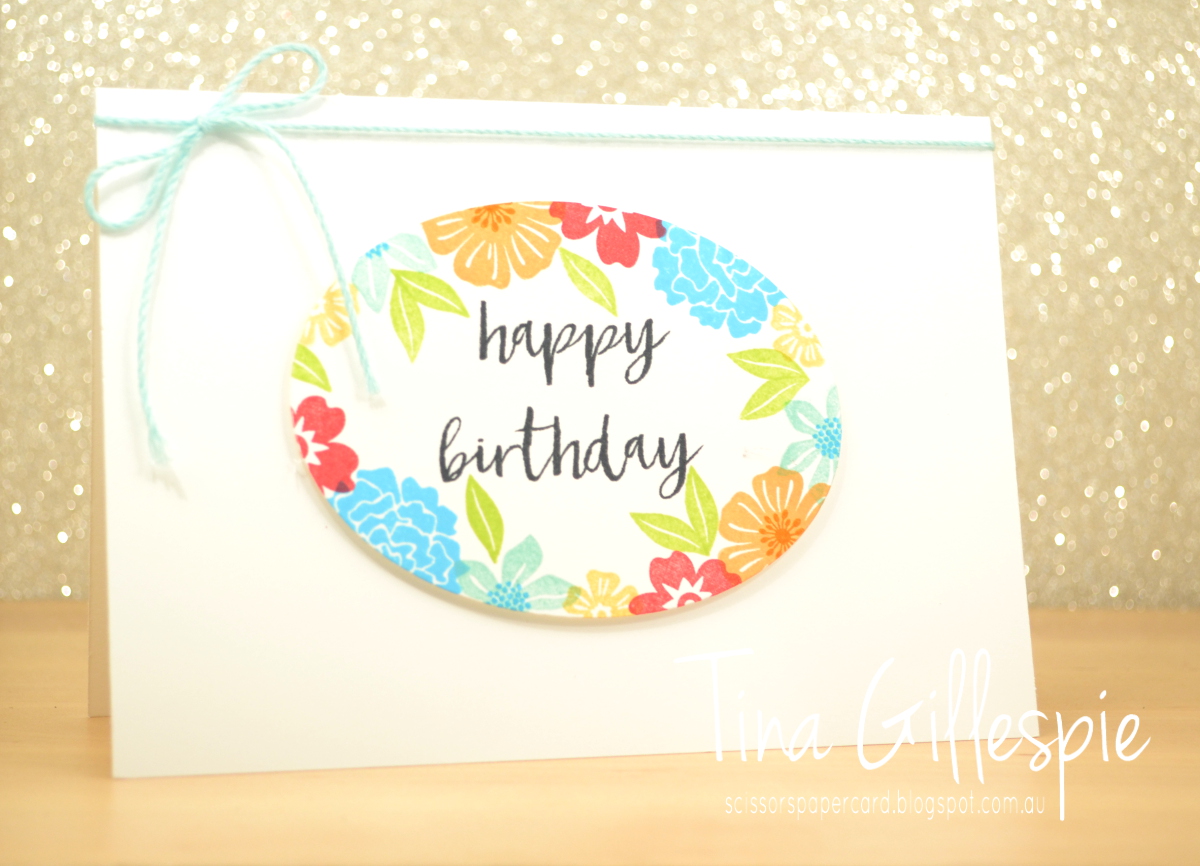
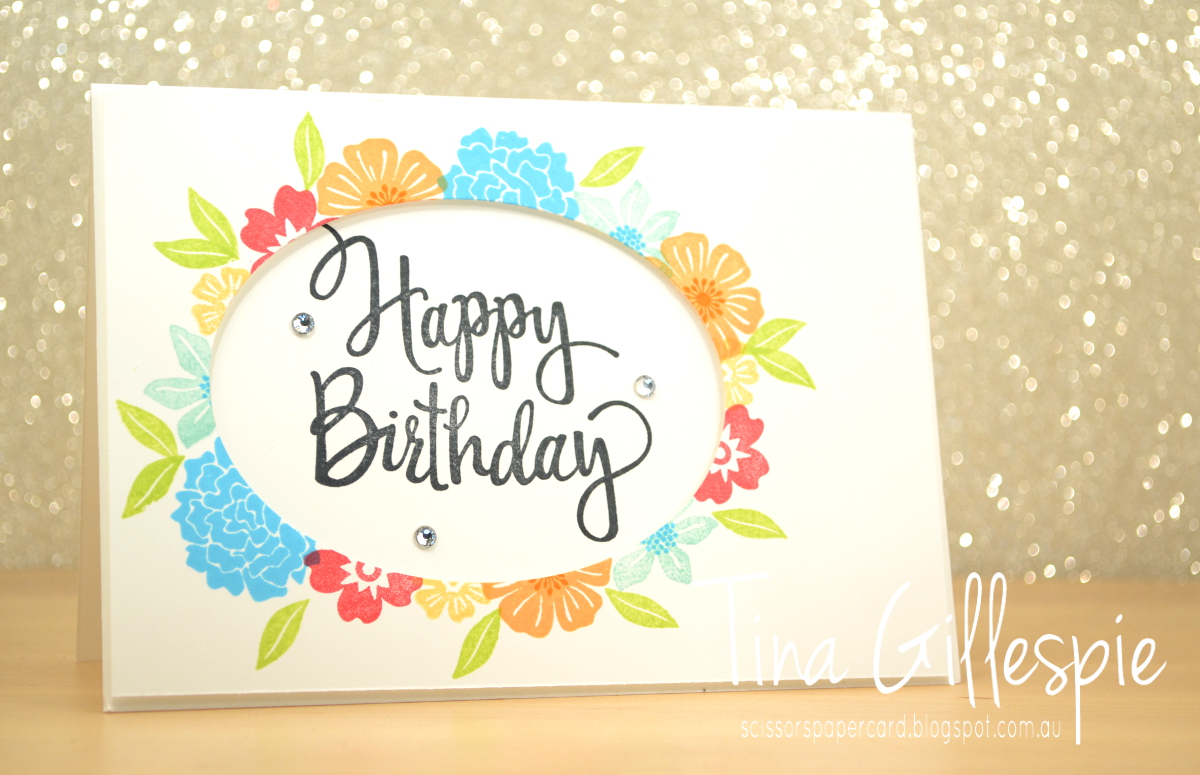
Today I have for you a fun set of cards that I CASEd from Leonie Schroder. I saw them on a demo Facebook group and thought they looked so fresh and fabulous - I just had to CASE them right away! Leonie CASEd the cards from Jennifer McGuire, who called it the Four From One technique.

scissorspapercard, Stampin' Up!, Beautiful Bouquet, Bunch Of Blossoms, Bloomin' Love, Milestone Moments, Stylised Birthday

Basically, you cut one card front and die cut a shape into it. Jennifer and Leonie used hearts, but I went for an oval.

scissorspapercard, Stampin' Up!, Beautiful Bouquet, Bunch Of Blossoms, Bloomin' Love, Milestone Moments, Stylised Birthday

You then need to cut four card bases. I cut them from Thick Whisper White, and cut two in landscape orientation, and two in portrait orientation.

scissorspapercard, Stampin' Up!, Beautiful Bouquet, Bunch Of Blossoms, Bloomin' Love, Milestone Moments, Stylised Birthday

You then adhere the two pieces from the card front to two of the card bases using temporary adhesive. In my case, this was the oval and the card front with the oval hole. Next, you stamp around the shape, making sure that half the stamp is on either side of the edge of the shape.

scissorspapercard, Stampin' Up!, Beautiful Bouquet, Bunch Of Blossoms, Bloomin' Love, Milestone Moments, Stylised Birthday

Once you've finished stamping, you carefully peel apart the layers. You should be left with two card bases that have been stamped, and tow pieces of card front that have also been stamped. On two pieces the stamping is on the outside of the oval, and on the other two, it's on the inside. All that's left to do is stamp the sentiments and assemble the two also cards. Oh, and embellish, if required.

scissorspapercard, Stampin' Up!, Beautiful Bouquet, Bunch Of Blossoms, Bloomin' Love, Milestone Moments, Stylised Birthday

I can't forget to stamp the insides either!

scissorspapercard, Stampin' Up!, Beautiful Bouquet, Bunch Of Blossoms, Bloomin' Love, Milestone Moments, Stylised Birthday

Here are the four cards together. If you look closely, you can see that the top and bottom card fronts were stamped together, and the two side cards were stamped together. It really is a super fun technique to try!

Bye for now,

Tina