Hi!
On Monday I showed you a card I'd made as a sample for a Masculine Cards class that I'd run recently. Here is one of the other cards we made at that class.
This card showed a great way to use up the multitued of little scraps of patterned paper you always seem to end up with. I just cut them to the same height and adhered them to a piece of backing cardstock. The widths don't matter, in fact I think different widths look better than uniform widths.
A bit tricky to see, but I scored some lines between the sentiment and the DSP panel. Scor
ing is a great way to add some interest to a card.
We used the Soda Pop Tops (now retired) to add a feature to the card. We stamped the compass from The Open Sea to go into the Soda Pop Top and then covered it with a layer of Crystal Effects. In hindsight I would have stamped it in a darker ink.
Bye for now,
Tina
Wednesday, 30 October 2013
Monday, 28 October 2013
Foil Embossing
Hi!
Today's card has some retired product on it, but I thought I'd show you anyway. It shows a great technique, and it was one we made in a Masculine Cards class a few months back.
Isn't the metallic background awesome? So simple too - it's just kitchen foil adhered to some cardstock and embossed in the Big Shot. Easy peasy!
Fabulous technique for male cards as it adds a really industrial look to the card.
Bye for now,
Tina
Today's card has some retired product on it, but I thought I'd show you anyway. It shows a great technique, and it was one we made in a Masculine Cards class a few months back.
Isn't the metallic background awesome? So simple too - it's just kitchen foil adhered to some cardstock and embossed in the Big Shot. Easy peasy!
Fabulous technique for male cards as it adds a really industrial look to the card.
Bye for now,
Tina
Friday, 25 October 2013
JAI #188: Just Add Grunge
Hi!
Here we go again!
This week at Just Add Ink the lovely Paula has challenged us to add grunge to our projects. Great! My Gorgeous Grunge stamp set has been getting a real workout lately. Luckily I love it so much!
I also used another grungy type stamp - Off The Grid - and paired it with an old favourite for male cards called The Open Sea.
The colour combination I used for the card was Soft Sky, Crumb Cake and Very Vanilla. Lots of sponging on the card, but the end result is lovely. Wait - can a grungy card be lovely? I know what is lovely - the new Burlap Ribbon from the Holiday Catalogue.
There you go! Will you play along at Just Add Ink this week? Give grunge a go - it's lots of fun!
Bye for now,
Tina
Here we go again!
This week at Just Add Ink the lovely Paula has challenged us to add grunge to our projects. Great! My Gorgeous Grunge stamp set has been getting a real workout lately. Luckily I love it so much!
I also used another grungy type stamp - Off The Grid - and paired it with an old favourite for male cards called The Open Sea.
The colour combination I used for the card was Soft Sky, Crumb Cake and Very Vanilla. Lots of sponging on the card, but the end result is lovely. Wait - can a grungy card be lovely? I know what is lovely - the new Burlap Ribbon from the Holiday Catalogue.
There you go! Will you play along at Just Add Ink this week? Give grunge a go - it's lots of fun!
Bye for now,
Tina
Wednesday, 23 October 2013
Happy Birthday Hudson!
Hi!
My not-so-baby boy turned 6 last month. Anyone discovered a magic formula for stopping them growing up yet??? The last year has flown by so quickly - he's been at school for a year now. Sigh...
If you're the parent/grand parent of a toddler you probably already know that this gorgeous creature is Little Charley Bear. Are you there Charley Bear? Hudson absolutely LOVES Charley Bear. We had two 9 hour drives during the holidays and Hudson watched his Charley Bear DVD the whole way. Yes, 9 hours straight of Charley Bear. Twice. So what else was I going to do but make him a Charley Bear card for his birthday?
To make Charley Bear I found this printable colouring page. I used the first one on the list. I saved the PDF and opened it in Photoshop where I cropped it to 6x4 inches. I then printed it twice, once on Very Vanilla and again on Soft Suede. I have a mini printer that prints 6x4 inch prints, so it was perfect. I then cut out the Vanilla bits and adhered them to the Soft Suede Charley. I had cut the paw print on his tummy from the Soft Suede bit, but the Soft Suede bits on his paws were just coloured with my marker. I was really pleased with how he turned out.
Lots of room on the inside for us all to write a lovely birthday message to the birthday boy. He loved his card.
Bye for now,
Tina
My not-so-baby boy turned 6 last month. Anyone discovered a magic formula for stopping them growing up yet??? The last year has flown by so quickly - he's been at school for a year now. Sigh...
If you're the parent/grand parent of a toddler you probably already know that this gorgeous creature is Little Charley Bear. Are you there Charley Bear? Hudson absolutely LOVES Charley Bear. We had two 9 hour drives during the holidays and Hudson watched his Charley Bear DVD the whole way. Yes, 9 hours straight of Charley Bear. Twice. So what else was I going to do but make him a Charley Bear card for his birthday?
To make Charley Bear I found this printable colouring page. I used the first one on the list. I saved the PDF and opened it in Photoshop where I cropped it to 6x4 inches. I then printed it twice, once on Very Vanilla and again on Soft Suede. I have a mini printer that prints 6x4 inch prints, so it was perfect. I then cut out the Vanilla bits and adhered them to the Soft Suede Charley. I had cut the paw print on his tummy from the Soft Suede bit, but the Soft Suede bits on his paws were just coloured with my marker. I was really pleased with how he turned out.
Lots of room on the inside for us all to write a lovely birthday message to the birthday boy. He loved his card.
Bye for now,
Tina
Labels:
Big Shot,
Birthday,
Simple Numbers Bigz Dies,
Technique
Monday, 21 October 2013
Baby Boy Cards
Hi!
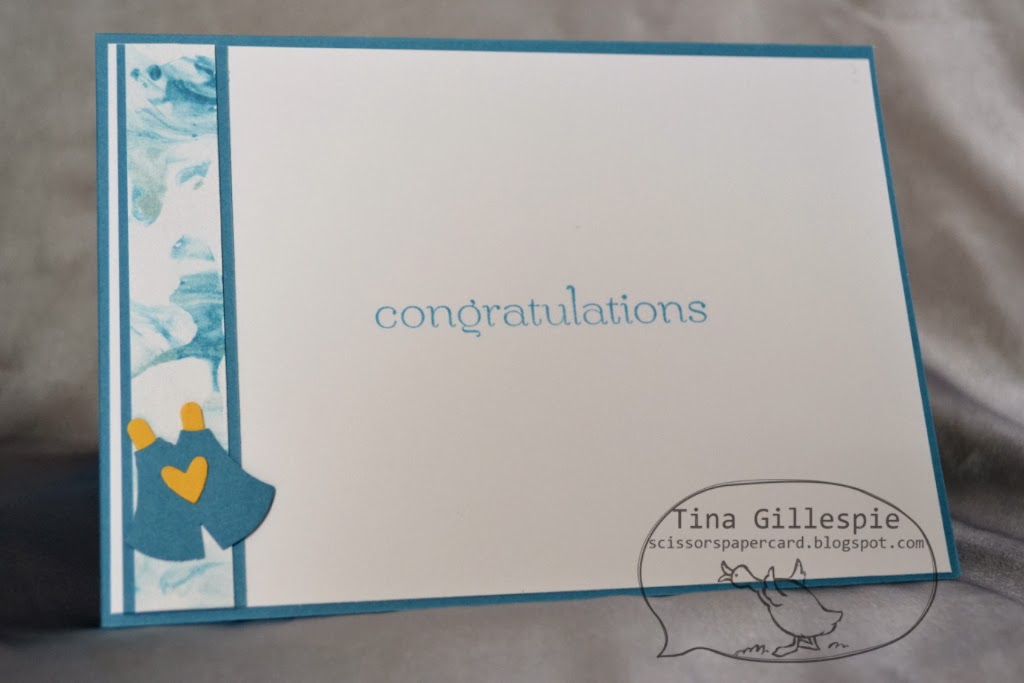
One of Rob's cousins had a baby boy recently and so Rob's mum asked me to make a congrats card for each of the great grandparents, granddad and parents of the new bubba. My stamping ladies had asked to do a technique this month so I decided to combine the two and make some cards using cardstock coloured using the shaving foam technique. It was so much fun!
I loved the swirly effect the shaving foam technique achieves. It reminded me of water so I used it as a base for a rubber duckie to swim on.
I think duckie looks pretty happy swimming around on the 'water'.
When you do the shaving foam technique, you don't just colour one piece of cardstock, you keep on going until you have exhausted your foam. The cardstock on the washing line card was the first one I tried and I didn't quite press it onto the foam enough, especially around the edges. I ended up cutting it a bit smaller to hide this fact.
Aren't the onesies cute - made using the breast section of the owl punch, as well as the little heart. The shoulder straps were made using a retired punch, but you could just as easily cut them by hand.
Can't waste any pieces - one of the better offcuts was used on the inside!
In case you are wondering I used Marina Mist and Soft Sky ink refills in the shaving foam and the cardstock I used on the cards was Marina Mist, Daffodil Delight and Whisper White.
Bye for now,
Tina
One of Rob's cousins had a baby boy recently and so Rob's mum asked me to make a congrats card for each of the great grandparents, granddad and parents of the new bubba. My stamping ladies had asked to do a technique this month so I decided to combine the two and make some cards using cardstock coloured using the shaving foam technique. It was so much fun!
I loved the swirly effect the shaving foam technique achieves. It reminded me of water so I used it as a base for a rubber duckie to swim on.
I think duckie looks pretty happy swimming around on the 'water'.
When you do the shaving foam technique, you don't just colour one piece of cardstock, you keep on going until you have exhausted your foam. The cardstock on the washing line card was the first one I tried and I didn't quite press it onto the foam enough, especially around the edges. I ended up cutting it a bit smaller to hide this fact.
Aren't the onesies cute - made using the breast section of the owl punch, as well as the little heart. The shoulder straps were made using a retired punch, but you could just as easily cut them by hand.
Can't waste any pieces - one of the better offcuts was used on the inside!
In case you are wondering I used Marina Mist and Soft Sky ink refills in the shaving foam and the cardstock I used on the cards was Marina Mist, Daffodil Delight and Whisper White.
Bye for now,
Tina
Friday, 18 October 2013
JAI #187: Just Add A Sketch
Hi!
Friday again!
I immediately saw a butterfly in the gap where the sentiment should be.
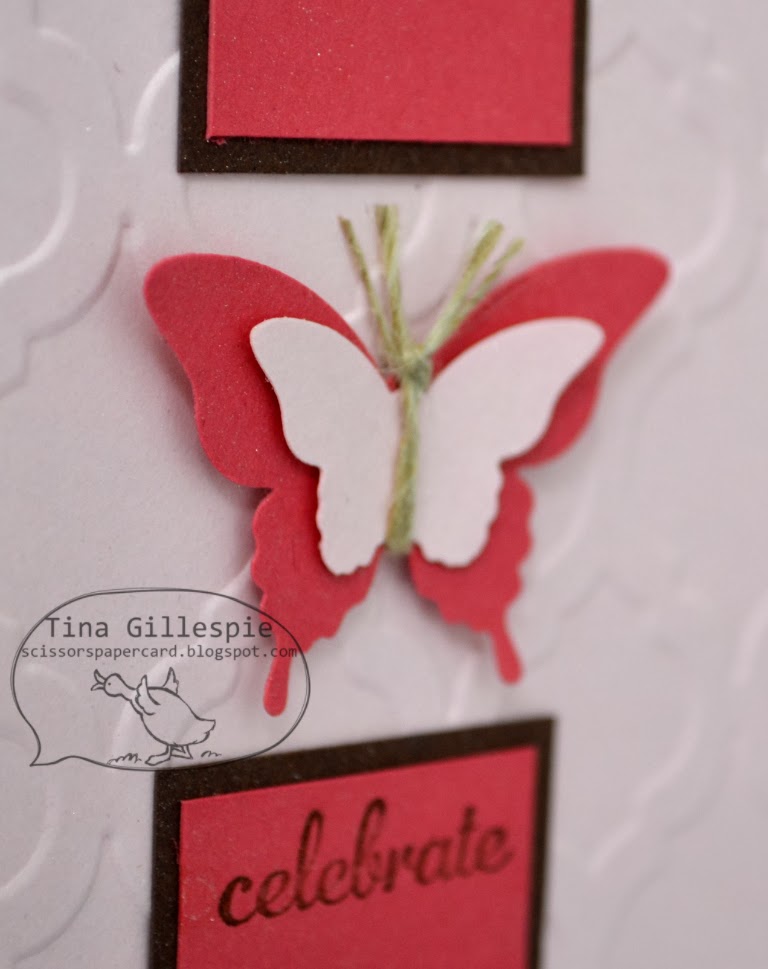
The butterfly was made by layering punchies from the two butterfly punches and then tying some linen thread around the bodies to create antennae. The whole thing was the popped up on a Dimensional.
The little sentiment from Express Yourself fit perfectly in the bottom panel, a very happy coincidence. I tend to cut first and think about these things after!
I punched some extra butterflies for the inside of the card. This time I split the Linen Thread into 3 sections, just to look a bit more delicate.
When I finished the card I spritzed the whole thing with some Isocol/Shimmer Paint mix. The recipient loves her bling, and I thought it was a lovely way to give the card a little glitz.
Stamps: Express Yourself (hostess), Memorable Moments
Ink: Chocolate Chip, Primrose Petals
Cardstock: Chocolate Chip, Primrose Petals, Pink Pirouette
Other: Big Shot, Modern Mosaic Embossing Folder, Elegant Butterfly Punch, Bitty Butterfly Punch, Linen Thread, Dimensionals, Champagne Mist Shimmer Paint (retired)
I hope you can play along this week with us at Just Add Ink.
Bye for now,
Tina
Friday again!
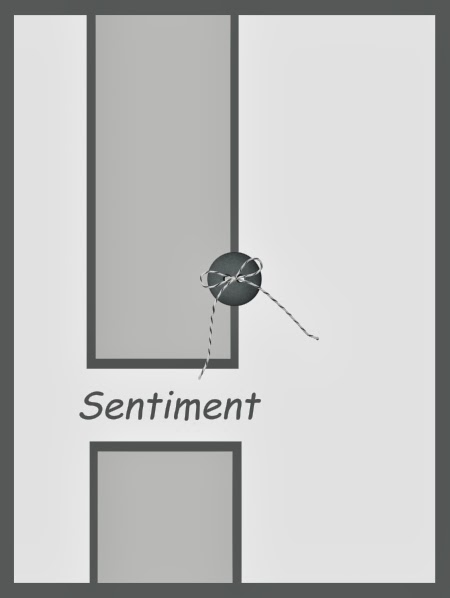
This week at Just Add Ink Paula has designed a fabulous sketch for us to use. It's a great sketch, and I'd imagine there are a heap of different ways to interpret it.
I immediately saw a butterfly in the gap where the sentiment should be.
The butterfly was made by layering punchies from the two butterfly punches and then tying some linen thread around the bodies to create antennae. The whole thing was the popped up on a Dimensional.
The little sentiment from Express Yourself fit perfectly in the bottom panel, a very happy coincidence. I tend to cut first and think about these things after!
I punched some extra butterflies for the inside of the card. This time I split the Linen Thread into 3 sections, just to look a bit more delicate.
When I finished the card I spritzed the whole thing with some Isocol/Shimmer Paint mix. The recipient loves her bling, and I thought it was a lovely way to give the card a little glitz.
Stamps: Express Yourself (hostess), Memorable Moments
Ink: Chocolate Chip, Primrose Petals
Cardstock: Chocolate Chip, Primrose Petals, Pink Pirouette
Other: Big Shot, Modern Mosaic Embossing Folder, Elegant Butterfly Punch, Bitty Butterfly Punch, Linen Thread, Dimensionals, Champagne Mist Shimmer Paint (retired)
I hope you can play along this week with us at Just Add Ink.
Bye for now,
Tina
Wednesday, 16 October 2013
A Quick Card Today!
Hi!
A quick and simple card for you today. I made it early on when the current Annual Catalogue was released. I love the Wildflower Meadow bundle - it's great to have on hand for simple, fast and effective cards.
I combined Crumb Cake with Baked Brown Sugar for this card - they work beautifully together for a tonal effect.
Sorry, I didn't photograph the inside before I wrote in it!!
Stamps: Wildflower Meadow, Label Love
Ink: Baked Brown Sugar
Cardstock: Very Vanilla, Baked Brown Sugar, Crumb Cake
Other: Big Shot, Wildflower Meadow Embossing Folder, Artisan Label Punch, Crumb Cake Seam Binding Ribbon, Dimensionals
Bye for now,
Tina
Subscribe to:
Posts (Atom)