Pages

Friday, 21 March 2014

JAI #207: Just Add A Sketch

Hi!

Once again, it's Friday and time for another Just Add Ink Challenge.  Don't we all love Friday!  This week Kim has designed a sketch for our papercrafting inspiration.


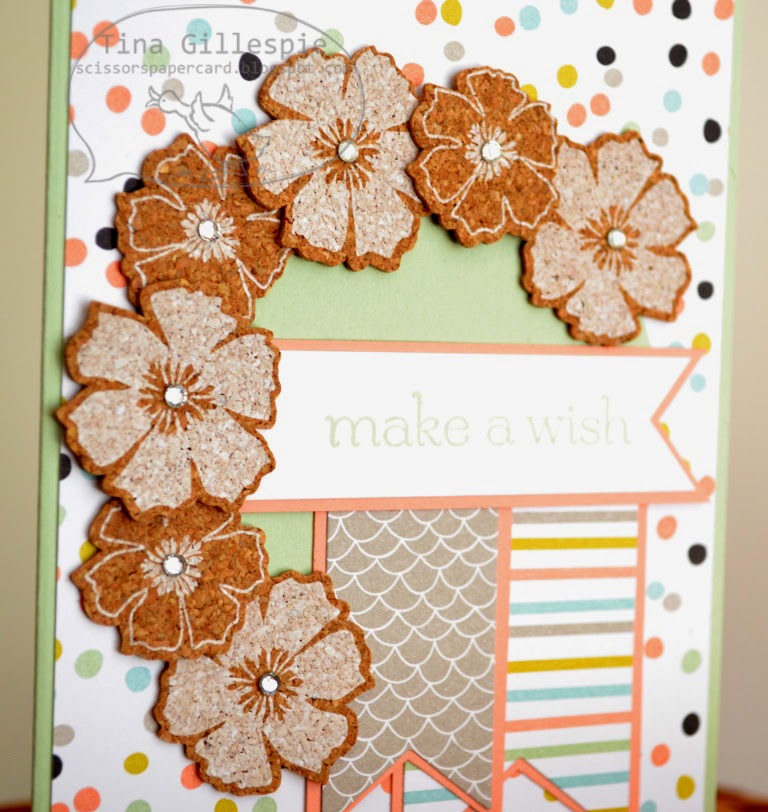
I have used a bit of creative licence with this sketch by rotating it 180 degrees and changing the tags to banners.  It's nice to shake things up sometimes!


This sketch also gave me the opportunity to use some of the cork flower stickers that are a Sale-A-Bration freebie.  Not much longer left to grab your freebies!


I really love the Sweet Sorbet collection.  I'm going to miss it when SAB is over.  I reckon I say that just about every year though!


I used another flower on the inside, I just cut it in half to make the most out of it.

How will you play with Kim's fabulous sketch this week over at Just Add Ink?

Bye for now,

Tina

Wednesday, 19 March 2014

Banner Birthday Card

Hi!

When I first got my SAB Banner Punch I had a bit of a play with it.  I didn't have the coordinating stamp set but I did have the Sweet Sorbet DSP, Embossing Folder and Twine.  Here's what I made.


I chose my cardstock colours based on the colours in the Sweet Sorbet DSP.  I really love that the DSP has a touch of Basic Black - I think it adds a touch of drama.  I double layered the banner punchies using Dimensionals to pop up the top layer.


The sentiment is stamped on a layer of vellum that is wrapped around the cardstock layer rather than adhered to it.  I love the way it gives a floating effect.


There's that belated stamp again.  It's really getting a workout this year.

Bye for now,

Tina

Monday, 17 March 2014

Superman Punch Art

Hi!

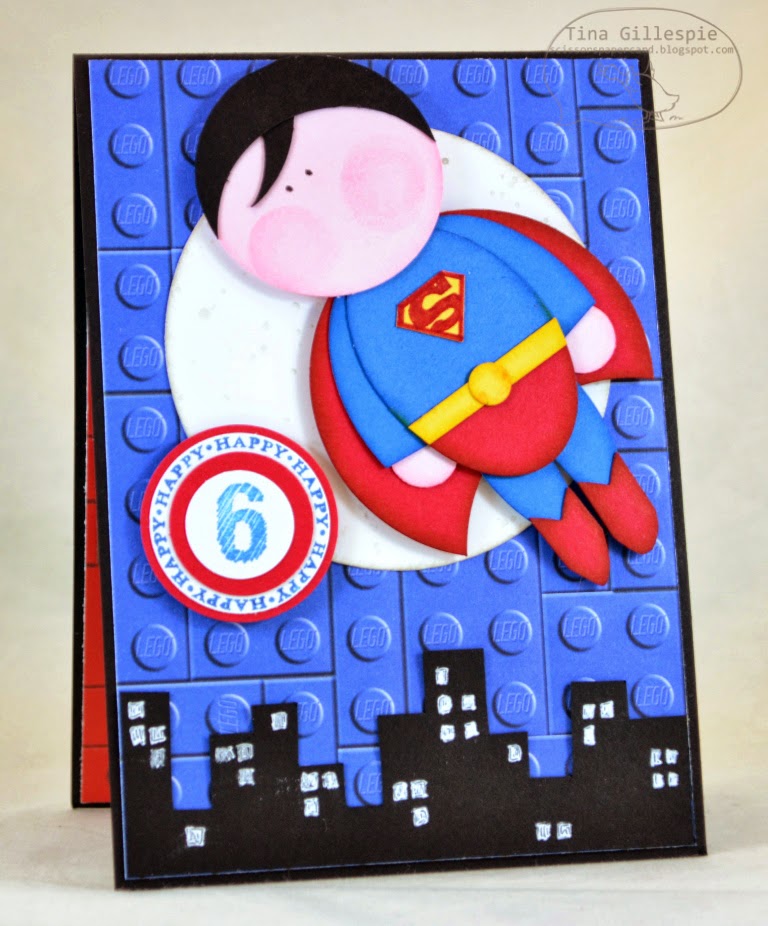
A couple of weeks ago we were invited to a very special little boy's 6th Birthday party.  He's right into superheroes (aren't most 6 year old boys?) and so the party had a superhero theme.  Of course I had to make a card to suit the theme.  After scouring the 'net for ideas I found this card by Caroline Bennie with the most perfectly cute Superman.


The Lego paper was from my stash, and I'd stuck it down before I realised that a blue Superman on a blue background was probably not going to work too well.  My solution was to make the moon for Superman to fly past.


I used a Circles Collection Framelit to cut the circle and then stamped it lightly with the small splatter stamp from Gorgeous Grunge.  I was trying give the effect of the craters on the moon.  I then created a cityscape by cutting the Basic Black cardstock to replicate buildings and using my white gel pen to add in some lights in windows.


I finished off the inside with a couple more scraps of Lego paper.  The birthday boy loved his card I'm pleased to report. Oh, and thanks to my hubby Rob for creating the logo for the front of Superman's costume.  He's a bit of a superhero nerd so I think he was the best person for the job.

Bye for now,

Tina

Sunday, 16 March 2014

Layouts 15 & 16

Hi!

I thought I'd sneak an extra post in today to try to catch up a bit on my 100 Layouts Challenge.  I've challenged myself to scrap (and blog!) 100 layouts this year.  I'm on track with the scrapping part of the challenge, but not so much on the blogging part!


Our first destination on day 2 in Paris was the Conciergerie.  It's had several uses in it's long history, but it is most famous for holding prisoners until they were beheaded during the French Revolution.  It's most famous imate was Marie Antoinette. The bottom right photo in the first layout is a reproduction of her cell.


The photo above shows the ceiling of what was once the dining hall. It's the first part of the building that you see when you enter and it's spectacular.  Even though it's quite plain, the arched ceilings are amazing.  They are plain because it was where the soldiers ate - Royalty didn't venture down here.  It was quite echoey in the hall - it would be very noisy when it was full of soldiers!


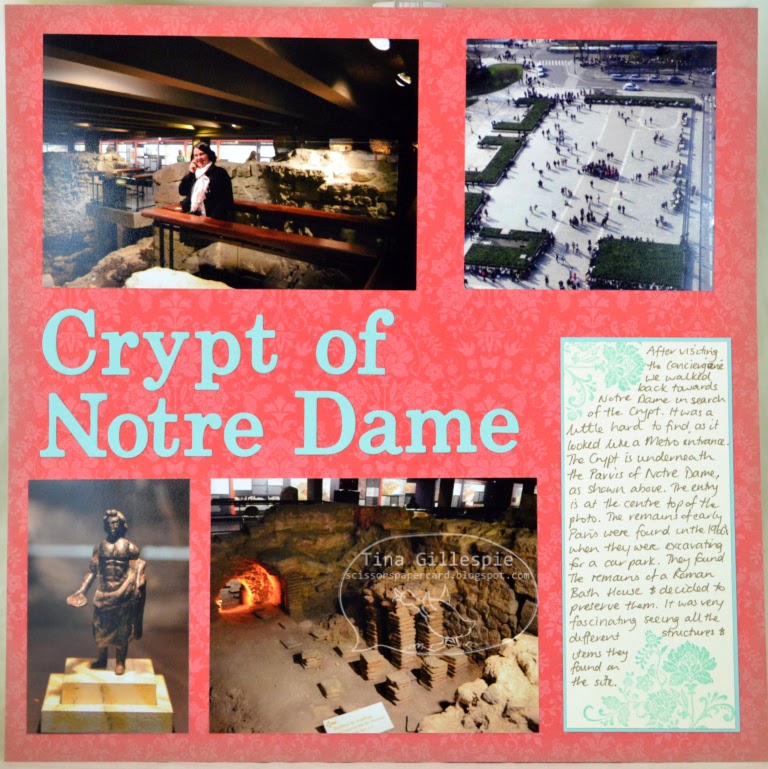
Next stop was the Crypt.  The remains of the first occupation of the island were found when construction began on an underground car park for Notre Dame.  Thankfully the car park got scrapped, and the Crypt was built instead.  It was fascinating to look at the structures and other treasures unearthed there.

Bye for now,

Tina

Saturday, 15 March 2014

Layouts 13 & 14

Hi!

I've missed a few weeks of my scrapbooking challenge layouts.  I have been scrapping, just not photographing them and blogging.  I'm all caught up now after spending the afternoon editing the photos. Here's layouts 13 and 14, two more from my Paris album.


Layout 13 is a single page and tells the story of our first night and morning in Paris. We had walked so far on the first day that I ended up with a massive blister on my heel.  Thankfully I was able to find some padded bandaids so I could continue walking comfortably. We were so tired we went to bed with out going out for dinner.  I think we were out cold by 9pm!  We were starving hungry the next morning, so we found a nearby bistro serving breakfast.  French eateries charge different prices depending on where you sit.  Outside is the most expensive and standing at the bar is the cheapest.  We settled in the middle, choosing to sit indoors.  I don't 'get' wanting to sit outside and eat amongst the car fumes!


First on the agenda on the second day was to take the Hop On Hop Off Bus Tour.  It was a great way to get our bearings in the city.  We chose to sit up top on the double decker bus in the open air.  It was such a lovely day and we had a fantastic view.  We were given little earphones that plugged into a socket and allowed us to listen to the running commentary in English.


I found these little pocket pages in Spotlight.  They just have the slots for 3 landscape photos, so they are like a half sized page.  It's a great way to add extra photos to your pocket page layouts without having to add a whole page. The pages here are the front and back of the half page.


And here's the final page in the spread.  We took lots of photos from the bus.  I think Rob had the camera and he's quite a bit snap happy!


Well, that's it for today's post.  I hope you're enjoying the layouts.

Bye for now,

Tina

Friday, 14 March 2014

JAI #206: Just Add Sale-A-Bration

Hi!

Wow, where did that week go? I feel like I should be starting all my posts with "I'm sorry..." Truth is I'm still struggling with the tiredness that comes with having really low iron stores. Wish I had a dollar for every time I've fallen asleep on the couch in the evenings.  Getting back into balance again just takes time.

This week at Just Add Ink we are challenging you to show us what you can do with your Sale-A-Bration freebies.  There's lots of choices and endless possibilities!


As you can see, I decided to use the Good As Gold Card Kit.  I really love the colours and patterns in the kit.  I kept the basic layout of the card as it is suggested in the kit, with a few key changes.  I used the card front and mounted it to make the card a 'normal' sized card.  I changed the orientation of the card, but kept the flags as suggested.


It's a great arrangement, so why mess with it?


I've gone with the 'not in the centre' sentiment again.  Really loving that effect!

I'll be looking forward to seeing what you enter into our Just Add Ink challenge this week.

Bye for now,

Tina

Sunday, 9 March 2014

JAI 205: Just Add A Sunburst

Hi!

Before I get into it, apologies for the unscheduled blog break.  I've been in bed most of the week with a bug that the kids also came down with.  Thankfully Rob was able to stay home to look after us all.  Added to that I discovered last week that I have very low iron stores, which has left me absolutely exhausted.  I'm on the mend now, but it's going to take a while to get those iron stores up again so I really need to make sure I'm looking after myself.

Well, on to today's card, which should have been Friday's card, but better late than never.  This week it's my challenge over at Just Add Ink, and I have challenged you all to include a sunburst on your card.  As the Design Team cards have shown, there are a multitude of different ways this can be interpreted.


I mad this card with this layout of mine in mind.  Not long after I'd scrapped this layout I'd seen a similar one in a magazine, the difference being that the scrapper had cut out the spritzed section and popped it up on top of her base cardstock.. I'd loved the effect and wanted to give it a go.


I spritzed the sun and sunbeams using a spritzer that had Isocol and Daffodil Delight reinker in it.  I must have previously used some shimmer paint in the spritzer because the end result was sparkly.  One of those very happy accidents!  Once it was all dry I cut out the spritzed section, sponged the edges with Daffodil Delight ink and raised it all up on Dimensionals.  The cloud was made from the bubbly speech bubble from the Word Bubbles Framelits set.


I often forget that the inside sentiment doesn't need to be in the centre.  Just a habit to keep stamping it there I guess.  I decided to stamp it in the corner so that it didn't interrupt the flow of the message I wanted to write on the inside.

I hope you can join in with the fun over at Just Add Ink this week.

Bye for now,

Tina