Pages

Thursday, 15 December 2011

Layout 82: Fire Station Visit

Hi!

Today I have some digital scrapping for you.  I haven't done much digital scrapping, but I found these free templates on the Creating Keepsakes site and I had to have a go.  They are pretty easy to use if you have a bit of an understanding of PhotoShop.


Hudson's playgroup went to visit a firestation, and these are some of the photos from the morning.  The layout took me all of 10 minutes to do.  I think I like the digital, but it will never replace traditional scrapping for me!

Catch you later,

Tina

Wednesday, 14 December 2011

Layout 81: June

Hi!

Here's another double layout in my monthly summary series.  It's June, which was a bit of a quiet month for us.


I used a sheet of the Well Worn DSP and matching More Mustard cardstock.  I just trimmed the DSP by hand along the zig zag created by the pattern in the paper.


The title was cut using the Timeless Type Alphabet dies, I just cut off the serifs for a different look.  I also covered the letters in a layer of Crystal Effects.


While I had the Crystal Effects out I also placed a small dot at the intersection of each of the lines in the DSP.  You might be able to see it in the photo above.

Ink: Not Quite Navy, More Mustard
DSP/Cardstock: Well Worn DSP, More Mustard, Cajun Craze
Other: Big Shot, Timeless Type Alphabet Dies, Paper Snips, Sponge Daubers, Crystal Effects

Catch you later,

Tina

Tuesday, 13 December 2011

Layout 80: May

Hi!

One of the tasks I set for my scrapbooking this year was to create a double layout for each month, just a snippet of the things that we did that month.  This layout is the one I created for May.


Each month I choose a favourite photo and print that full sized, and the rest I print at quarter size.  The white blobs are erased faces for privacy.


After I die cut the word May I ran it through the Big Shot again in the Perfect Polka Dot embossing folder.  I thought it suited the papers I chose for the layout, just a little bit playful.  You may be able to see the embossing in the photo above.

Ink: Lucky Limeade Stampin' Write Marker
DSP/Cardstock: Cheerful Treat (Hostess), Melon Mambo, Lucky Limeade, Whisper White
Other: Big Shot, Simple Letters Alpha Dies, Petal Cone Die, Perfect Polka Dots Embossing Folder, Itty Bitty Punch, Circle Punch

Catch you later,

Tina

Monday, 12 December 2011

Layout 79: The Boy In The Box

Hi!

Waaaaaayyyyy back in January I challenged myself to complete 100 layouts in 2011.  I was going really well until November got swallowed into a black hole of sickness.  So here I am, mid way through December, and I'm up to layout 79.  Not too bad considering, but I still want to complete my challenge.  You're going to be seeing a lot of layouts before the end of the year!


This layout has been floating around on my desk half finished for about 2 months.  I had the DSP and the photos stick down, but I just couldn't finish it.  I think I was stuck on a title.  I eventually settled on The Boy In The Box for the title and then the rest of the layout was easy to finish.  It's so frustrating getting stuck on one little detail like that!


I got out an old favourite stamp set for this layout - Baroque Motifs.  It was one of the very first stamp sets I purchased, but it hasn't seen much ink lately.  I love the way the textured cardstock has an effect on the image.  I was after this rough kind of look and it worked perfectly!


The shape of the DSP came from a piece of paper I had in my stash.  I just traced it onto the DSP and hand cut it out.  I liked the curves in the paper and how they offset the angular photos and title.

Stamps: Baroque Motifs
Ink: Basic Black
DSP: First Edition Speciality DSP, Real Red Textured 12 x 12, Basic Black, Very Vanilla, Real Red
Other: Big Shot, Timeless Type Alpha Dies, Decorative Label Punch, Spiral Border Punch (retired), Small Alpha Stickers (non SU)

Catch you later,

Tina

Saturday, 10 December 2011

Grand Big Top Birthday!

Hi!

Do you have your sunnies on?  No? Well, go get them then!  Today's card is bright.  Very bright!

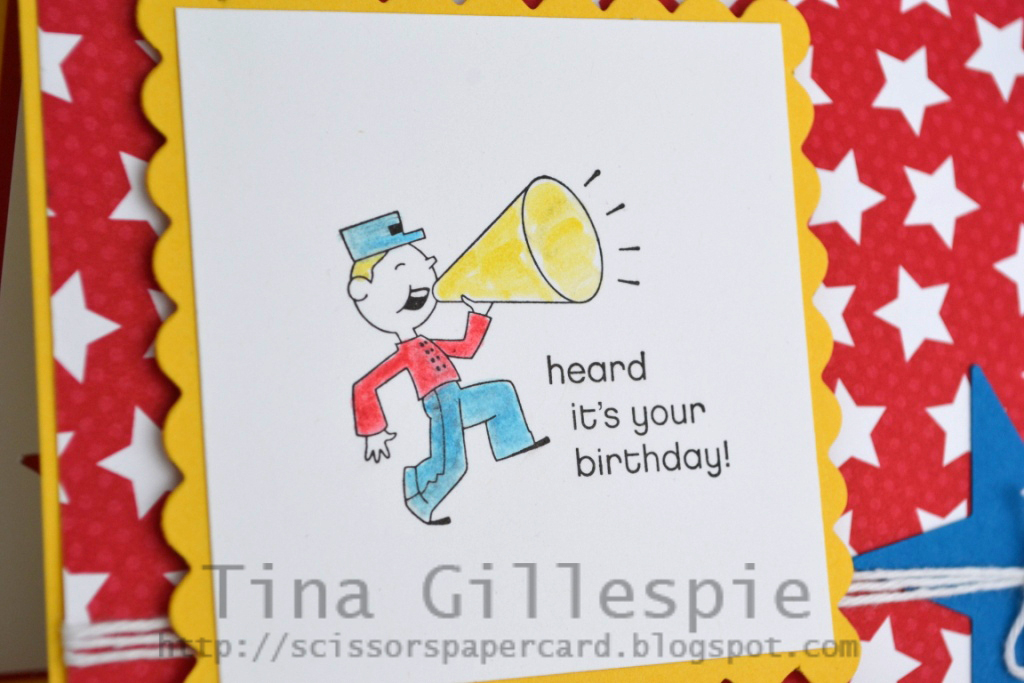
I combined the Big Top Birthday DSP with the Hostess stamp set Ain't Love Grand for this card.  It was made for my neighbour who recently celebrated a birthday.


I love the Big Top Birthday DSP.  It's so bright and cheerful!  I didn't have the Pacific Point star on the card to start with, but I felt like the Baker's Twine was getting a bit 'lost' in amongst all the stars on the DSP.  The star punchie was a quick and easy way to give the twine a boost.


I stamped the marching man in Basic Black ink and then coloured him using my Blender Pen and coordinating ink colours.


For the inside I reached for the star punch again.  This time I punched through the Whisper White layer so that you can see the Real Red layer through the hole made by the punch.  Sadly, the star punches have been retired by Stampin' Up!, but you could just as easily use any of the punches we stock to get a similar effect.

Stamps: Ain't Love Grand (hostess), Happiest Birthday Wishes (hostess)
Ink: Basic Black, Real Red, Pacific Point, Daffodil Delight
DSP/Cardstock: Big Top Birthday DSP, Daffodil Delight, Real Red, Pacific Point, Whisper White
Other: Big Shot, Scallop Square Duo Bigz Die, White Baker's Twine, Dimensionals, Blender Pen, Large Star Punch (retired)

Catch you later,

Tina

Thursday, 8 December 2011

Meeting Shelli

Hi!

Today I have a layout featured on Stamp A Memory.  It records the evening when I met Shelli Gardner, the founder and CEO of Stampin' Up! at the annual Convention in May this year.  Here's a little sneak peek:


I hope you can pop over and take a look at the whole layout.  Click on the photo to take you there.

Catch you later,

Tina

Tuesday, 6 December 2011

Just Add Tania Gould!

Hi!

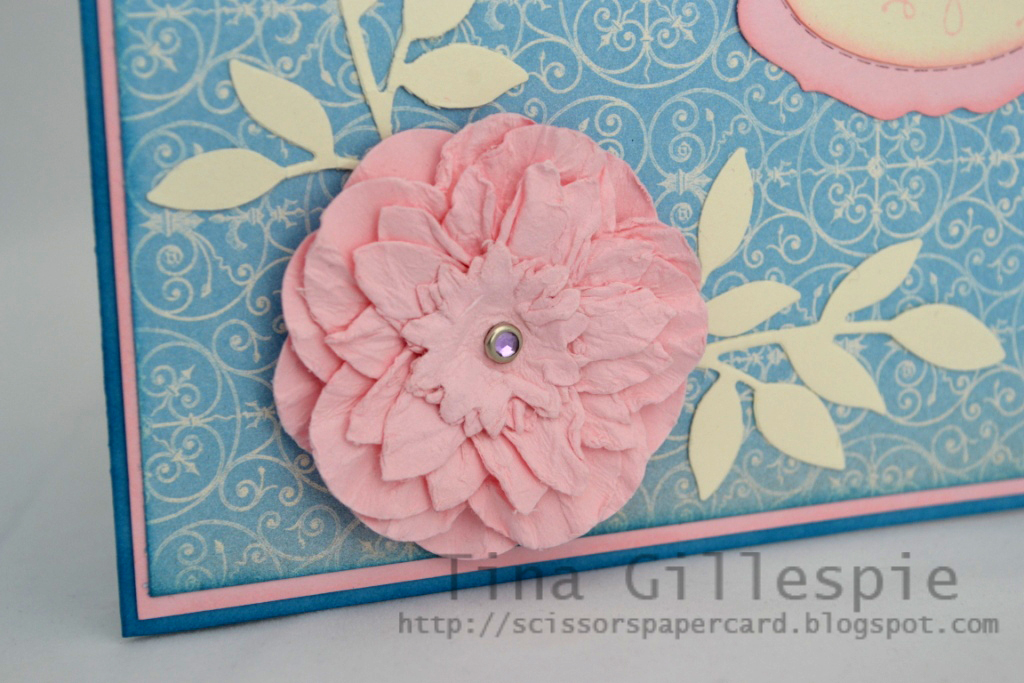
The team at Just Add Ink have come up with a new challenge - to CASE a card from a selected Design Team member, in this case Tania Gould.  So off I popped to look through her blog for inspiration, and boy did I find some!  Tania is one very clever papercrafter.  The card I finally settled on to CASE was this card.  I loved the 3D flower she'd made, and since I wanted to have a go at a similar flower it was the perfect card to CASE.  Here's my version.


I love these flowers, but a bit of forward planning is necessary to make them.  You need to wet the cardstock, and so you have to wait for them to dry before you can use them on a project.  You can find the tutorial for making them here on Joanne Leddy's blog.


A bit hard to see because it's stamped in Pink Pirouette, but the greeting is from Happiest Birthday Wishes.


Stamps: Happiest Birthday Wishes (Hostess), Perfect Punches
Ink: Pink Pirouette, Marina Mist
DSP/Cardstock: Beau Chateau DSP, Marina Mist, Pink Pirouette, Very Vanilla
Other: Big Shot, Little Leaves Die, Lots Of Tags Die, Large Oval Punch, Fancy Flower Punch, 5-Petal Flower Punch, Boho Blossoms Punch, Scallop Circle Punch, Pink Circle Rhinestone Brad, Basic Jewels Pearl, Sponge Daubers

Catch you later,

Tina