Hi!
Time for this week's Colour Creations Blog Share. This week it's Night Of Navy, which recently got shifted to the Neutrals colour family. It makes sense if you think about things like clothing - navy items are often used as a neutral with other items.
I started my card by using my sponge brayer to colour the bottom corner of the card. I then used my Aqua Painter to drip and then flick some water over the coloured area. You can see the difference - the drips are big and round, while the flicks are much smaller. It's a fun way to add interest to a block of colour.
The flowers from Incredible Like You are stamped in Berry Burst. I didn't stamp off the colour - the more solid stamp in the two stamp pair is designed to transfer less ink to the card, giving a lighter shade. So clever! The leaf stamps are the same design as the flower. I stamped them in Old Olive, which incidentally, is next week's colour.
I recreated a mini version of the front on the inside. I realised after I'd stuck everything down that I'd forgotten to do the water flicks over the Night Of Navy. Oops!
Why not head on over to Catherine's blog, where you can see the rest of this week's Night Of Navy cards?
Bye for now,
Tina
Tuesday, 22 January 2019
Sunday, 20 January 2019
CTC# 212: Sale-A-Bration
Hi!
It's the end of another busy week, which makes it time for the CASEing The Catty Sunday Challenge Blog Hop!
I do love a good blog hop! The blog before mine belongs to the talented Judy May. You may have started there, or anywhere on the hop - it doesn't matter. Just keep on hopping until you get back to where you started. Hopefully by the end you'll be inspired to enter out challenge.
This week we are back to CASEing the Sale-A-Bration Catalogue. It's got heaps of great cards, so it was hard to narrow it down to just one. I CASEd a card from the front cover last time, so I decided to head for the back of the catalogue for inspiration this time. I decided I's CASE this card, from the bottom of page 18.
I don't have the Lasting Lily stamp set, but a few days ago I saw a card on the FB, where a demonstrator had punched some daisies from the Gingham Gala DSP. I was keen to give it a go, so this card seemed like a great way to do it.
I used the coordinating Daisy Delight stamp set to create the stem of the daisy. I don't like the tiny little leaves on the stem, so I just used a marker to ink the stem part. I then used the larger leaf stamp and the filler stamp to add the leaves. Much better proportions!
The daisy centre needed a little something, so I added this huge (retired) Iced Rhinestone. I think it finishes off the card quite nicely! How cute does the gingham daisy look? I just can't get enough of this DSP!
I often use 3 layers on my daisies, but this time it didn't look right. I'd already punched the third daisy, so I decided to use it on the inside rather than waste it. I just snipped it in half, layered it, and glued to it to corner of the cardstock, trimming it to fit.
That's it for me, now you're off to visit Siobhan's blog to see what fun she's had with the SAB Catalogue.
Don't forget to also pop by our Facebook group, where you can add your card to this week's challenge. See you there!
Bye for now,
Tina
It's the end of another busy week, which makes it time for the CASEing The Catty Sunday Challenge Blog Hop!
I do love a good blog hop! The blog before mine belongs to the talented Judy May. You may have started there, or anywhere on the hop - it doesn't matter. Just keep on hopping until you get back to where you started. Hopefully by the end you'll be inspired to enter out challenge.
This week we are back to CASEing the Sale-A-Bration Catalogue. It's got heaps of great cards, so it was hard to narrow it down to just one. I CASEd a card from the front cover last time, so I decided to head for the back of the catalogue for inspiration this time. I decided I's CASE this card, from the bottom of page 18.
I don't have the Lasting Lily stamp set, but a few days ago I saw a card on the FB, where a demonstrator had punched some daisies from the Gingham Gala DSP. I was keen to give it a go, so this card seemed like a great way to do it.
I used the coordinating Daisy Delight stamp set to create the stem of the daisy. I don't like the tiny little leaves on the stem, so I just used a marker to ink the stem part. I then used the larger leaf stamp and the filler stamp to add the leaves. Much better proportions!
The daisy centre needed a little something, so I added this huge (retired) Iced Rhinestone. I think it finishes off the card quite nicely! How cute does the gingham daisy look? I just can't get enough of this DSP!
I often use 3 layers on my daisies, but this time it didn't look right. I'd already punched the third daisy, so I decided to use it on the inside rather than waste it. I just snipped it in half, layered it, and glued to it to corner of the cardstock, trimming it to fit.
That's it for me, now you're off to visit Siobhan's blog to see what fun she's had with the SAB Catalogue.
Don't forget to also pop by our Facebook group, where you can add your card to this week's challenge. See you there!
Bye for now,
Tina
Thursday, 17 January 2019
JAI #440: Just Add Something New Blog Hop
Hi!
Yay for the return of Just Add Ink for another year! As always, we are kicking off the new year with a Blog Hop to start our challenges. Blog hops are a circle, start where you like and just keep on hopping until you get back to where you started. You may want to grab a cuppa first! The very lovely Jo's blog is the one before mine, and you'll find the link to the next blog at the end of the post.
Just before Christmas I treated myself to some new stamps from Kindred Stamps. My daughter, Ada is a huge fan of a superstar band that has just had a movie released about the lead singer. Hopefully you get the hint - I'm not allowed to say the names! When Kindred release a stamp set inspired by some iconic rockers, and it included Ada's favourite, I just had to get it. This was the first time it saw ink.
Ada is starting High School this year (I nearly typed next year!!) and so I wanted to make a card for her to let her know I think she's going to have an amazing year, and this set fit the bill. I started by using some Vegas Gold Shimmer Paint to create the spotlights. I just masked horizontally across the top and bottom and then, one at a time, I masked the diagonal lines to create the spots. I wanted the lights to fade out towards the bottom, so I let the sponging taper out. To get the pool of light on the ground, I cut a very thin oval into a post it note and sponged through the opening. The trickiest part was lining it up with the spotlights. I repeated, on a smaller scale, for the tops of the spotlights. I tried using cardstock to make the top of the lights, but it ended up looking like the aliens were trying to beam him up, so I abandoned that idea!
I coloured the singer with my Copic markers and then fussy cut and popped him up using Dimensionals. I definitely need more practice with hair/highlights, but overall I'm pretty happy with how he turned out. I should also mention that I used the same Shimmer Paint to edge the piece of cardstock under the main panel. I like my golds to match, so this was the best way to get the look.
The sentiment on the inside is also from a Kindred Stamps set, but a different set to the one on the front. I thought it was very apt though!
Now you're off to see what the incredible Lou has made with her 'something new'.
Yay for the return of Just Add Ink for another year! As always, we are kicking off the new year with a Blog Hop to start our challenges. Blog hops are a circle, start where you like and just keep on hopping until you get back to where you started. You may want to grab a cuppa first! The very lovely Jo's blog is the one before mine, and you'll find the link to the next blog at the end of the post.
Just before Christmas I treated myself to some new stamps from Kindred Stamps. My daughter, Ada is a huge fan of a superstar band that has just had a movie released about the lead singer. Hopefully you get the hint - I'm not allowed to say the names! When Kindred release a stamp set inspired by some iconic rockers, and it included Ada's favourite, I just had to get it. This was the first time it saw ink.
Ada is starting High School this year (I nearly typed next year!!) and so I wanted to make a card for her to let her know I think she's going to have an amazing year, and this set fit the bill. I started by using some Vegas Gold Shimmer Paint to create the spotlights. I just masked horizontally across the top and bottom and then, one at a time, I masked the diagonal lines to create the spots. I wanted the lights to fade out towards the bottom, so I let the sponging taper out. To get the pool of light on the ground, I cut a very thin oval into a post it note and sponged through the opening. The trickiest part was lining it up with the spotlights. I repeated, on a smaller scale, for the tops of the spotlights. I tried using cardstock to make the top of the lights, but it ended up looking like the aliens were trying to beam him up, so I abandoned that idea!
I coloured the singer with my Copic markers and then fussy cut and popped him up using Dimensionals. I definitely need more practice with hair/highlights, but overall I'm pretty happy with how he turned out. I should also mention that I used the same Shimmer Paint to edge the piece of cardstock under the main panel. I like my golds to match, so this was the best way to get the look.
The sentiment on the inside is also from a Kindred Stamps set, but a different set to the one on the front. I thought it was very apt though!
Now you're off to see what the incredible Lou has made with her 'something new'.
What new crafting things have you purchased recently? Don't forget to link your card over at the Just Add Ink blog.
Bye for now,
Tina
Labels:
Back In Time,
Blog Hop,
Challenge,
Copics,
Design Team,
Just Add Ink,
Kindred Stamps,
Rock On,
Shimmer Paint
Tuesday, 15 January 2019
Dragonflies In The Mossy Meadow
Hi!
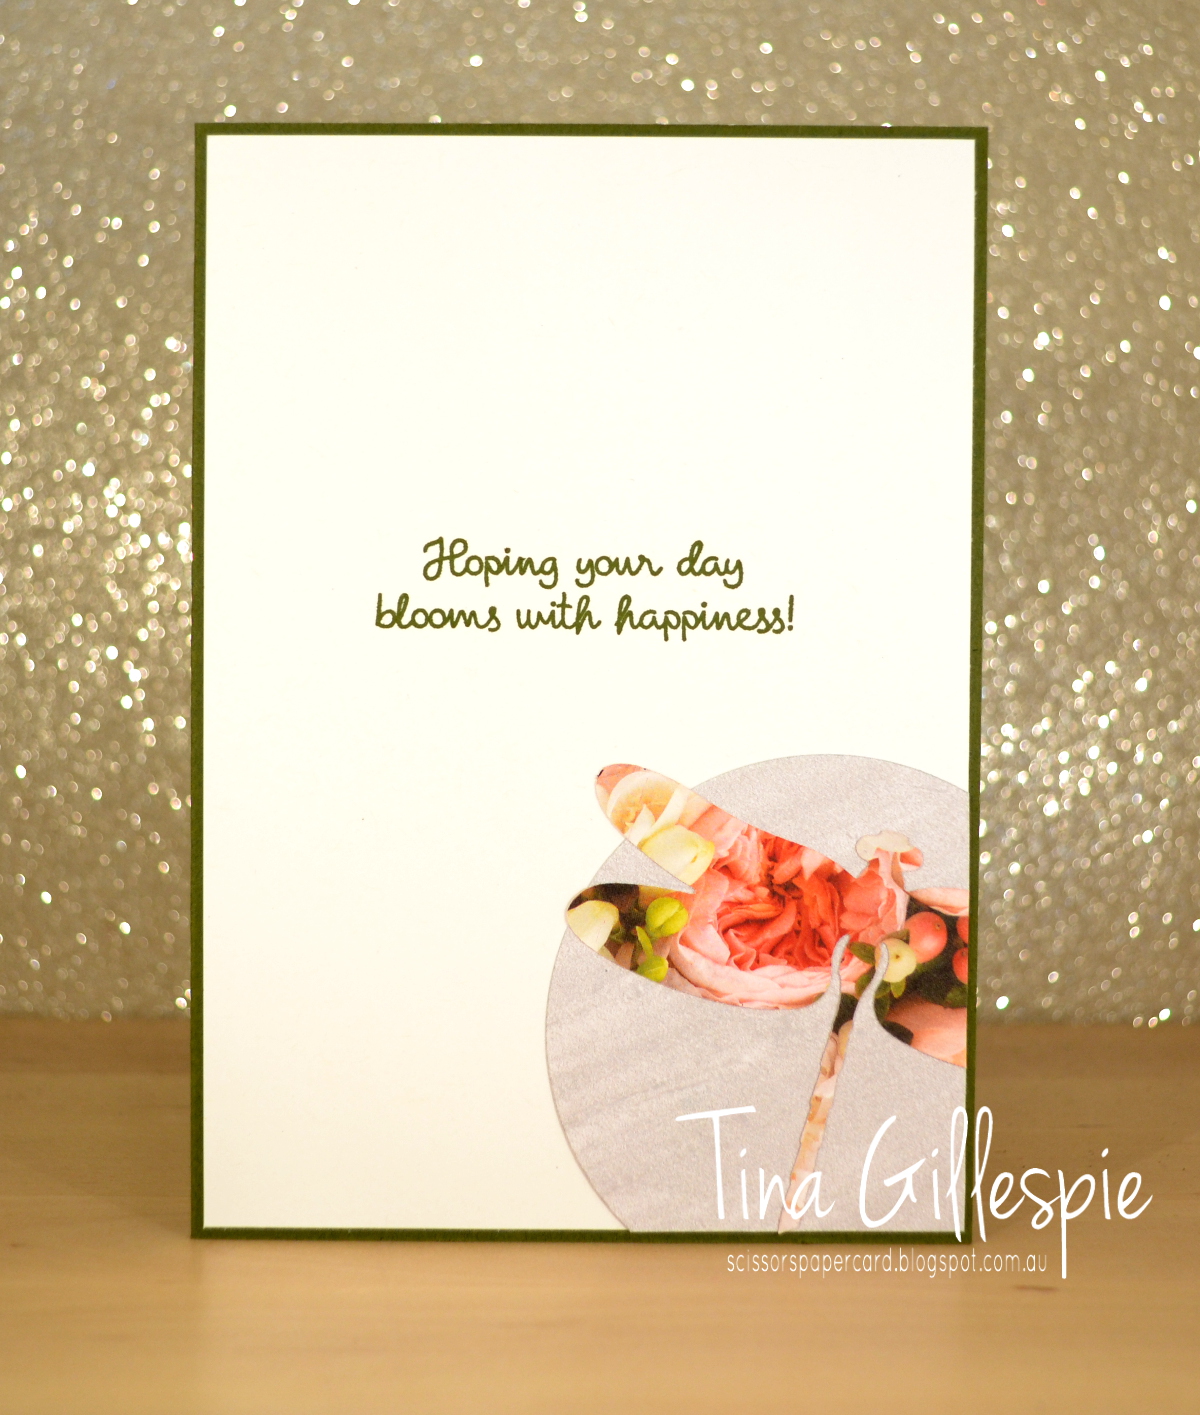
This week's Colour Creations features Mossy Meadow, a colour I am yet to really warm to. It's a part of the Neutrals family and is a dark, earthy green. It's a feature colour in the gorgeous Petal Promenade DSP pack, so that was my starting point for this card.
My class ladies had seen this card on my blog, featuring the Inlaid Dies Technique, and were keen to give it a go. That card was too complicated for a class situation, so I made this as a simpler alternative. I love how the floral paper looks cut into the dragonfly shape!
So as a recap, the technique is a bit like masking, but with dies. You start at the back by cutting the circle. The hole is then 'filled' by the same sized circle in a different pattern paper, held in place with washi tape on the back. Next I cut the top dragonfly, again filling the hole with the floral paper. Finally, I cut and filled the lower dragonfly. You need to use a *lot* of washi on the back to hold it all in place, but it's worth it - I love the look!
I kept the circle from the front, and also the first dragonfly die cut, to use on the inside. The dragonfly wasn't a complete cut, so I made sure he was flying off the edge to disguise that fact.
I hope you like the card and try out the technique - it's a fun one!
Why not pop on over to Catherine's Blog, where you can see what everyone else has done with Mossy Meadow this week?
Bye for now,
Tina
This week's Colour Creations features Mossy Meadow, a colour I am yet to really warm to. It's a part of the Neutrals family and is a dark, earthy green. It's a feature colour in the gorgeous Petal Promenade DSP pack, so that was my starting point for this card.
My class ladies had seen this card on my blog, featuring the Inlaid Dies Technique, and were keen to give it a go. That card was too complicated for a class situation, so I made this as a simpler alternative. I love how the floral paper looks cut into the dragonfly shape!
So as a recap, the technique is a bit like masking, but with dies. You start at the back by cutting the circle. The hole is then 'filled' by the same sized circle in a different pattern paper, held in place with washi tape on the back. Next I cut the top dragonfly, again filling the hole with the floral paper. Finally, I cut and filled the lower dragonfly. You need to use a *lot* of washi on the back to hold it all in place, but it's worth it - I love the look!
I kept the circle from the front, and also the first dragonfly die cut, to use on the inside. The dragonfly wasn't a complete cut, so I made sure he was flying off the edge to disguise that fact.
I hope you like the card and try out the technique - it's a fun one!
Why not pop on over to Catherine's Blog, where you can see what everyone else has done with Mossy Meadow this week?
Bye for now,
Tina
Sunday, 13 January 2019
CTC #211: All My Love
Hi!
Hello again, and welcome to the new week's CASEing The Catty Blog Hop! This week the blog before mine is Peta's. It really doesn't matter where you start - just keep on going until you get back to where you started. When you're done, why not pop on over to the Facebook group to enter a card?
This week I picked a card from page 7. It can be a bit tricky to think about how to CASE a card when you don't have any of the same products. Actually, I probably shouldn't say tricky, as it's not really, it just takes a little more thought.
The card I CASEd is quite soft with its colours, but I went in the other direction and went bold so that I could play with the new Happiness Blooms DSP.
You can see that my card is essentially the same, I've just used what I have in my stash. The flowers were all fussy cut from the DSP as I don't yet own the Bloom By Bloom stamp set.
I also had to substitute for the Stitched Labels die, as I don't have the die used on the card, which is from the Rose Trellis set. It just goes to show that a CASE can be more than a direct copy.
I'm sorry I don't have my usual picture of the inside today - I'd mailed the card before I realised that the photo I'd taken was too blurry to be used. You'll just have to imagine that I stamped the tall, thin sentiment from Picture Perfect Birthday and adhered a few of the smaller flowers in a cluster beside it. Can you picture it? I hope so!
Now you're off to see the lovely Rebecca's card for the All My Love challenge.
Don't forget to check out our Facebook group when you're done!
Hello again, and welcome to the new week's CASEing The Catty Blog Hop! This week the blog before mine is Peta's. It really doesn't matter where you start - just keep on going until you get back to where you started. When you're done, why not pop on over to the Facebook group to enter a card?
This week I picked a card from page 7. It can be a bit tricky to think about how to CASE a card when you don't have any of the same products. Actually, I probably shouldn't say tricky, as it's not really, it just takes a little more thought.
The card I CASEd is quite soft with its colours, but I went in the other direction and went bold so that I could play with the new Happiness Blooms DSP.
You can see that my card is essentially the same, I've just used what I have in my stash. The flowers were all fussy cut from the DSP as I don't yet own the Bloom By Bloom stamp set.
I also had to substitute for the Stitched Labels die, as I don't have the die used on the card, which is from the Rose Trellis set. It just goes to show that a CASE can be more than a direct copy.
I'm sorry I don't have my usual picture of the inside today - I'd mailed the card before I realised that the photo I'd taken was too blurry to be used. You'll just have to imagine that I stamped the tall, thin sentiment from Picture Perfect Birthday and adhered a few of the smaller flowers in a cluster beside it. Can you picture it? I hope so!
Now you're off to see the lovely Rebecca's card for the All My Love challenge.
Don't forget to check out our Facebook group when you're done!
Bye for now,
Tina
Friday, 11 January 2019
Another Bat-Card
Hi!
Sometime Stampin' Up! release a product that I know, as soon as I see it, that I have to have it and it will never leave my collection. This bat punch was one of those products, simply because my family and a lot of my friends are big superhero fans. I will definitely get my money's worth out of this punch!
Today's card was one I made as a sample for a card making session I ran towards the end of last year. The ladies coming were making a floral/butterfly card, but one lady had to bring her young son, so this was an alternative I made for him to copy.
I kept it super simple (excuse the pun!) so that all he had to do was punch the bat, stamp the sentiment and glue it all together. Easy!
He had a lot of fun using the punch and ended up with a lot more bats on his card than I had on mine!
This card would be great for one of those "need a card in a hurry for a kid's birthday party" situations that we all seem to find ourselves in!
Bye for now,
Tina
Sometime Stampin' Up! release a product that I know, as soon as I see it, that I have to have it and it will never leave my collection. This bat punch was one of those products, simply because my family and a lot of my friends are big superhero fans. I will definitely get my money's worth out of this punch!
Today's card was one I made as a sample for a card making session I ran towards the end of last year. The ladies coming were making a floral/butterfly card, but one lady had to bring her young son, so this was an alternative I made for him to copy.
He had a lot of fun using the punch and ended up with a lot more bats on his card than I had on mine!
This card would be great for one of those "need a card in a hurry for a kid's birthday party" situations that we all seem to find ourselves in!
Bye for now,
Tina
Tuesday, 8 January 2019
Enjoying Macaron On The Waterfront
Hi!
Welcome back to Colour Creations for 2019! This year/week we are kicking off with one of my all-time favourite colours - Mint Macaron. When I found out that is was returning in the recent Colour Refresh I may have jumped up and down and even squealed a little. LOL!
The idea for todays card came about because I had a piece of Mint Macaron DSP from the Tranquil Textures DSP pack that was too small to be used as a full sized card front. Easy fix - chop it up and stretch it out! I started by chopping a piece off the bottom and then chopping that in thirds. The top piece was then chopped the same way before all pieces were adhered to the Night Of Navy cardstock. The trick is to just adhere a small section until you are happy with the placement.
I tried something new to me with stamping the main panel. After I cut the Stitched Circle, I left the cardstock in the die while I stamped the scene. I like that it leaves the stitched border white, but not in a uniform way like masking would. I think I'll be trying this again!
I repeated the same scene on the inside. Did you notice that on the palm trees I stamped the trunks twice, but the fronds a heap more, including second generation stamping to get different shades of Mint Macaron? It makes the palms so much more lush, as befits a tropical scene.
As always, head on over to Catherine's Blog to see the rest of this week's cards. I can't wait to see what everyone's made.
Bye for now,
Tina
Welcome back to Colour Creations for 2019! This year/week we are kicking off with one of my all-time favourite colours - Mint Macaron. When I found out that is was returning in the recent Colour Refresh I may have jumped up and down and even squealed a little. LOL!
The idea for todays card came about because I had a piece of Mint Macaron DSP from the Tranquil Textures DSP pack that was too small to be used as a full sized card front. Easy fix - chop it up and stretch it out! I started by chopping a piece off the bottom and then chopping that in thirds. The top piece was then chopped the same way before all pieces were adhered to the Night Of Navy cardstock. The trick is to just adhere a small section until you are happy with the placement.
I tried something new to me with stamping the main panel. After I cut the Stitched Circle, I left the cardstock in the die while I stamped the scene. I like that it leaves the stitched border white, but not in a uniform way like masking would. I think I'll be trying this again!
I repeated the same scene on the inside. Did you notice that on the palm trees I stamped the trunks twice, but the fronds a heap more, including second generation stamping to get different shades of Mint Macaron? It makes the palms so much more lush, as befits a tropical scene.
As always, head on over to Catherine's Blog to see the rest of this week's cards. I can't wait to see what everyone's made.
Bye for now,
Tina
Subscribe to:
Posts (Atom)