Pages

Showing posts with label Teeny Tiny Sentiments. Show all posts

Monday, 28 May 2018

Saying Goodbye to Wisteria Wonder

Hi!

Wisteria Wonder is one of the colours that has been cut from the range of Stampin' Up! colours starting next month. It's been a purple I've liked using, as it's a lovely, soft colour. Having said this, I'm pretty excited about the new purples, as are the purple lovers that have been begging for a 'true' purple for many years!

scissorspapercard, Stampin' Up!, Happy Birthday Gorgeous, Happy Birthday Thinlit, Garden Trellis TIEF

The first card today is a CASE of a tag in the soon to be finished Annual Catalogue. You can see it on page 76, smack bang in the centre of the page. It's the tag on the Foil frenzy gift box.

scissorspapercard, Stampin' Up!, Happy Birthday Gorgeous, Happy Birthday Thinlit, Garden Trellis TIEF

I kept the tag essentially the same. I had to use an oval as the base as I didn't own the Lots Of Labels Framelits set at the time that I made this card.  I also used the flowers and leaves from Happy Birthday Gorgeous. They frame the Happy Birthday diecut so well!

scissorspapercard, Stampin' Up!, Happy Birthday Gorgeous, Happy Birthday Thinlit, Garden Trellis TIEF

Hmm, thinking back, I don't use the flowers in this set anywhere as much as I should!

scissorspapercard, Stampin' Up!, Teeny Tiny Sentiments, Dragonfly Dreams, Delightful Daisy DSP, Stitched Shapes Framelits, Cat Punch

My second card pairs Wisteria Wonder with the Delightful Daisy DSP and the Cat punch. I haven't used the punch much, but it has carried over to the new Annual Catalogue, so I've got another yer at least to remedy that!

scissorspapercard, Stampin' Up!, Teeny Tiny Sentiments, Dragonfly Dreams, Delightful Daisy DSP, Stitched Shapes Framelits, Cat Punch

Teeny Tiny Sentiments is another retiring set that I didn't use much, but it was very handy to have on hand. It contains a HUGE range of sentiments that cover nearly every occasion you could think of, and because they are so small you can fit them anywhere on a card.

scissorspapercard, Stampin' Up!, Teeny Tiny Sentiments, Dragonfly Dreams, Delightful Daisy DSP, Stitched Shapes Framelits, Cat Punch

I gave this card to my Mother-In-Law for Mother's Day. She loves cats, so it was very fitting for her.

Bye for now,

Tina

Friday, 8 April 2016

JAI #306: Just Add Sympathy

Hi!

Here we are again  - it's Friday, so time for another Just Add Ink challenge.


This week Jan has challenged us to Just Add Sympathy. I don't know about you, but I find these some of the most difficult to make, especially at the times they are needed. This was a good chance to get one made when I wasn't too sad and not feeling creative.


I went for a subdued colour scheme of Early Espresso, Sahara Sand, Rose Red, Garden Green and Very Vanilla. I quite like that mix of colours.


The Hardwood background was stamped with Early Espresso ink on Sahara Sand cardstock. I love the old, weathered look it creates for the background.


I used my Thoughts And Prayers stamp set for the inside. It's an oldie, but a goodie, for sympathy cards.

As usual, the rest of the Design Team have come up with some fabulous creations for your inspiration. You can see them over at the Just Add Ink blog. I hope you can play along with us this week.

Bye for now,

Tina

Thursday, 15 October 2015

AWH Blog Hop: Colour Combo

Hi!


Welcome to the Art With Heart Team Blog Hop for October. This month we have a colour challenge for you. Have you heard about the GREAT opportunity to earn more as a hostess (or get a greater discount on your Starter Kit by putting your hostess benefits towards the starter kit) between October 8th to November 9th, There's no greater time to host a party or even a virtual party on Facebook. Contact me to find out more. You will love being a part of out awesome Australia wide team. We are all about fun, friendship, inspiration and support.


I really love this combo - it's a great mix of bold and soft colours.  I decided to pull out my very neglected Mini Treat Bag Thinlits and have a play with the set.


Wait a minute, I hear you say, that's not a bag, it's a box! It sure is! To make the box using the Thinlits I cut two of the front/side pieces, trimmed off the top to make it level and then scored about 1/4 inch in along the side piece to create a flap.  I then cut a piece for the base, making it a little longer than the box is wide so I could score to create flaps to adhere it to the sides of the box. Hopefully that makes sense!


While the box pieces were still flat I used the heart thinlit to create a window in the front of the box. This box will hold a wedding gift, but if you wanted a more generic theme you could use the banner or star shapes, or even a circle.  I used my Flower Patch stamps and the coordinating Flower Fair Framelits to decorate the front.


I needed a little card to fit into the box, so I decided to go with the same basic design.  I used the cut out heart on the card so I switched to a Whisper White base.


Here are the two together. I don't know about you, but I love finding uses for dies other than their intended use - it makes them so much more appealing!

The next stop in the Blog Hop is Ros Davidson, who is bound to amaze you with her creativity!


If you find a broken link or have come to this blog hop from a different entry point, you can view the participants below:
 
  1. Tina Gillespie
  2. Ros Davidson
  3. Genna Gifford
  4. Kathryn Ruddick
  5. Judy May
  6. Jenny van Dijk
  7. Kate Morgan
Bye for now,

Tina

Wednesday, 12 August 2015

Another Work Of Art CASE

Hi!

Last Wednesday I showed you a card I'd CASEd using the Work Of Art stamp set to create a flower.  Today I have another CASE that uses the stamps to create a sailboat.  Again - so very clever!


I really loved this card and was keen to make it when one of my class ladies showed me a picture of it.  I'm a bit of a blue person so all the blues really appealed!


We used the stars from the star border punch on the flag (I'm drawing a blank on it's name right now!).  They were a little fiddly to stick down but worth the effort.


The swooshy stamps are great for adding a subtle background to a sentiment.

Bye for now,

Tina

Wednesday, 10 September 2014

I Like You Circle Flip Card

Hi!

I quite like the Circle Card Thinlits, but I often forget to use it!  I thought the flower images from the Hostess set I Like You would work beautifully with the shaped card, and I think I was right!


I stamped the Left side of the base card with one of the smaller floral images from I Like You, and then used the happily coordinating Gold Soiree SDSP on the left side.  Have I said before how much I love that Stampin' Up! make it so easy to make things match?


The focal floral image was coloured with my Rich Razzleberry and Old Olive Blendabilities Markers. The sentiment comes from Tap Tap Tap and was the perfect size to fill the space left after the flower was stamped.


After I made (and photographed) the back of the card I decided that it would look better with another flower stamped on there.  I shifted the sentiment a little and stamped the same flower that I stamped on the left of the card.  It looked much better, but silly me forgot to photograph the new back.  Oh well!

Bye for now,

Tina

Wednesday, 6 August 2014

A Blendies RAK

Hi!

A little while ago I participated in a weekend cybercrop.  It was fun to create all weekend and participate in some challenges while in my PJ's.  Part of the fun was getting to bond over the internet with team members in all parts of Australia.  One of the challenges we were set was to create a card and send it to another team member.


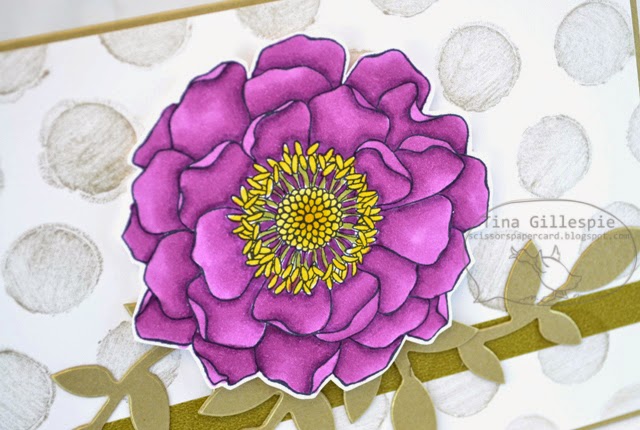
I had a Blended Bloom image coloured with the Rich Razzleberry Blendabilities sitting on my desk, so I decided it was the perfect time to turn it into a card.  Also sitting on my desk was the new Dots and Stripes Decorative Masks, so I decided to make use of  the Dots mask too.


I sponged over the mask with some retired Champagne Mist Shimmer Paint.  I really like the streaky look it achieved.


I was pleased to find out that the recipient had been having a bad week and that the card really cheered her up. I was glad I selected her when I heard that!

Bye for now,

Tina

Monday, 12 May 2014

Peaceful Petals for Mother's Day

Hi!

Did you have a lovely weekend?  I celebrated Mother's Day with my family yesterday.  I had a wonderful day and received lots of fabulous handmade gifts from my beautiful children. I was very spoilt!  Today I have a Mother's Day card to show you that I made for my Mother-In-Law.


I made this card as a class sample.  Not all of the ladies wanted to make a Mother's Day card so I tried to make it a bit more generic for them.  A Thinking Of You sentiment on the front makes a great all purpose card.


We stamped the main flower on some Blushing Bride cardstock and then trimmed around it and popped it up on Dimensionals over the top of some stamped and trimmed leaves.


I didn't get a good picture of the inside of the card, but this is a close up of the centre of the inside.  I stamped the flower in Blushing Bride and then the sentiment in Primrose Petals.

I'll be back on Wednesday with another Mother's Day card.

Bye for now,

Tina

Thursday, 30 January 2014

CPC Challenge #31

Hi!

It's been a while since I entered a card challenge, so I thought it was time to do just that! The challenge is over at Craft Project Central and it's a lovely sketch challenge.


Isn't it a great sketch? Here's my take on it.


The washi tape is the new Retro Fresh designs from the Occasions Catalogue.  It's so lovely and bright, a great focal point for this card.


The Essentials Wooden Elements are also new in the Catalogue.  There are a heap of great shapes in the pack.  I just have to let myself use them rather than hoard them!


Of course I had to finish off the inside of the card to match the outside!

Stamps: Off The Grid, Teeny Tiny Sentiments, Make A Wish
Ink: Baked Brown Sugar, Tangerine Tango
Cardstock: Baked Brown Sugar, Whisper White
Other: Retro Fresh Designer Washi Tape, Essentials Wooden Elements, Star Punches (retired), Glue Dots

Bye for now,

Tina

Monday, 16 December 2013

World Map Birthday Card

Hi!

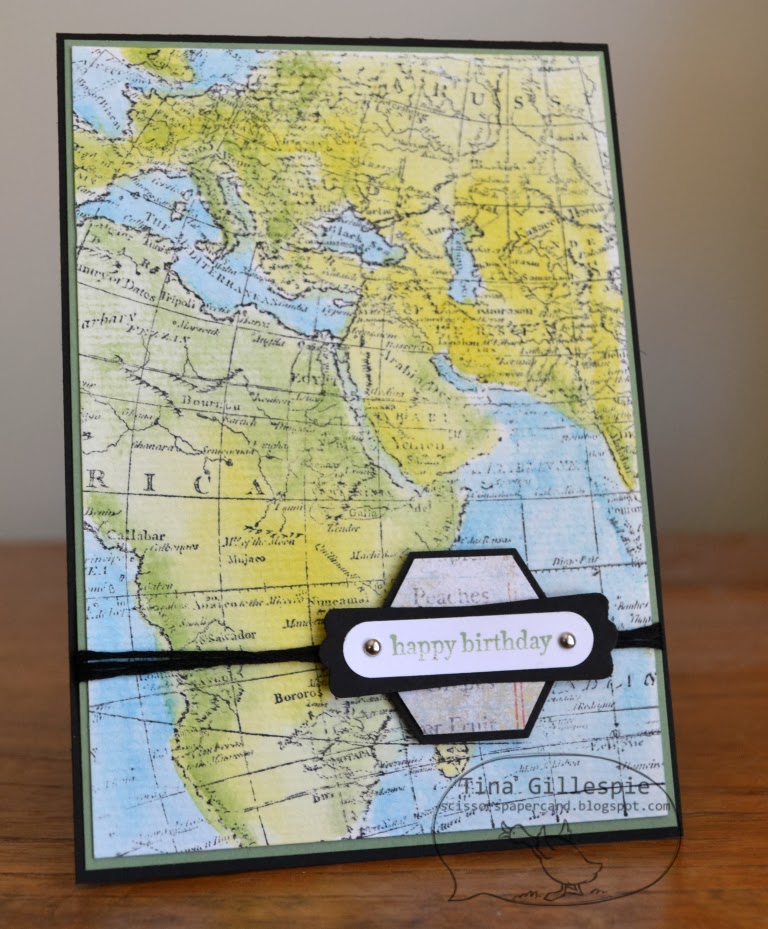
A bit of a break from the Christmas cards tonight.  Instead I have a card made for my uncle, who has done a bit of travelling lately.


I recently purchased the World Map stamp set, and this was my first play with it.  I stamped it on watercolour paper with Stazon ink and then watercoloured it.  I coloured the oceans in Marina Mist, trying to make it darker around the edges than the middle of the ocean.


For the land areas I coloured the whole thing first with Summer Starfruit and then coloured around the edges and anywhere else I thought should be green with Wild Wasabi.  I was going for an atlas looking map and I think I got pretty close!


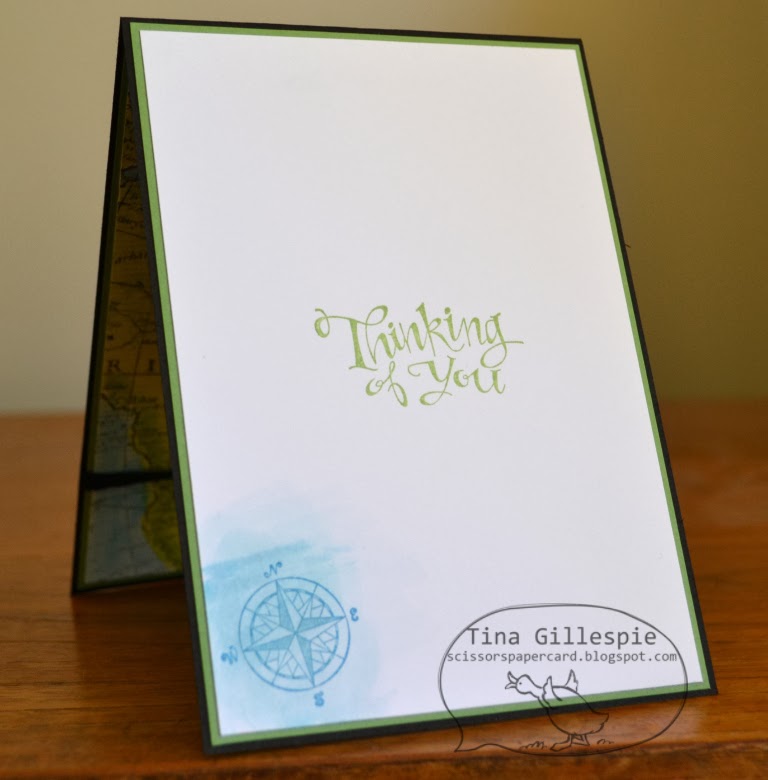
I finished off the inside with the compass stamp from The Open Sea, a great companion set to the World Map!

Have a great week,

Bye for now,

Tina
Monday, 25 November 2013

Simply Stars Christmas Card

Hi!

Just a quick post today, as I forgot to schedule it last night and I'm about to head off to the hospital with my eldest boy for day surgery.  Nothing major, just a small procedure.


This is a card I made with a few different groups a couple of months ago. It's a great card for showing that you don't need a Christmas specific stamp set to create a fabulous Christmas card.


I used the Simply Stars stamp set, with Teeny Tiny Sentiments on the outside and Sweet Essentials on the inside. The colours are Wild Wasabi, Real Red and Whisper White.


So quick and easy!  You could whip 10 of these a night and have your Christmas cards made in a few evenings.

Bye for now,

Tina

Monday, 18 November 2013

Get Well Swing Card

Hi!

When I sat down at my craft desk to have a bit of a play I didn't really have a card in mind, other than I wanted to use my Circles Thinlits Card Die.  I then spied an image I'd made for another card but ended up not using.  It was already circular, so it fit with the Thinlits Card perfectly!


As the image I'd watercoloured was an ambulance I decided to go with a Get Well card.  The card base is Garden Green, despite it looking more like Wild Wasabi in the photo!


Some random stamping over the card base to jazz up the card.


So quick and easy to put this card together, and it was good to use up a leftover piece that had been floating around on my desk!

Bye for now,

Tina
Friday, 30 August 2013

JAI #180: Just Add Colouring

Hi!

Gee, the weeks are flying by!

 
Time for another Just Add Ink challenge! This week Nikki has challenged us to add colouring to our projects.  You can watercolour, use markers, crayons, whatever you like to colour your image.  I chose to watercolour on my card.

 
I used a new stamp set called You're My Hero.  It's a great one for boys cards.  I also used my new favourite set Gorgeous Grunge to create the background.


I used watercolour paper to stamp on and colour the image.  It's fabulous quality paper, perfect for watercolouring. I used my Real Red and Daffodil Delight inkpads to colour the image.


I also coloured the police car in the stamp set using Pacific Point and Daffodil Delight. A cute finishing touch for the inside of the card.

Stamps: You're My Hero, Gorgeous Grunge, Teeny Tiny Sentiments
Ink: Real Red, Daffodil Delight, Pacific Point, Basic Grey, Stazon
Cardstock: Real Red, Whisper White, Watercolour Paper
Other: Big Shot, Circles Framelits Dies, Aqua Painter, Paper Snips, Dimensionals

I hope you can play along with us this week at Just Add Ink.

Bye for now,

Tina

Friday, 16 August 2013

JAI #178: Just Add Snowflakes!

Hi!

It's great to be back doing the Just Add Ink challenges again.


This week is a tricky one for me - to Just Add Snowflakes. With the arrival of the new catalogue I had a big clear out of my retired stamps.  When I went looking for something for this card I realised I had no snowflake stamps left. Hmmm, time for the old thinking cap!


I decided to used the rock salt technique to create the look of snowflakes.  It's pretty easy, you just grind some rock salt onto your cardstock and run it through the big shot. It creates lots of little divots in the cardstock in a random pattern that you then colour over to highlight. Many people brayer, but not being confident with the brayer I decided to sponge the colour on.  I started with a layer of Soft Sky over the whole card front, then Marina Mist from the ground up, finishing with Night Of Navy over the top third.


Here's a closer look.  You can see that I also spritzed the finished card with some shimmer paint (retired) to give some extra effect.


I kept the inside simple, by just stamping the Lovely As A Tree stamp again in Soft Sky that I stamped off once.

Stamps: Lovely As A Tree, Sweet Essentials, Postcard, Teeny Tiny Sentiments
Ink: Soft Sky, Marina Mist, Night Of Navy, Early Espresso
Cardstock: Soft Sky, Early Espresso, Very Vanilla
Other: Big Shot, Modern Label Punch, Word Window Punch, Essentials Paper Piercing Pack, Piercing Tool, Piercing Mat, Rhinestones, Dimensionals, Sponges, Shimmer Paint (retired), Rock Salt

I hope you can play along at Just Add Ink this week,

Bye for now,

Tina