Pages

Showing posts with label Lovely As A Tree. Show all posts

Thursday, 27 February 2025

JAI 740: Just Add Colour

 Hi!


Thanks for joining me for the new Just Add Ink challenge. This week we have an interesting colour combination for you, suggested to us by Rochelle.


It's a little bit nautical, don't you think? Having said that, I went in another direction altogether!


To me, the colours represented the sky, just as it was transitioning from day to night. The last blaze of the sun as it sinks below the horizon, and the dark sky with twinkling stars emerging. I used Blending Brushes to create the sky, blending from Pretty In Pink, to Cherry Cobbler and finally Night Of Navy. I then splattered some Frost White shimmer paint, concentrating on the top of the card, to represent the stars.


The trees, from Lovely As A Tree, were actually stamped before the splatters. I tried heat embossing the word 'courage' using white embossing powder over the trees, but it didn't pop as much as I'd like, so the Pretty In Pink strip with Rose Metallic Thread underneath was popped over the top.

The inside of the card was stamped with the same stamp set - Ribbon Of Courage.

That's all from me for this challenge. You can see what the rest of the Design Team has created using these fun colours over on the Just Add Ink blog. You'll also find our Linky there when you are ready to add your card to the challenge gallery.

Bye for now,

Tina

Thursday, 27 October 2022

JAI 627: Just Choose Two

 Hi!


Yay! Friday means that it's time for the new Just Add Ink challenge. This week it's a Choose Two challenge, and I was the one who suggested the three options.


You can choose two of day, night or silhouette to add to your card. Which two will you choose? I went for night and silhouette.

scissorspapercard, Just Add Ink, Clearly Besotted Bedtime Story, Tim Holtz Moon Mask, Stampin' Up! Lovely As A Tree

My card is a tri-fold opening card. I cropped the front window using my Stitched Rectangle Dies, added two thin strips of cardstock to create the window panes, and then added another cropped black panel to the back to hide the ends of the strips. The black cat silhouette was adhered, and then a window sill, cut using the Hearth & Home Framelits, was adhered over the top. I'd heat embossed the sentiment, from Bedtime Story by Clearly besotted, on the piece first.

scissorspapercard, Just Add Ink, Clearly Besotted Bedtime Story, Tim Holtz Moon Mask, Stampin' Up! Lovely As A Tree

On the next section, you can see the scene I created for the cat to gaze at. I started by stamping the Lovely As A Tree large tree at the bottom, making sure that it came up high enough to overlap the moon. The moon is from the Tim Holtz Moon Mask pack. I laid the solid mask over the stamped card, used a Blending Brush to apply some Balmy Blue ink, and then went around the edges with some Night Of Navy ink. I then splattered some Frost White Shimmer Paint over the top. Once it was dry I laid the detail mask over the moon and blended some Sahara Sand ink over the top. The moon really looks like it's glowing!

scissorspapercard, Just Add Ink, Clearly Besotted Bedtime Story, Tim Holtz Moon Mask, Stampin' Up! Lovely As A Tree

Another cat silhouette and sentiment from Bedtime Story finished off the inside of the card.

Which two will you choose to go on your card this week? I think that day and night would be tricky, but I'd love to see it done. Maybe it will be your card! You can see the rest of this week's Design Team cards over on the Just Add Ink blog. You can also link up your card for the challenge there. I can't wait to see what you make.

Bye for now,

Tina

Thursday, 10 December 2020

JAI #535: Just Add Magical Creatures

 Hi!


Thanks for joining me for the new Just Add Ink challenge. It's one I've been looking forward to doing since we got our schedule of challenges. It was a great idea from Kelly!


Just Add Magical Creatures - that's right up my alley! The hardest part for me was deciding which stamps to use. In the end I settled on a set that I hadn't used yet, called Forrest Elves from Kindred Stamps.

scissorspapercard, Stampin' Up!, Kindred Stamps, Just Add Ink, Forrest Elves, Wizard Friends, Waterfront, Lovely As A Tree, Copic Markers

I started by stamping my Elven Queen on a piece of Whisper White and then used a sticky note to mask her off. The big tree from the retired favourite, Lovely As A Tree, was stamped behind her to create a forrest. I then masked the area for the moon and used a blending brush to add ink for the sky and ground. The sentiment is from another Kindred Stamps set, called Wizard Friends.

scissorspapercard, Stampin' Up!, Kindred Stamps, Just Add Ink, Forrest Elves, Wizard Friends, Waterfront, Lovely As A Tree, Copic Markers

The moon had a tiny bit of Soft Suede ink added. I just used the dirty brush I'd used to create the ground, as I only wanted minimal ink. I then stamped some of the splatters from Waterfront over the top to give the look of craters in the moon. I used the same stamp for the forrest floor. The Queen was coloured using my Copic Markers in the softest blues, greens and yellows that I own. I went a bit bolder for her hair and her amulet. I liked that the masking left a bit of a halo around her, as it looks a little like she is glowing - very elvish!

scissorspapercard, Stampin' Up!, Kindred Stamps, Just Add Ink, Forrest Elves, Wizard Friends, Waterfront, Lovely As A Tree, Copic Markers

The inside sentiment says 'I love you' in Elvish, so I will likely give this card to my daughter or someone very close to me.

Which Magical Creature will you choose to add to your card? I nearly went with Santa, but I'm a little ready to be finished with Christmas cards, so I chose something fun instead. The Design team have had fun with this challenge, and you can see their cards over on the Just Add Ink blog, where you can also link up your card.

Bye for now,

Tina
Monday, 27 August 2018

Nature's Poem Doubled

Hi!

Today's card features a new fold that is trending at the moment. I can't recall what it's called - double easel maybe? - but it's a fun one, so I thought I'd give it a go.

scissorspapercard, Stampin' Up!, Lovely As A Tree, Picture Perfect Birthday, Nature's Poem DSP, Stitched Shapes, Ovals Collection, Fancy Fold

Have you seen it around? Think it looks to tricky to try? It's not at all tricky! Start with a standard card base (Soft Suede) and then cut another card base in a contrasting colour (Cajun Craze), but slightly smaller all around. Adhere the smaller card base to the front of the first card base, but upside down. Then just fold the part of the smaller base that isn't stick down in half, so that it forms the zig saggy bit that sits at the front. Decorate, and you're done! I haven't given measurements, because it varies according to the size of your A4 card, but it would be easy enough to google a tutorial for your country.

scissorspapercard, Stampin' Up!, Lovely As A Tree, Picture Perfect Birthday, Nature's Poem DSP, Stitched Shapes, Ovals Collection, Fancy Fold

I used Nature's Open DSP to decorate my card. I don't own the coordinating stamps and dies, so I used ole favourite Lovely As A tree and Picture Perfect Birthday instead. This is what the card looks like closed flat. You could decorate the back section of the front if you desired, but I thought the wodgrain paper didn't need anything else.

scissorspapercard, Stampin' Up!, Lovely As A Tree, Picture Perfect Birthday, Nature's Poem DSP, Stitched Shapes, Ovals Collection, Fancy Fold

I used the same two stamp sets to finish off the inside.

Are you keen to try this card fold yet? It really isn't tricky, but it's WOW enough that the recipient will probably think you spent hours and hours making it. It will be our secret 😜

Bye for now,

Tina

Monday, 11 June 2018

Old & New Are Better Together

Hi!

Today's card is one that features some old favourite Stampin' Up! stamps with some new product. It's Lovely As A Tree and Nature's Poem DSP. Although the DSP is a part of the new Nature's Poem suite of products, it was also designed to compliment the everlasting Lovely As A Tree stamp set.

scissorspapercard, Stampin' Up!, Lovely As A Tree, Better Together, Nature's Poem DSP

I love this pattern from the DSP pack. The veiny, translucent leaves are just gorgeous! I thought the softer, muted colours (there's also the same pattern, but in a richer colour palette in the pack) were very suitable for a more masculine sympathy card.

scissorspapercard, Stampin' Up!, Lovely As A Tree, Better Together, Nature's Poem DSP

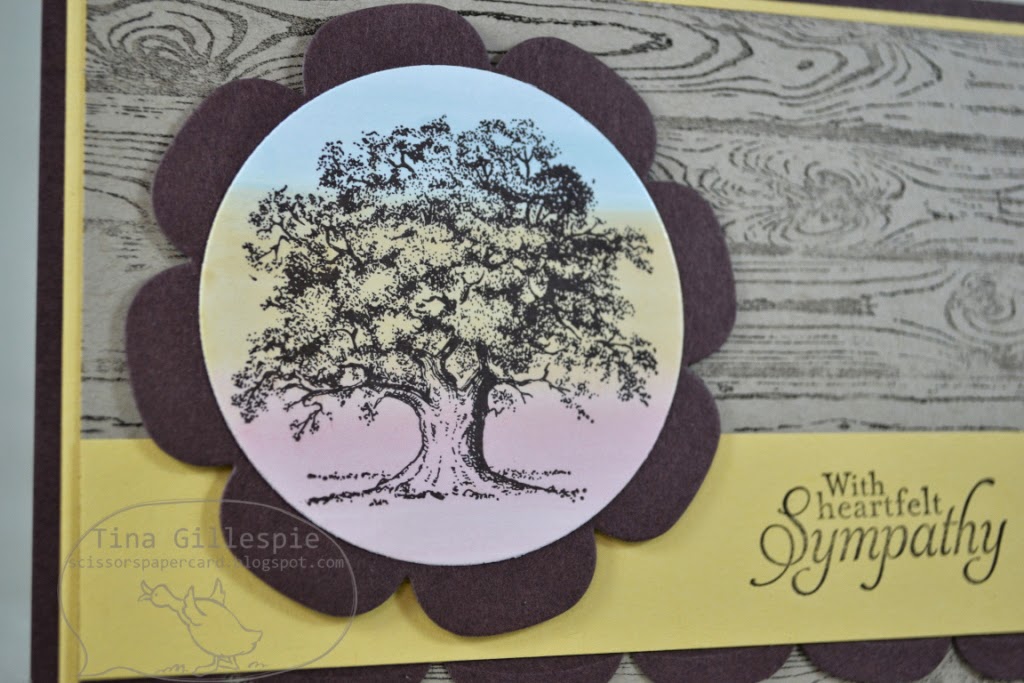
All that Crumb Cake looked a little stark on it's own, so I stamped the tree from LAAT in the corner. Although it doesn't stand out much, it really adds some interest to the card. Any how gorgeous does Crumb Cake look teamed with Tranquil Tide?

scissorspapercard, Stampin' Up!, Lovely As A Tree, Better Together, Nature's Poem DSP

I let the inside mirror the outside by using a smaller strip of the Nature's Poem DSP. It's definitely a pack to add to your DSP stash - or should I say DSP hoard? LOL!

Bye for now,

Tina

Friday, 24 October 2014

JAI #237: Just Add Clear Block Stamping

Hi!

Are you ready for another Just Add Ink challenge?  This week Paula has challenged us to try some Clear Block Stamping.  Never heard of it? It's pretty much just what it sounds like - you ink up your clear block and stamp with it.  Easy peasy!


I decided to use my clear block stamping to create a background for a masculine card.  I used one of the smaller clear blocks and inked it in Cajun Craze, Tangerine Tango and Daffodil Delight (not at the same time!) before stamping the tree over the top in Memento ink.


I was originally going to use the stamped strip to create a banner for my card, but at the last minute I cut a small section off the bottom to create the piece for the sentiment.  The space in between looked a little bare so I added the Linen Thread and attached it with some staples.  It's a great way to embellish a male card without it getting too girly.


The Design Team have come up with some wonderful samples of Clear Block Stamping to inspire you this week.  Why don't you pop on over to the Just Add Ink blog to see for yourself? You're bound to come away inspired to stamp!

Bye for now,

Tina

Friday, 18 April 2014

JAI #211: Just Add A Sketch

Hi!

Happy Easter!  I'm really looking forward to spending some time scrapbooking this long weekend.  What will you be doing?  Hopefully finding some time to create a card for our Just Add Ink Challenge.  This week Paula has designed a fabulous sketch for us.


I switched a few things around with the sketch to create my card.


To create the larger scallops under the flag I cut a second Floral Frames die cut, and then used a Circles Collection Framelit to cut a circle out of the middle.  I then cut between two of the scallops so that I could stretch the circular shape into a straight line.  Easy!


This card did double duty as a class sample for my stamping ladies this month. They'd wanted to do a technique so we did the baby wipe background technique. You can see the colours behind the stamped tree.


I hope you have a relaxing weekend, with plenty of papercrafting time.  See you over at Just Add Ink!

Bye for now,

Tina

Friday, 16 August 2013

JAI #178: Just Add Snowflakes!

Hi!

It's great to be back doing the Just Add Ink challenges again.


This week is a tricky one for me - to Just Add Snowflakes. With the arrival of the new catalogue I had a big clear out of my retired stamps.  When I went looking for something for this card I realised I had no snowflake stamps left. Hmmm, time for the old thinking cap!


I decided to used the rock salt technique to create the look of snowflakes.  It's pretty easy, you just grind some rock salt onto your cardstock and run it through the big shot. It creates lots of little divots in the cardstock in a random pattern that you then colour over to highlight. Many people brayer, but not being confident with the brayer I decided to sponge the colour on.  I started with a layer of Soft Sky over the whole card front, then Marina Mist from the ground up, finishing with Night Of Navy over the top third.


Here's a closer look.  You can see that I also spritzed the finished card with some shimmer paint (retired) to give some extra effect.


I kept the inside simple, by just stamping the Lovely As A Tree stamp again in Soft Sky that I stamped off once.

Stamps: Lovely As A Tree, Sweet Essentials, Postcard, Teeny Tiny Sentiments
Ink: Soft Sky, Marina Mist, Night Of Navy, Early Espresso
Cardstock: Soft Sky, Early Espresso, Very Vanilla
Other: Big Shot, Modern Label Punch, Word Window Punch, Essentials Paper Piercing Pack, Piercing Tool, Piercing Mat, Rhinestones, Dimensionals, Sponges, Shimmer Paint (retired), Rock Salt

I hope you can play along at Just Add Ink this week,

Bye for now,

Tina

Friday, 6 July 2012

Festive Friday #26

Hi!


How are you going on your Christmas card stash?  How about a colour combination to inspire you to make some more?  Nicole has challenged us to make a card using these gorgeous colours.


They aren't colours that immediately scream "Christmas", but I guess that's sometimes a good thing!  Here's my card.

I decided to focus on the browns and create a natural looking Christmas card.  Isn't this tree from Lovely As A Tree perfect as a Christmas tree?  After I stamped it I added some Dazzling Diamonds to the image using my Two-Way Glue Pen.  It adds a lovely shimmer that I hoped looked a little like snow.  Here's a closer look.

Hmm, a bit hard to capture the shimmer in a photo!

Nice and simple stamping on the inside to finish off the card.

Stamps: Lovely As A Tree, Snow Swirled, Season of Joy
Ink: Early Espresso, Crumb Cake
DSP/Cardstock: Letters To Santa DSP, Blushing Bride, Crumb Cake
Other: Dazzling Diamonds, Paper Snips, Two-Way Glue Pen, Dimensionals

I hope you can play along this week at Festive Friday Challenges - it's a lovely colour combination for Christmas cards!
Bye for now,
Tina

Friday, 9 March 2012

JAI 108: Just Add A Colour Combination

Hi!

I love the colour challenge weeks at Just Add Ink, and this week I'm in luck, because it's a fantastic combination.

I had so much fun playing with this colour combination.  I decided I wanted to make a masculine card as I don't have many of those in my stash.  I also decided to pull out some old favourite stamp sets that hadn't seen much ink lately.


Even though there are quite a few layers on the card, I love the Clean and Simple feel of the card.  I was itching to add some ribbon or something else to pretty it up a bit, but that's not really 'right' on a male card now is it?


I kept the inside fairly clean and simple too.

I hope you can find time to play along this week at Just Add Ink.

Stamps: Lovely As A Tree, Fifth Avenue Floral, Happiest Birthday Wishes (hostess)
Ink: Early Espresso, Island Indigo
DSP/Cardstock: Pool Party In Colour Patterns DSP, Island Indigo, Early Espresso, Whisper White
Other: Dimensionals

Bye for now,

Tina

Saturday, 4 December 2010

Lovely As A Tree

Hi!

Today's card was made for the challenge at Stampin' Royalty.  They have a fab colour combination to work with this week.

 I needed to make a masculine birthday card, so this combo suited my needs perfectly.

I stamped the tree in Early Espresso ink on River Rock card stock.  I also sponged around the River Rock card stock with River Rock ink.  It's a bit hard to see in the photo, but I love the aged look it gives to the main panel.

Stamps: Lovely As A Tree, Basic Phrases
Ink: Early Espresso, River Rock
Card Stock: Marina Mist, Early Espresso, River Rock, Rich Razzleberry
Other: Hemp Twine, Dimensionals, Big Shot, Polka Dot Embossing Folder, Stamp Positioner, Blue Eyelets

Catch you later,

Tina

Monday, 20 September 2010

Another Father's Day Card

Hi!

I thought it was about time I showed you the card I made for my father-in-law for Father's Day.  He's getting it late because he was in Hawaii for a combined work trip/holiday with my mother-in-law and has only just got back.  Lucky them!

I asked Rob what he wanted me to make, and after a few interesting suggestions from him I suggested he flick through the Idea Book and Catalogue for inspiration.  We finally settled on a CASE of a card on page 97.


Rob liked the idea of torn edges and I liked the colour scheme from the new Elegant Soiree DSP, so this is the card we came up with to combine our ideas.  We both ended up happy with the results - I just hope the recipient does too!  Happy (belated) Father's Day Neil!

Stamps: Lovely As A Tree
Ink: Sahara Sand, Baja Breeze
Card Stock: Sahara Sand, Baja Breeze, Very Vanilla
Other: Chit Chat Rub On (retired), 1 3/8" x 7/8" Oval Large Punch, Sponge Daubers, Dimensionals, Stamp Positioner, String (recycled from a clothing tag)

Catch you later,

Tina

Monday, 16 August 2010

Helping Hudson and Just Add Ink

Hi!

I'm here today with the card I designed for both the Helping Hudson Colour Challenge and the latest Just Add Ink Challenge.  Hudson is my little man and we are trying to raise the money to purchase him a Kid Walk mobility aid.  The fabulous girls at Just Add Ink have been a fantastic source of support for our fundraiser.  You can find out all about it at Helping Hudson: A Wheely Great Cause.

The Helping Hudson colour challenge was to design a monochromatic card and the JAI challenge was to Just Add Wheels.  Here's my card:


I've used the So Swirly Jumbo Wheel to create the background of this card.  I'm so pleased that we're not losing this wheel in the next catalogue - I love it lots!

There's a fantastic prize up for grabs in both challenges - so please pop on over to both and give them a go.

Stamps: Lovely As A Tree, So Swirly Jumbo Wheel
Ink: Chocolate Chip, Creamy Caramel
Card Stock: Creamy Caramel, Close To Cocoa, Chocolate Chip, Whisper White
Other: Chit Chat Rub Ons (retired), Chocolate Chip Button, Sponge Dauber, Word Window Punch

Catch you later - hopefully over at Helping Hudson!

Tina

Thursday, 20 May 2010

Lovely as a Tree Birthday Card

Hi!

A quick post today because I should be studying...

I made this card a few days ago. I wanted to try out a new technique - using a mirror image. Here's the card I made:


I stamped the trees onto the Very Vanilla card stock and then stamped them again onto the acrylic sheet that came with my stamp positioner. I then flipped it over, lined it up and pressed it onto the card stock. Easy peasy! I layered this panel under the Soft Suede panel, which I raised with dimensionals.

I'm not sure if the card is finished enough though. I keep thinking it needs something else, but I just can't quite put my finger on it. Any ideas?

Stamps: Lovely as a Tree, Vintage Labels (retired 2010 SAB)
Ink: Soft Suede
Card Stock: Very Vanilla, Soft Suede
Other: Stamp Positioner, Word Window Punch, Sponge Dauber

OK, back to the study for me!

Catch you later,

Tina

Sunday, 21 February 2010

Lovely As A Tree

Hi!

I finally got a chance to do some crafting last night. Hubby was out for work, all three children were asleep and my time was all my own. Yay! I put Dirty Dancing on to watch and settled in to make a card for Stampin' Royalty Challenge #7: make a masculine card. The timing of this challenge was perfect, as it is my brother-in-law's birthday next week.


I'd received a set of Stampin' Pastels in my starter kit, so I decided to give them a whirl. I was a bit nervous, as I'd never used them before. I used Chocolate Chip for the trunk and also dabbed it in a few places in the tree to give the effect of branches peeking through. I used a combination of Sage Shadow and Really Rust for the foliage. I was really pleased with the soft effect the pastels created. I'll definitely be using the pastels again.

Cardstock: Whisper White, Chocolate Chip, Really Rust, Sage Shadow
Stamps: Lovely As A Tree, Fifth Avenue Floral
Ink: Chocolate Chip, Creamy Caramel, Versamark
Pastels: Sage Shadow, Really Rust, Chocolate Chip
Other: Chocolate Chip Taffeta ribbon

Catch you later,

Tina