Hi!
Welcome to the new Colour Creations Blog Share.
This week we are all using Early Espresso on our cards. It's a rich brown that works fabulously as an alternative to Basic Black when you're wanting a dark neutral colour. It took me a little while to warm to Early Espresso when it first came out - I was a Chocolate Chip girl - but now it's a colour I use a lot.
For my card today I've paired it with Grapefruit Grove and Very Vanilla. I recently purchased the Botanical Tags Thinlits, and thought that they'd look great as a silhouette effect on my card.
It might be a little difficult to see, but I've painted the two birds and the word 'amazing' with a layer of Wink Of Stella. Can you see the new Tin Tile Dynamic Textured Impressions Embossing Folder on my card? It's so pretty!
Again, it's difficult to see in the photo, but instead of using Very Vanilla cardstock on my card I've actually used a sheet of DSP from the Petal Promenade DSP pack. It's got a very subtle pattern that's perfect for stamping on. Can you see the swirls through the paper on the inside of my card? I also used it under the sentiments on the front of the card. It's a quick and easy way of creating a subtle effect on a card.
You can see the rest of this week's cards over at Catherine's Blog. Now I'm off to get stuck into making next week's card.
Bye for now,
Tina
Showing posts with label Tabs For Everything. Show all posts
Tuesday, 18 September 2018
Thursday, 21 September 2017
AWH Blog Hop: Fancy Folds
Hi!
Welcome to another Art with Heart Team blog hop where we are focusing on fancy folds. You will find loads of creative inspiration tonight, showcasing different folding techniques and projects. Don't be afraid of trying some Fancy Fold cards; they may look intimidating, but in fact, they are not that difficult to create.
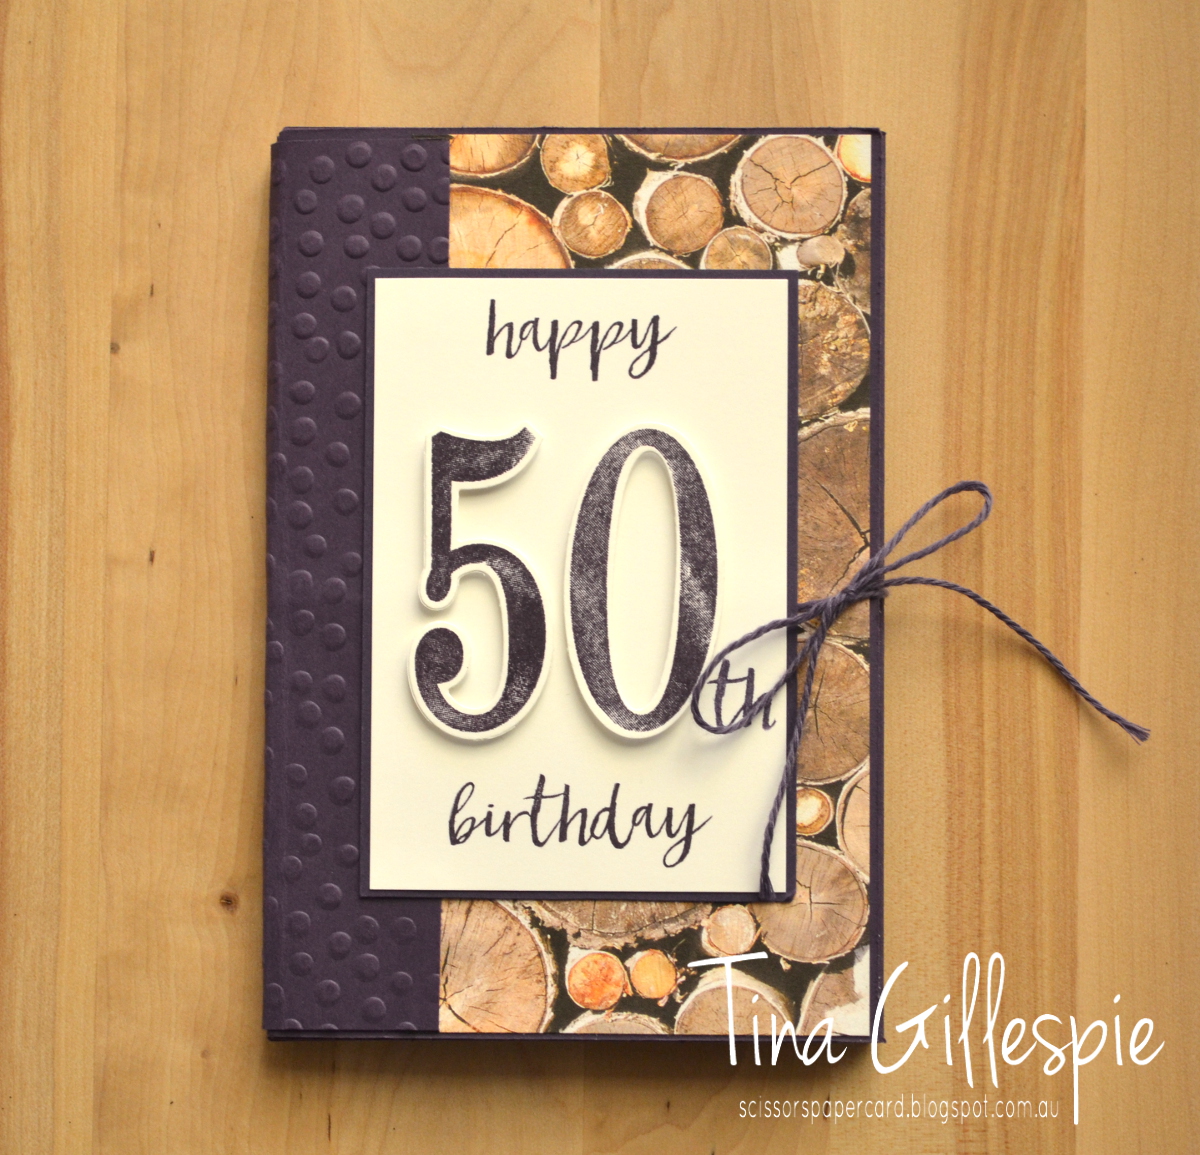
I was recently asked to make a birthday card for a woman turning 50, but it had to be big enough for around 30 people to sign. My first thought was to make a super-sized card, but I thought about how annoying that would be to store, so I decided to make something that was the size of a regular card, and add some extra pages for the guests to write on.
I'm not sure of the name of the fold, but you pretty much take a sheet of cardstock that is double the height of the finished card and 3-4 times the width. In this case I used a sheet of 12x12 cardstock in Elegant Eggplant. I should mention at this point that my brief included using purple and no flowers - the recipient is a really outdoorsy kind of person who enjoys camping, etc.
I scored the 12x12 at 4 and 8 inches, and then turned it 90 degrees and cut at 6 inches from the edge and stopping at the second score line from the edge. I also cut two extra pieces of cardstock that were 6x4, with an additional flap on one 6 inch side. Here's a diagram that shows what I did. Dashed lines are scored, solid are cutting lines, and all measurements are in inches.
I adhered the to extra flaps to the edges of b and c. I then adhered A to a, B to b and C to c using Tear And Tape Adhesive. This creates a little book with 8 pages. You could leave the top of each page open, so that you could have extra tags in the pockets too.
I decorated the front and back cover with Wood Textures DSP and used another piece of cardstock to act as a spine, hiding all of the folds. I added a length of twine to the cover before adding the spine, so that the card can be tied shut.
Each of the pages was decorated with a little more of the DSP, and I also added a few stamps from the Tabs For Everything set to give it a bit more colour. I heard that the card was a hit, so I was very pleased!
Well, that's it for me, so now you're hopping off to visit Kate Morgan's blog. She always has something fabulous that is bound to inspire.
I was recently asked to make a birthday card for a woman turning 50, but it had to be big enough for around 30 people to sign. My first thought was to make a super-sized card, but I thought about how annoying that would be to store, so I decided to make something that was the size of a regular card, and add some extra pages for the guests to write on.
I'm not sure of the name of the fold, but you pretty much take a sheet of cardstock that is double the height of the finished card and 3-4 times the width. In this case I used a sheet of 12x12 cardstock in Elegant Eggplant. I should mention at this point that my brief included using purple and no flowers - the recipient is a really outdoorsy kind of person who enjoys camping, etc.
I scored the 12x12 at 4 and 8 inches, and then turned it 90 degrees and cut at 6 inches from the edge and stopping at the second score line from the edge. I also cut two extra pieces of cardstock that were 6x4, with an additional flap on one 6 inch side. Here's a diagram that shows what I did. Dashed lines are scored, solid are cutting lines, and all measurements are in inches.
I adhered the to extra flaps to the edges of b and c. I then adhered A to a, B to b and C to c using Tear And Tape Adhesive. This creates a little book with 8 pages. You could leave the top of each page open, so that you could have extra tags in the pockets too.
I decorated the front and back cover with Wood Textures DSP and used another piece of cardstock to act as a spine, hiding all of the folds. I added a length of twine to the cover before adding the spine, so that the card can be tied shut.
Each of the pages was decorated with a little more of the DSP, and I also added a few stamps from the Tabs For Everything set to give it a bit more colour. I heard that the card was a hit, so I was very pleased!
Well, that's it for me, so now you're hopping off to visit Kate Morgan's blog. She always has something fabulous that is bound to inspire.
If you find a broken link or have come to this blog hop from a different entry point, you can view the participants below:
Bye for now,
Tina
Subscribe to:
Posts (Atom)