Hi!
EDIT: Oh, wow, I was a winner at CASEing The Catty with this card!
It's been a long while since I've managed to play along with the CASEing The Catty challenge, but after a busy weekend with Rob and the kids, I decided I'd make sure I made the time to give the challenge a go. For challenge #205, the CTC have asked us to choose a birthday card from the catalogue and give it a Christmas twist. What fun! I made a cuppa and settled in with my Annual Catalogue and eventually decided I'd CASE the Mint Macaron/Gorgeous Grape card at the top right of page 136.
I kept the layout pretty much the same, and I also used Swirly Frames on my focal panel, but to give it the Christmas twist, I went with the Hometown Greetings Edgelits.
I started by stamping and cutting two of the large Swirly Frames circles in Night Of Navy and using my Layering Circles dies. I then took my Aquapainter and Night of Navy and Gorgeous Grape ink to create the evening sky on one of the circles. I was so thrilled with how that turned out! I also flicked over some Frost White Shimmer Paint to represent the stars. I cut the second circle with the edgelit, trimming off the second house as it didn't look quite right to me. I then used Dimensionals to pop it up on top of the first circle.
The inside was kept fairly simple so that I'll have plenty of room to write a Christmas message when I send the card. Thanks to the CTC team for a fun challenge!
Bye for now,
Tina
Showing posts with label Hearts Come Home. Show all posts
Sunday, 25 November 2018
Wednesday, 7 November 2018
A CASE Of A CASE Of Myself
Hi!
Try saying that five times quickly!
Today's card is a CASE of both a card I made recently (that was a CASE of another card I made that was a CASE of a decor item in the Annual Catalogue - confused yet?), and also of an ATC I made recently for a swap I hosted. Let's get unconfused!
The front of the card is a CASE of my ATC. An ATC is an Artist Trading Card, and is usually a 2.5 by 3.5 inch card that is decorated. This time we did ATC Coins, which are 2.5 inches round. Here's my ATC so that you can see how I CASEd myself.
I used the same colour combo, but without the Daffodil Delight on the card. I also went for the slightly larger houses, as I used larger circles on the card. I kept the smaller houses for the inside of my card.
The starry (or even snowy) sky is made by flicking Shimmer Paint over the cardstock using an Aqua Painter or a small paintbrush. You basically pick up some paint with the brush and then flick the bristles of the brush over the edge of the paint lid while holding it over the cardstock. Play around with the amount of paint and the distance flicked to get different sized splatters. It is a bit messy though, so make sure you cover anything that doesn't need splatters.
This inside of the card is a CASE of this card. I won't try to explain the chain of CASEd cards, you can follow the links on each post if you're curious! I loved how the inside of my last card turned out, so I copied it pretty much exactly for this card. I just switched out the DSP for the Shimmer Paint splatters. I think they look more like snow than the stars on the DSP.
Claire is once again hosting this week's Blog Share over on her blog. Don't forget to go check out everyone's cards - you won't be disappointed!
Bye for now,
Tina
Try saying that five times quickly!
Today's card is a CASE of both a card I made recently (that was a CASE of another card I made that was a CASE of a decor item in the Annual Catalogue - confused yet?), and also of an ATC I made recently for a swap I hosted. Let's get unconfused!
The front of the card is a CASE of my ATC. An ATC is an Artist Trading Card, and is usually a 2.5 by 3.5 inch card that is decorated. This time we did ATC Coins, which are 2.5 inches round. Here's my ATC so that you can see how I CASEd myself.
I used the same colour combo, but without the Daffodil Delight on the card. I also went for the slightly larger houses, as I used larger circles on the card. I kept the smaller houses for the inside of my card.
The starry (or even snowy) sky is made by flicking Shimmer Paint over the cardstock using an Aqua Painter or a small paintbrush. You basically pick up some paint with the brush and then flick the bristles of the brush over the edge of the paint lid while holding it over the cardstock. Play around with the amount of paint and the distance flicked to get different sized splatters. It is a bit messy though, so make sure you cover anything that doesn't need splatters.
This inside of the card is a CASE of this card. I won't try to explain the chain of CASEd cards, you can follow the links on each post if you're curious! I loved how the inside of my last card turned out, so I copied it pretty much exactly for this card. I just switched out the DSP for the Shimmer Paint splatters. I think they look more like snow than the stars on the DSP.
Claire is once again hosting this week's Blog Share over on her blog. Don't forget to go check out everyone's cards - you won't be disappointed!
Bye for now,
Tina
Wednesday, 17 October 2018
Non Traditional Christmas Traditions
Hi!
It's time for the new Heart Of Christmas Blog Share. This week has been a bit of a purple week for me. Did you see yesterday's Gorgeous Grape card? Tonight I've gone for the other new purple - Highland Heather. I've teamed it with the new Silver Foil Edged Cards and Envelopes, which you can find in the Holiday Catalogue.
I started by stamping the Sheet Music stamp in the top left and bottom right corners. I then sponged all around using Highland Heather ink, leaving the middle bare. I stamped the starry swirl from Star Of Light through the middle. I then splattered some water on the card, and finished by using my Aqua Painter to splatter some Frost White Shimmer Paint over the top. Be careful with the water - it does not agree with the silver foil.
The sentiment stamp is also from the Holiday Catalogue. It's from the Christmas Traditions bundle, which also includes the punch and a gorgeous Christmas tin. How perfect is this sentiment with the Sheet Music stamp? I've layered it over a Silver Foil banner and a vellum circle.
Luckily, another stamp set has some more lyrics from the same song! I've used Hearts Come Home on the inside. I've finished it off in the same way as the front of the card. I really love the way the swirls look along the edge of the sponging. I think I'll use that on another card soon!
You can find the rest of this week's Heart Of Christmas cards over at Claire's Blog. I always look forward to seeing what everyone creates each week.
Bye for now,
Tina
It's time for the new Heart Of Christmas Blog Share. This week has been a bit of a purple week for me. Did you see yesterday's Gorgeous Grape card? Tonight I've gone for the other new purple - Highland Heather. I've teamed it with the new Silver Foil Edged Cards and Envelopes, which you can find in the Holiday Catalogue.
I started by stamping the Sheet Music stamp in the top left and bottom right corners. I then sponged all around using Highland Heather ink, leaving the middle bare. I stamped the starry swirl from Star Of Light through the middle. I then splattered some water on the card, and finished by using my Aqua Painter to splatter some Frost White Shimmer Paint over the top. Be careful with the water - it does not agree with the silver foil.
The sentiment stamp is also from the Holiday Catalogue. It's from the Christmas Traditions bundle, which also includes the punch and a gorgeous Christmas tin. How perfect is this sentiment with the Sheet Music stamp? I've layered it over a Silver Foil banner and a vellum circle.
Luckily, another stamp set has some more lyrics from the same song! I've used Hearts Come Home on the inside. I've finished it off in the same way as the front of the card. I really love the way the swirls look along the edge of the sponging. I think I'll use that on another card soon!
You can find the rest of this week's Heart Of Christmas cards over at Claire's Blog. I always look forward to seeing what everyone creates each week.
Bye for now,
Tina
Wednesday, 29 August 2018
A Twinkly Christmas
Hi!
Here we are again with a new week of Heart Of Christmas. This is the third week of our Christmas themed Blog Share.
A month or so ago I CASEd a card from the Annual Catalogue. You can see it here. For this week's Heart Of Christmas I decided to remake the card, but as a much faster and easier version.
I decided to use plain Whisper White for the rows of houses instead of the Silver Foil on the original card. It's a great substitute, and helps to keep costs down if you are mass producing cards like this.
Instead of water colouring and heat embossing the night sky I decided to use some paper from the Twinkle Twinkle DSP pack. Isn't it perfect for this card? Just another way to keep the costs a little lower.
I used an offcut of the DSP to finish the inside. I had originally planned to have the houses along the bottom, but it looked a little strange with the abrupt edge of the DSP along the top. Shifting the houses to the top solved this problem nicely!
Here are my two cards side by side so that you can see the differences.
Why not pop on over to Claire's blog to see the rest of the cards in the Heart Of Christmas Blog Share this week? They are always fantastic!
Bye for now,
Tina
Here we are again with a new week of Heart Of Christmas. This is the third week of our Christmas themed Blog Share.
A month or so ago I CASEd a card from the Annual Catalogue. You can see it here. For this week's Heart Of Christmas I decided to remake the card, but as a much faster and easier version.
I decided to use plain Whisper White for the rows of houses instead of the Silver Foil on the original card. It's a great substitute, and helps to keep costs down if you are mass producing cards like this.
Instead of water colouring and heat embossing the night sky I decided to use some paper from the Twinkle Twinkle DSP pack. Isn't it perfect for this card? Just another way to keep the costs a little lower.
I used an offcut of the DSP to finish the inside. I had originally planned to have the houses along the bottom, but it looked a little strange with the abrupt edge of the DSP along the top. Shifting the houses to the top solved this problem nicely!
Here are my two cards side by side so that you can see the differences.
Why not pop on over to Claire's blog to see the rest of the cards in the Heart Of Christmas Blog Share this week? They are always fantastic!
Bye for now,
Tina
Sunday, 22 July 2018
CTC #188
Hi!
Sadly, the school holidays are drawing to a close. They always go so quickly! Ada and I went to see the new Mamma Mia movie tonight, and we both loved it. There may have been a few tears shed! I resisted the urge to sing along - I'll save that for the DVD! - but I came home in a great mood, so I decided to take advantage by making a card for the latest CASEing the Catty challenge. This week it's the Holiday section of the Annual Catalogue. I have yet to start my Christmas cards, so this was a great opportunity.
The card I CASEd is on page 101 of the catalogue. It's one of those eye catching, WOW! cards that I've been dying to try since I first laid eyes on it. I'm hoping I did it justice, as it really is an amazing card.
I started by sponging Pumpkin Pie, Crushed Curry and Blueberry Bushel ink on water colour paper and then spritzing with water. You can see the green layer where the colours ran together, but it's also on the catalogue card, so I didn't try to 'fix' it. After it dried I stamped and heat embossed the sentiment, moon and stars. I had to curve the sentiment on the block a little, as it was a tight squeeze when it was straight.
The houses were cut from Silver Foil paper - it's the devil to photograph without any reflections, but it looks amazing on any card. I couldn't quite work out how the SU Concept Artist had cut their front layer, as it didn't match any of the dies in the set. It must have been some fancy Big Shot trick, but far to tricky for me to work out at 9PM on a Sunday! The row of houses works well enough. It's popped up on Dimensionals to give the card some depth.
The piece I'd originally cut from the front didn't have enough length on the bottom, so I put it to work on the inside. I sponged the same colours on some Whisper White card stock, spritzed and dried the piece. The technique doesn't work as well as it does on watercolour paper, but it's good enough for my purposes.
So now I can say I've started my 2018 Christmas cards. Who knows when I'll make more, but at least I have one in my stash now!!
Bye for now,
Tina
Sadly, the school holidays are drawing to a close. They always go so quickly! Ada and I went to see the new Mamma Mia movie tonight, and we both loved it. There may have been a few tears shed! I resisted the urge to sing along - I'll save that for the DVD! - but I came home in a great mood, so I decided to take advantage by making a card for the latest CASEing the Catty challenge. This week it's the Holiday section of the Annual Catalogue. I have yet to start my Christmas cards, so this was a great opportunity.
The card I CASEd is on page 101 of the catalogue. It's one of those eye catching, WOW! cards that I've been dying to try since I first laid eyes on it. I'm hoping I did it justice, as it really is an amazing card.
I started by sponging Pumpkin Pie, Crushed Curry and Blueberry Bushel ink on water colour paper and then spritzing with water. You can see the green layer where the colours ran together, but it's also on the catalogue card, so I didn't try to 'fix' it. After it dried I stamped and heat embossed the sentiment, moon and stars. I had to curve the sentiment on the block a little, as it was a tight squeeze when it was straight.
The houses were cut from Silver Foil paper - it's the devil to photograph without any reflections, but it looks amazing on any card. I couldn't quite work out how the SU Concept Artist had cut their front layer, as it didn't match any of the dies in the set. It must have been some fancy Big Shot trick, but far to tricky for me to work out at 9PM on a Sunday! The row of houses works well enough. It's popped up on Dimensionals to give the card some depth.
The piece I'd originally cut from the front didn't have enough length on the bottom, so I put it to work on the inside. I sponged the same colours on some Whisper White card stock, spritzed and dried the piece. The technique doesn't work as well as it does on watercolour paper, but it's good enough for my purposes.
So now I can say I've started my 2018 Christmas cards. Who knows when I'll make more, but at least I have one in my stash now!!
Bye for now,
Tina
Wednesday, 29 November 2017
AWH HOC: Final Week!
Hi!
Can you believe that it's the final week of The Heart Of Christmas? I can't! That would be like admitting that it's nearly Christmas!
I'ave had a great time making cards for these blog shares each week - it's been a good way of making sure I've made a decent start on my stash of Christmas cards.
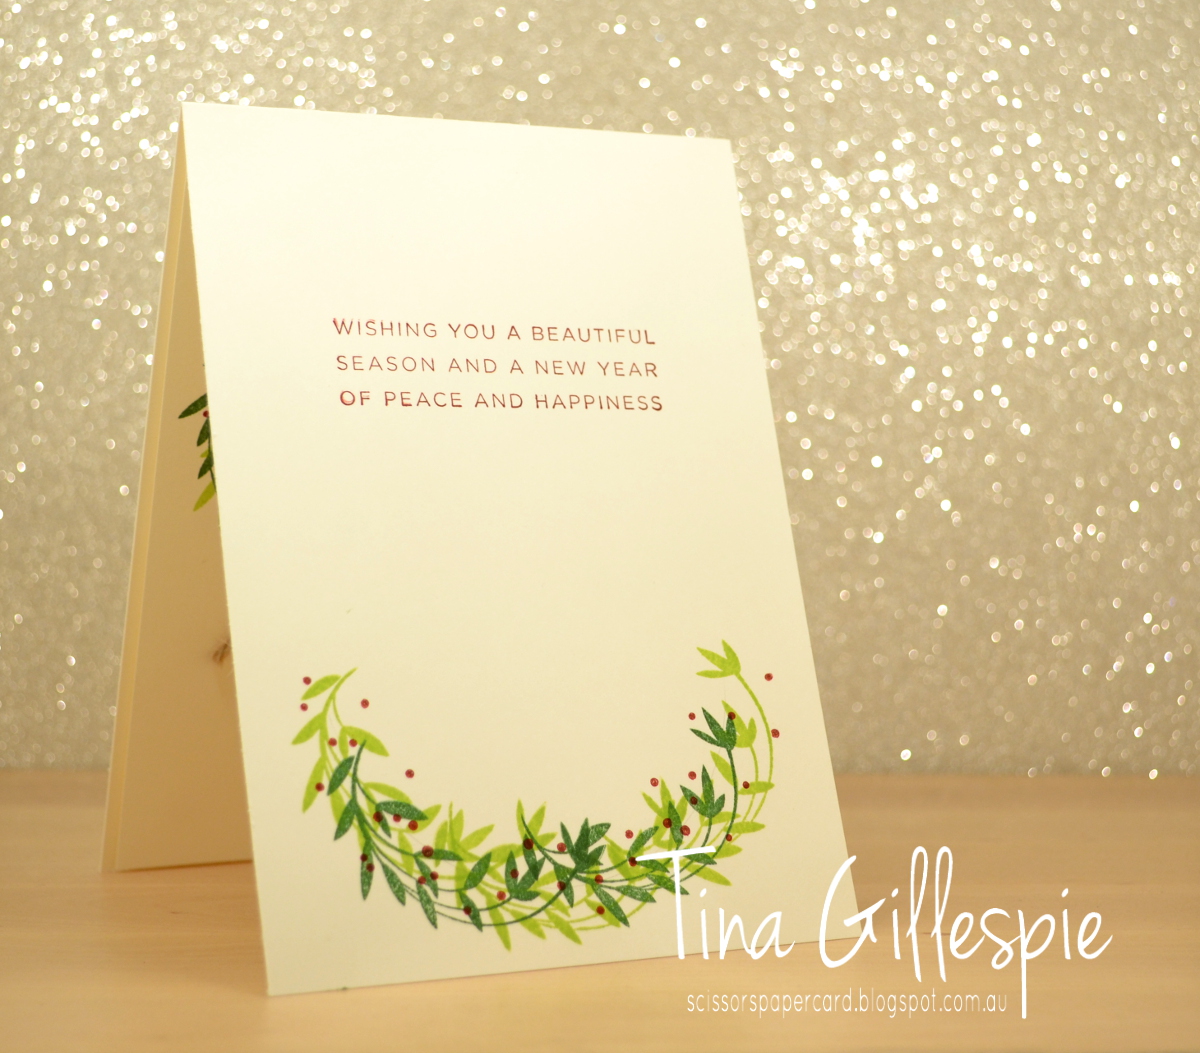
This week I've created a very Australian bush look wreath - do you agree that it looks like a wreath made of gum leaves? You wouldn't guess that the stamp is actually meant to be a peacock tail! The stamp is from a new set called Beautiful Peacock, and it's one of the upcoming Sale-A-Bration sets.
I lightly drew a circle on some Very Vanilla yardstick by tracing around the bottom of an old Embossing Paste pot. I then stamped the image 5 times around the circle in Garden Green ink, and then a further 5 times in Lemon Lime Twist ink. I offset them, so that it made a smoother circle shape. If you look closely at the separate image, you can see that it's a bit of a scallopy looking circle in just one colour, so you definitely need the two colours to smooth it out.
I followed the same process for the inside, except for only making a half-wreath. You can see on both that I've stamped some Cherry Cobbler 'berries' using another stamp from the Beautiful Peacock set.
As usual, you can find links for the rest of the group over on Claire's blog. I've loved checking out everyone's cards each week - they are so inspirational.
Bye for now,
Tina
Can you believe that it's the final week of The Heart Of Christmas? I can't! That would be like admitting that it's nearly Christmas!
I'ave had a great time making cards for these blog shares each week - it's been a good way of making sure I've made a decent start on my stash of Christmas cards.
This week I've created a very Australian bush look wreath - do you agree that it looks like a wreath made of gum leaves? You wouldn't guess that the stamp is actually meant to be a peacock tail! The stamp is from a new set called Beautiful Peacock, and it's one of the upcoming Sale-A-Bration sets.
I lightly drew a circle on some Very Vanilla yardstick by tracing around the bottom of an old Embossing Paste pot. I then stamped the image 5 times around the circle in Garden Green ink, and then a further 5 times in Lemon Lime Twist ink. I offset them, so that it made a smoother circle shape. If you look closely at the separate image, you can see that it's a bit of a scallopy looking circle in just one colour, so you definitely need the two colours to smooth it out.
I followed the same process for the inside, except for only making a half-wreath. You can see on both that I've stamped some Cherry Cobbler 'berries' using another stamp from the Beautiful Peacock set.
As usual, you can find links for the rest of the group over on Claire's blog. I've loved checking out everyone's cards each week - they are so inspirational.
Bye for now,
Tina
Wednesday, 15 November 2017
AWH HOC Week 25
Hi!
Welcome to this week's Heart Of Christmas.
This week I decided to make a card from scratch, rather than modify a Watercolour Christmas Kit card. My daughter participated in a choral festival of music recently, and one of the sections of the performance was a retelling of The Nutcracker. It straight away made me think of the Christmas Around The World DSP, so that's the paper I reached for this week.
I also wanted to use the new Tinsel Trim. I needed a 'reason' for it to be on the card, so I ended up splitting the front panel and using the trim to divide the two patterns. The tinsel is fabulous - a little bulky for mailed cards when you tie a bow - but a fun, sparkly addition to any card!
Another Holiday Catalogue product that I hadn't used much is the Black Rhinestones - not just for Halloween, they make a nice addition to the sentiment panel on my card.
The tinsel was a little bulky to add to the inside, so I opted for a strip of Real Red cardstock to edge the DSP. The sentiment is from Hearts Come Home.
As usual, pop on over to Claire's blog where you can find the links to the rest of the team participating today. Not many weeks left now!
Bye for now,
Tina
Welcome to this week's Heart Of Christmas.
This week I decided to make a card from scratch, rather than modify a Watercolour Christmas Kit card. My daughter participated in a choral festival of music recently, and one of the sections of the performance was a retelling of The Nutcracker. It straight away made me think of the Christmas Around The World DSP, so that's the paper I reached for this week.
I also wanted to use the new Tinsel Trim. I needed a 'reason' for it to be on the card, so I ended up splitting the front panel and using the trim to divide the two patterns. The tinsel is fabulous - a little bulky for mailed cards when you tie a bow - but a fun, sparkly addition to any card!
Another Holiday Catalogue product that I hadn't used much is the Black Rhinestones - not just for Halloween, they make a nice addition to the sentiment panel on my card.
The tinsel was a little bulky to add to the inside, so I opted for a strip of Real Red cardstock to edge the DSP. The sentiment is from Hearts Come Home.
As usual, pop on over to Claire's blog where you can find the links to the rest of the team participating today. Not many weeks left now!
Bye for now,
Tina
Wednesday, 6 September 2017
AWH HOC Week 15
Hi!
Welcome to this week's Heart Of Christmas with the Art With Heart team.
This week I have the pleasure of hosting The Heart Of Christmas. Claire has some family commitments, and so I volunteered to be a temporary home for the Bog Share until she is able to resume.
This week's card came about as I had an extra sample Embossing Paste/Glitter panel left over from a card class last month. I didn't want to waste it, so I decided to make it up into a card that was different to the card the classes made. I'd stuffed up the panel a little by getting some paste where it wasn't wanted, so I had to trim it a little to hide my whoopsie.
The word 'Joy' comes from the new Hearts Come Home stamp set. The whole sentiment is actually Joy To The World, but I only wanted(/had room for) the word Joy.
I do love a bit of glimmer on a Christmas card, so I added a strip to the inside to finish it off.
Here are the links to the rest of the Art With Heart ladies who are sharing their gorgeous Christmas projects this week:
Kate Morgan
Sharon Davern
Caroline Manwaring
Rachel Palmieri
Rachel Woollard
Ros Davidson
Claire Daly
Monika O'Neill
Catherine Proctor
I'm sure they'd love it if you left them a comment.
Bye for now,
Tina
Welcome to this week's Heart Of Christmas with the Art With Heart team.
This week I have the pleasure of hosting The Heart Of Christmas. Claire has some family commitments, and so I volunteered to be a temporary home for the Bog Share until she is able to resume.
This week's card came about as I had an extra sample Embossing Paste/Glitter panel left over from a card class last month. I didn't want to waste it, so I decided to make it up into a card that was different to the card the classes made. I'd stuffed up the panel a little by getting some paste where it wasn't wanted, so I had to trim it a little to hide my whoopsie.
The word 'Joy' comes from the new Hearts Come Home stamp set. The whole sentiment is actually Joy To The World, but I only wanted(/had room for) the word Joy.
I do love a bit of glimmer on a Christmas card, so I added a strip to the inside to finish it off.
Here are the links to the rest of the Art With Heart ladies who are sharing their gorgeous Christmas projects this week:
Kate Morgan
Sharon Davern
Caroline Manwaring
Rachel Palmieri
Rachel Woollard
Ros Davidson
Claire Daly
Monika O'Neill
Catherine Proctor
I'm sure they'd love it if you left them a comment.
Bye for now,
Tina
Thursday, 24 August 2017
AWH Blog Hop: Holiday Catalogue
Hi!
To create the Diamond Box, I followed a tutorial on the Stampin' Up! blog. It was a really easy box to make - you just need your paper trimmer and a Gift Bag Punch Board. Before assembling the box, I ran it through the Big Shot a few times with the night sky die from the Card Front Builder Thinlits. I also stamped it with some houses and trees from the Hearts Come Home stamp set. Have I mentioned before that it's my favourite from the Holiday Catalogue? LOL.
Here you can see the effect of the box as a luminaire. I popped a battery operated candle inside and photographed it in low light so you can see how the light comes through the stars and the moon cut into the box.
I used some Pool Party Shimmer Ribbon from the Annual Catalogue to create the bow on top. It was a little fiddly, but the end result was well worth it!
Here's a closer look at the stamping and the die cuts. I used some new Specialty DSP from the Holiday Catalogue to create the box lid. It's called Merry Music, and features Christmas Carols, musical notation and snowflakes in both white on black, and black on white. It's thinner than our usual DSP, but you get twice as much in the pack - 4 sheets each of the 6 double sided designs.
Bye for now,
Tina
Tonight some of the Art with Heart Stampin’ Up! team girls are sharing some fun and fabulous ideas to inspire you from our brand new Holiday Catalogue available on 1st September until 2nd January 2018. Be sure to request your copy of the catalogue today!
I only placed a small preorder of products from the Holiday Catalogue, so I had to be a bit creative with how I could use them for this Blog Hop! In the end I decided to create a small gift box, that could also be used as a luminaire.
To create the Diamond Box, I followed a tutorial on the Stampin' Up! blog. It was a really easy box to make - you just need your paper trimmer and a Gift Bag Punch Board. Before assembling the box, I ran it through the Big Shot a few times with the night sky die from the Card Front Builder Thinlits. I also stamped it with some houses and trees from the Hearts Come Home stamp set. Have I mentioned before that it's my favourite from the Holiday Catalogue? LOL.
Here you can see the effect of the box as a luminaire. I popped a battery operated candle inside and photographed it in low light so you can see how the light comes through the stars and the moon cut into the box.
I used some Pool Party Shimmer Ribbon from the Annual Catalogue to create the bow on top. It was a little fiddly, but the end result was well worth it!
Here's a closer look at the stamping and the die cuts. I used some new Specialty DSP from the Holiday Catalogue to create the box lid. It's called Merry Music, and features Christmas Carols, musical notation and snowflakes in both white on black, and black on white. It's thinner than our usual DSP, but you get twice as much in the pack - 4 sheets each of the 6 double sided designs.
Because the DSP is thinner, I decided to reinforce the bottom of the lid with some Pool Party cardstock. Then I decided I'd hide the flaps on the bottom of the box with some of the DSP - a nice little surprise for the recipient!
Now it’s time to hop on over to our next participant, the very talented fellow South Aussie, Kathryn Mangelsdorf
.
If you find a broken link or have come to this blog hop from a different entry point, you can view the participants below:
1. Alisha Watson
2. Claire Daly
3. Ros Davidson
4. Judy May
5. Monika O'Neill
6. Rebecca Jacovou
7. Rachel Palmieri
8. Kate Morgan
9. Caroline Manwaring
10. Catherine Proctor
11. Tina Gillespie
<-- br="" me="" s="" that="">12. Kathryn Mangelsdorf
13. Rachel Woollard
14. Sharon Davern
15. Kimberly Hern-->
2. Claire Daly
3. Ros Davidson
4. Judy May
5. Monika O'Neill
6. Rebecca Jacovou
7. Rachel Palmieri
8. Kate Morgan
9. Caroline Manwaring
10. Catherine Proctor
11. Tina Gillespie
<-- br="" me="" s="" that="">12. Kathryn Mangelsdorf
13. Rachel Woollard
14. Sharon Davern
15. Kimberly Hern-->
Tina
Wednesday, 23 August 2017
AWH HOC Week 13
Hi!
I wasn't sure I was going to get to make a card for this week's Heart Of Christmas post, but then I remembered I had a half made card that I could easily finish. Yay!
This is a smaller card, just 4 1/4 inches square. I like making this size sometimes, just as a change from the regular size cards.
Do you remember to stamp on DSP, or forget like me? It's a great way to add a bit of interest to a card. I love the silhouette Santa with his reindeer, and I think it looks great tucked away up there in the corner of the card.
The long edgelit dies in this set are so pretty. I have plans to make a bridge card using them (just like everyone else LOL), so keep an eye out for that!
You can see the cards that the rest of the team that's participating in today's Heart Of Christmas share have made over on Claire's blog.
Bye for now,
Tina
I wasn't sure I was going to get to make a card for this week's Heart Of Christmas post, but then I remembered I had a half made card that I could easily finish. Yay!
This card was my first play with the Hearts Come Home bundle from the new Holiday Catalogue. have you seen it yet? It's a fantastic catalogue. My wish list grows longer each time I look through it!
This is a smaller card, just 4 1/4 inches square. I like making this size sometimes, just as a change from the regular size cards.
Do you remember to stamp on DSP, or forget like me? It's a great way to add a bit of interest to a card. I love the silhouette Santa with his reindeer, and I think it looks great tucked away up there in the corner of the card.
The long edgelit dies in this set are so pretty. I have plans to make a bridge card using them (just like everyone else LOL), so keep an eye out for that!
You can see the cards that the rest of the team that's participating in today's Heart Of Christmas share have made over on Claire's blog.
Bye for now,
Tina
Wednesday, 16 August 2017
AWH HOC Week 12
Hi!
I'm very excited to show you this week's Art With Heart, The Heart Of Christmas cards. Did you notice I said cards, not card? That's right, I have two cards this week!
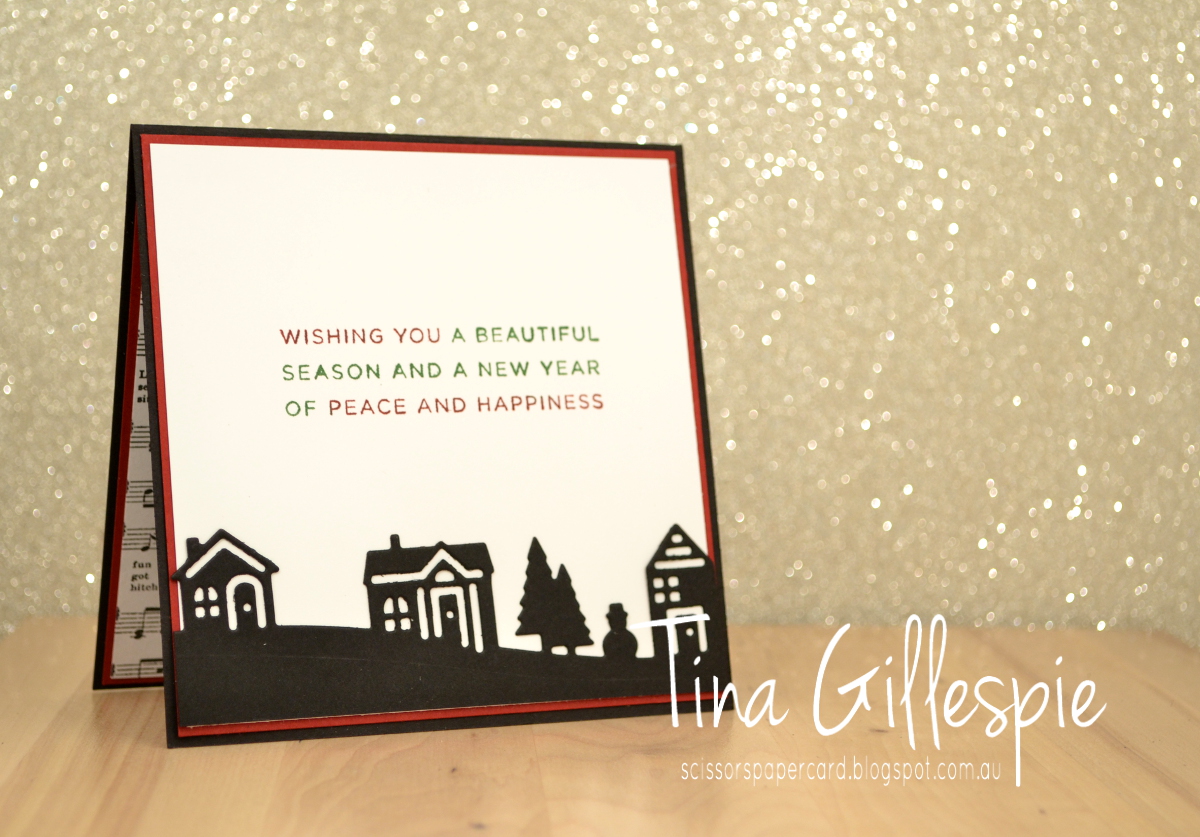
I'm also excited because I made the cards using a new bundle from the upcoming Holiday Catalogue. As soon as I saw the bundle, I fell in love and just had to have it! It's called Hearts Come Home, and you can find it on page 39 of the Holiday Catalogue.
The card I made first is a CASE of a card on page 47 of the Holiday Catalogue it uses a different stamp set and DSP, but I loved the layout and colours, so I used them on my card. The DSP is a lightweight Specialty pack called Merry Music SDSP, and it's lovely - lots of Christmassy music designs, and you get 24 sheets in the pack.
I love the Edgelits in the bundle, that you can use to create layered scenes on your card. I've just used part of one for my card. I used the marker to rubber technique to colour my sentiment.
I've carried many of the same elements to the inside of the card.
Now for the second card - it's a stepped up version of the first card.
The die cut house is where I went a little mad! I cut the house and tree again in Old Olive, Cherry Cobbler and Daffodil Delight, and then used all the little bits you'd usually throw away to fill in the design. Very, very fiddly, but I love the look!
I also stepped up the inside by adding another scalloped layer, and by making the sentiment multi coloured. Most of these stepped up bits are quick and easy to do, making the card easy to mass produce if you desired. Maybe not the house bit though!
You can see what the rest of the team have created this week by visiting Claire's blog. You'll find all the links there.
Bye for now,
Tina
I'm very excited to show you this week's Art With Heart, The Heart Of Christmas cards. Did you notice I said cards, not card? That's right, I have two cards this week!
I'm also excited because I made the cards using a new bundle from the upcoming Holiday Catalogue. As soon as I saw the bundle, I fell in love and just had to have it! It's called Hearts Come Home, and you can find it on page 39 of the Holiday Catalogue.
The card I made first is a CASE of a card on page 47 of the Holiday Catalogue it uses a different stamp set and DSP, but I loved the layout and colours, so I used them on my card. The DSP is a lightweight Specialty pack called Merry Music SDSP, and it's lovely - lots of Christmassy music designs, and you get 24 sheets in the pack.
I love the Edgelits in the bundle, that you can use to create layered scenes on your card. I've just used part of one for my card. I used the marker to rubber technique to colour my sentiment.
I've carried many of the same elements to the inside of the card.
Now for the second card - it's a stepped up version of the first card.
I've used many of the same things, just added to them - the scalloped layers under the main panel and the DSP, for example. They would also look amazing in Cherry Cobbler, I think.
I also stepped up the inside by adding another scalloped layer, and by making the sentiment multi coloured. Most of these stepped up bits are quick and easy to do, making the card easy to mass produce if you desired. Maybe not the house bit though!
You can see what the rest of the team have created this week by visiting Claire's blog. You'll find all the links there.
Bye for now,
Tina
Subscribe to:
Posts (Atom)