Pages

Showing posts with label Floral Frames Framelits. Show all posts

Friday, 17 July 2015

JAI #271: Just Add A Sketch

Hi!

Wow, three posts this week! Hopefully I can keep up the pace! Today's post is the new Just Add Ink Challenge, which is a fantastic sketch designed by Narelle.


I decided to break out my new Sprinkles of Life stamp set for this card.


I've teamed it with the new Cherry On Top DSP Stack.  The combination is fabulous for a cute kid's birthday card.


It's been a while since I used the Floral Frames Framelits, so I decided to dust them off for this card.  The whimsical shape is another great addition to a kid's card.


I love this sentiment for the inside, and it just calls for at least a double scoop on the cone.

What will you do with the sketch? I'll see you over at the Just Add Ink blog.

Bye for now,

Tina

Friday, 18 April 2014

JAI #211: Just Add A Sketch

Hi!

Happy Easter!  I'm really looking forward to spending some time scrapbooking this long weekend.  What will you be doing?  Hopefully finding some time to create a card for our Just Add Ink Challenge.  This week Paula has designed a fabulous sketch for us.


I switched a few things around with the sketch to create my card.


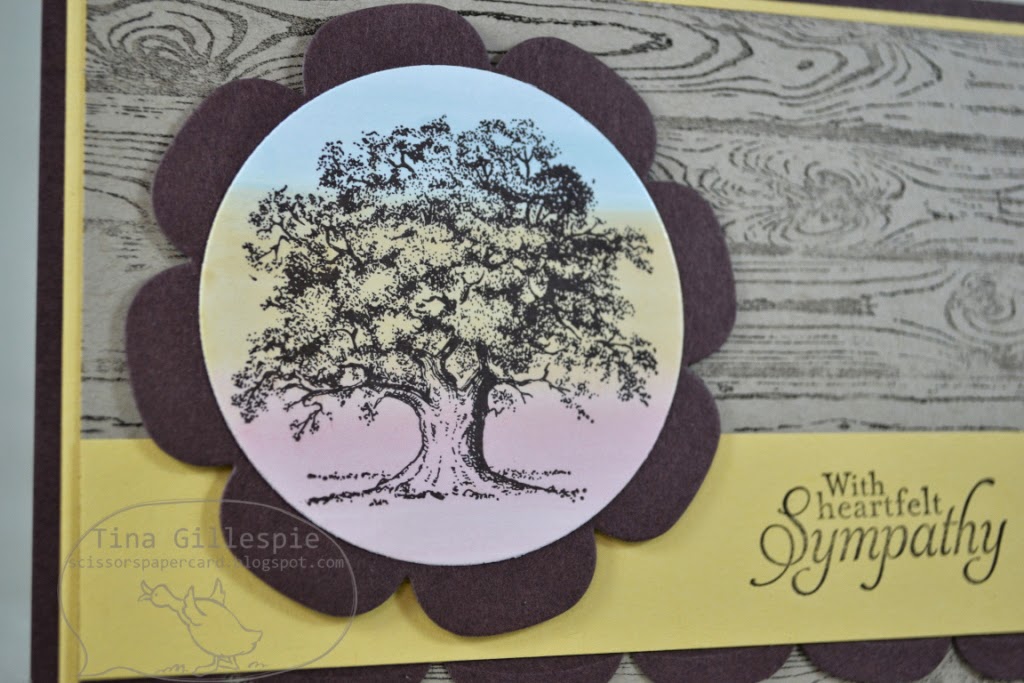
To create the larger scallops under the flag I cut a second Floral Frames die cut, and then used a Circles Collection Framelit to cut a circle out of the middle.  I then cut between two of the scallops so that I could stretch the circular shape into a straight line.  Easy!


This card did double duty as a class sample for my stamping ladies this month. They'd wanted to do a technique so we did the baby wipe background technique. You can see the colours behind the stamped tree.


I hope you have a relaxing weekend, with plenty of papercrafting time.  See you over at Just Add Ink!

Bye for now,

Tina

Friday, 31 January 2014

JAI #200: Just Add Inspiration

Hi!

How are you all on this lovely Friday?  Have your children survived the first week back at school? Have you survived your children's first week back at school?  It can be a bit of a shock to the system after the lazy days of summer holidays!  How about trying the new Just Add Ink challenge to give you back your sanity?


Nikki found these gorgeous images to inspire our card making this week.  Wouldn't you just love to sit at that table and enjoy a cup of tea?


I saw this gift box and tutorial by Connie Collins a long time ago and have been meaning to try out the flower ever since.  This challenge seemed the perfect time.  Isn't it a beautiful flower?  It's not difficult to make at all, but it does take a while as you need to wait for it to dry.


This isn't a card you would want to post as the flower sits out quite a way from the card. Sending it in the post would squash that beautiful flower. Luckily I have plenty of friends I can hand deliver this card to.


I was a bit stumped as to what to do on the inside. I don;t have any daisy stamps, so I ended up stamping a leaf from Peaceful Petals and lightly coloured it with a blender pen.

Stamps: Field Flowers, Sassy Salutations, Peaceful Petals
Ink: Wild Wasabi, So Saffron
Cardstock: Pistachio Pudding, So Saffron, Wild Wasabi, Chocolate Chip, Whisper White
Other: Big Shot, Floral Frames Collection Framelits, Decorative Dots TIEF (SAB), Scribbles Swirls Sizzlit (retired), White Baker's Twine, 1 1/4" Circle Punch, 1" Circle Punch, Blender Pen

I hope you can join in this week at Just Add Ink, we'd love to see what you create.

Bye for now,

Tina

Wednesday, 11 September 2013

Layered Daydream Medallions

Hi!

Today's card is one I made as a sample for a couple of parties I did in July. 


I got my inspiration for this card from the Annual Catalogue.  You can see the card I CASEd on page 114.  I loved the style of the card and the colour scheme so I adapted it to make it a little easier to put together.


The card in the catalogue layered all the stamping, but I decided to stamp and die cut each layer individually. I also changed the card to a standard A6 size.


The inside of mine is very plain, but the ladies at my parties stamped some more of the Medallions inside their cards.

Stamps: Daydream Medallions, Sassy Salutations, Make A Wish
Ink: Pool Party, Crisp Cantaloupe, Baked Brown Sugar
Cardstock: Pool Party, Very Vanilla
Other: Big Shot, Floral Frames Framelits, Vintage Faceted Button, Linen Thread, Dimensionals, Glue Dots

Bye for now,

Tina

Wednesday, 28 August 2013

A Daydream medallions CASE

Hi!

Woops!  Looks like Wednesday snuck up on me and I forgot about blogging this morning!

Today's card is one I used for a couple of parties I ran in July.  It's a CASE from the Annual Catalogue.  You can find the original card on page 114.


I kept the colour scheme and stamp set but I changed a few things.  Instead of stamping each layer onto the one piece of cardstock we stamped each layer separately and then cut them using the coordinating Floral Frames Framelits.


Every second layer was popped up on Dimensionals.  I also used Vintage Faceted Buttons for the centre.  It is such a pretty card and I think everyone enjoyed making it.


The inside of my card is fairly plain, but at the parties we stamped some of the smaller Medallions stamps.

Stamps: Daydream Medallions, Sassy Salutations, Make A Wish
Ink: Pool Party, Baked Brown Sugar, Crisp Cantaloupe
Cardstock: Pool Party, Very Vanilla
Other: Big Shot, Floral Frames Framelits, Vintage Faceted Buttons, Linen Thread, Dimensionals, Glue Dots

Bye for now,

Tina

Wednesday, 13 March 2013

Filter Paper Flowers

Hi!

I had the pleasure of doing a party for a group of ladies last Friday night. I was so excited to be able to show off some of the new products from the Seasonal Catalogue. The card I demonstrated to them showed off the filter paper and how you can make gorgeous ruffled flowers from it.


I love how clean and simple this card is, but how effective the flower looks. Here's a closer look.


To create the flower I cut 8 layers of the filter paper using the Big Shot, set a brad through the middle and scrunched up the layers one at a time.  The layers are then fluffed out to achieve the desired look.

Stamps: Sassy Salutations
Ink: Island Indigo
Cardstock: Crumb Cake, Filter Paper
Other: Big Shot, Floral Frames Framelits, In Colour Brads, Glue Dots

Bye for now,

Toma

Wednesday, 16 January 2013

Some More Gift Boxes

Hi!

On Monday I showed you the gift boxes I had made for Christmas Gifts.  Today I have more boxes, but these ones were thank you gifts for two special ladies.

 
I wanted to thank Lia and Isabel, the two creative genius minds behind Camera Creche. They had most generously given me a spot in their photography course and I had had a fabulous time learning how to use my DSLR in Manual Mode.
 
 
While I made these boxes, the design is not my own. They are based on the boxes we made as Make and Takes at Convention in 2012.
 
 
The ladies loved them!
 
Bye for now,
 
Tina

Saturday, 22 September 2012

New Annual Catalogue Blog Hop

Hi!

Here we are once again on another blog hop.  I love blog hops - they are such a wonderful way to spend some time gaining lots of inspiration.  The only thing better is stamping time!!!  There are 7 of us on this hop today so it won't take you long, but you're bound to find some fabulous ideas along the way.  We are all focusing on products from the New Annual Catalogue  The blog before mine is the clever Margaret Knoops.  Start or stop anywhere, it doesn't matter - just keep following the links to hop round the circle until you get back to where you started.  Please leave some comments along the way - we all love to know what you think of our projects.

My projects today were made for a special purpose.  My youngest finished preschool last week so they were made as gifts to give to his teachers and aides.


I made each teacher a card and decorated a candle to go in a goodie bag with some wine and chocolate.  I used the Floral District DSP as the basis for all my cards.  Here's a closer look at the stamped panel, cut using a Floral Frames Framelit.


The butterfly from Papillion Potpourri was stamped directly onto the panel, and then a second time onto a scrap of cardstock without reinking.  This gives a more muted effect with the colour.  I then punched it with the new Elegant Butterfly punch, curled the wings and adhered it with a glue dot over the top of the first butterfly.


The handprint isn't a stamp - it's Hudson's actual handprint.  I rubbed his hand on my Daffodil Delight ink pad and then stamped his hand onto the cardstock.  He had great fun 'helping' me.  I did it just before bathtime so I didn't have to worry about inky handprints everywhere!

Here's the same card and candle, just in Rose Red.  I made three sets at the same time in a bit of a production line.


The candles were bought as a set of three, I just cut a small strip of DSP to stick to the glass and tied some coordinating ribbon around the DSP.  I popped them in a cellophane bag and tied the top with more ribbon.  How lucky to find candles that colour matched the DSP so well!


Finally, the Baja Breeze card.  This one was for the Director of the centre, who is a man, so I tried to tone down the 'girliness' of the cards.  I kept the butterfly though, as I thought it was a great symbol of how Hudson has grown and changed while he's been at preschool.


Here they are together.  I had fun making these special gifts, and I hope the recipients love them.  It's hard to say but I think I like the Baja Breeze set the most - but I am a bit partial to blue!

Stamps: Notable Alphabet, Papillion Potpourri, Daydream Medallions, For My Family
Ink: Rose Red, Rich Razzleberry, Baja Breeze, Daffodil Delight
DSP/Cardstock: Floral District DSP, Confetti White (retired), Rose Red, Rich Razzleberry, Baja Breeze, Whisper White
Other: Big Shot, Floral Frames Framelits, Elegant Butterfly Punch, Rose Red Seam Binding Ribbon, Whisper White Stitched Grosgrain Ribbon, Rich Razzleberry Stitched Grosgrain Ribbon, Basic Jewels Rhinestones, Glue Dots
Non-SU: Scented Candles, Cellophane Bags

Now you're off to see the fabulous creations over at Di Dunk's blog.  Please remember to leave a comment before you go, just click on the but below that says "Comments".

Bye for now,

Tina