Pages

Showing posts with label Envelope Punch Board. Show all posts

Friday, 9 November 2018

Orlando Swaps Part One

Hi!

How exciting - today is the first day of OnStage in Orlando. I wrote this post a couple of weeks ago, but still, I bet I'm going to be excited on the day!

Normally on a Friday I'd have the latest Just Add Ink post for you, but to cater for OnStage, last week's challenge actually runs for two weeks. Click on the link to check out the challenge details.

Instead I have for you one of the swaps I made to take to Orlando. Did you know that most Americans have never heard of the chocolatey goodness that is a Tim Tam? Did you also know that you can buy a box of 150 individually wrapped Tim Tams at Officeworks? What a perfect opportunity to educate some people on the delights of Tim Tams!


I started by working out how I was going to package the Tim Tam. I ended up deciding to use my Envelope Punch Board and the Crafty Owl's Box Buster to create a little box. This is the shape I ended up with, after starting with a 5 1/8" square piece of DSP.

scissorspapercard, Stampin' Up!, OnStage Swaps, Animal Expedition DSP, Labeler Alphabet, Envelope Punch Board, Stamparatus

I had to do some additional trimming on the bottom left and top right corners, as they wouldn't fold nicely into the box if I didn't. Once I'd folded along the score lines and snipped to create flaps, I turned the piece over and used my SNAIL to adhere some instructions to the inside of the box. Yep, I'm going to educate my fellow on how to do the Tim Tam Slam!

scissorspapercard, Stampin' Up!, OnStage Swaps, Animal Expedition DSP, Labeler Alphabet, Envelope Punch Board, Stamparatus

I then popped a Tim Tam into the box and folded the instructions over the top. I then started folding the box. I worked out that if I folded the larger long edge, followed buy the two short edges and finally the shorter long edge, I could get away with using one of my demo labels to hold the box closed.

scissorspapercard, Stampin' Up!, OnStage Swaps, Animal Expedition DSP, Labeler Alphabet, Envelope Punch Board, Stamparatus

If I tried folding in the short edges first there wouldn't be enough of the flaps exposed to stick to the label.

scissorspapercard, Stampin' Up!, OnStage Swaps, Animal Expedition DSP, Labeler Alphabet, Envelope Punch Board, Stamparatus

Here's the bottom of the box with my label attached. Now - how to decorate the top?

scissorspapercard, Stampin' Up!, OnStage Swaps, Animal Expedition DSP, Labeler Alphabet, Envelope Punch Board, Stamparatus

Aww, how cute! I made 40 of these swaps, as that's how many little kangaroos there are in two packs of the Animal Expedition DSP. I had very sore hands after hand cutting all 40 kangaroos and 80 branches! Thankfully, for the stamping I was able to use my Stamparatus for super quick production line stamping.

I'll be back on Monday with my other swap.

Bye for now,

Tina

Friday, 12 February 2016

JAI #298: Just Add V

Hi!


This week at Just Add Ink it's my turn to set the challenge and I'm challenging you to Just Add V to your cards.  It can be anything to do with V - violet, van, VW, vase, you could even go for the obvious and make a Valentine!

Tina Gillespie, Just Add Ink, Going Places, Stampin' Up!, Crazy About You

I decided to make a 'Vest' card for the V challenge. I have to say though, my kids looked at this and thought I'd made a Dr Who card - I think it was the bow tie that did it.

Tina Gillespie, Just Add Ink, Going Places, Stampin' Up!, Crazy About You

I used a sheet of DSP from the Going Places DSP Stack for my vest.  I drew up a template on the back of the DSP and then hand cut the curves. I used some Real Red Candy Dots and Candy Dot bases for the buttons.

Tina Gillespie, Just Add Ink, Going Places, Stampin' Up!, Crazy About You

I went super simple for the inside, just using Crazy About You to stamp the sentiment.

What can you think of for a V card? Can't wait to see it over at Just Add Ink.

Bye for now,

Tina

Thursday, 16 January 2014

JAI 198: Just Add A Blog Hop!

Hi!

Welcome back to the start of challenges for 2014 at Just Add Ink. We are kicking off the year with a Blog Hop.


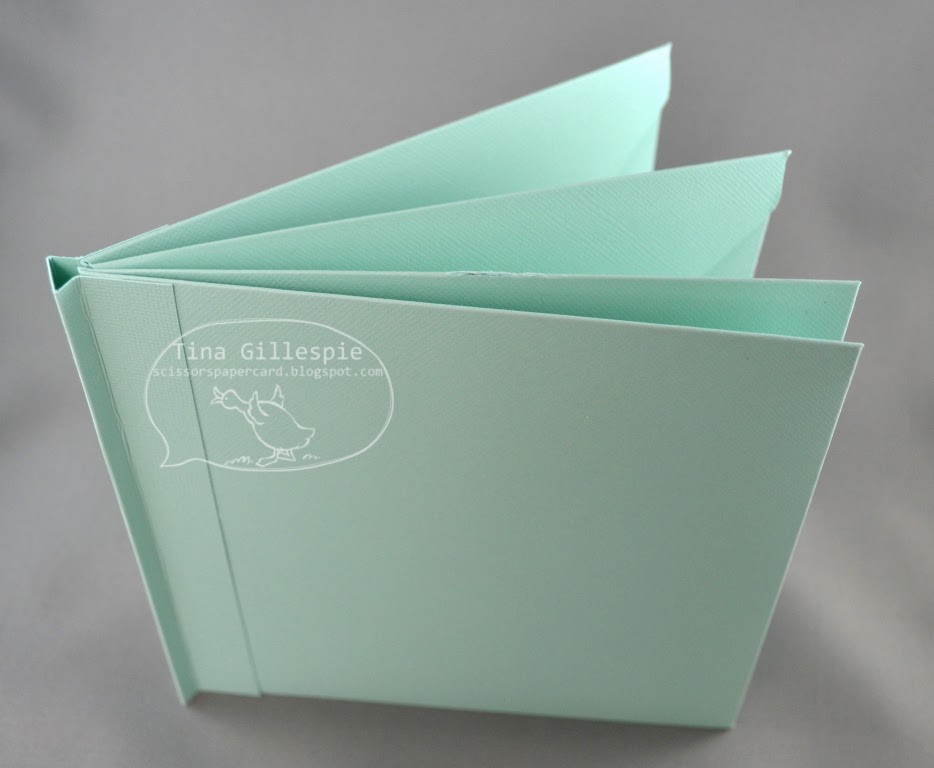
The theme of the blog hop, as you may have guessed, is the Envelope Punch Board and the Thinlints Dies.  You can use either, or both, in your creation.  I chose to use the Envelope Punch Board to create an Envelope Mini Album.


The album is full of photos of my daughter Ada and her BFFs (best friends forever).  I started off with four 6x6" envelopes created with the Envelope Punch Board and adhered them together to create the base of the album.


In the photo below you can see that not all of the envelope flaps were adhered down.  They are used as the basis of a pocket.


The middle pages ended up with two pockets.


The next few photos show the album decorated with DSP.  It's a bit of a sneak peek of the new Sale-A-Bration DSP.  It's so gorgeous!


Pretty, soft, feminine papers, perfect for little girls.


Here's the album fully decorated with the DSP.  Lots of cute patterns to choose from.


Here is a decorated page, showing one of the inserts from the pockets.  I ended up using a circle punch to create a little spot for your fingers to go to make it easier to pull out the insert page.


If you are keen to give this album a go, you can find the tutorial video here.

The next stop on the Blog Hop is the very talented Trish Rayfield.


Bye for now,

Tina


Friday, 29 November 2013

JAI #193: Just Add Inspiration

Hi!

Boy - where did that week go? Apologies for not posting on Wednesday as usual - the week really ran away on me!  But now it's Friday, and time for another Just Add Ink Challenge.

http://just-add-ink.blogspot.com.au/2013/11/just-add-ink-193inspiration-challenge.html

This week Kim has found this gorgeous picture to inspire us.  Lots and lots of stars for all kinds of Christmassy (or not!) inspiration.


I had resisted buying the Christmas Star stamp for a long time, but while it was on special last month I gave up resisting and purchased it.  So glad I did, as it's fantastic!


Sequins are very on trend right now in papercraft, so I decided to add some to give the card a bit more sparkle.  It was in fact the sequins that dictated the use of Tempting Turquoise on the card, as they matched perfectly.


I used a Candy Dot and brad combination at the centre of the star, just for a little more emphasis.


Can't forget the inside of the card either!


And because I'd also purchased the Envelope Punch Board, and the card was 5 inches square, I just had to make a matching envelope too.  Any excuse!  I used Sahara Sand cardstock to match with the card.

Well, that's it for me.  Are you inspired to create?  I hope to see you over at Just Add Ink.

Bye for now,

Tina