Pages

Showing posts with label Happy Birthday To You SAB. Show all posts

Thursday, 3 August 2023

JAI 664: Just Add Colour

 Hi!


Hooray - it's Friday! It's been a busy week for me, but for Friday through to Sunday my diary is looking very blank. I'm looking forward to having some crafty time, both with paper and fabric over the weekend. What about you? Hopefully you can find time to play along with our new Just Add Ink challenge.


This week Di has suggested this gorgeous colour combo for us to play with. I adore the blue/greens, and the soft purple is a stunning colour to complement them. I decided to go with a somewhat floral card, even though Pool Party and Lost Lagoon aren't really 'leafy' colours. I think it turned out beautifully, though.

scissorspapercard, Just Add Ink, Stampin' Up! Happy Birthday To You Bundle

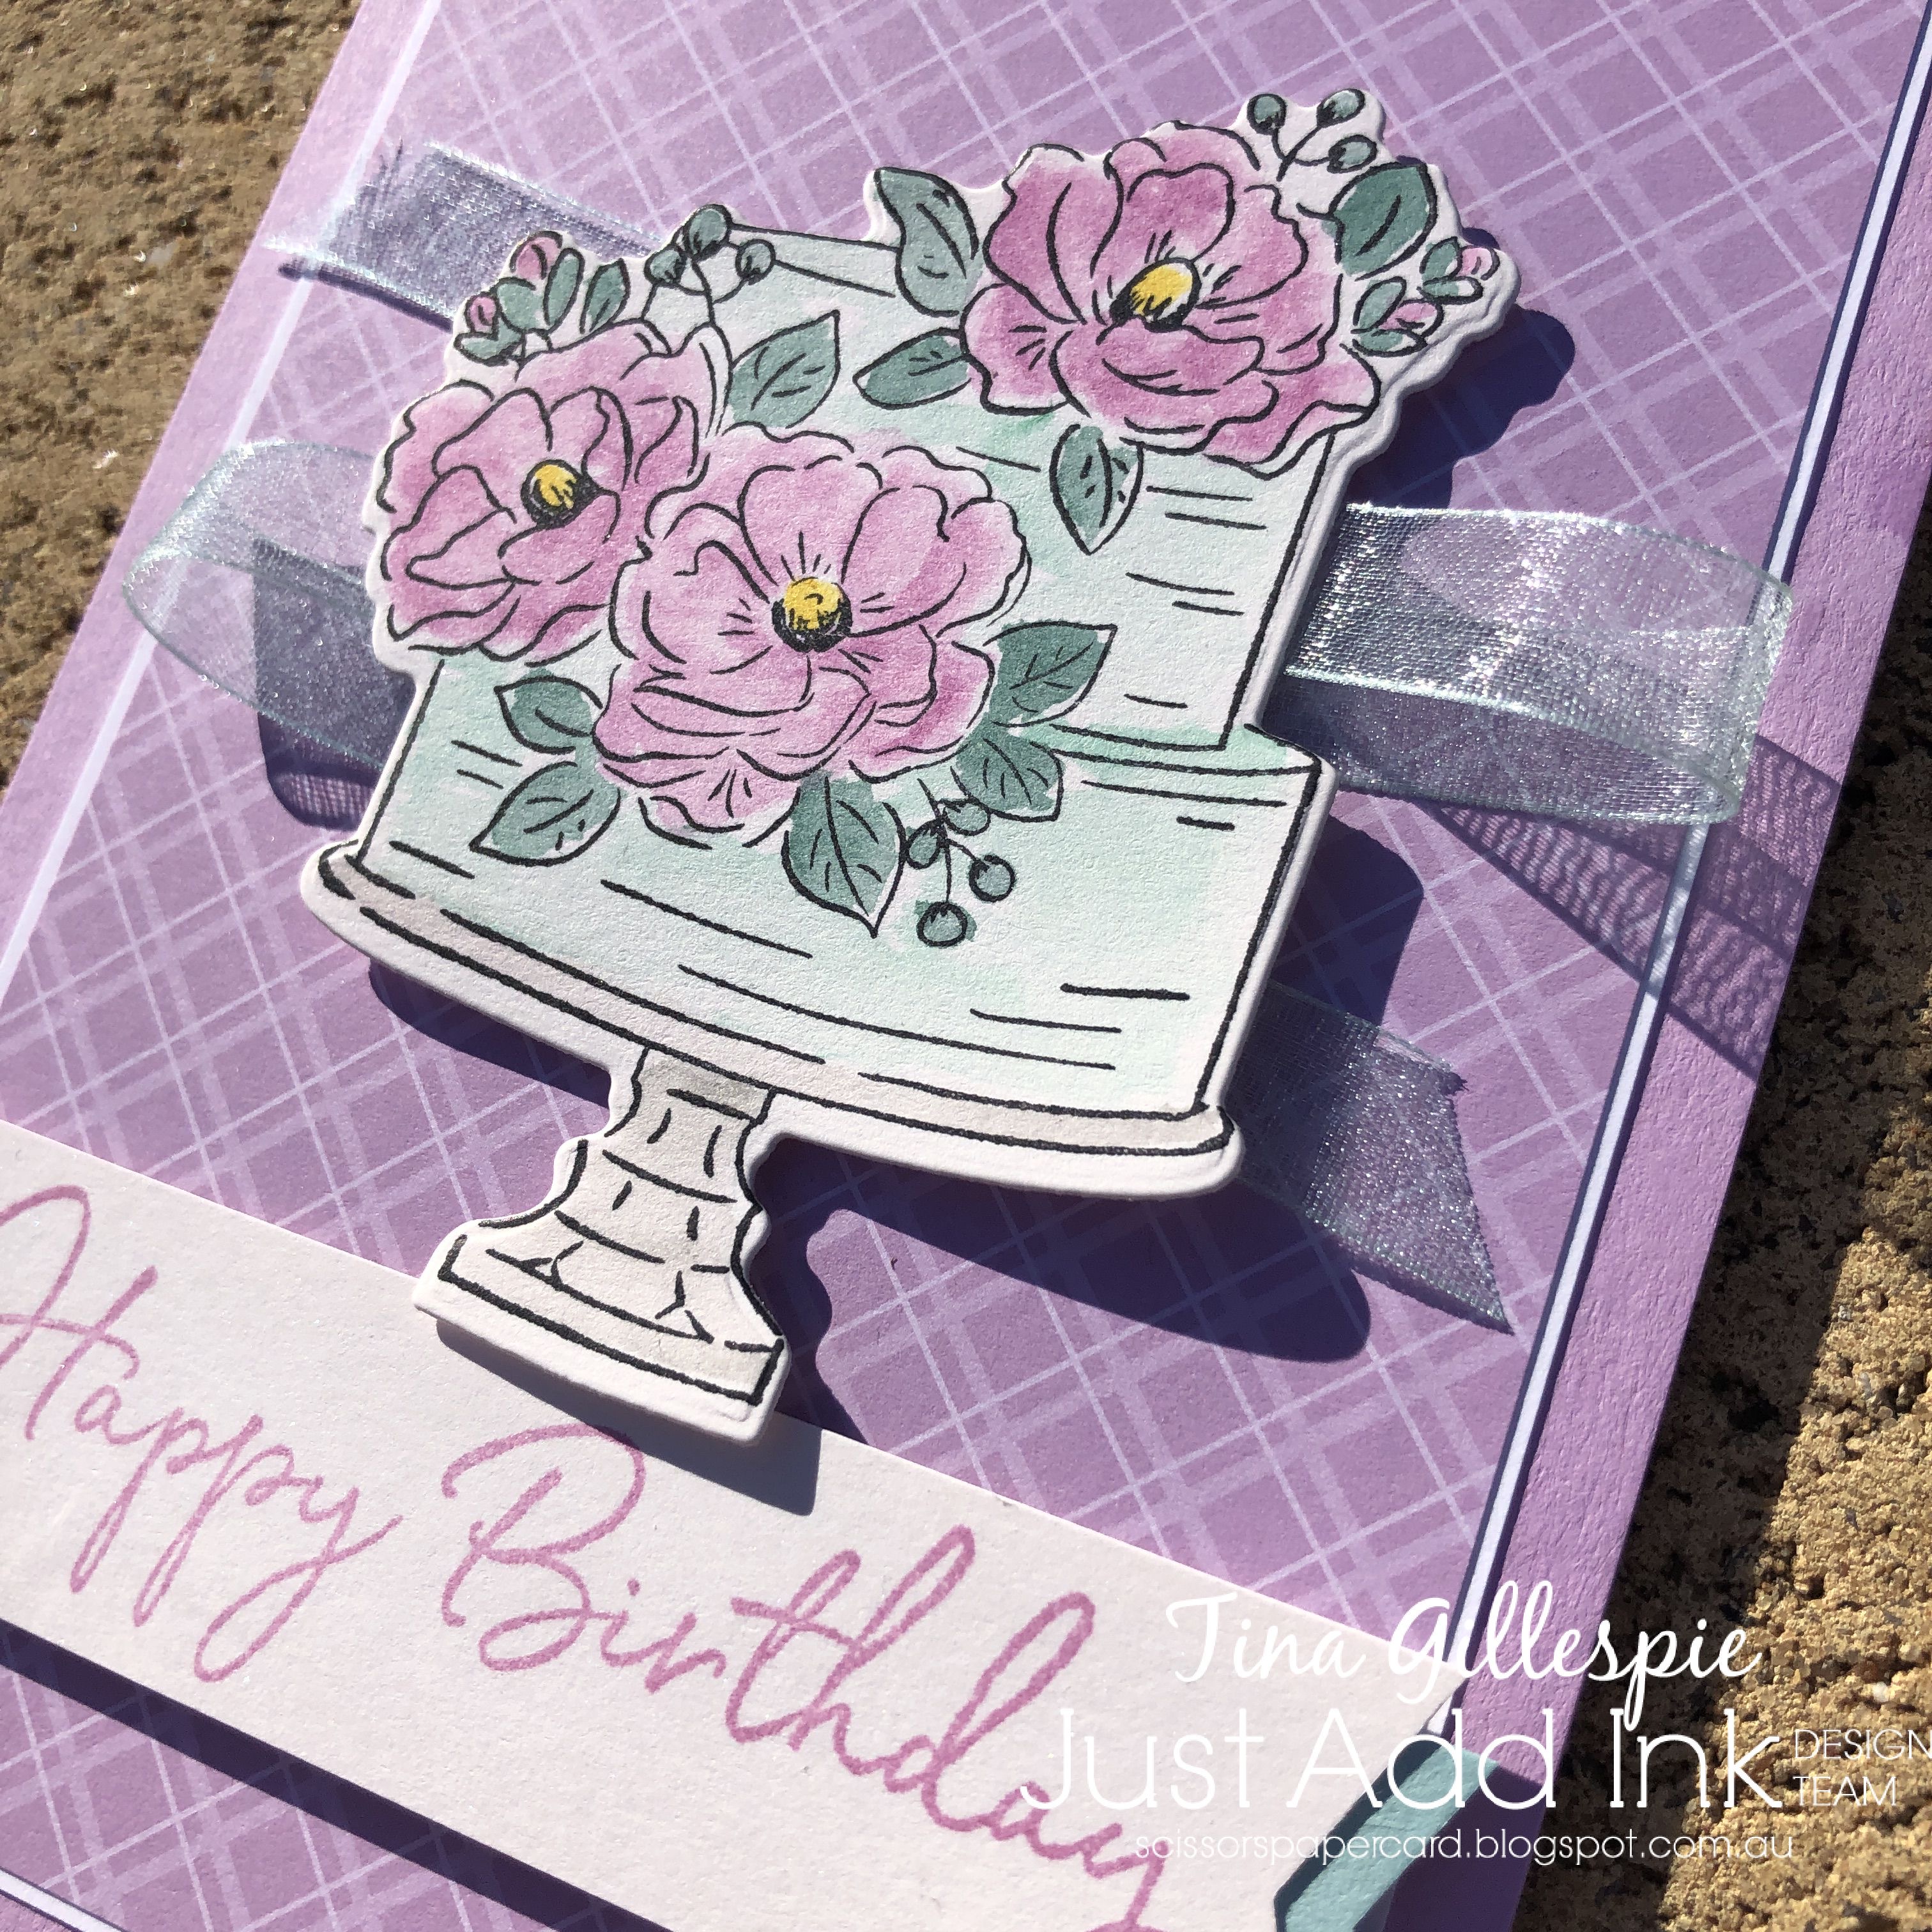
I pulled an old stamp and die set, Happy Birthday To You, off my shelf and stamped the cake image on Shimmery White paper using Stazon ink so that I could watercolour the image. I used Pool Party for the cake and the other two colours for the blooms.
scissorspapercard, Just Add Ink, Stampin' Up! Happy Birthday To You Bundle

The sheer Pool Party ribbon adds a lovely bit of pizzazz to the card, don't you think? It shimmers nicely, too, to go along with the Shimmery White cardstock that I've stamped and coloured.

scissorspapercard, Just Add Ink, Stampin' Up! Happy Birthday To You Bundle

I stamped the cake image again for the inside, just catching a portion of it on the edge of the card. It's a bit too big to stamp the whole image on the inside!

What do you see with the colours? There are so many possibilities. You can see what the rest of the Design Team have done with the colours over on the Just Add Ink blog. You can also add your card to our Linky when you're ready to enter the challenge.

Bye for now,

Tina

Thursday, 23 June 2022

JAI 609: Just Add Flowers

 Hi!


Welcome back for another Just Add Ink challenge. It really is the best way to start the weekend.


This week, Annie has asked us to add flowers to our cards. I'd be nearly willing to bet that there isn't a stamper without at least one floral stamp in their collection!

scissorspapercard, Stampin' Up!, WaffleFlower, Just Add Ink, Sunflower Love, Simply Said 1, Butterflies & Flowers Layering Decorative Masks, Happy Birthday To You, Floral Card

The flowers on this card are from a WaffleFlower set, called Sunflower Love. The sentiment is also WaffleFlower, called Simply Said 1, and was cropped with the coordinating dies. I coloured the flowers with my Copic Markers.

scissorspapercard, Stampin' Up!, WaffleFlower, Just Add Ink, Sunflower Love, Simply Said 1, Butterflies & Flowers Layering Decorative Masks, Happy Birthday To You, Floral Card

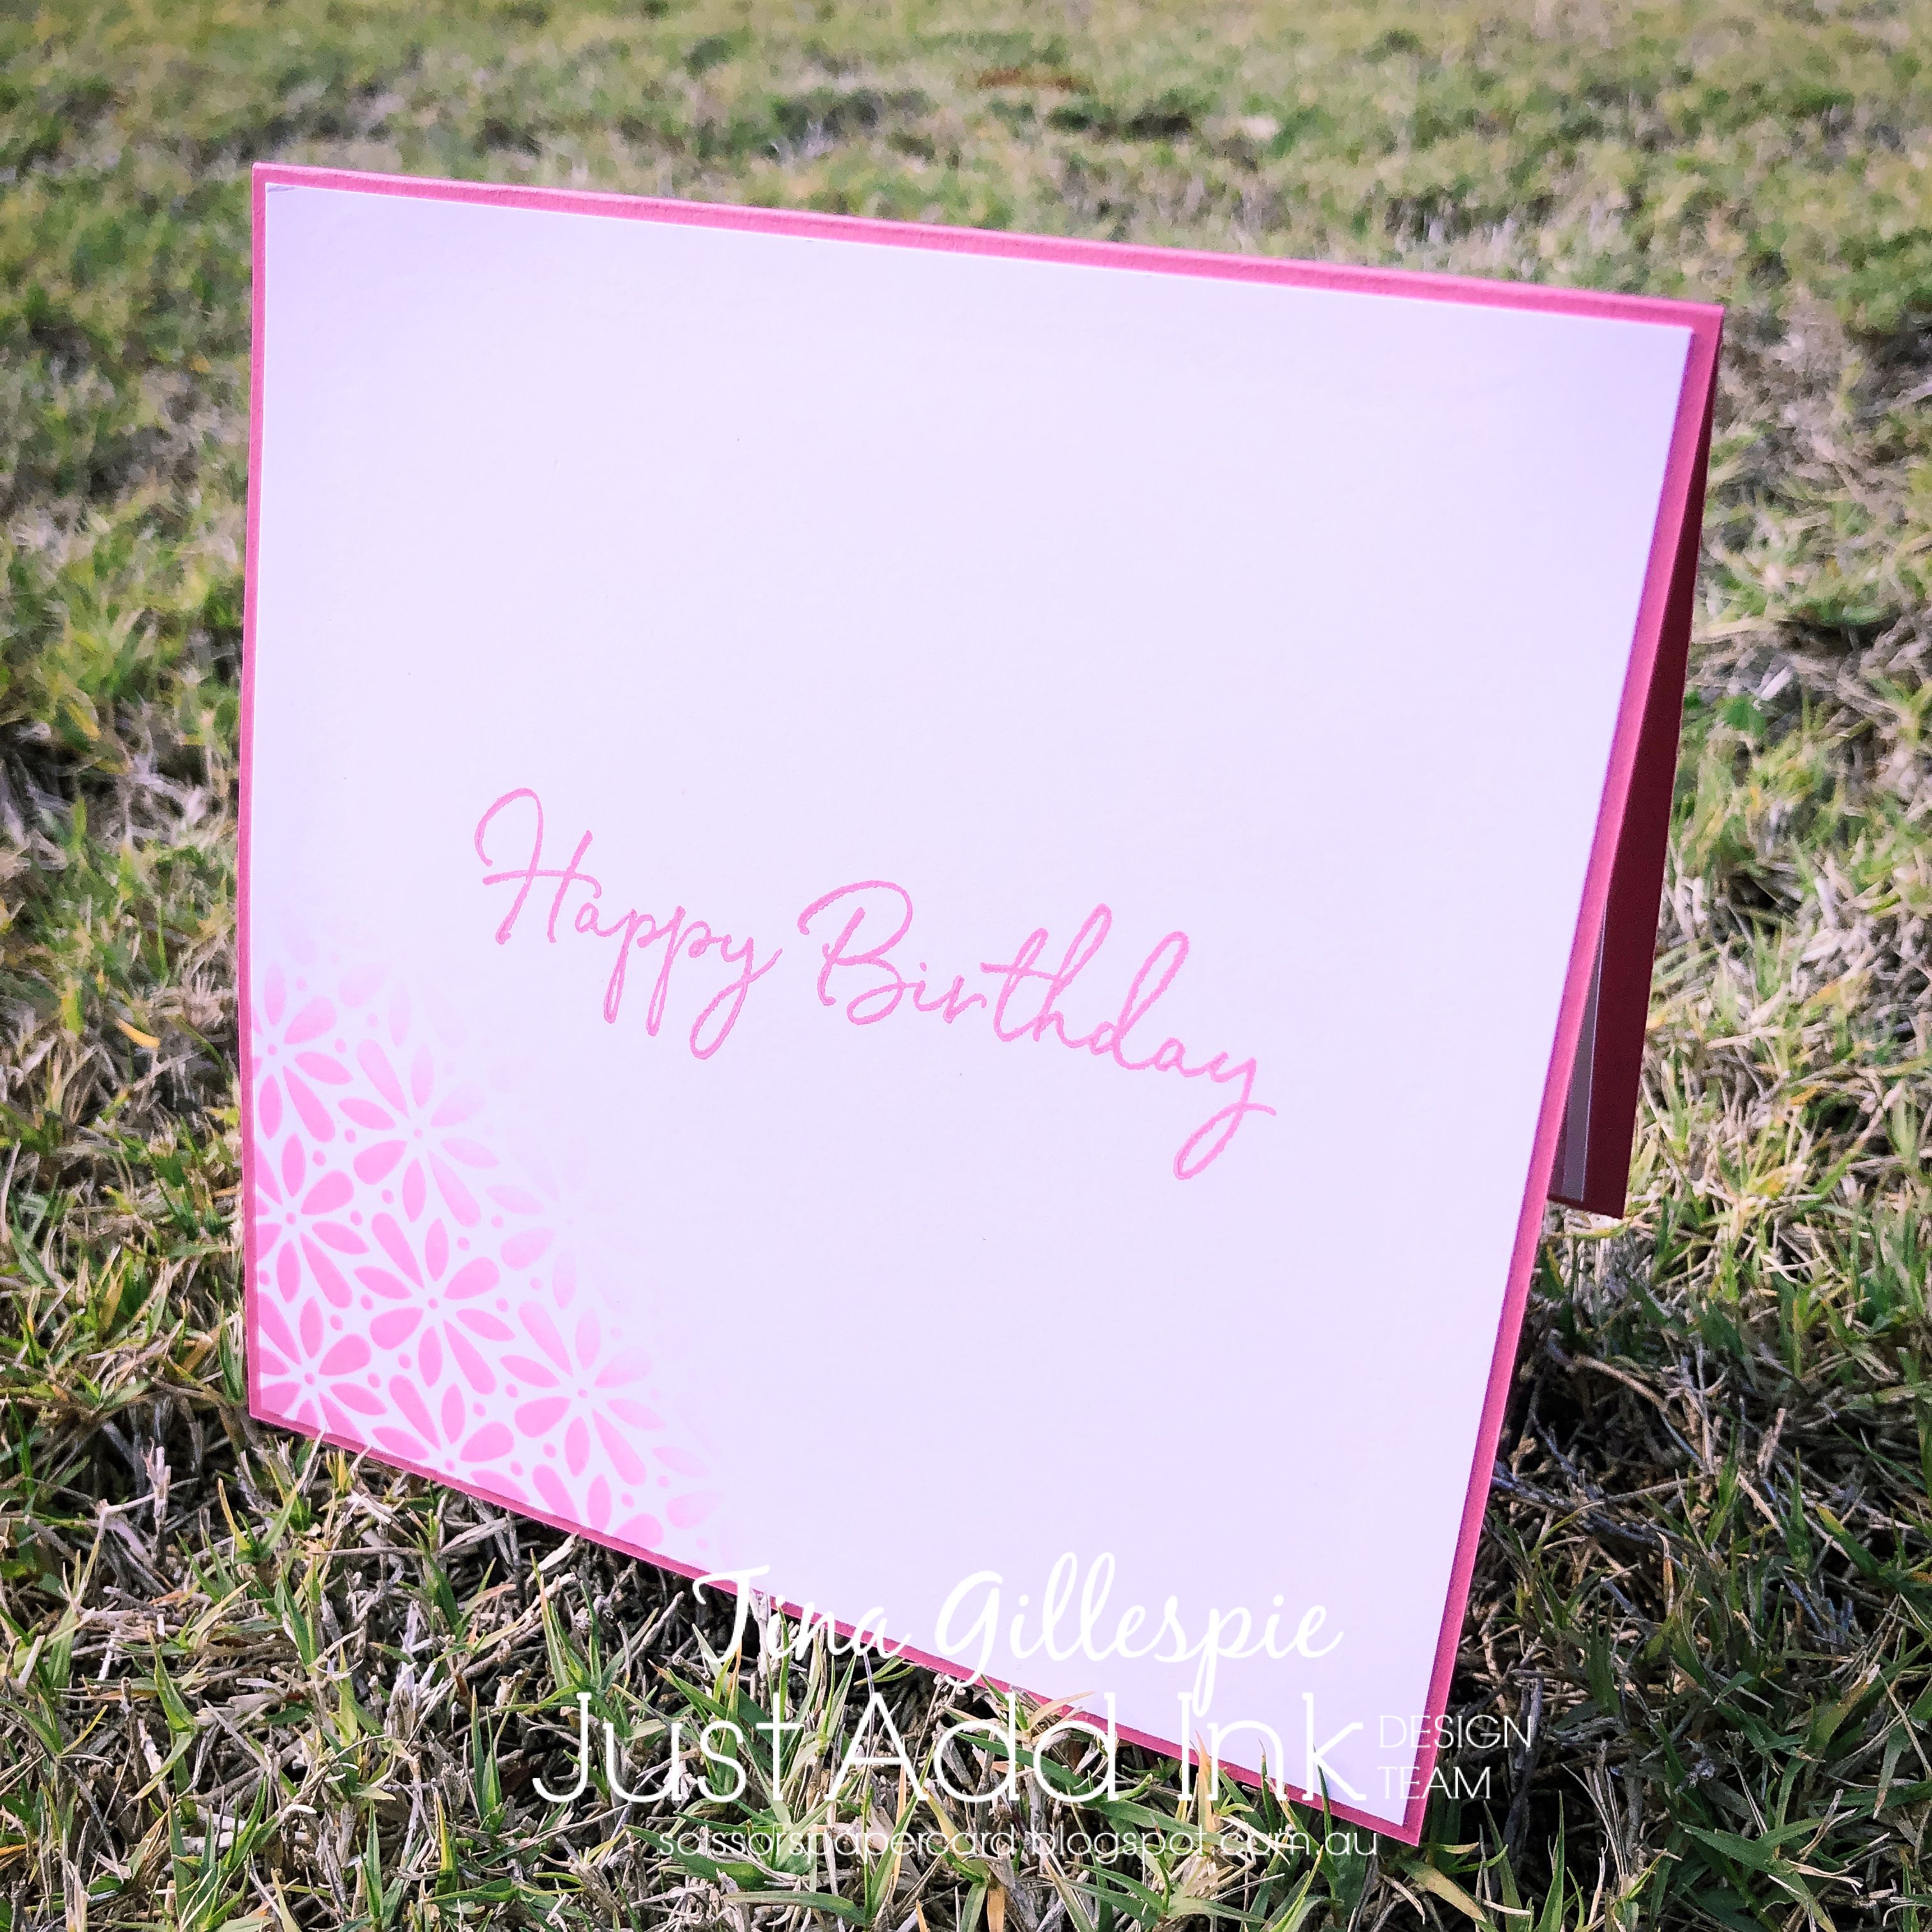
To create the background, I used a Blending Brush to apply some Picked Raspberry Distress Oxide ink to the Whisper White cardstock. I then spritzed some water onto the floral background stencil from the Butterflies and Flowers Layering Decorative Masks set, and laid it wet side down on the inked card. After a few seconds, I removed it. The water lifts some of the ink, giving a lovely, subtle look.

scissorspapercard, Stampin' Up!, WaffleFlower, Just Add Ink, Sunflower Love, Simply Said 1, Butterflies & Flowers Layering Decorative Masks, Happy Birthday To You, Floral Card

I used the same mask on the inside, but this time I brushed the ink through the stencil.

That's all from me for now, but please head on over to the Just Add Ink blog, where you'll find the rest of this week's Design Team cards - you won't want to miss them! You can also link up your card there when you've made your flower card.

Bye for now,

Tina

Thursday, 3 September 2020

JAI #521: Just Add Inspiration

 Hi!


Yay! Today marks the start of a super long weekend, well, for me and the kids! Poor Rob still has to work on Friday and Monday, but the kids have pupil free days. It should have been the start of the Royal Adelaide Show, and even though it was cancelled, the kids still get the pupil free days. Hooray for a good weather forecast, so we can spend some time outside.


But let's get on with the show. This week at Just Add Ink Rachael has challenged us with this fabulous Inspiration Photo. I say fabulous, because who wouldn't want to sit and celebrate at such a pretty table? However, I really struggle with these photos, as I don't tend to make super girly cards. Then I remembered that I had some retired Blushing Bride Glimmer Paper and off I went!

scissorspapercard, Stampin' Up!, Uniquely Creative, Just Add Ink, Happy Birthday To You, Stitched 3 Window Frame Die, Birthday Dies, In Good Taste DSP, Glimmer Paper, Stampin' Blends

I started by cropping the Glimmer Paper using a Uniquely Creative Die, called Stitched 3 Window Frame. I backed it with a piece of In Good Taste DSP that is probably meant to be plaster, but could also pass as cake icing!

scissorspapercard, Stampin' Up!, Uniquely Creative, Just Add Ink, Happy Birthday To You, Stitched 3 Window Frame Die, Birthday Dies, In Good Taste DSP, Glimmer Paper, Stampin' Blends

The cake was from last year's SAB offering. There's no cake in the Inspiration Photo, but it looks like a celebration to me, and there has to be cake at a party - right? I coloured with with my Rococo Rose, Shaded Spruce and Granite Grey Blends with a Gold Foil stand. The Inspiration Photo uses Rose Gold, but I don't have anything in Rose Gold, so plain old Gold it is!

scissorspapercard, Stampin' Up!, Uniquely Creative, Just Add Ink, Happy Birthday To You, Stitched 3 Window Frame Die, Birthday Dies, In Good Taste DSP, Glimmer Paper, Stampin' Blends

I created a softer version of the cake for the inside. This one was stamped in second generation Blushing Bride ink and coloured using a Blender Pen and my Blushing Bride, Soft Sea Foam and Grey Granite Ink Pads. I quite like how the softer flowers turned out!

What elements do you like in the Inspiration Photo? You could explore the colours, the theme, the glitter - the possibilities are endless! Pop on over to the Just Add Ink blog, where you can see what the rest of the Design team have created. You can also link up your card to enter our challenge.

Bye for now,

Tina

Sunday, 22 March 2020

CTC #265 Week 2: Second Release Sale-A-Bration

Hi!

https://www.facebook.com/groups/1625891621049580/

Welcome, and thank you for doing us for our new CASEing The Catty Sunday Challenge Blog Hop. We are mid way though our fortnightly challenge to CASE a project from the Second Release Sale-A-Bration Catalogue.


It's a wee little catalogue, but it's certainly packed with inspiration - sometimes in unexpected places! My card was CASEd from the picture of the Flowering Foils DSP on page 3. The way the papers were arranged in peaks, like mountains, caught my eye.

scissorspapercard, Stampin' Up!, CASEing The Catty, Happy Birthday Too You, Rectangle Stitched Dies, Masculine Card

I simplified quite a bit to only have one set of peaks, but I was really pleased with how it turned out. I cropped three of the largest Stitched rectangle dies, one each of Balmy Blue, Blueberry Bushel and Night Of Navy. I imagine this card would look just as great. in other colours too! The Happy Birthday was heat embossed in Silver.

scissorspapercard, Stampin' Up!, CASEing The Catty, Happy Birthday Too You, Rectangle Stitched Dies, Masculine Card

Here's how I started the layers on the Thick Whisper White card base. I glued the first layer down with Tombow, and then flipped the card to trim the excess away from the back. I then repeated the process with the other two layers. I did lay the three layers over the base first without glue so that I didn't glue the top layer too high, which would leave gaps at the bottom. I hope that makes sense!

scissorspapercard, Stampin' Up!, CASEing The Catty, Happy Birthday Too You, Rectangle Stitched Dies, Masculine Card

The inside was decorated using the offcuts from the front! I was left with very little waste, which always makes me happy!

Our challenge is run through our Facebook group. Pop on over there, after you've finished the hop, of course! You can upload your card and see everyone else's cards. Lots of inspiration to be found!


Next up in the Blog Hop is the lovely Bec. I absolutely adore her purple card - you certainly don't want to miss it!


Bye for now,

Tina

Thursday, 23 January 2020

JAI #489: Just Add Colour

Hi!


Its time for the new week of Just Add Ink. Yay! This week we have a little bit of a different Colour Challenge for you. Rachael has given us these five colours, and we are to choose any three.


Hmm, which ones appeal to you? Confession: I struggled for the longest time with these. I just couldn't find a combo of three that I liked! Then I picked up 'The Gang's All Meer' and inspiration struck. I went with the bottom line: Blueberry Bushel, Daffodil Delight and Call Me Clover.

scissorspapercard, Stampin' Up!, Just Add Ink, The Gang's All Meer, Music From The Heart, Rectangle Stitched Dies, Share From The Heart Embellishments

I started by stamping the cacti and the lizard (iguana?) in my new Saddle Brown Stazon on Watercolour paper. I then used my selected colours (and a little touch of Sahara Sand) to watercolour my scene. I diluted the Blueberry a lot so that it worked better as a sky colour. The sun is stamped from Waterfront, as I really suck at getting a round shape freehand.

scissorspapercard, Stampin' Up!, Just Add Ink, The Gang's All Meer, Music From The Heart, Rectangle Stitched Dies, Share From The Heart Embellishments

I stamped the Clover card base with the cactus and lizard in coordinating ink. The sentiment panel was finished with a mini paper clip and some white thread from the retired Share What You Love Embellishment kit. Why do I hoard these kits, only to use them once it's retired?

scissorspapercard, Stampin' Up!, Just Add Ink, The Gang's All Meer, Music From The Heart, Rectangle Stitched Dies, Share From The Heart Embellishments

I finished off the inside with another cactus. I tried to add in the lizard too, but I just couldn't make him work. Next time!

Time now to pop on over to the Just Add Ink blog, where you can find the rest of this week's Design Team cards. You can also link your card up for the challenge. Which three of our colours appeal to you?

Bye for now,

Tina

AWH January Blog Hop: Sale-A-Bration

Hi!


Welcome to the first Art With Heart Blog Hop for 2020. This month we are featuring cards using the amazing products you can earn for free during our Sale-A-Bration promotion. Until the 31st of March, for every $90 you spend on Stampin’ Up! products, you will earn free products from our Sale-A-Bration brochure. Just ask me if you'd like to know more!

I recently earned the gorgeous Golden Honey Specialty DSP, and so that's what I'm using on tonight's card. I'm not big on bees, but there are enough non-bee papers to make it worth getting for me. The DSP is specialty paper because one side of each sheet contains gold foil elements.

scissorspapercard, Stampin' Up!, Art With Heart, Sale-A-Bration, Happy Birthday To You, Golden Honey SDSP, Watercolour Pencils

As much as I'm not into bees, I couldn't resist adding a couple of the gold foil bees to the front of my card. They were very easy to fussy cut from the DSP. I popped them up (using Black Dimensionals - yay!) over a piece of black and gold DSP. It's meant to be a honeycomb look, but I'm already trying to work out if I can get it to look like a circuit board on a future card. LOL.

scissorspapercard, Stampin' Up!, Art With Heart, Sale-A-Bration, Happy Birthday To You, Golden Honey SDSP, Watercolour Pencils

The SDSP features black, gold and white, but I wanted to add some colour. After experimenting with Blends and Stampin' Write Markers, I ended up using my Watercolour Pencils. The bottom third of each flower/petal was coloured with Rich Razzleberry, and the top third with Flirty Flamingo. I then used my Wink Of Stella (what else!?!) to blend the colours into the middle third. The pop of colour is quite nice, I think!

scissorspapercard, Stampin' Up!, Art With Heart, Sale-A-Bration, Happy Birthday To You, Golden Honey SDSP, Watercolour Pencils

I used a Sale-A-Bration stamp set, Happy Birthday To You, for the sentiments on my card. I also used a left over strip of my coloured flower DSP to finish the inside of the card. There wasn't a flower at the left of the strip, which looked a little boring, so I fussy cut a tiny gold bee and glued him over the leaves.

That's all from me tonight, so now you're off to visit my lovely friend, Rachel Palmieri to see what wonderful creation she's made using her SAB goodies. I can't wait!


If you have a broken link or have come to this blog hop midway, you can view all the participants below:


Bye for now,

Tina

Sunday, 19 January 2020

CTC #261 Week 1: Sale-A-Bration

Hi!


Wow, this week went fast! It's Sunday, which means it's time for the new CASEing The Catty Sunday Challenge Blog Hop. After two weeks of CASEing the new JJ Mini Catalogue, we are now CASEing the SAB Catalogue. Did you arrive here from Rachel's blog? Wasn't her card pretty?


It's a smaller catalogue, but there's still a tonne of inspiration to be found. My eye was caught by this card on page 7. I loved how they've used strips of Bermuda Bay cardstock over a Bermuda Bay base to create an interesting background for the card.


I don't know what I was thinking, but I decided to step it up even more! I used Grapefruit Grove, a colour that I haven't used much of lately. It's retiring in July, so I thought I better use it a bit more before it goes!

scissorspapercard, Stampin' Up!, CASEing The Catty, Hugs From Shelli, Happy Birthday Too You, Painted Labels Dies, Stitched So Sweetly Dies, Bird Ballad DSP

I started by cutting a heap of 1cm x 15cm strips of Grapefruit Grove. I then used a 1cm x 1cm piece in the exact centre to help me line up the first four strips, laid out around the square. I then used one piece as a spacer to lay out the rest of the strips. I did five strips in one direction before changing. I was so pleased with how it turned out!

scissorspapercard, Stampin' Up!, CASEing The Catty, Hugs From Shelli, Happy Birthday Too You, Painted Labels Dies, Stitched So Sweetly Dies, Bird Ballad DSP

After all that effort, I didn't want to hide too much under other layers, so I kept the rest of the front very simple. I like that the die cut from the Painted Labels dies looks a lot like a nest under the bird, which was fussy cut from the Bird Ballad DSP. The sentiment label was from the new Stitched So Sweetly dies. A few Grapefruit Grove Faceted Gems finished the front.

scissorspapercard, Stampin' Up!, CASEing The Catty, Hugs From Shelli, Happy Birthday Too You, Painted Labels Dies, Stitched So Sweetly Dies, Bird Ballad DSP

I also kept the inside very simple, just a sentiment from the SAB set, Happy Birthday To You, and a small flower, fussy cut from the DSP.

Our new schedule of challenges means that you now have two weeks in which to get your challenge card made and posted to the group. This is Week 1 of the new challenge, so you have plenty of time. Just head to our Facebook group and upload your photo there. Don't forget to let us know which card you've CASEd.


Time for me to go for this week, but you're now off to see what my lovely friend, Judy, has created.


Bye for now,

Tina

Thursday, 19 December 2019

JAI #487: Just Add A Sketch

Hi!


Hello, and welcome to the final Just Add Ink challenge of 2019! This will be a non-competitive challenge, running through until the start of January. So what have we got for you? A sketch challenge, designed by the wonderful  Jackie!


I've been looking forward to this sketch for a while now - I think it's fabulous, and great for a wide range of themes. I toyed for a while with doing a dinosaur card, but in the end I reached for my new Poppy Moments Dies.

scissorspapercard, Stampin' Up!, Just Add Ink, Poppy Moments Dies, Painted Labels Dies, Layered Leaves Embossing Folder,  Peaceful Poppies DSP, Happy Birthday Too You, Sale-A-Bration

The poppy dies have three layers - the solid base, the outline and the centre. I cut the base in Vellum, the outline in Poppy Parade and the centre in Basic Black. I like the translucent look of the vellum - a little more interesting than stark white in this case! I accidentally got the circle elements of the sketch the wrong way around. Ooops! That's what I love about a sketch though - it's open to interpretation, as long as you can still see the original in the card.

scissorspapercard, Stampin' Up!, Just Add Ink, Poppy Moments Dies, Painted Labels Dies, Layered Leaves Embossing Folder,  Peaceful Poppies DSP, Happy Birthday Too You, Sale-A-Bration

I couldn't resist adding the little scallop border piece onto the card, from the new Painted Labels Dies. It's so sweet, but in Basic Black it's a little dramatic too! I think I will be using it lots. The sentiment is from a new Sale-A-Bration set, Happy Birthday To You. I added a couple of leaves to the card, cut from vellum and Mossy Meadow cardstock.

scissorspapercard, Stampin' Up!, Just Add Ink, Poppy Moments Dies, Painted Labels Dies, Layered Leaves Embossing Folder,  Peaceful Poppies DSP, Happy Birthday Too You, Sale-A-Bration

I used another leaf and the smaller poppy on the inside. The large poppy is beautiful, but a little big for the inside! The sentiment is also from Happy Birthday To You. I love the scripty font!

Thanks for joining me for another year of Just Add Ink challenges. I love being a part of the JAI team, and I look forward to more crafty fun with them in 2020. I hope you can join in our challenges, we love seeing what everyone makes for them.

That's all for me on my blog for 2019. I'll be back in early 2020 after a short break with my family. Have a wonderful Christmas and a fabulous New Year. I hope Santa brings you some new crafty goodies to play with!

Bye for now,

Tina

Sunday, 8 December 2019

CTC #258: Wrapped In Plaid

Hi!


Hello, and welcome to our second last CASEing The Catty Sunday Challenge Blog Hop for 2019. After next week's challenge, the DT will be taking a little break until January. This week, though, we are looking at the Wrapped In Plaid suite in the Holiday Catalogue. Did you come from Siobhan's blog, or are you starting here? You know the drill - just keep going until you get to where you started!


I have a little confession to make - I really dislike plaid! There are some really gorgeous projects in the suite, but I just can't get past the plaid. So when I was looking at the cards, trying to decide which one to CASE, I had to think a bit laterally. In the end I chose this card from page 15.


The colours really appealed to me, so that's what I chose to CASE - the colour combo. The colours used in the catalogue card are Very Vanilla, Crumb Cake, Soft Suede, Garden Green, Pretty Peacock, Cherry Cobbler and Gold Glimmer. I used all of these, except I swapped Very Vanilla for Whisper White, on my card, plus Blushing Bride and Balmy Blue.

scissorspapercard, Stampin' Up!, CASEing The Catty, Happy Birthday To You, Sale-A-Bration, Varied Vases, Watercolouring, Subtles DSP

I was so thrilled with how this turned out. I stamped the cake from the new Sale-A-Bration set, Happy Birthday To You, in Stazon on watercolour paper, and then coloured the image using my Aqua Painter and ink pads. I chopped a piece of Pretty Peacock Scalloped Linen Ribbon in half longways and added it to the top and bottom of my image panel. I also used some retired Gold Thread to bring in some more of the gold in the colour combo.

scissorspapercard, Stampin' Up!, CASEing The Catty, Happy Birthday To You, Sale-A-Bration, Varied Vases, Watercolouring, Subtles DSP

Speaking of gold, it's a little tricky to photograph, but the flower centres, buds and the cake plate are all coloured with Golden Glitz Delicata ink. I simply tapped the inkpad onto a clear block and then used my Aqua Painter to pick it up and paint it on, just like our regular ink.

scissorspapercard, Stampin' Up!, CASEing The Catty, Happy Birthday To You, Sale-A-Bration, Varied Vases, Watercolouring, Subtles DSP

I also used the Golden Glitz ink to stamp the cake again on the inside of my card.

Do you like the Wrapped In Plaid Suite? Luckily for me, you don't have to like it to enter our challenge, you can take your inspiration from anything in pages 12-17 of the Holiday catalogue. You can add your card to our Facebook group to enter.


Thanks for stopping by! You can continue the hop by clicking on the next button below. This will take you to Julia's blog - I'm pretty sure she falls into the 'love' category with the Wrapped In Plaid Suite!


Bye for now,

Tina