Pages

Showing posts with label Dressed To Impress. Show all posts

Sunday, 12 December 2021

CTC 348: CASE The Sketch

 Hi!


Thanks again for joining me for the new CASEing The Catty Sunday Challenge Blog Hop. This is our second last challenge for the yer before we take a short break over the Christmas/New Year period. It's a busy time of year, but I hope that you can find the time to join us.
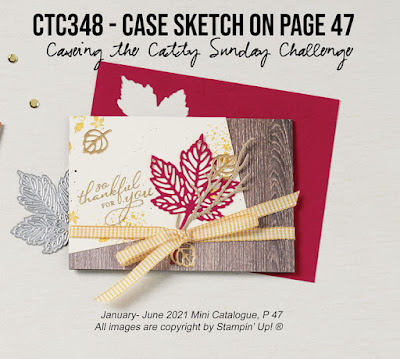
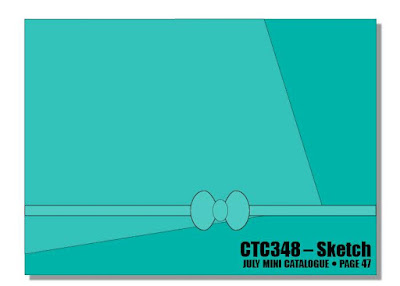
This week we have chosen this card, from page 47 of the Mini Catalogue, to CASE. Here's a simplified version so that you can have a better look at the elements of the card.

I quite like the diagonal panel, and contemplated doing that clever technique where you make two cuts in a 6x6 piece of DSP and get enough of those panels for four cards. I can't think of the name - can you? In the end, though, I had a busy weekend and only had time to make one card.
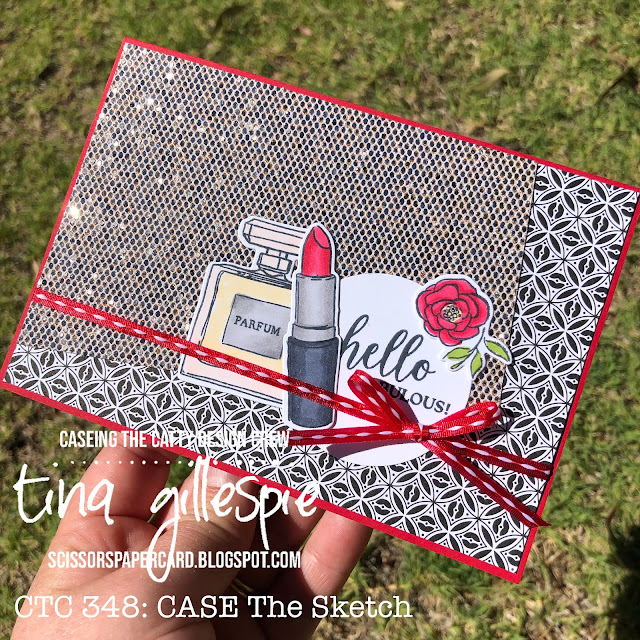
scissorspapercard, Stampin' Up!, CASEing The Catty, Dressed To Impress Bundle, Be Dazzling SP, Pattern Party Host DSP, Stampin' Blends

Are you the same as me and hoard the pretty paper while it's current and then don't use it until it's retired? Sigh. The Be Dazzling paper was like this for me!! I cut a 3 1/2" x 6" piece and then glued it to the Pattern Party Host DSP on the core angle. When dry, I just trimmed away the excess from the back. I used my Dressed To Impress Bundle to decorate the front.
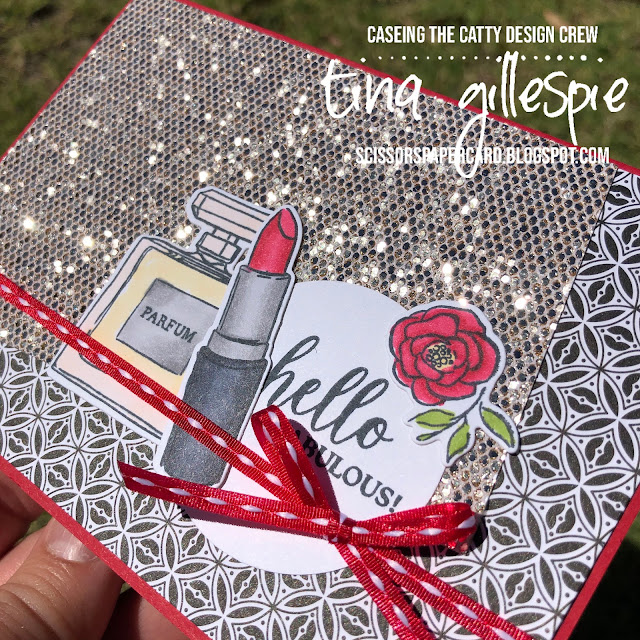
scissorspapercard, Stampin' Up!, CASEing The Catty, Dressed To Impress Bundle, Be Dazzling SP, Pattern Party Host DSP, Stampin' Blends

The dazzling paper is delightfully sparkly, don't you think? The perfect match for the Dressed To Impress stamps!
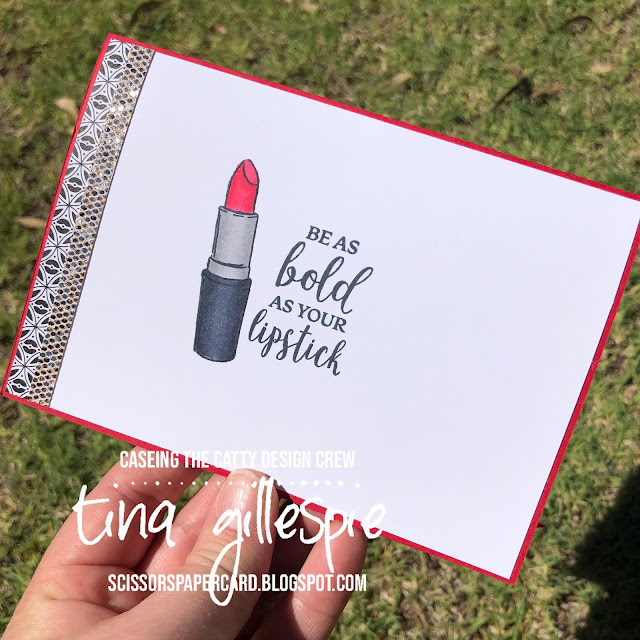
scissorspapercard, Stampin' Up!, CASEing The Catty, Dressed To Impress Bundle, Be Dazzling SP, Pattern Party Host DSP, Stampin' Blends

I couldn't resist adding another strip of the Be Dazzling paper to the inside of the card - there can never be too much bling!

To join in with our challenge, all you need to do is join our Facebook group and post a photo of your card in the group before the Sunday evening deadline. It's that easy! We'd love to see what you make each week.

Next up is my lovely friend, Sandra Collett. She's made a gorgeous card, with a very fancy tilted panel!!

Bye for now,

Tina

Thursday, 8 April 2021

April Creative Showcase: Mother's Day

 Hi!


Thanks for stopping by for this month's Creative Showcase. This month we are making Mother's Day cards, getting in nice and early, ready for the big day next month. I was struggling a bit for ideas, until I was fluffing around at my craft desk and came across some images from Grace's Garden that I'd stamped ages ago, but done nothing with in the meantime. Straight away I pictured a scene in my head, and I'm pretty thrilled with how it translated to paper.

scissorspapercard, Stampin' Up!, Grace's Garden, My Meadow, Dressed To Impress, Stampin' Blends, Mother's Day Card

There are a lot of layers on this card! I started by using my Sponge Brayer and Blending Brush to apply some Balmy Blue and Pacific Point ink to the top part of the background layer. I wanted this layer to look like it had a dirt path that lead through a forest. I used stamps from My Meadow to achieve this look, and then finished the layer by applying some Granny Apple Green ink to the bottom of the card. Most of it is hidden by the next layer, but I like to be thorough!

scissorspapercard, Stampin' Up!, Grace's Garden, My Meadow, Dressed To Impress, Stampin' Blends, Mother's Day Card

The second layer is the tall flowers (no idea what type of flowers they are meant to be!) that sit behind the fence and gate. This layer also includes the part of the path that you can see in front of the gate, and the grass to either side. The third layer is the gate, fence and cat. I left the fence white, apart from some slight touches of grey, added with My Light Grey Granite Blend. I also fussy cut it out, including the tiny pieces in between the slats - I wanted to be able to see the path and flowers through the fence. The final layer is the cluster of flowers to the right of the gate.

scissorspapercard, Stampin' Up!, Grace's Garden, My Meadow, Dressed To Impress, Stampin' Blends, Mother's Day Card

I couldn't find room for a sentiment on the front, so I had to put it on the inside! This one is from Dressed To Impress, and is flanked by some more flowers from Grace's Garden.

That's all from me for this month's Creative Showcase, but you can find the rest of the links for this month's blogs over on Rachel's blog. She does such a great job of keeping us all organised every month!

Bye for now,

Tina

Thursday, 4 March 2021

JAI 544: Just Add L

 Hi!


Thanks for joining me for the new Just Add Ink Challenge. Hopefully you have time to play along with us. It's a long weekend here in Adelaide, which always means a little extra crafting time for me. I'm hoping to get the next block in the quilt top I am working on done - what about you?


If you're paper crafting, why not join in our Just Add L challenge? Your card just needs to have one thing that starts with L on it. Maybe a stamp set, or a colour, technique, embellishment, theme, whatever you can think of that starts with L!

scissorspapercard, Stampin' Up!, Just Add Ink, Dressed To Impress, All Dressed Up Dies, Best Dressed DSP, Stitched So Sweetly Dies, Subtle 3DEF, Peaceful Moments, Mother's Day

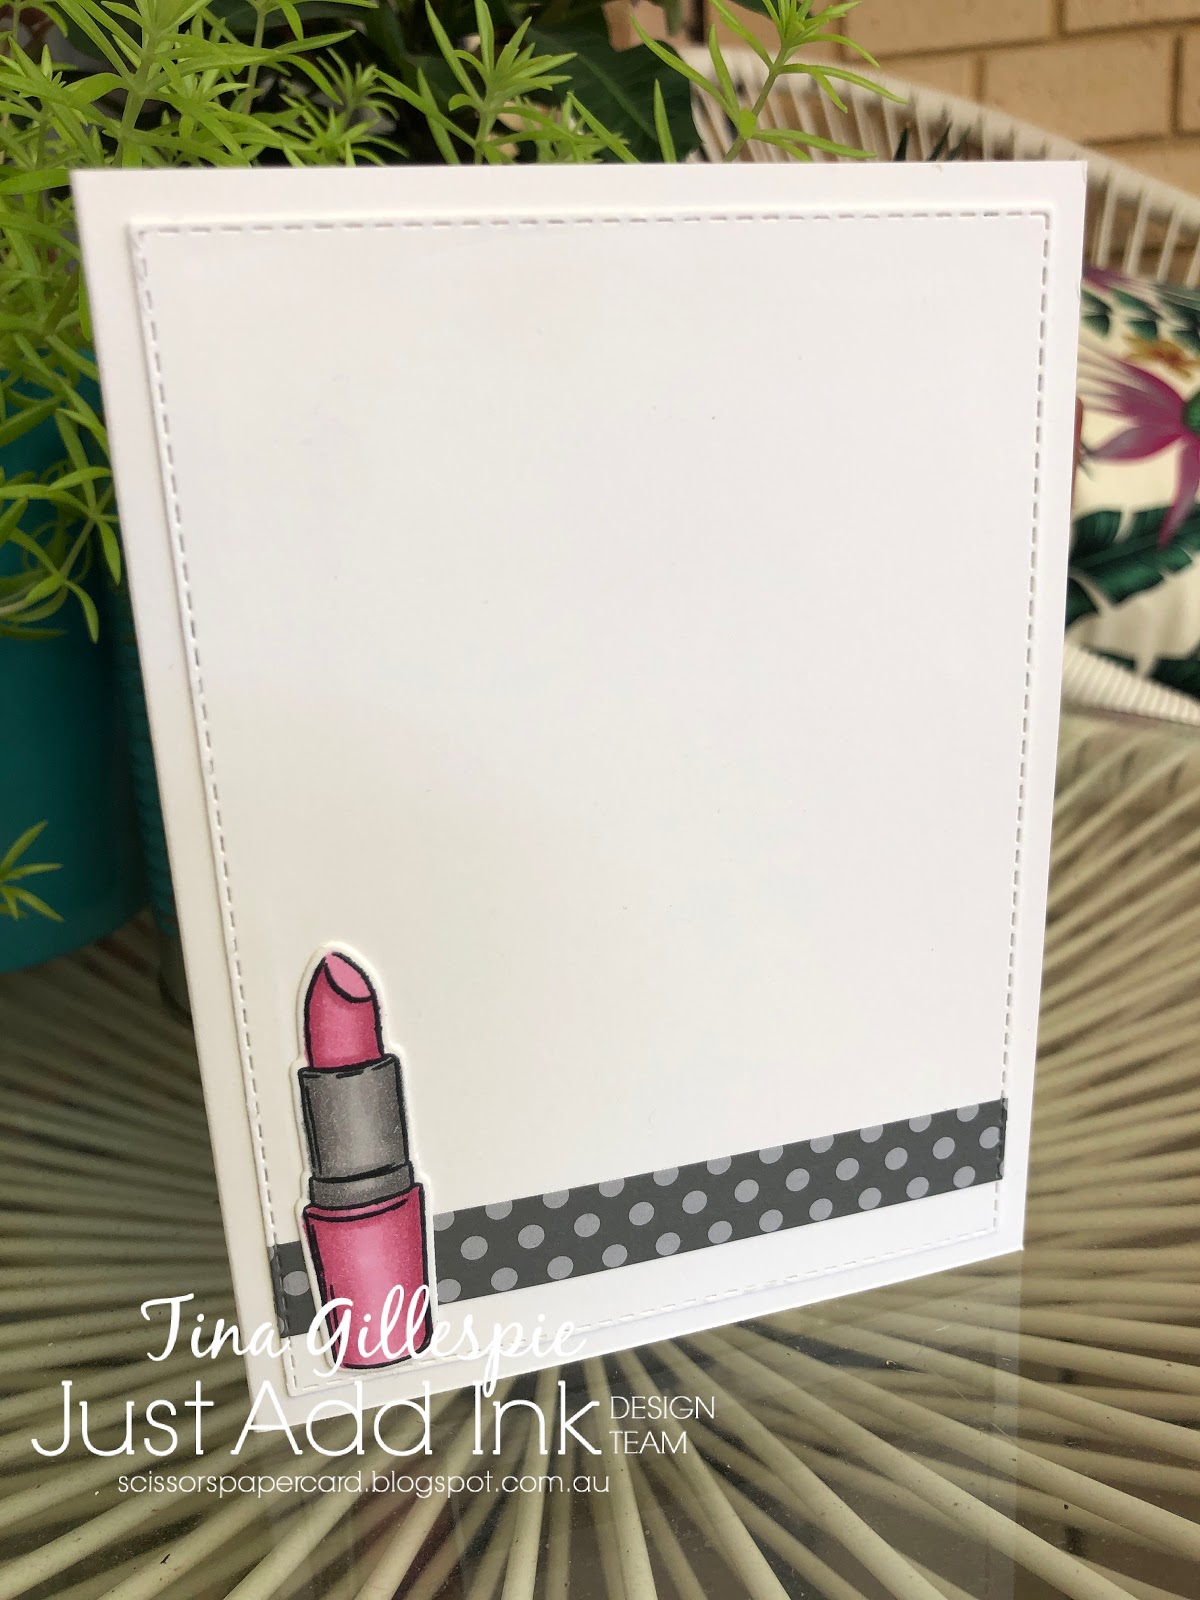
I went for Lipstick! I haven't used my Dressed To Impress stamps much lately, so this was a good excuse to pull them out. I stamped the lipstick with Memento ink and coloured it with my Watercolour Pencils and Wink Of Stella. It's lovely and shimmery in real life!

scissorspapercard, Stampin' Up!, Just Add Ink, Dressed To Impress, All Dressed Up Dies, Best Dressed DSP, Stitched So Sweetly Dies, Subtle 3DEF, Peaceful Moments, Mother's Day

For a bit of added texture, I ran my DSP through the Big Shot with the Subtle 3DEF. It's such a pretty effect, and makes the paper look like fabric.

scissorspapercard, Stampin' Up!, Just Add Ink, Dressed To Impress, All Dressed Up Dies, Best Dressed DSP, Stitched So Sweetly Dies, Subtle 3DEF, Peaceful Moments, Mother's Day

The DSP on the inside got the same treatment as on the front. And I'm happy, because I now have one of the two Mother's Day cards that I need for this year made. Now just to put it in a safe spot where it won't get lost!

Time now to pop on over to the Just Add Ink blog, where you can see the rest of this week's Design team cards. I love these alphabet challenges, as everyone is so creative in interpreting them.

Bye for now,

Tina

Wednesday, 10 February 2021

Colour Creations: Pool Party

 Hi!


Thanks once again for joining me for this week's Colour Creations Creative Showcase. It's time for Pool Party to shine! This blue-green colour always makes me think of Tiffany Blue, so I went with that girly theme for my card.

scissorspapercard, Stampin' Up!, Colour Creations, Dressed To Impress, Pretty Perennials, Joy To The World Paper Pumpkin, Forever Gold SP, Stitched Rectangles Dies, Stampin' Blends

I started by using my Stitched Rectangles Dies to cut an opening in the card front, and then adhered a piece of the Forever Gold Laser Cut DSP to the back. I popped the piece up over the top of my card base using Dimensionals. I probably should have added a piece of Window Sheet behind the laser cut, as it's a little more saggy than I'd like. Hopefully it's one of those tiny details that only the creator of a card would notice!

scissorspapercard, Stampin' Up!, Colour Creations, Dressed To Impress, Pretty Perennials, Joy To The World Paper Pumpkin, Forever Gold SP, Stitched Rectangles Dies, Stampin' Blends

I used my All Dressed Up Dies to cut a strip of Pool Party card to go across the front of the card as a base for me to glue all of the other elements to the card. The perfume and flowers are from the coordinating Dressed To Impress stamp set. The perfume had a very light wash of Pool Party ink, and the flowers were coloured with Blends. A swish of Wink Of Stella finished it all off.

scissorspapercard, Stampin' Up!, Colour Creations, Dressed To Impress, Pretty Perennials, Joy To The World Paper Pumpkin, Forever Gold SP, Stitched Rectangles Dies, Stampin' Blends

The shoes and flowers on the inside were also coloured with the Blends, and then given the Wink Of Stella treatment. I figured that a girly, Tiffany inspired card couldn't be too glittery!

Time now to pop on over to Cathy's blog, where you'll find the rest of this week's Pool Party cards.

Bye for now,

Tina

Thursday, 7 May 2020

JAI #504: Just Add Colour

Hi!


Thanks for popping in for the new Just Add Ink challenge. This week it's a colour combo, set by me!


I really love the mix of greys with the dusky pink. I needed a Mother's Day card for my mum, and I thought this colour combo would work well for a feminine card, despite the greys.

scissorspapercard, Stampin' Up!, Just Add Ink, Dressed To Impress Bundle, Ornate Frames Dies, Stitched Rectangles Dies, Stampin' Blends, In Colour DSP

I only recently purchased the Dressed To Impress bundle, despite it being available since January. With the news that it was carrying over to the new Annual Catalogue, I decided to purchase while I could still get it at the discounted bundle price.

scissorspapercard, Stampin' Up!, Just Add Ink, Dressed To Impress Bundle, Ornate Frames Dies, Stitched Rectangles Dies, Stampin' Blends, In Colour DSP

I started by stamping the lipstick in Memento and then colouring with my Rococo Rose and Smokey Slate Blends. The sentiment comes from the stamp stamp set, and was cropped using a die from the bundle. The Glimmer label underneath was cut from the Ornate Frames Die. A strip of Basic Grey DSP and some Rose Metallic Thread, all layered over some sponged Rococo Rose ink, finished the front of the card.

scissorspapercard, Stampin' Up!, Just Add Ink, Dressed To Impress Bundle, Ornate Frames Dies, Stitched Rectangles Dies, Stampin' Blends, In Colour DSP

I had stamped and coloured a second lipstick at the same the as the one on the front, knowing it would go to great use on the inside. I adhered the strip of DSP to the card before I cropped it with the largest Stitched Rectangle die. This added the stitching to the DSP without any extra effort on my behalf. I didn't stamp an inside message, as I chose to write a personal message to my mum instead.

Time now to pop on over to the Just Add Ink blog, where you can find the rest of this week's Design Team cards. When you've made your card using the challenge colours, you can link it up there as well!

Bye for now,

Tina